Cycle 2 | Mysterious Melodies
Posted: April 20, 2025 Filed under: Uncategorized 1 Comment »For my cycle 2 project, I wanted to expand upon my original idea and add a few resources based on the evaluation I received from the initial performance. I wanted to lean away from the piano-ness of my original design and instead abstract the experience into a soundscape that was a bit more mysterious. I also wanted to create an environment that was less visually overwhelming and played more with the sense of light in space. I have long been an admirer of the work of James Turrell, an installation artist that uses light, color and space as his main medium. Since my background is primarily in lighting and lighting design, I decided to remove all of the video and projection elements and focus only on light and sound.
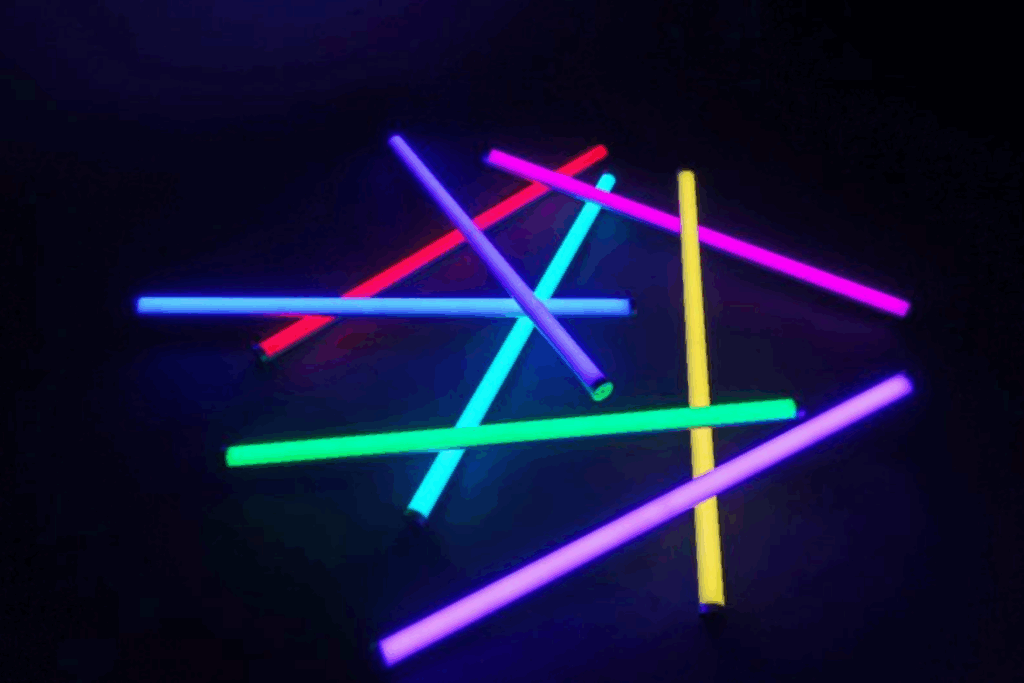
ACCAD and the Motion Lab recently acquired a case of Astera Titan Tubes. They are battery powered LED tubes that resemble the classic fluorescent tube, but have full color capabilities and the ability to be separated into 16 “pixels” each. They also have the ability to receive wireless data from a lighting console and be controlled and manipulated in real time. I started by trying to figure out an arrangement that made sense with the eight tubes that I had available to me. I thought about making a box with the tubes at the corners, I also thought about arranging them in a circular formation. I decided against the circular arrangement because, arranged end to end, the 8 tubes would have made an octagon, and spread out, they were a bit linear and created more of a “border”. Instead, I arranged them into 8 “rays”. Lines that all originated from the center and fanned out from a central point. This arrangement felt a bit more inviting, however it did create distinct “zones” in-between the various sections. The tubes also have stands that allow them to be placed vertically. I considered this as well, but I ended up just setting them flat on the ground.
In order to program the lights, I opted to go directly from the lighting console. This was the most straightforward approach, since they were already patched and working with the ETC ion in the Motion Lab. I started by putting them into a solid color that would be the “walk in” state. I wanted to animate the pixels inside the tubes and started by experimenting with the lighting console’s built in effects engine. I have used this console many times before, but I have found the effects to be a bit lacking on usability and struggled to manipulate the parameters to get the look I was going for. I was able to get a rainbow chase and a pixel “static” look. This was okay, but I knew I wanted something a bit more robust. I decided to revisit the pixel mapping and virtual media server functions that are built into the console. These capabilities allow the programmer to create looks that are similar to traditional effects, but also create looks that would otherwise be incredibly time consuming if not completely impossible using the traditional methods. It took me a bit to remember how these functions worked since I have not experimented with them since my time working on “The Curious Incident of the Dog in the Night”, programming the lighting on the set that had pixel tape integrated into a scenic grid. I finally got the pixel mapping to work, but ran out of time before I could fully implement the link to triggers already being used in Touch Designer. I manually operated the lighting for this cycle, and intend to focus more on this in the next cycle.
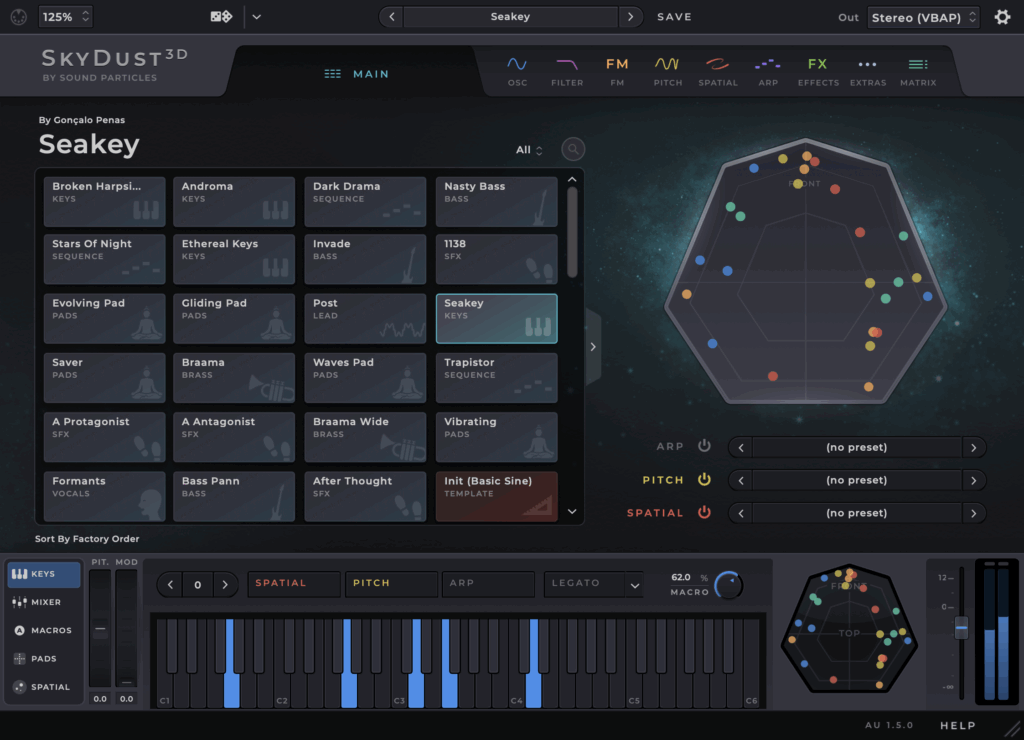
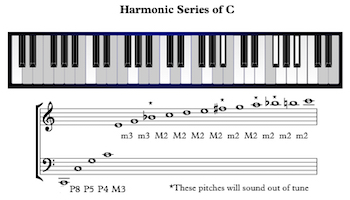
For the audio portion, I decided to use “Skydust” a spatial synthesizer that Professor Jean-Yves Munch recommended. This allowed me to use the same basic midi integration as the last cycle, but expand the various notes into spatial sound without the need for an extra program to take care of the panning. Similar to the last cycle, I spent a lot of time listening to the various presets and the wide variety of sounds and experiences they produced. Everything from soft and southing to harsh and scary. I ended up going with the softer side and finding a preset called “waves pad” which produced something a bit ethereal but not too “far out”. I also decided to change up the notes a bit. Instead of using the basic C chord, I decided to use the harmonic series. I had a brief discussion with Professor Marc Ainger and this was recommended as a possible arrangement that went beyond the traditional chord structure.
For the patch, I kept the same overall structure but moved the trigger boxes around into a more circular shape to fill the space. Additionally, I discovered that I could replace the box with other shapes. Since the overall range of the depth sensor is a circle, I decided to try out the “tube” or cylinder shape in touch designer. When adding boxes and shapes into the detector, I also noticed that there is a limit of 8 shapes per detector. This helped a bit to keep things simplified and I ended up with 2 detectors, one that had boxes in a circular formation, and another with tubes of various sizes, one that was low and covered the entire area, with another that was only activated in the center, and a third tube that was only triggered if your reached up in the center of the space.

The showing of this project was very informative since only one other person had experienced the installation previously. I decided to pull the black scrim in front of the white screen in motion lab to darken the light reflections, while also allowing the spatial sound to pass through. I also pulled a few black curtains in front of the control booth to hide the screens and lights inside. I was pleasantly surprised by how long people wanted to explore the installation. There was a definite sense of people wanting to solve or decode a mystery or riddle, even though there was no real secret. The upper center trigger was the one thing I hoped people would discover and they eventually found it (possibly because I had shown some people before). For my next cycle I plan to continue with this basic idea but flesh out the lighting and sonic components a bit more. I would like to trigger the lighting directly from touch designer. I am still searching for the appropriate sound scape and am debating between using pre recorded samples to form a song or continuing with the midi notes and instruments. Maybe a combination of both?
Pressure Project 3 | Highland Soundscapes
Posted: April 20, 2025 Filed under: Uncategorized | Tags: Pressure Project 3 Leave a comment »Our prompt for pressure project 3 was to create an audio soundscape that reflects a cultural narrative that is meaningful to you. Since I am 75 percent Scottish, I choose to use the general narrative of Braveheart as an inspiration. My biggest challenge for this project was my motivation. Since I am concurrently taking Introduction to Immersive Audio, I have already done a project similar to this one just a few weeks ago. I struggled a bit with that project, so this one seemed a bit daunting and unexciting. I must admit, the biggest hurdle was just getting started.

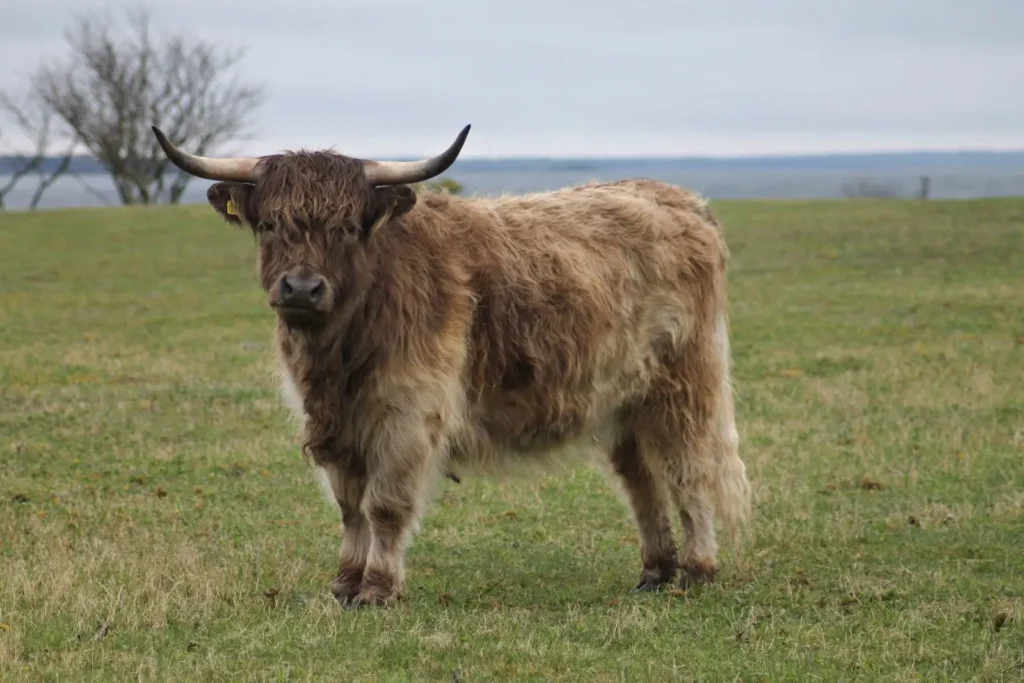
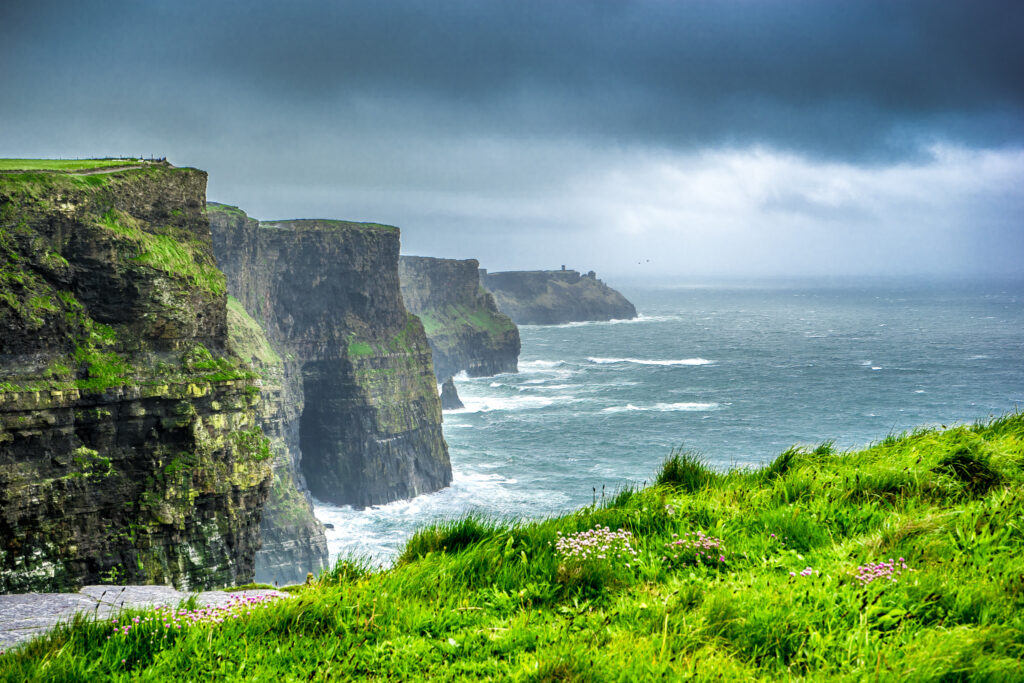
I wanted to establish the setting of the Scottish countryside near the sea. I imagined the Cliffs of Moher, which are actually in Ireland, but the visual helped me to search and evaluate the many different wave sounds available. I used freesound.org for all of my various sound samples. In order to establish the “country side” of the soundscape, I found various animal noises. I primarily focused on “highland cow” and sheep. I found many different samples for these and eventually I got tired of listening to the many moos and trying to decide which sounded more Scottish. I still don’t know how to differentiate.
To put the various sounds together I used Reaper. This is the main program we have been using for my other class, so it seemed like the logical choice. I was able to lay a bunch of different tracks in easily and then shorten or lengthen them based on the narrative. Reaper is easy to use after you get the hang of it and it is free to use when “evaluating” which apparently most people do their entire lives. I enjoyed the ease of editing and fading in and out which is super simple in Reaper. Additionally, the ability to automate panning and volume levels allowed me to craft my sonic experience easily.

For the narrative portion, I began by playing the seaside cliffs with waves crashing. The sound of the wind and crashing waves set it apart from a tranquil beach. I gradually began fading in the sound of hoofs and sheep as if you were walking down a path in the highlands and a herd of cattle or sheep was passing by. The occasional “moo” helped to establish the pasture atmosphere I wanted to establish. The climax of the movie Braveheart is a large battle where the rival factions charge one another. For this, I found some sword battle sounds and groups of people yelling. After the loud intense battle, I gradually faded out the sounds of clashing swords and commotion to signify the end of the battle. To provide a resolution, I brought back in the sounds of the cattle and seaside, this was to signify that things more or less went “back to normal” or, life goes on.
For the presentation portion, I decided to take an extension since my procrastination only lead me to have the samples roughly arranged in the session and the narrative portion wasn’t totally fleshed out. This was valuable not only because I was not fully prepared to present on day 1, but I was also able to hear some of the other soundscapes that helped me to better prepare and understand the assignment. While I am not proud that I needed an extension, I am glad I didn’t decide to present something that I didn’t give the proper amount of effort to. While, I don’t think it was my best work, I do think it was a valuable exercise in using time as a resource and how stories can sometimes take on a life of their own when a listener has limited visual and lingual information and must rely totally on the sounds to establish the scene and story. I felt the pressure of project 3 and I am glad I got the experience, but I’m also glad it’s over 🙂
Cycle 1: Big Rainbow Piano
Posted: April 6, 2025 Filed under: Uncategorized Leave a comment »For Cycle 1, I started by identifying a few resources I wanted to explore. Since attending the Touch Designer workshop at the beginning of the semester, I have been searching for an opportunity to utilize the software and explore the tools that were provided to us from Sudo Magic. I was able to get my hands on the “Geo Zone Detector” Comp which allows you to easily draw a rectangular volume and use the point cloud data from a depth sensor to detect when a person or object is occupying that zone.
I decided to use the basic framework of a human sized piano keyboard to test this system. I began by drawing the “geo zones” in the Comp to be approximately the size of a person, one meter by two meters by three meters. This was roughly the width and height of the person with enough length to occupy a human sized “key”. Then the next step was to align the depth sensor in the Motion Lab. As part of the “patch lab” in the Touch Designer workshop, I learned to use the point transform Top to orient the pint cloud to the Motion Lab x,y,z coordinate system.

Once I had the point cloud and spatial trigger boxes aligned and working in unison, I tried to attach a specific sound frequency to each “geo zone”. I started by using the audio oscillator chop. This produced a pure sine wave that I could dial in the exact frequency of each note on the piano. Getting this to work with the Geo Zone Comp was straight forward, but I did have to alter the settings for zone “trigger threshold” so that it would detect only an arm of a leg and not just the whole person.
The pure sine wave was able to prove that the concept was working. However, I was disappointed in the tonality of the sound and I wanted to find a way to trigger an actual piano. I wanted to find a solution that wasn’t too complicated and did not require too much additional hardware. I have dabbled with Garage Band for many years and I was well aware of the plethora of virtual instruments available in the software. My previous experience with a MIDI keyboard lead me believe this would be a plug and play type of solution.
Unfortunately, the world of MIDI and Apple drivers is not exactly “plug and play” but there is a pretty easy to use “audio midi setup” app that allows you to see the devices plugged into your computer. A few google searches led me to the IAC or inter-application communication driver. This allows one software program to send MIDI messages to another without the need for MIDI hardware attached. This is exactly what I needed. However, the MIDI out Chop in Touch Designer does not fill in the necessary coding to talk directly to other devices. A few additional google searches led me to the simple channel plus note syntax. Once I inserted all of the triggers in this format, the Geo Zone Detector was triggering a MIDI keyboard in Garage Band. Success! I spent over an hour listening to different synths and virtual instruments before I landed on “Gritty Bells” which had a pleasant tone, but also a rhythmic component that essentially “played a song” when you hit different notes together.

In an effort to connect the Isadora skills I had already learned, I wanted to draw some graphical boxes similar to the “shapes” actor. I found the “rectangle” sop to be essentially the same thing. You can draw a box and also define a line color, fill color and line weight. This process created the “keys” of the keyboard. In addition to triggering MIDI notes, I connected the same triggers to the ”fill” parameter of the boxes. The end result was the key lighting up and playing the notes simultaneously.
Finally, I projected the boxes on the ground and tweaked the keystone to line up with the boxes already defined in the Geo Zone Detector. I decided to roll out a strip of white Marley to help the top down projection reflect off of the floor and then refined the keystone and geo zones further so they aligned. This was a bit of a trial and error operation. The Marley was a fixed size so I started by aligning the projections and then scaled the Geo Zones to match. I could easily tweak each section, or the entire point cloud using the point transform Top.
When it came time to present, I added some color projection on the MOLA cylinder scrim. These scrims were already in place for Noah’s cycle 1, So I decided at the last minute to add a rainbow gradient projection onto the cylinder. I had this idea previously and I got lucky having just enough prep time to quickly make the gradient match the keyboard and load it into Resolume utilizing a previous projection map (resource).
I made everyone leave the lab before they saw the finished cycle 1. This helped to reset the vibe after the somewhat chaotic setup process. Some people had already seen the basic setup before but there were also some new guests that have never experienced the installation or the motion lab. Everyone seemed to timidly approach the installation but once the were all there, everyone took turns playing notes and testing the reactivity of the “piano”. Some people tried to play a song and others were trying to find the limits of the depth sensor to see how little of their presence triggered a note and how high or low their foot or hand needed to be.

The feedback I received was generally positive. People enjoyed the colorful and playful nature of the setup as well as the pleasant tones emitted my the speakers. Someone said it reminded them of a Fischer Price Xylophone, which I must admit, was not something I was going for, but unintentionally recreated almost exactly! Some of the other feedback I received was that they enjoyed that they could step back and watch others interact and play since there were essentially a “play” space on the Marley, and a “observer” space outside the rectangle. Some others commented that more interactive possibilities would have been interesting, such as a different response to the height of your hand or foot that triggered the notes.
For Cycle 2 I plan on using the same basic concept but abstract the entire field to be a little less rectangular and obviously a type of piano. I have been experimenting with a spatial synthesizer that can utilize the immersive sound system in the Motion Lab. I also plan to add more “geo zone” boxes to increase the sensitivity and interactive possibilities.
Pressure Project 1
Posted: February 13, 2025 Filed under: Uncategorized Leave a comment »For pressure project one I was inspired by the original Isadora template to keep things simple and looping indefinitely as opposed to creative a narrative. My original instinct was to animate the patch with random positions and shape patterns to create something that was consistently changing to keep the viewer’s attention. Thankfully, Isadora’s license was not valid on my first attempt so I was unable to save my work. On my second attempt, I challenged myself to be a bit more intentional about my choices and work within the scope of the assignment. Knowing that we had the option to use a camera input as a sensor, I began the process of adding some video feedback and interaction to the patch.
Adding the video to the squares was easy enough. From my previous experience with Isadora, I already knew how to add a new user input to the user actors, so it was a simple process. However, I quickly realized that the incoming aspect ratio was rectangular and the shapes we were given were square. In the spirit of simplicity and symmetry, I choose to crop the video to a square. This led to the image having a border and combining the projectors gave the effect of a color filter which I thought was a bit retro and fun. This basic foundation gave me the inspiration for the rest of the patch.
The square image with a thick border remined me of a photo booth and I was off to create an experience that could capture that magic into an interactive experience. I wanted to essentially “take a snap shot” at the same time as the colored square appeared. I found the freeze actor worked perfectly for this. Adding the same trigger as the projector activation synced everything up nicely.
I wanted to refine the images a bit more by changing the way they appeared and disappeared. For this, I wanted to create the effect of turning over a card or picture to reveal what is underneath. I have never tried this in Isadora before so I experimented a bit before I found the 3D projector. The setting on this actor are quite different from the normal projector, but I was quickly able to figure out what most of the options did. To rotate the image, I added a ramp to the Y rotation so it would flip into place when the projector became active. This worked as you might expect, but I did discover there were some artifacts and lines that would tear into the image as the effect was taking place. I played around with the blend modes and layer heights, but nothing seemed to work. Finally I found the “depth test” setting that made the transition smooth and looked good. I would have liked to flip the image back over when it disappeared, but I ran out of time and figuring out the timing and trigger delays was not as important to me as getting a good image.
One of the goals for me on this project was also to explore new actors and refine my methods of using them. I have used the eyes++ actor many times, but with limited success. Recently I have tried filtering the input with a chroma key to isolate faces which has worked fairly well. This technique worked well for trying to essentially “zoom in” on the users face when taking the “photo”. I had to guess what actors to use to do the cropping and centering of the image on the “Blob” but I was able to get something that worked reasonably well.
When it was time to present, I quickly realized the camera tuning I had done in my office at home was producing the same results in the classroom. I was able to franticly changes some setting to get it working again just before our presentations began. For the presentation itself, I choose to display the stage on the classroom TV. This was similar to how I had programmed everything in my office with second display. I was excited to see how others would react and I was pleased that most people seemed to enjoy the experience. One thing I did notice was that at some point people started to back away from the screen. This was partially to give others space, but I think it was also because the camera was essentially following them and they didn’t want their picture taken. For a future iteration I might try to limit the range of the camera so it only interacted with people at a certain range and distance.
Overall, I enjoyed working on this project and I’m happy I was able to keep most of the original programming intact.


