Cycle 3
Posted: April 29, 2021 Filed under: Nick Romanowski Leave a comment »Cycle 3 was all about bringing everything together and completing my game environment. My original plan with this project was to replicate the Spider-Man web-slinging attraction coming to Disney California Adventure. That meant adding a story, goals, a set duration, etc. Unfortunately, things proved to be slightly more difficult than I had hoped and I instead just created the basic mechanics and environment for the aforementioned game to take place in.
Picking up where I left off in Cycle 2: My original launch system was a series of complicated algebra equations all tied together to tell a project (a torus) how it should launch. Essentially, a timer would tell the torus what it’s z values where and then it would scrub over a parabola to provide y values and use a slope equation to calculate the x values. The largest problem with this system is that it didn’t create a super realistic launch. The torus would move on its arc path and then just abruptly stop at the end. To create the effect I wanted, I needed to incorporate physics into the project.
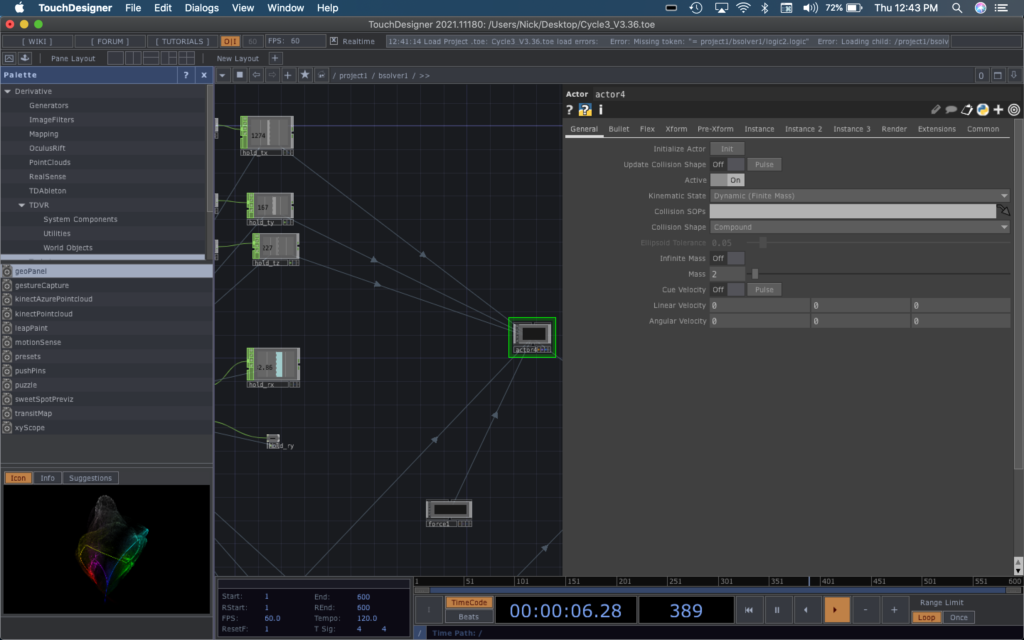
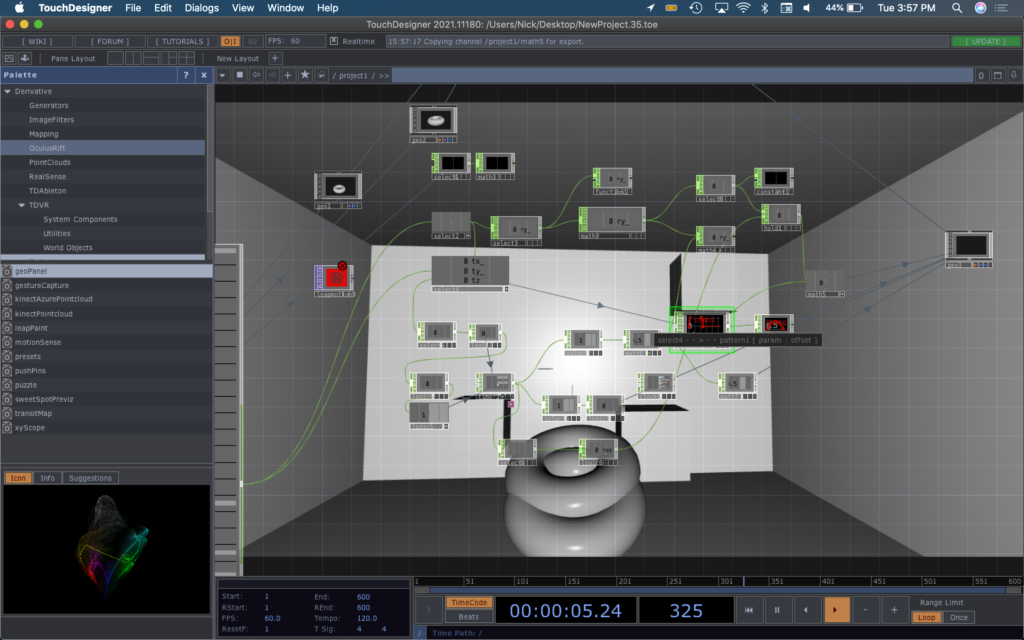
Enter the Bullet Solver: TouchDesigner has a COMP entitled Bullet Solver, which is essentially a physics environment based off of an open source physics engine of the same name. How the Bullet Solver works is that it allows you to put “actors” inside of it that have different physics settings (rigid or dynamic) and then when you run the COMP it allows them to interact with one another. This mean that I could launch a projectile and then let it interact with its surrounding environment and forces (mainly gravity) – creating a realistic environment.
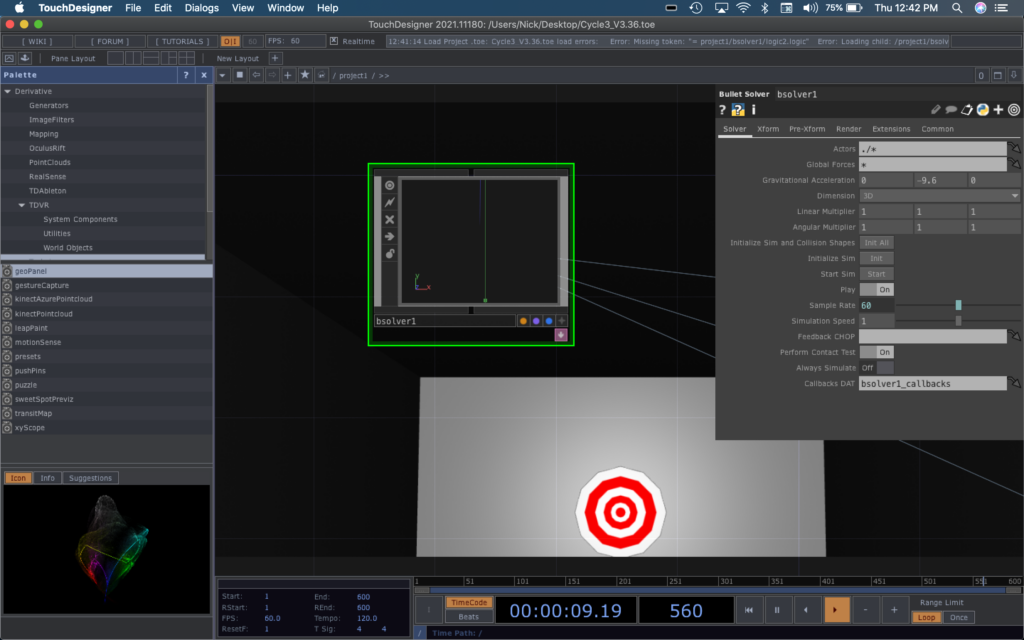
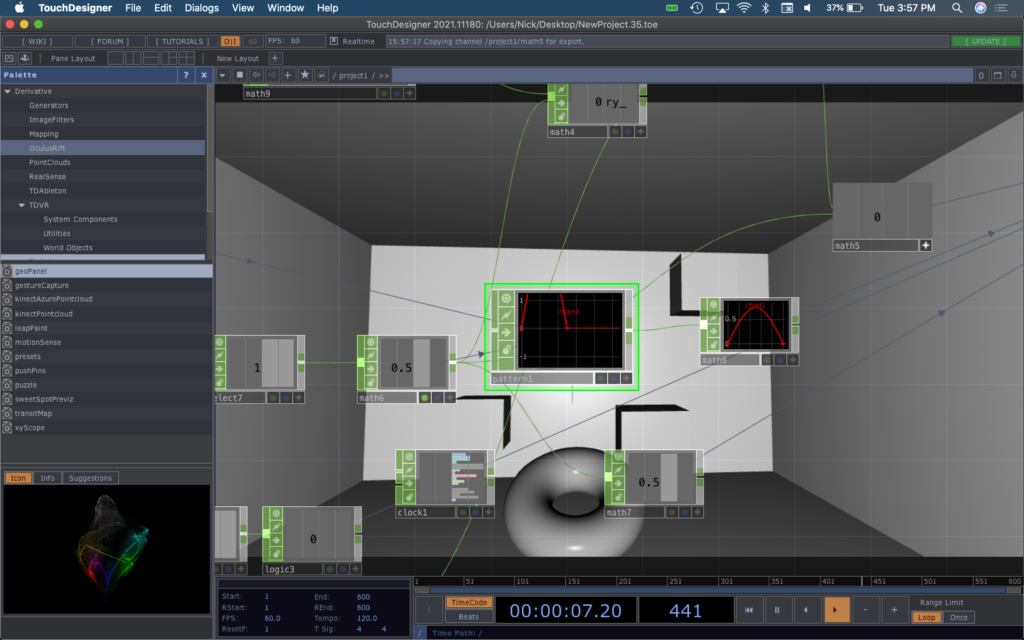
The new launching mechanism I constructed bypassed the complex algebra from Cycle 2. This one works by taking in palm rotation values from the leap motion and using those as multipliers on a Force operator inside the Bullet Solver. The Force operator creates a “force” that can influence and propel dynamic bodies inside the solver. A series of timers tell the projectile when it should allow itself to be solely affected by the force and when it should let gravity take over and “fall”.
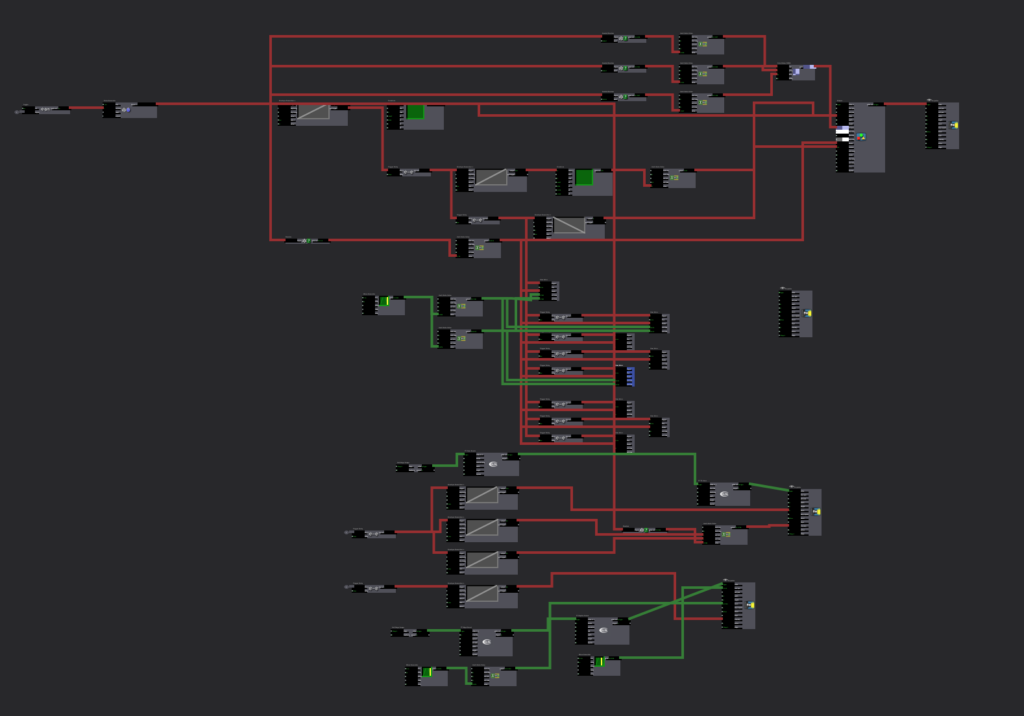
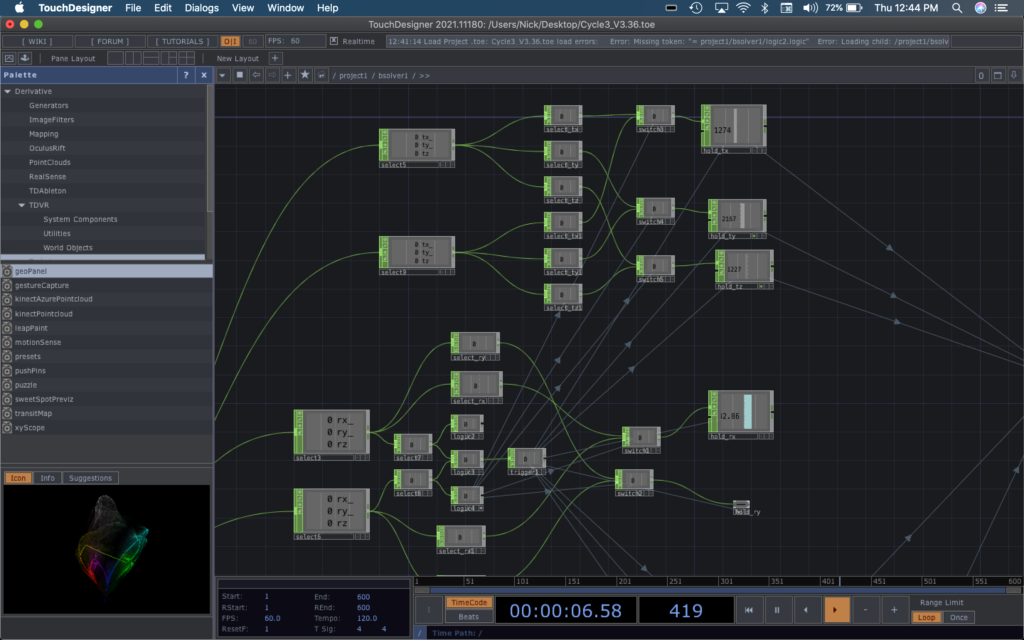
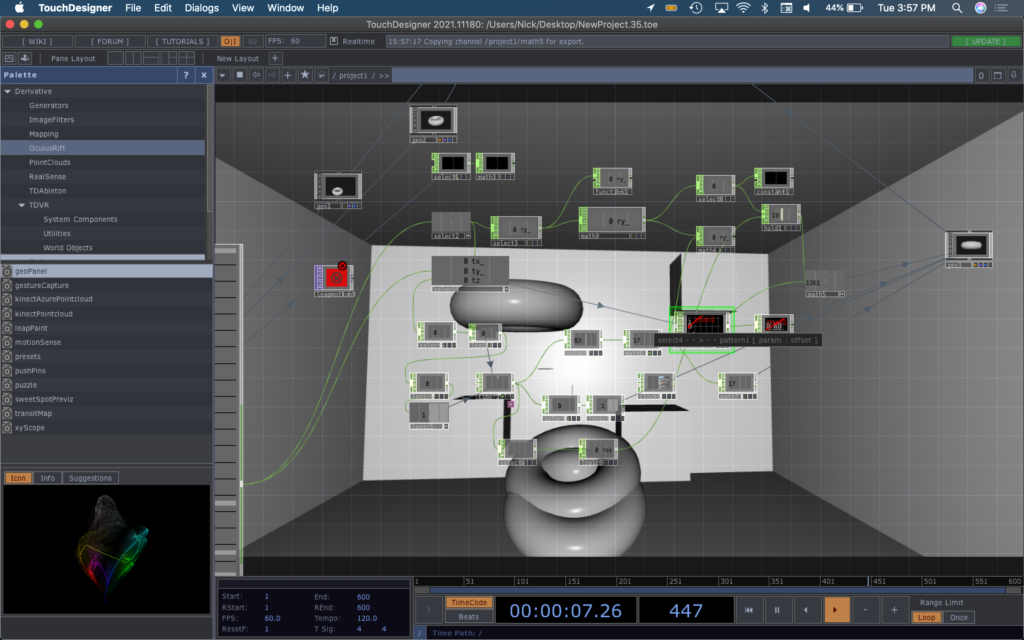
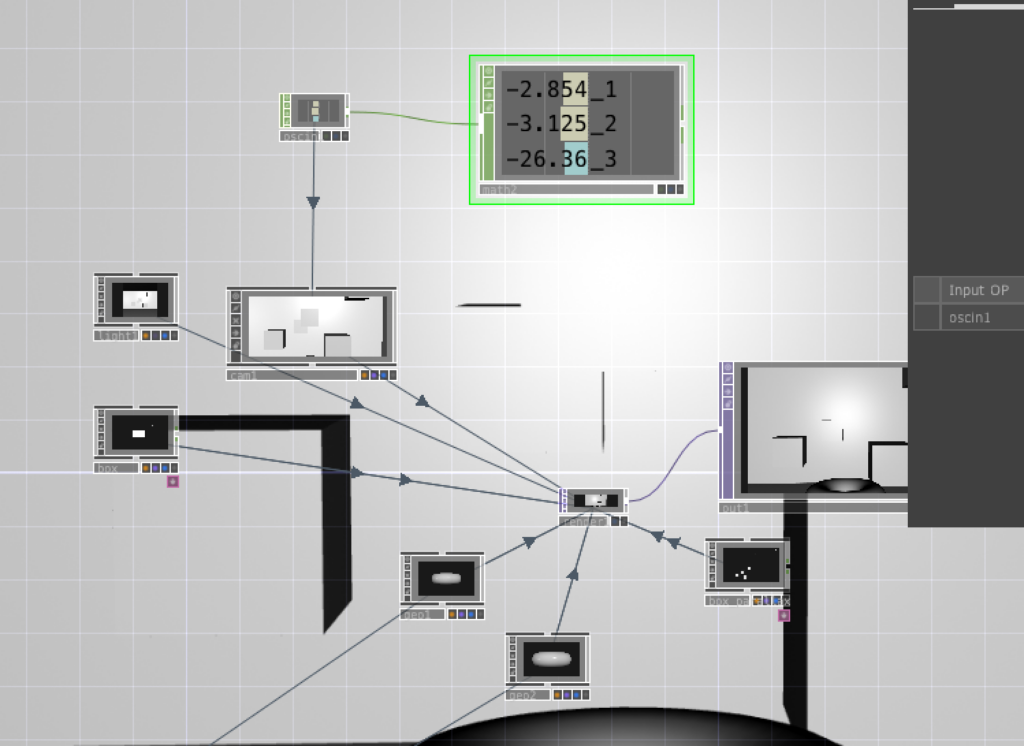
A randomly placed circle inside the game is the target that you should aim to hit with the projectile. Each time you fire a projectile, it regenerates in a random place calculated by the operator network shown below.
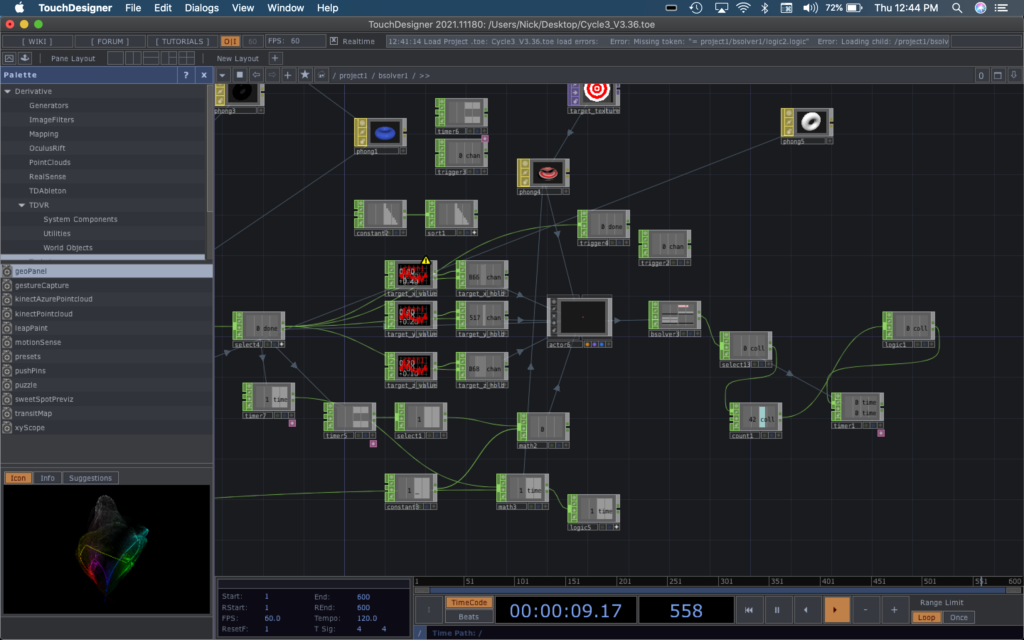
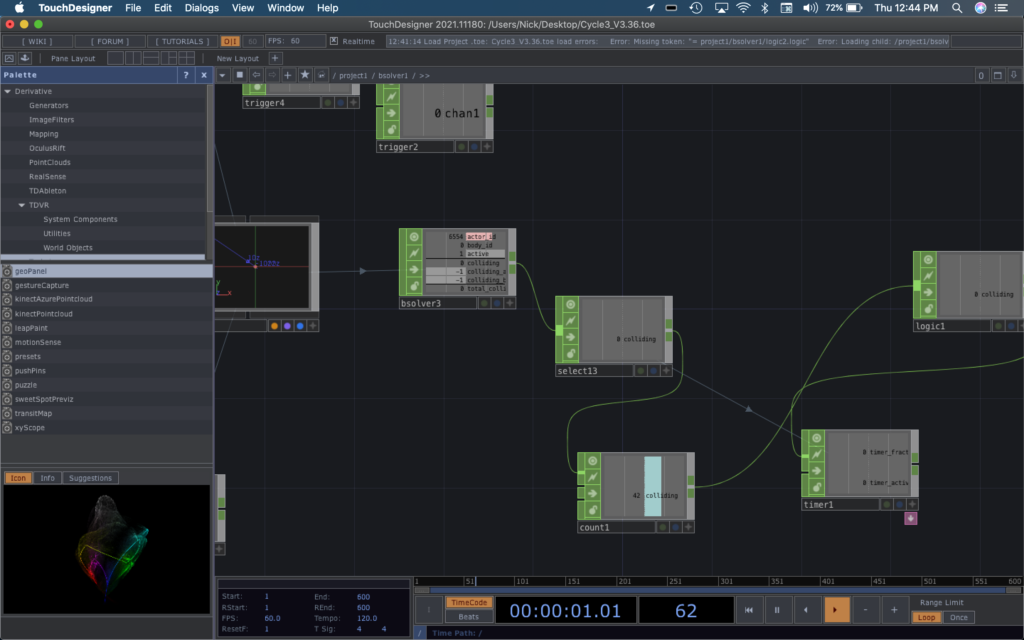
The collisions are detected with another operator that detects when the dynamic body that is target collides with something. The target often spirals out of place and collides with the rigid container shape which are also counted as collisions. To remedy that problem, a counter operator that only allows itself to be increased every so many seconds ensures that only the first collision is counted as a score. When a collision is recorded, it tells a text geometry to render itself in the foreground and showcase the score.
A series of logic gates are used to calculate whether the hands detected by the Leap are the right or left and tells the hand geometries how to display themselves. Another set of gates determines which hand has entered launch position and uses switches to tell the projectile to grab that hands orientation and placement values.
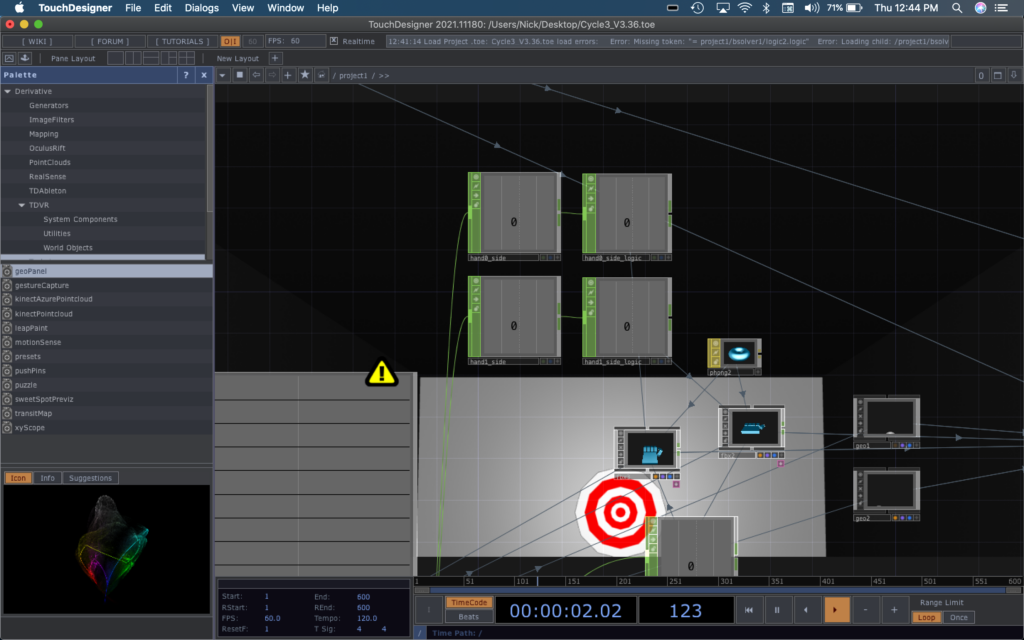
To conclude: the environment allows a player to put their hand perpendicular to the ground and use this gesture to aim and launch a ball at a randomly generated target. They can also move their head around to activate a parallax effect powered by a Kinect connected to Isadora that sends its values via OSC to TouchDesigner. If I were to further this project with a Cycle 4, I would like to add a story and a definitive beginning and end to the game. I created some basic aesthetics with this cycle, using phong materials to add color or basic textures, but I would love to take things further in a way that supported a storyline.
Cycle 2
Posted: April 27, 2021 Filed under: Nick Romanowski Leave a comment »The goal with Cycle 2 was to create the leap-motion driven firing mechanism for the game environment. My idea was to use the leap-motion to read a user’s hand position and orientation and used that to set an origin of and trigger the launch of a projectile. TouchDesigner’s Leap operator had an overwhelming amount of outputs that read nearly every joint in the hand, but they didn’t quite have a clean way to recognize gestures. To keep things simple, the projectile launch is solely based on the x-rotation of your hand. When the leap detects that your palms is perpendicular to the ground, it sends that pulse that causes the projectile to launch.
Creating launch mechanics was a bit of a difficult feat. The system I built in Cycle 2 had no physics and instead relied on some fun algebra to figure out where a projectile should be at a given time. When the hand orientation trigger is pulsed, a timer starts that runs the duration of the launch. When it’s running, a torus’s render is toggled to on and its position is controlled by the network shown below.
The timer numbers undergo some math to become the z-axis value of the torus. The value of a timer at a specific time feeds into a pattern operator formatted like a parabola to grab a y-axis value on said parabola and map it to the y-axis of the parabola. The x-axis of the user’s hand is used to manipulate that amplitude of the pattern operator parabola to cause the torso to go higher if you tilt your hand back. Using a slope formula: y=mx. the x-axis position of the torus is calculated. The timer value is multiplied by a value derived from the y-rotation of your hand to fire the torus in the direction that your aiming. When the timer run completes, it resets everything and puts the torus back at its start point.
Cycle 1
Posted: April 6, 2021 Filed under: Nick Romanowski Leave a comment »My overall goal for this final project is to create a video game like “shooting” environment that utilizes leap motion controls and a parallax effect on the display. Cycle 1 was focused on creating the environment in which the “game” will take place and building out a system that drives the head tracking parallax effect. My initial approach was to use basic computer vision in the form of blob tracking. I originally used a syphon to send kinect depth image from Isadora into TouchDesigner. That worked well enough, but it lacked a z-axis. Wanting to use all of the data the kinect had, I decided to try and track the head in 3D space. This lead me down quite the rabbit hole as I tried to find a kinect head tracking solution. I looked into using NIMate, several different libraries for processing, and all sorts of sketchy things I found on GitHub. Unfortunately none of those panned out so I fell on my backup, which was Isadora. Isadora looks at your skeleton and picks out the bone associated with your head. It then runs that through a limit scale value actor to turn it into values better suited for what I’m doing. Those values then get fed into an OSC transmit actor.
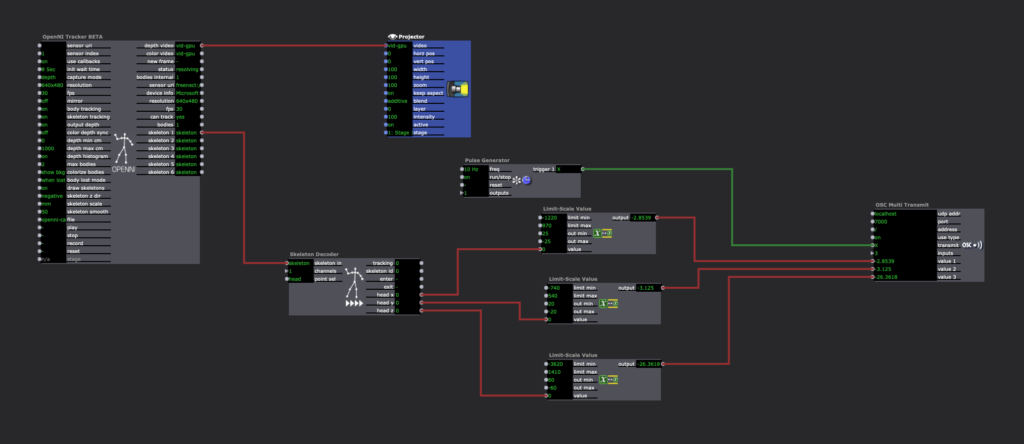
TouchDesigner has an OSCin node that listens for the stream coming out of Isadora. Using a little bit of python, a camera in touch allows its xRotation, yRotation, and focal length to be controlled by the values coming from the OSCin. The image below shows some rounding I added to the code to make the values a little smoother/consistent.
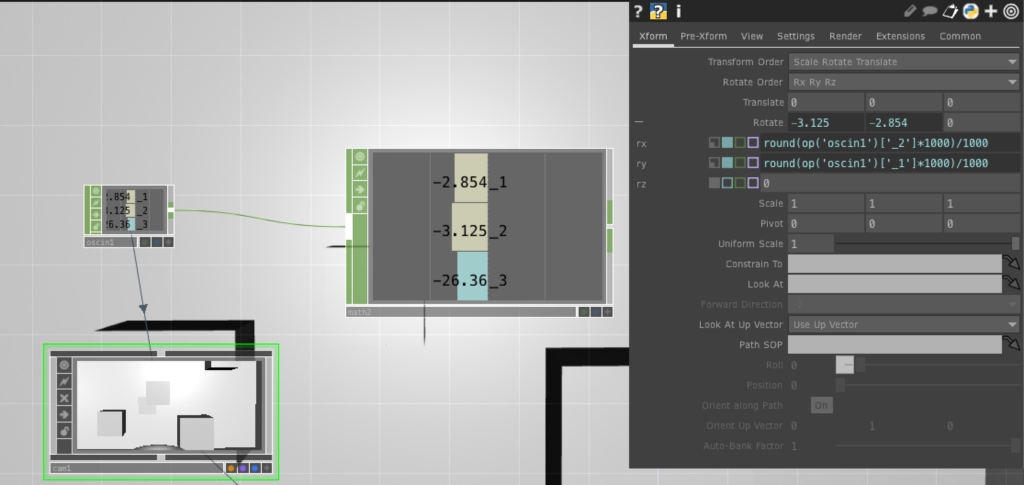
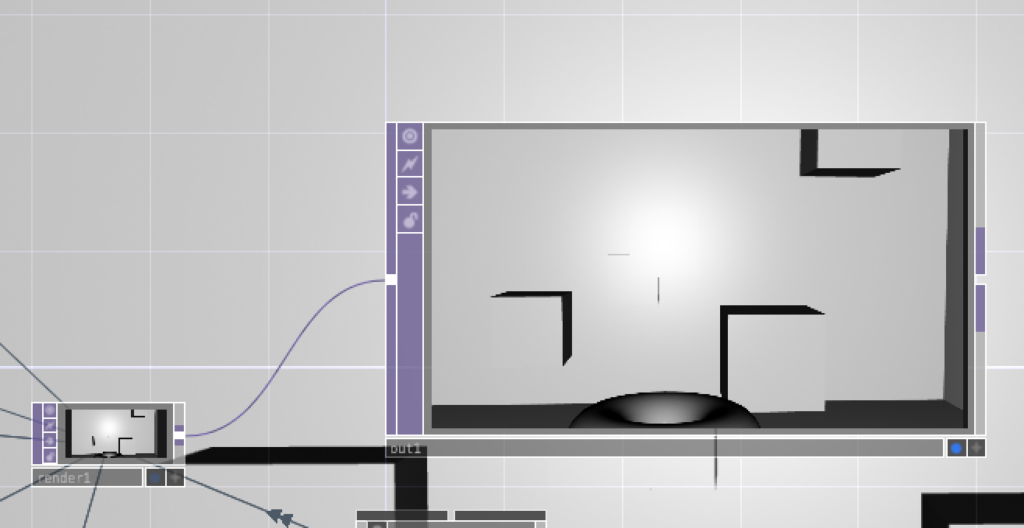
TouchDesigner works by allowing you to set up a 3D environment and feeding the various elements into a Render node. Each 3D file, the camera, and lighting are connected to the renderer which then sends that image to an out which can be viewed in a separate window.
Pressure Project 3
Posted: March 21, 2021 Filed under: Nick Romanowski, Pressure Project 3 | Tags: Nick Romanowski Leave a comment »For Pressure Project 3, I wanted to tell the story of creation of earth and humanity through instrumental music. One of my favorite pieces of media that has to do with the creation of earth and humanity, is a show that once ran at EPCOT at Walt Disney World. The nighttime spectacular was called Illuminations: Reflections of Earth and used music, lighting effects, pyrotechnics, and other elements to convey different acts showcasing the creation of the universe and our species.
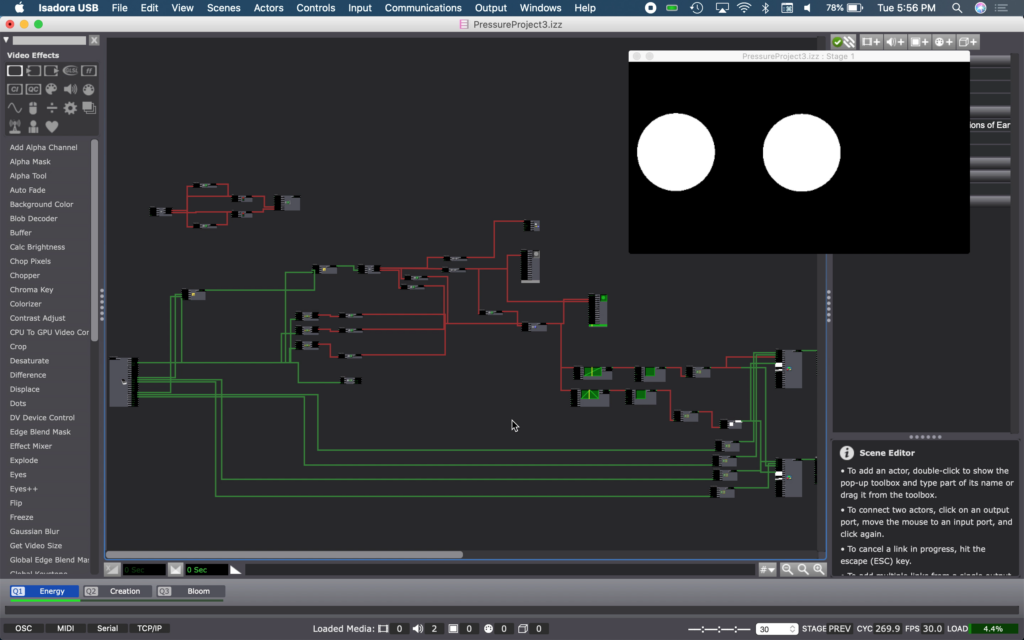
I took this piece of music into Adobe Audition and split the track up into different pieces of music and sounds that could be manipulated or “visualized” in Isadora. My idea was to allow someone to use their hands to “conduct” or influence each act of the story as it plays our through different scenes in Isadora. The beginning of the original score is a series of crashes that get more and more rapid as time approaches the big band and kicks off the creation of the universe. Using your hands in Isadora, you become the trigger of that fiery explosion. As you bring your hands closer to one another, the crashes become more and more rapid until you put them fully together and you hear a loud crash and screech and then immediately move into the chaos of the second scene which is the fires of the creation of the universe.
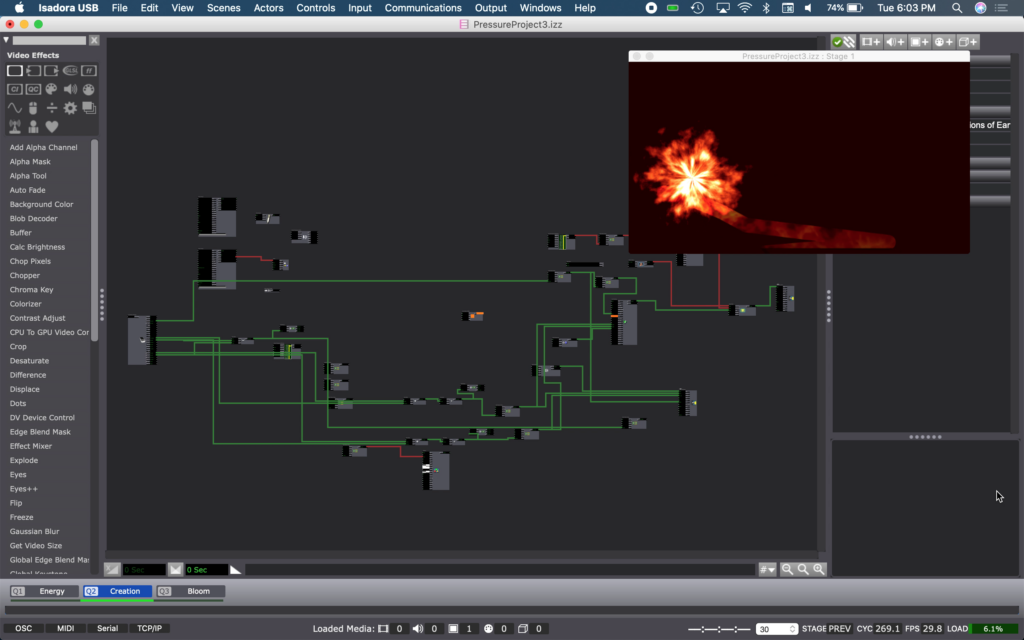
Act 2 tracks a fire ball to your hand using the Leap Motion. The flame effect is created using a GLSL shader I found on shader toy. A live-drawing actor allows a tail to follow it around. A red hue in the background flashes in sync with the music. This was an annoyingly complicated thing to accomplish. The sound frequency watcher that flashes the opacity of that color can’t listen to music within Isadora. So I had to run my audio through a movie player that outputted to something installed on my machine called Soundflower. I then set my live capture audio input to Soundflower. This little path trick allows my computer to listen to itself as if it were a mic/input.
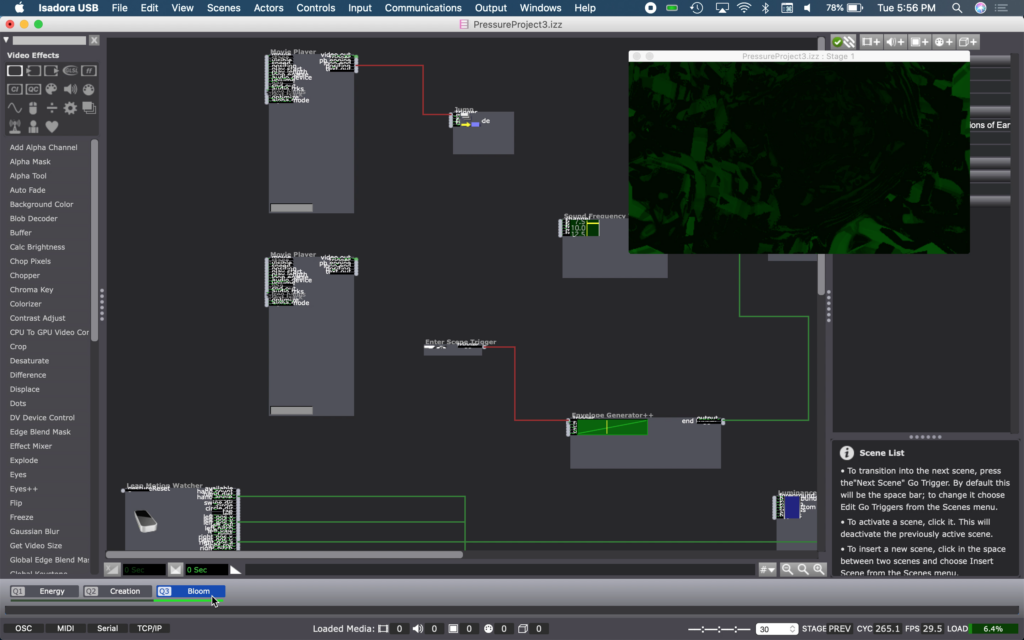
Act 3 is the calm that follows the conclusion of the flames of creation. This calm brings green to the earth as greenery and foliage takes over the planet. The tunnel effect is also a shader toy GLSL shader. Moving your hands changes how it’s positioned in frame. The colors also have opacity flashes timed with the same Soundflower effect described in Act 2.
I unfortunately ran out of time to finish the story, but I would’ve likely created a fourth and fifth act. Act 4 would’ve been the dawn of humans. Act 5 our progress as a species to today.
Pressure Project 2 (Nick)
Posted: March 2, 2021 Filed under: Nick Romanowski, Pressure Project 2 Leave a comment »I remember hearing about the LEAP motion when it was originally posted on KickStarter. One of the things that I was initially interested in was the idea of interacting with objects in virtual, 3D space. That’s the direction I head with this pressure project as I attempted to build a sort of 3D interaction interface.
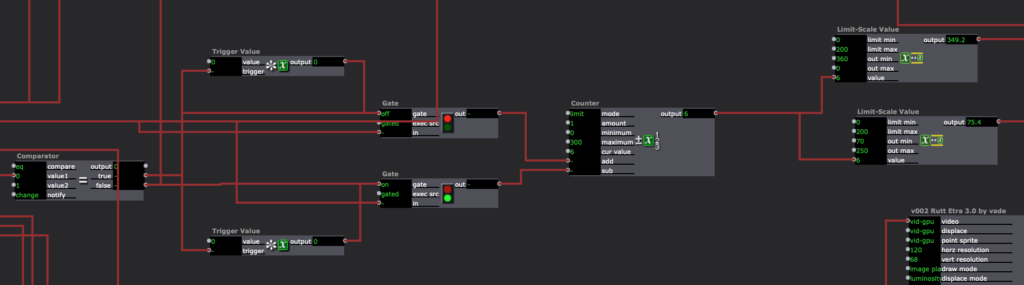
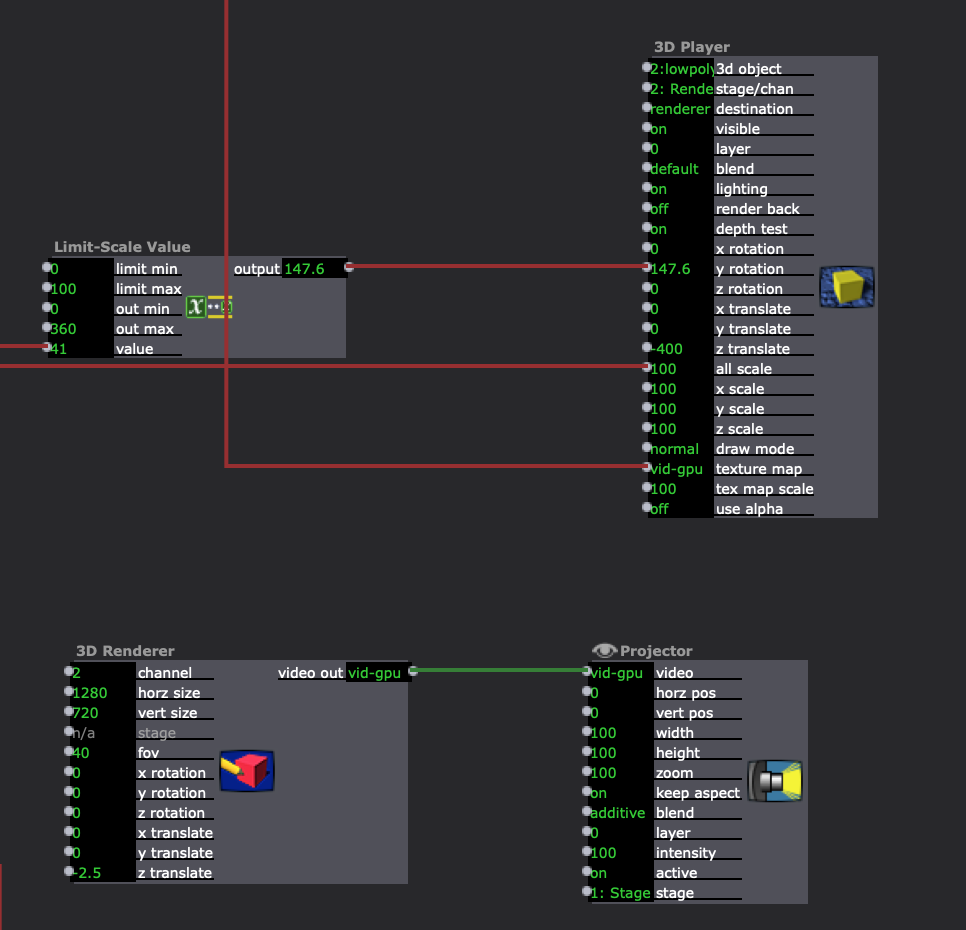
I began going about this by first creating a way to visualize hands in the scene, knowing that this had to be handed off to someone I thought that forcing them to launch the LEAP visualizer would bee sort of clunky. I instead used the x and y values from each hand to generate hold values that I changed with a limit scale and fed into projectors on some images of sprite hands I found online. I used rutt etra to rotate them as well, grabbing the roll value from the LEAP and feeding it into that actor.
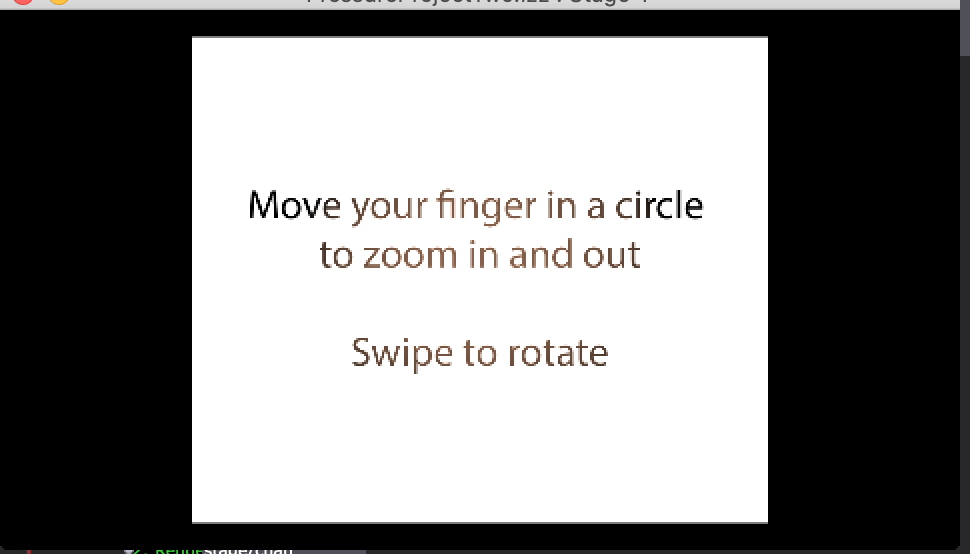
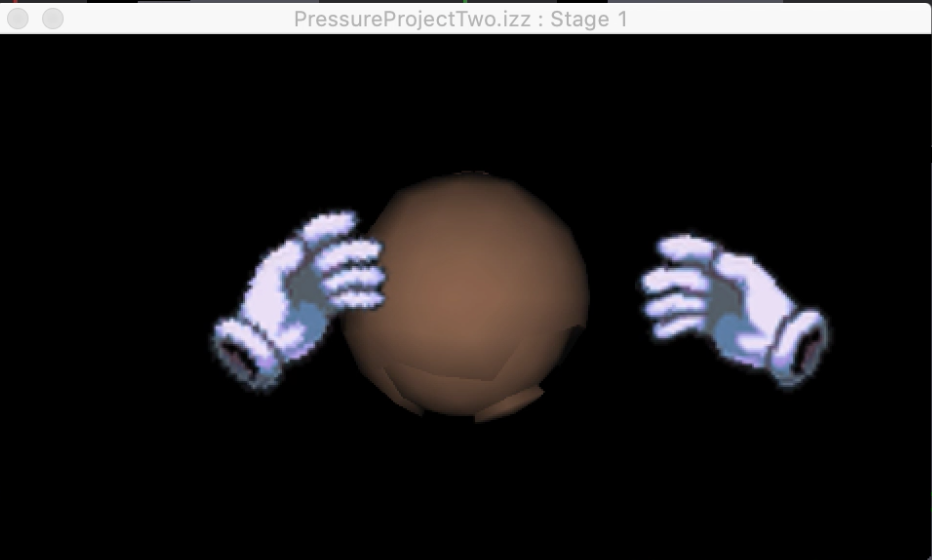
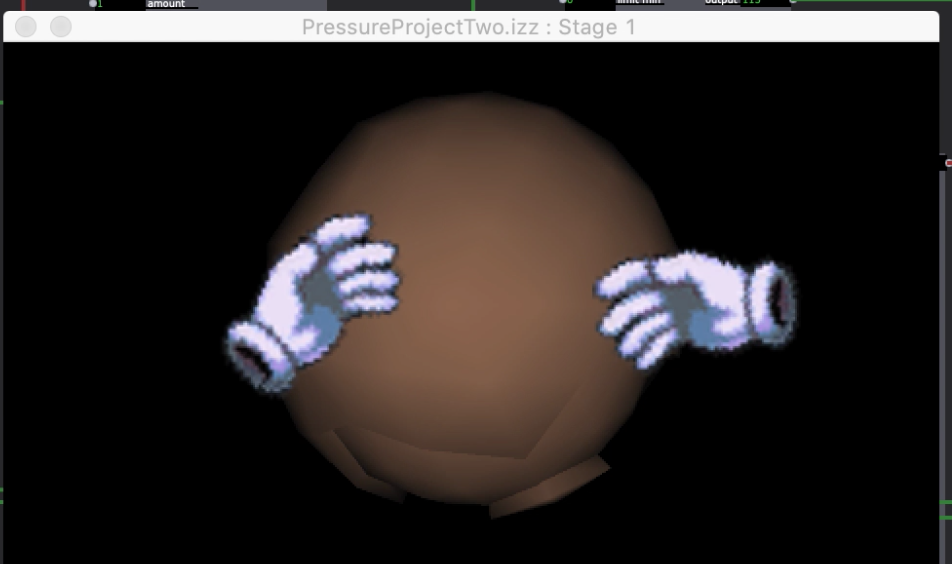
I spent a lot of time building some clunky logic gates to help make my interactions more intuitive. I wanted it to be so that if you made a circle with a finger one way, it zoomed in, but if you did it the other, it zoomed out. That required quite a bit of playing around with until I devised a system that always let the “circle” trigger through but changed whether it was adding or subtraction from the total zoom based on whether the direction was pumping out a 1 or 2. I then used a similar system to do the same thing for swiping to rotate. All of that data was plugged into a 3D player that was set to a Render which was plugged into a projector. Again, with passing this to someone else in mind, I added some quick instructions that hold on the screen until both hands are present.
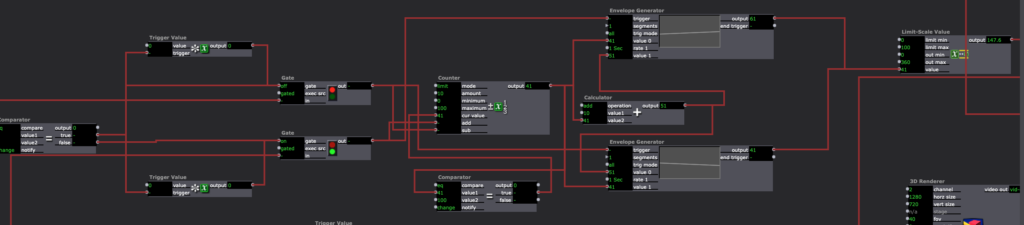
Figuring out the logic gates and the 3D were probably the most difficult portions of this pressure project. In the future I think I will go with Alex’s suggestion which is to just build my logic in a javascript actor to save the trouble of using 10+ logic-esque actors passing values back and forth. I’m happy I at least got a taste of 3D as I’d like to pursue working with it further in my final project. Rutt etra was also interesting to play with as it seems to be able to take traditionally 2D objects and add a Z-axis to them, which I think will also be helpful in my final project.
Pressure Project 1 (Nick)
Posted: February 4, 2021 Filed under: Nick Romanowski, Pressure Project I Leave a comment »With this first pressure project, I was mostly interested in playing around with Isadora and seeing what I could accomplish with the actors we’ve worked with so far and a few extra that I was able to research and play around with. I was inspired by some of the example projects we played with in the first or second week that had mesmerizing/repeating patterns.
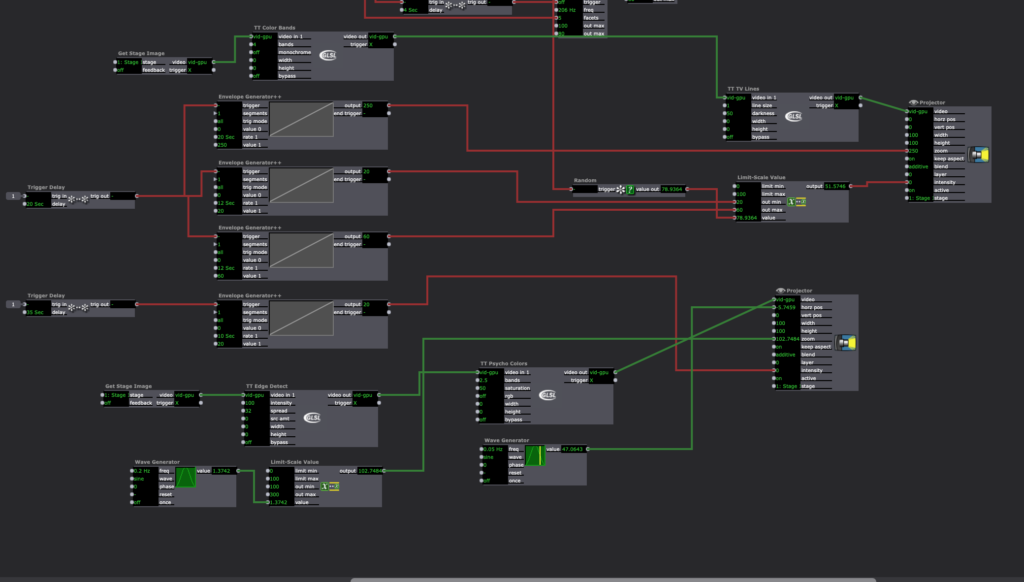
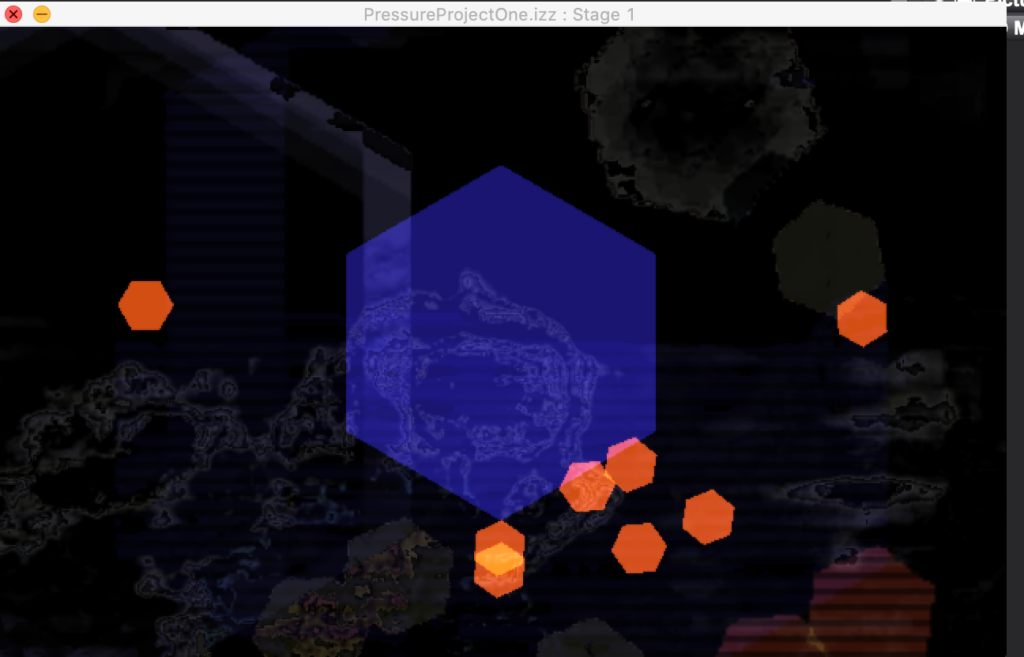
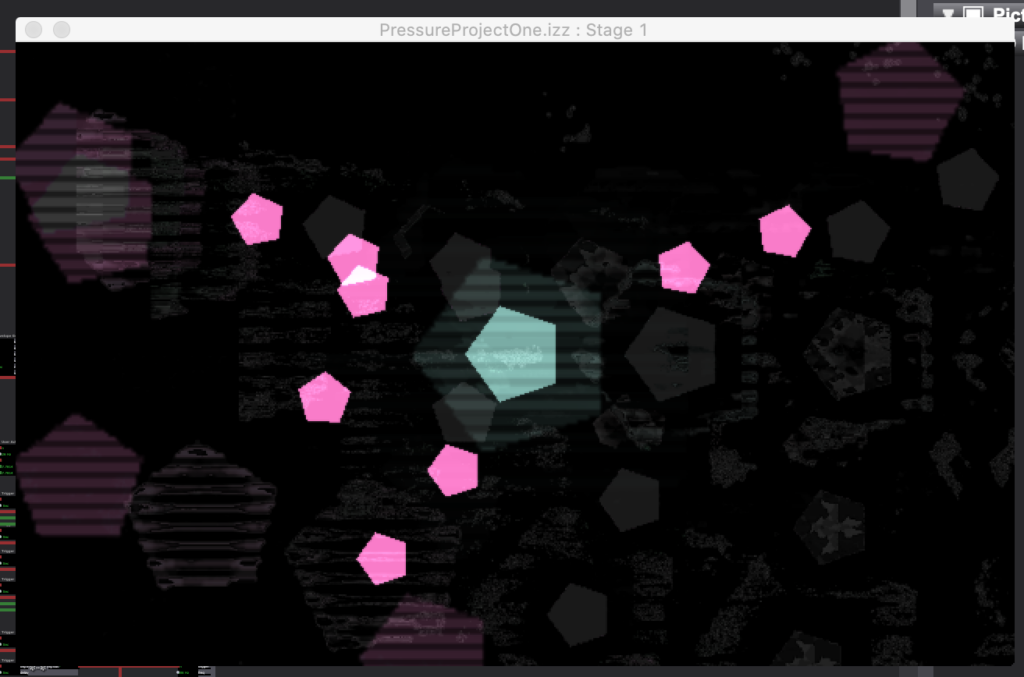
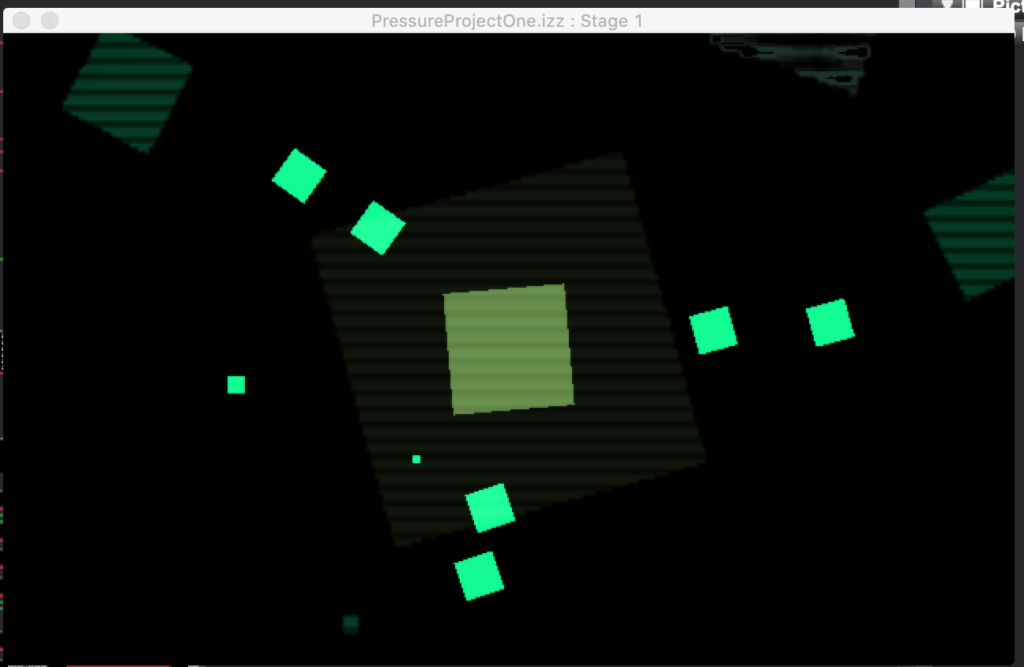
I decided to create this sort of large “breathing” shape that would enter and exit the scene and be immediately followed by smaller versions of it that moved in a sort of orbiting fashion. Coming from a motion background, I wanted my movements to be a bit smoother than what the envelope generator offers by default. I used the curvature actors to play with the speed values the envelope generator was pumping out. To create my orbiting shapes, I created a user actor that would make one of them, and then inside there I found javascript that I could put into the javascript actor that would make them move in an elliptical motion. The user actors were built with several inputs to influence their facets (to mirror the big shape) and their motion (different values to feed into the javascript creating their circular paths). Those littler shapes were all on trigger delays to allow the mama shape to do its thing first. 20 or so seconds in, two “get stage image” actors start to capture the stage and make things even more mesmerizing. I used TT color bands and TT tv lines to create an “echo” of everything that was going on onstage and then the tv lines make it feel as if it’s sort of like a broadcast. That broadcast idea is pushed further a second “get stage image” that uses an edge detect plugged into a projector with a wave generator driving its horizontal positions, creating a sort of phasing effect. The end result is a mesmerizing, cosmic, and occasionally extraterrestrial set of visuals.