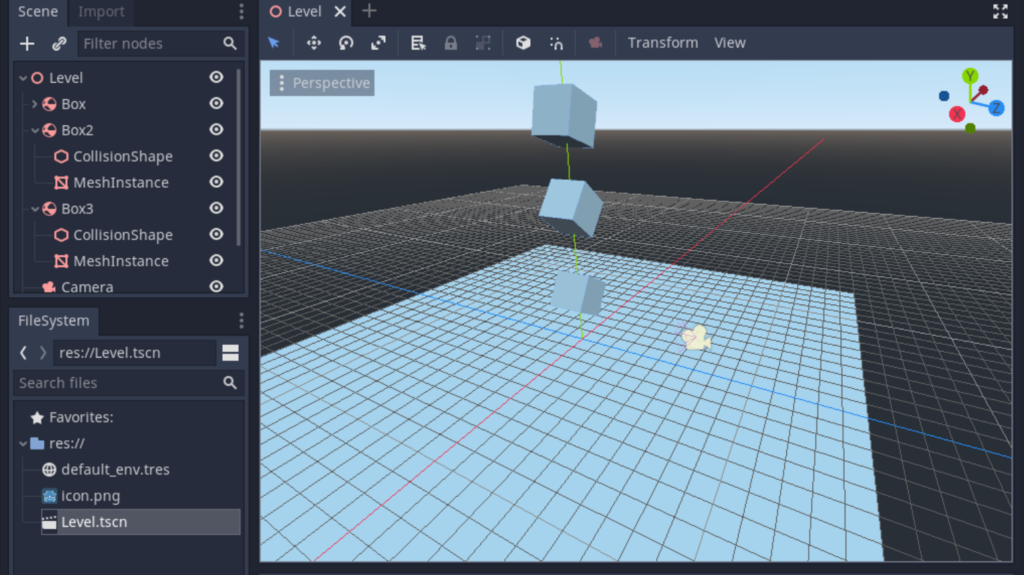
Cycle 1 Documentation (Maria)
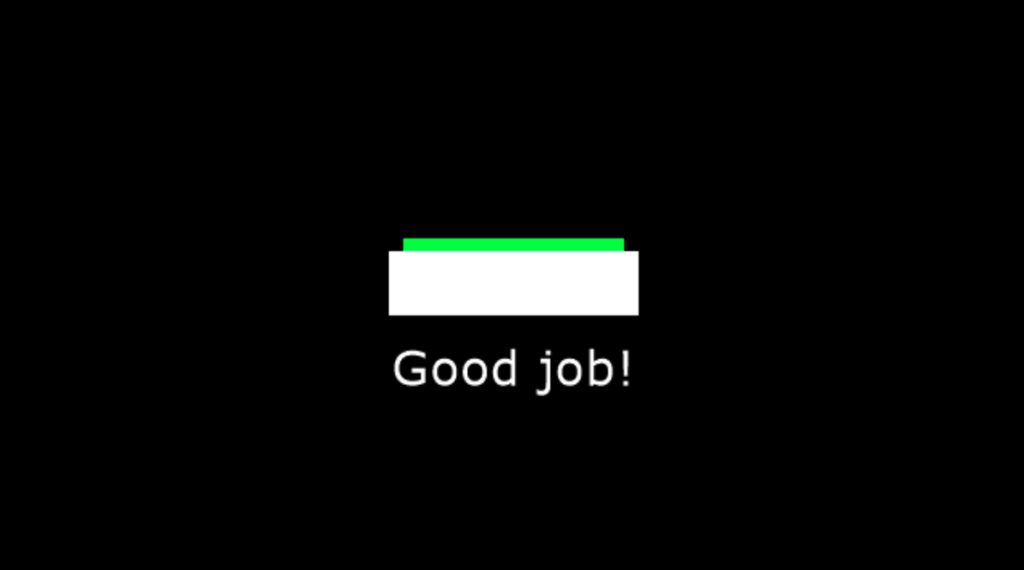
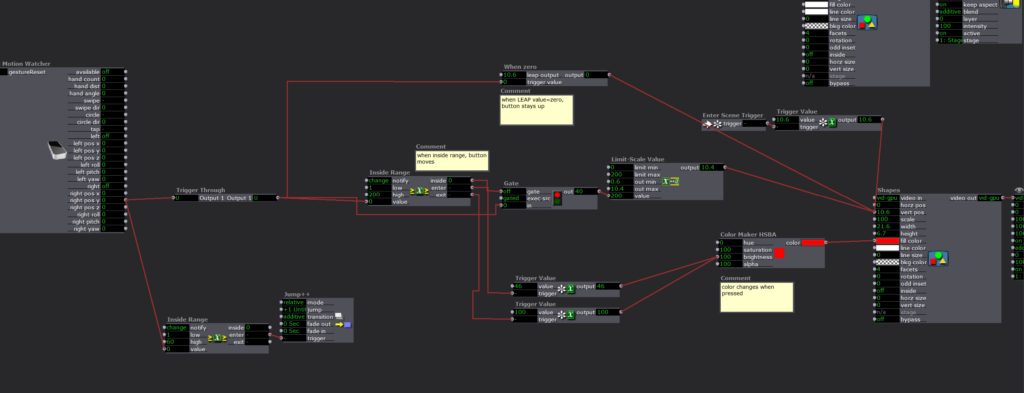
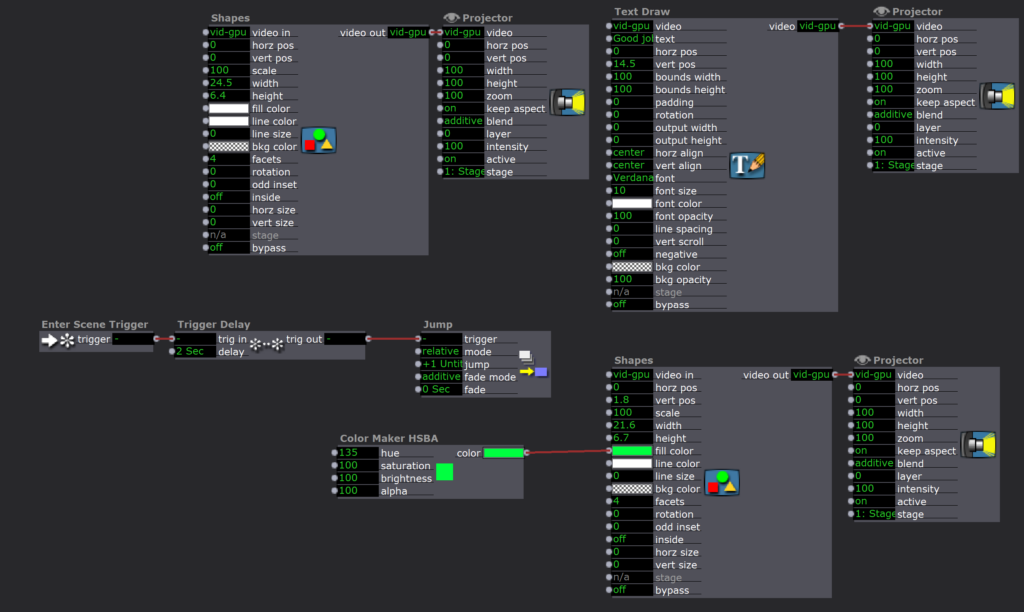
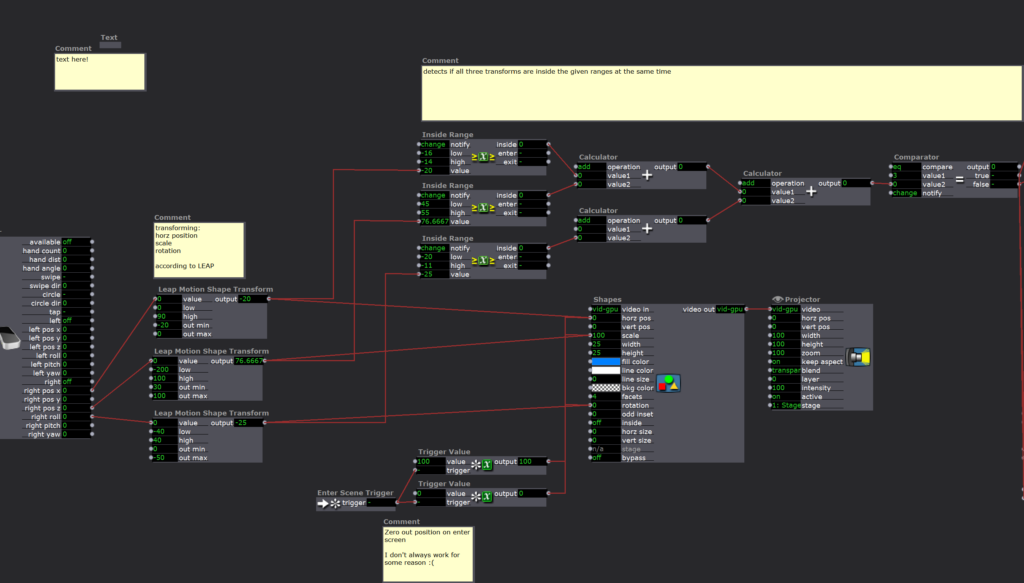
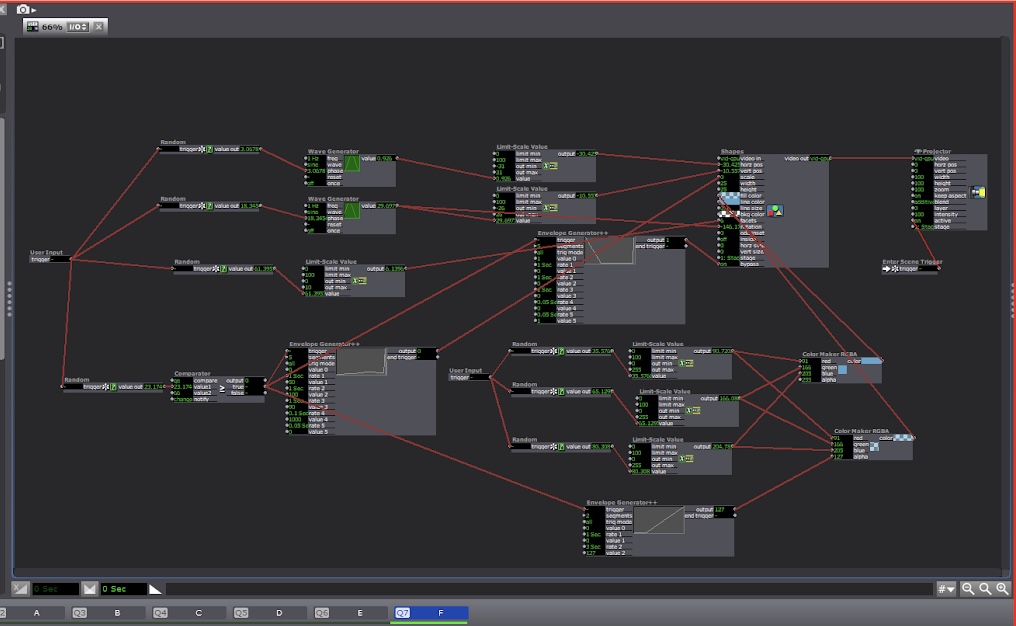
Posted: March 29, 2021 Filed under: Maria B, Uncategorized Leave a comment »For this cycle, I wanted to explore interaction design with the LEAP motion. I made two little ‘puzzles’ in Isadora in which the user would have to complete certain actions to get to the next step. I thought a lot about the users experience–providing user feedback in response to actions and making the movements intuitive. The first one was simply pressing a button by moving your hand downwards.


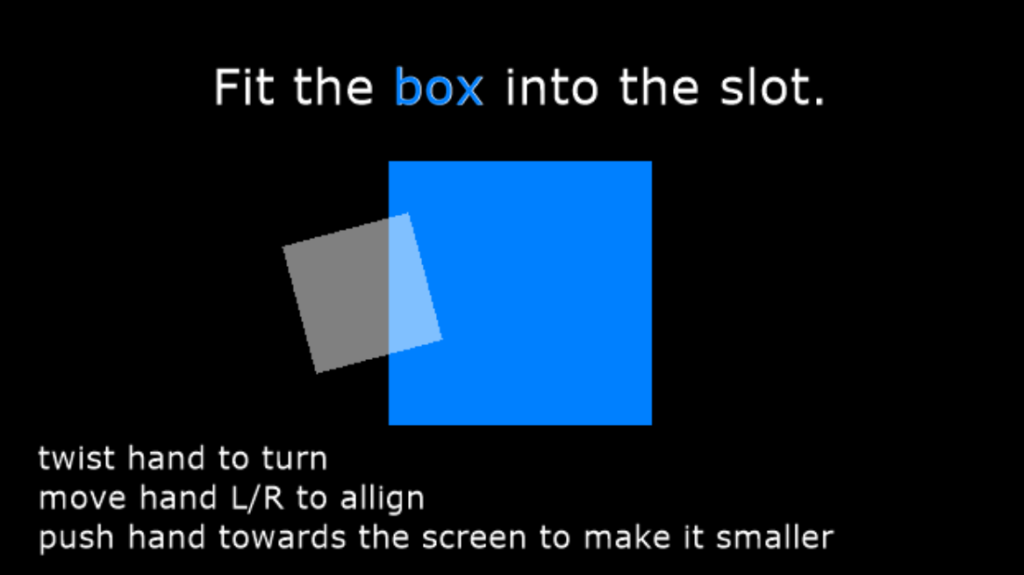
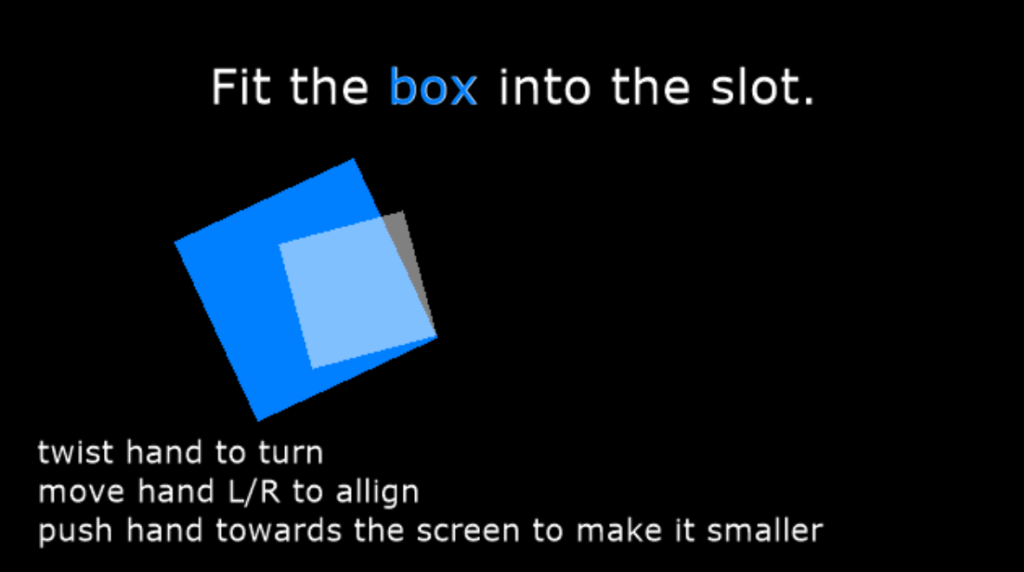
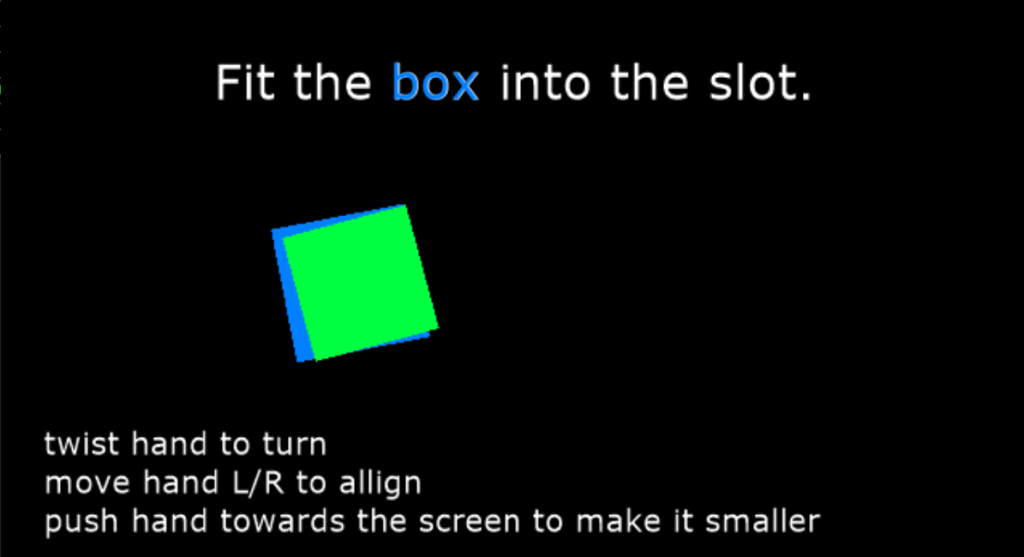
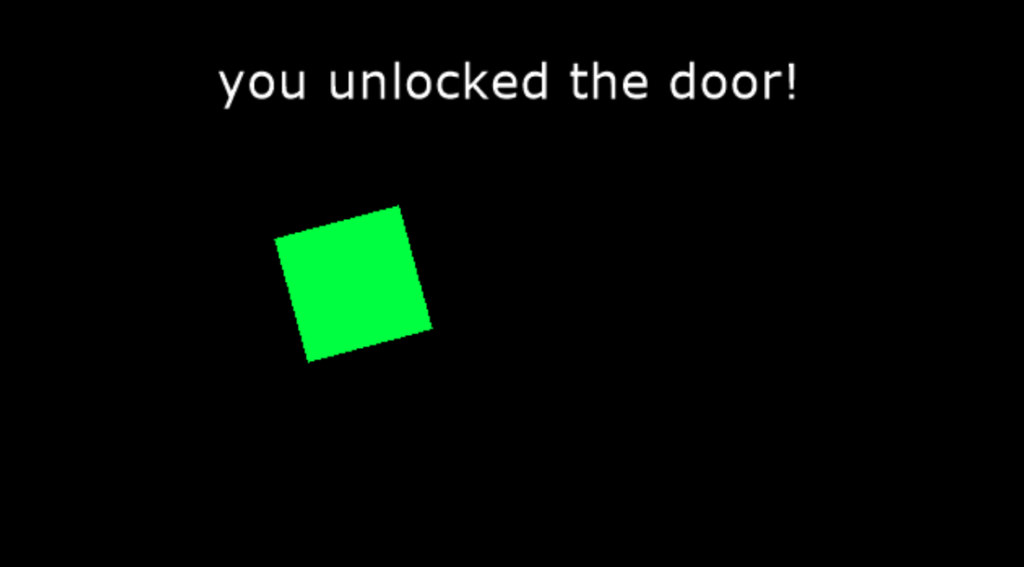
The second puzzle was aligning a shape into a hole based on the movement of the users hands.
For the next cycle, the goal is to create more of a story that guides/gives purpose to these puzzles.
Cycles 1 (Sara)
Posted: March 25, 2021 Filed under: Assignments, Sara C Leave a comment »Intent
For the remainder of the term, Alex has given us free rein to explore any hardware or software we so choose in order to create an experiential media system of our very own. I’m a lifelong gamer who normally can’t abide motion controls (It’s like those Reese’s commercials: “You got your motion controls in my video game!”), but I’m also desperately curious about the ways in which we can make VR experiences more immersive. As a result, my goal for the next month is to test Leap Motion functionality by swapping out conventional video game controls for hand gestures. Problem 1: I don’t have a VR headset at the moment upon which to test. Problem 2:
I’ve never made a video game.
I decided I’d hop, skip, and jump over Problem 1 entirely and simply focus on a desktop-based, 3D game experience for the duration of this project. As for Problem 2? Well, I did what most any human in the world looking to acquire a new skill would do in the present day—I started browsing YouTube tutorials. I figured I’d run a crash course in rookie game dev before tackling my own Leap-Motion-Meets-Godot prototype. One week and an eight-part video series later:
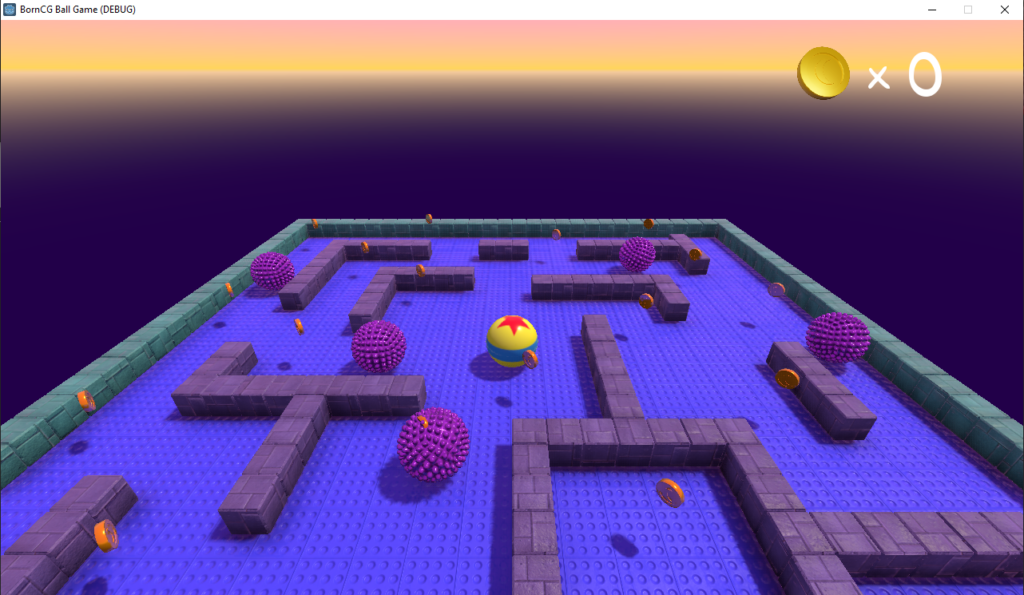
Et voilà, I made…someone else’s video game.
Difficulties
I mentioned to Alex that this achievement feels hollow. The BornCG channel is truly a monument to patient, thorough software skills instruction. I didn’t run into any significant difficulties while following this series because the teacher (who is an actual high school programming teacher, I believe) was so diligent in holding my hand the entire time. But I also completed the software equivalent of a Paint By Numbers picture. Because of that, I don’t feel true ownership of this project. Moving forward, I know I need to veer off the well-trodden, well-lit path and stumble around in the dark woods. It’ll be messy, yes. But it’ll at least be my mess.
Accomplishments
All of that being said, I will say there were a couple of lightbulb moments where I deviated from the script the tutorial instructor laid out before us. A commenter pointed out that the texture for the provided block asset was much larger than it needed to be, which resulted in slower game load times. I couldn’t quite parse the commenter’s proposed solution, so I hopped over into Photoshop and downscaled the texture maps in there and reapplied them in Blender. (Woo!) Later, someone else in the comments lamented that the built-in block randomization feature in Godot was buggy and prone to file size bloat, so I meticulously read, re-read, and re-re-read their solution for manually introducing block variety. (Huzzah!) Similarly, another commenter had a more straightforward solution to coin rotation transforms that didn’t include adding scores of empty objects; it took some time, but I successfully followed that little side trail as well. (아싸!)
Finally, like a teacher who shows you how to solve example problems before leaving you to your own devices, the instructor ended the series with the game only three quarters complete. I wanted to push it over the finish line, so using the skills I’d accrued, I populated the scene with additional enemies and coins to bring it wholly to life. I gotta say, while it may not feel like “my” game, I sure am proud of that low-poly assortment of randomized blocks, those spinning coins, and those gnarly, extra enemies.
Now, on to the next one!
(Link to video of completed game)
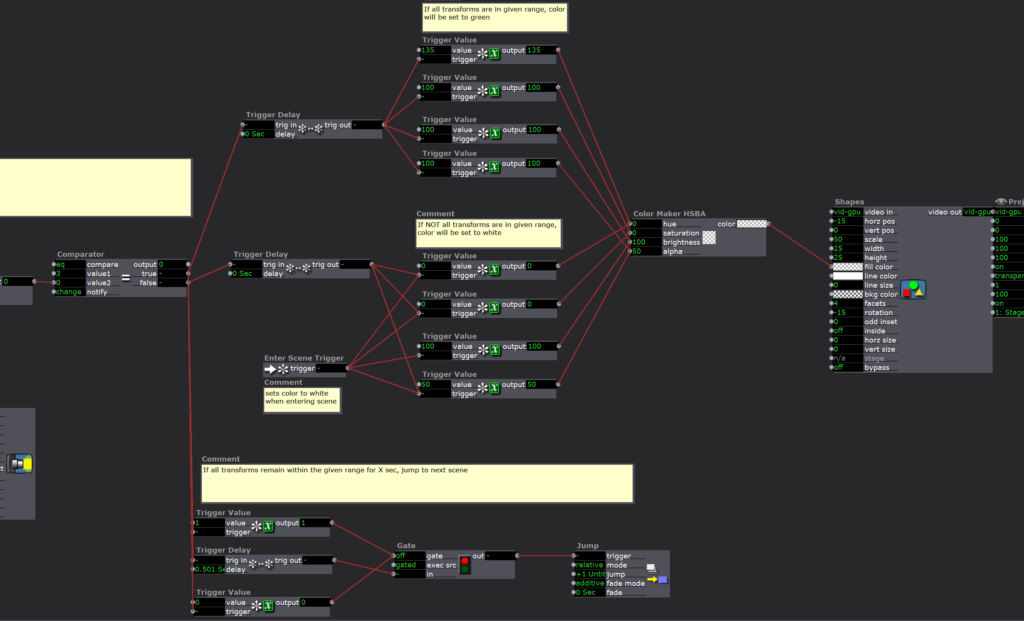
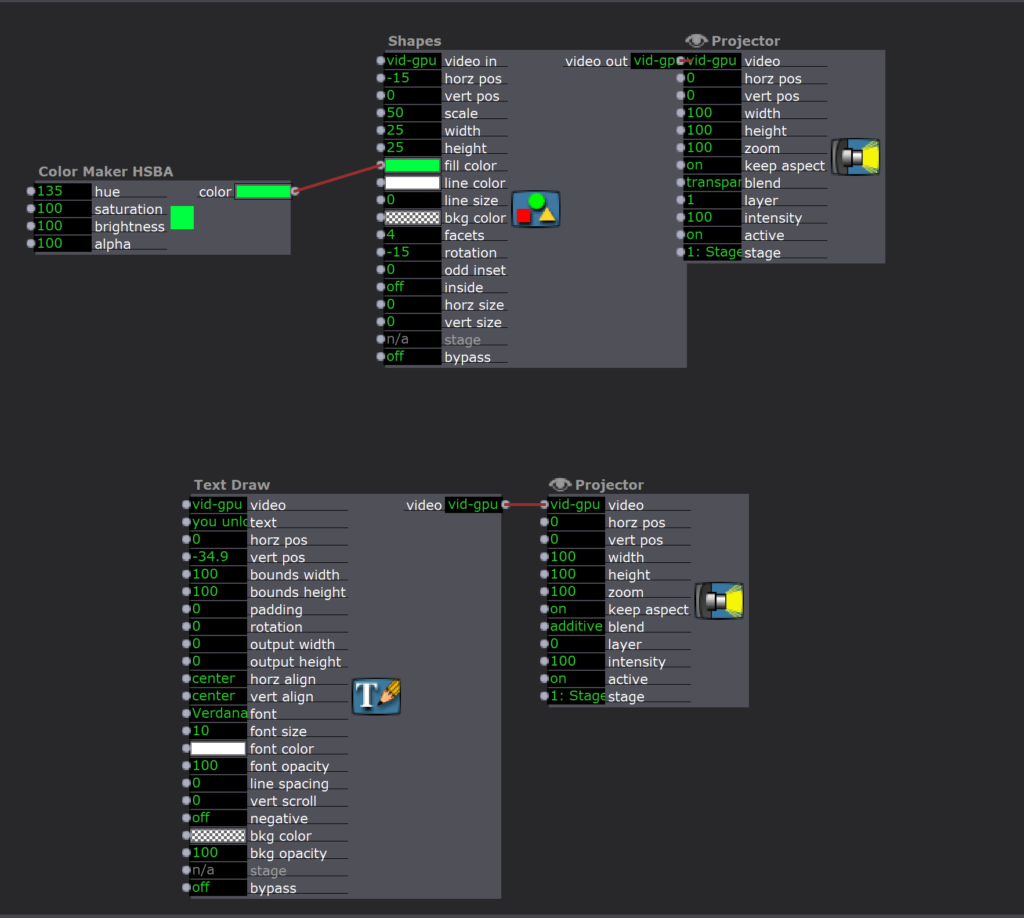
Pressure Project 3
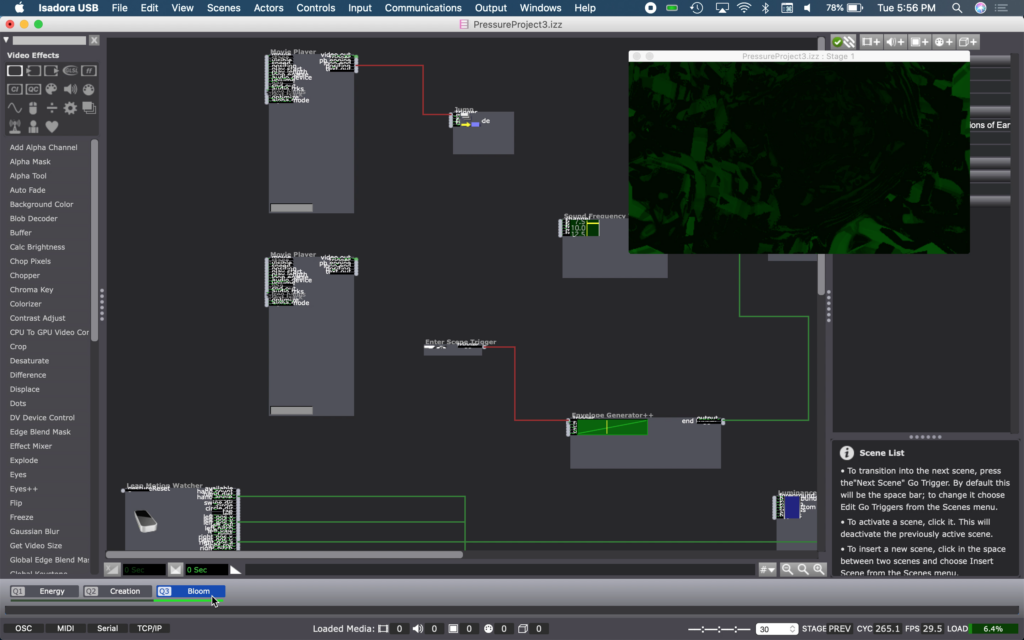
Posted: March 21, 2021 Filed under: Nick Romanowski, Pressure Project 3 | Tags: Nick Romanowski Leave a comment »For Pressure Project 3, I wanted to tell the story of creation of earth and humanity through instrumental music. One of my favorite pieces of media that has to do with the creation of earth and humanity, is a show that once ran at EPCOT at Walt Disney World. The nighttime spectacular was called Illuminations: Reflections of Earth and used music, lighting effects, pyrotechnics, and other elements to convey different acts showcasing the creation of the universe and our species.
I took this piece of music into Adobe Audition and split the track up into different pieces of music and sounds that could be manipulated or “visualized” in Isadora. My idea was to allow someone to use their hands to “conduct” or influence each act of the story as it plays our through different scenes in Isadora. The beginning of the original score is a series of crashes that get more and more rapid as time approaches the big band and kicks off the creation of the universe. Using your hands in Isadora, you become the trigger of that fiery explosion. As you bring your hands closer to one another, the crashes become more and more rapid until you put them fully together and you hear a loud crash and screech and then immediately move into the chaos of the second scene which is the fires of the creation of the universe.
Act 2 tracks a fire ball to your hand using the Leap Motion. The flame effect is created using a GLSL shader I found on shader toy. A live-drawing actor allows a tail to follow it around. A red hue in the background flashes in sync with the music. This was an annoyingly complicated thing to accomplish. The sound frequency watcher that flashes the opacity of that color can’t listen to music within Isadora. So I had to run my audio through a movie player that outputted to something installed on my machine called Soundflower. I then set my live capture audio input to Soundflower. This little path trick allows my computer to listen to itself as if it were a mic/input.
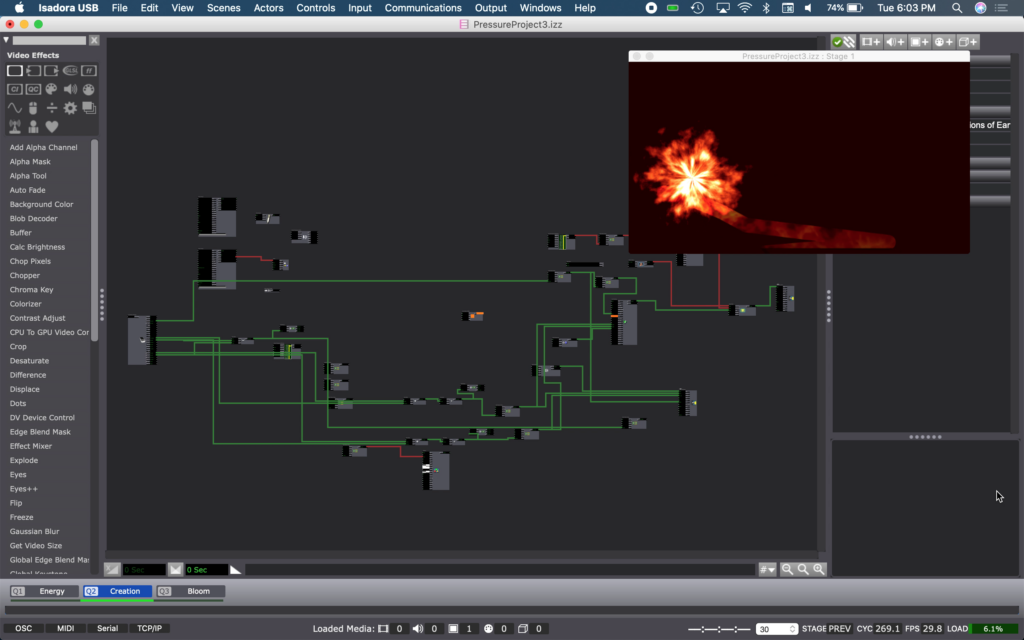
Act 3 is the calm that follows the conclusion of the flames of creation. This calm brings green to the earth as greenery and foliage takes over the planet. The tunnel effect is also a shader toy GLSL shader. Moving your hands changes how it’s positioned in frame. The colors also have opacity flashes timed with the same Soundflower effect described in Act 2.
I unfortunately ran out of time to finish the story, but I would’ve likely created a fourth and fifth act. Act 4 would’ve been the dawn of humans. Act 5 our progress as a species to today.
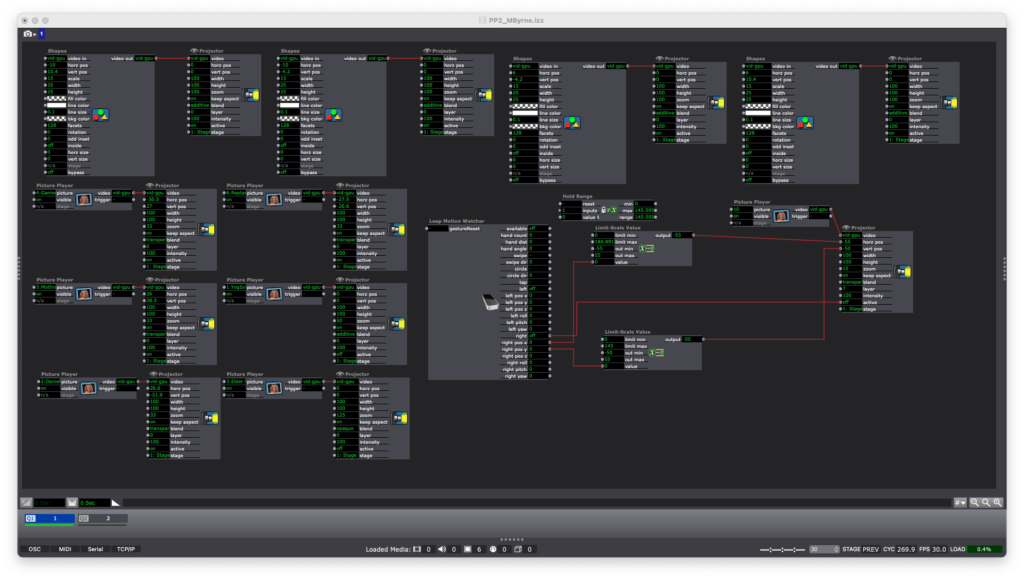
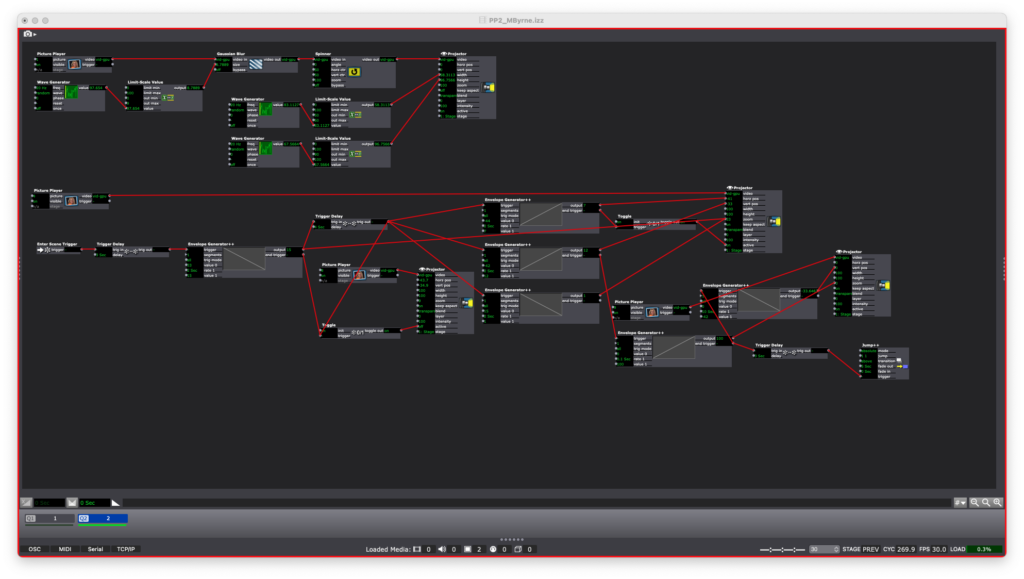
Pressure Project 2 (Murt)
Posted: March 20, 2021 Filed under: Uncategorized Leave a comment »For this project, I decided to work with some design elements which I did not use in PP1: set travel paths and pre-existing image assets. While I was able to get the Leap Motion functioning as I wanted it(almost), I ran out of time before I could get the trigger system set up.
I call this piece Kaiju vs. Yog-Sothoth even though two of the four available characters are American cartoon characters. The characters are: Gamera, Mothra, Reptar, and Daniel Tiger. The user is intended to select characters by moving a cursor(a six-fingered hand pointer). Each character tries to fight the Lovecraftian “Outer God” Yog-Sothoth. Only Daniel Tiger is successful. Emotional intelligence is somehow effective against Yog-Sothoth’s non-corporeal intrusion of our world.
The first of the two Isadora scenes is the character select screen which includes the Leap Motion system, shapes, and character PNGs.
The second scene is Gamera going up against Yog-Sothoth. YS is animated with Gaussian Blur and some random waves which control X/Y dimensions. Gamera is animated in scale and path, plus a chat bubble. There is one additional animation which occurs after Gamera’s charge.
It would have been nice to see this finished, but I think what I was able to come up with is fun in itself.
Pressure Project 1 (Murt)
Posted: March 20, 2021 Filed under: Uncategorized Leave a comment »For PP1, my first area of concern was finding that moment of delight. I thought about the sorts of things that many people find delightful that also fit the resources which I possessed as a novice Isadora user. I settled on bubbles or balloons.
I created user actors for bubbles of various size, shape and color. Two of the bubbles explode and appear randomly. All of the bubbles initialize at random locations and oscillate vertically and horizontally on a sine wave. Each bubble also has random values feeding a Color Maker. The exploding bubble user actor above has an EnvGen controlling the Alpha channel. Some bubbles have their Facet value controlled by a Table to create star polygons. One of these stars has a WaveGen oscillating its Odd Inset value. I used five different scenes to cycle through the bubbles and to create an infinite sequence. I also made a control page with buttons for “GO” and “Stop”
The result is something that resembles a screen saver.
When I took Fundamentals of Media Design in the Theatre Department, one of our assignments was to move shapes around the screen using AE. This put the shapes onto a definite path, which is something I wanted to avoid with PP1. Perhaps I could have replaced one of the exploding bubbles with one which would follow a path but appear randomly.
Overall I found this project useful for learning workflows within Isadora, especially scene changes and control screens.
Pressure Project 3 (Maria)
Posted: March 12, 2021 Filed under: Maria B, Pressure Project 3, Uncategorized Leave a comment »I approached this project wanted to tell a fictional, widely recognized narrative that I knew well. So I chose to tell the story of The Lion King. My initial plan for this pressure project ended up being a lot more than I could chew in the allotted 9 hours. I wanted to bring in MIDI files that told the story through sound, and map out different notes to coordinate with the motion and color of visuals on the screen (kind of like what was demonstrated in the Isadora MIDI Madness boot-camp video). After finding MIDI versions of the Lion King songs and playing around with how to get multiple channels/instruments playing at once in Isadora, I realized that trying to map all (or even some) of these notes would be WAY too big of a task for this assignment.
At this point, I didn’t have too much time left, so I decided to take the most simple, straightforward approach. Having figured out the main moments I felt necessary to include to communicate the story, I went on YouTube and grabbed audio clips from each of those scenes. I had a lot of fun doing this because the music in this movie is so beautiful and fills me with so many memories 🙂
- Childhood
- Circle of Life
- Just can’t wait to be King
- “I laugh in the face of danger”
- Stampede
- Scene score music
- “Long live the king”
- “Run, run away and never return”
- Timone and Pumbaa
- First meet
- Hakuna Matata
- Coming Back to Pride Rock
- Nala and Simba Reunite
- Can You Feel the Love Tonight
- “simba you have to come back” “sorry no can do”
- Rafiki/omniscient Mufasa “Remember who you are”
- Simba decides to go back
- The Battle
- Score music of sad pride lands/beginning of fight
- “I killed Mufasa”
- Scar dies
- Transition music as Pride Rock becomes sunny again -> Circle of Life
I took this as an opportunity to take advantage of scenes in Isadora and made a separate scene for each audio clip. The interface for choosing the correct starting and ending points in the clip was kind of difficult, it would definitely be easier to do in Audition but this was still a good learning experience.
I used MP3 files since they act as movie files, and the movie player actor has outputs while the sound player does not. I determined the correct starting position using the ‘position’ input (and sometimes using a ‘Time to Media Percent Actor’ if I already knew exactly where in the clip I wanted to start). I connected the position output to a comparator that triggered a Jump actor to go to the next scene when the position value (value 2) went above the value I inputted (value 1).
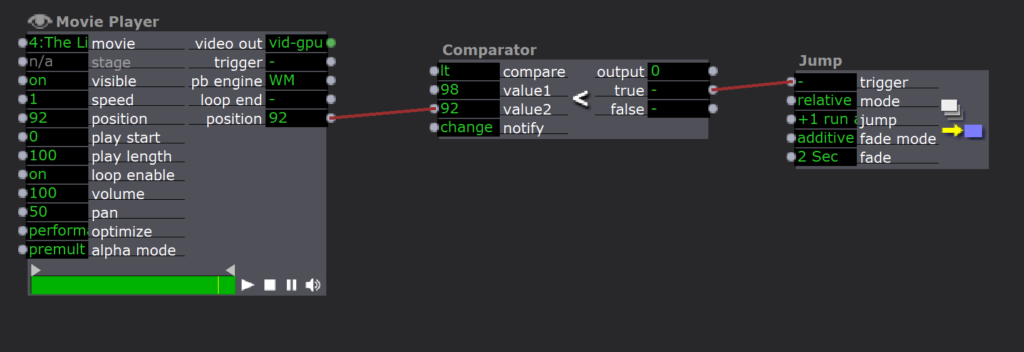
Here is the final result:
I wasn’t super proud of this at first because I didn’t feel like I took enough creative liberties with the assignment. However, when I shared it in class, it seemed to evoke an emotional response from almost everyone! It really demonstrated the power music has to bring up memories and emotions, especially when it is something so familiar. Additionally, it showed the power of a short music/audio clip to tell a story without any other context–even the people who weren’t super familiar with the movie were able to gain a general sense of the story arc.
Pressure Project 3 (Sara)
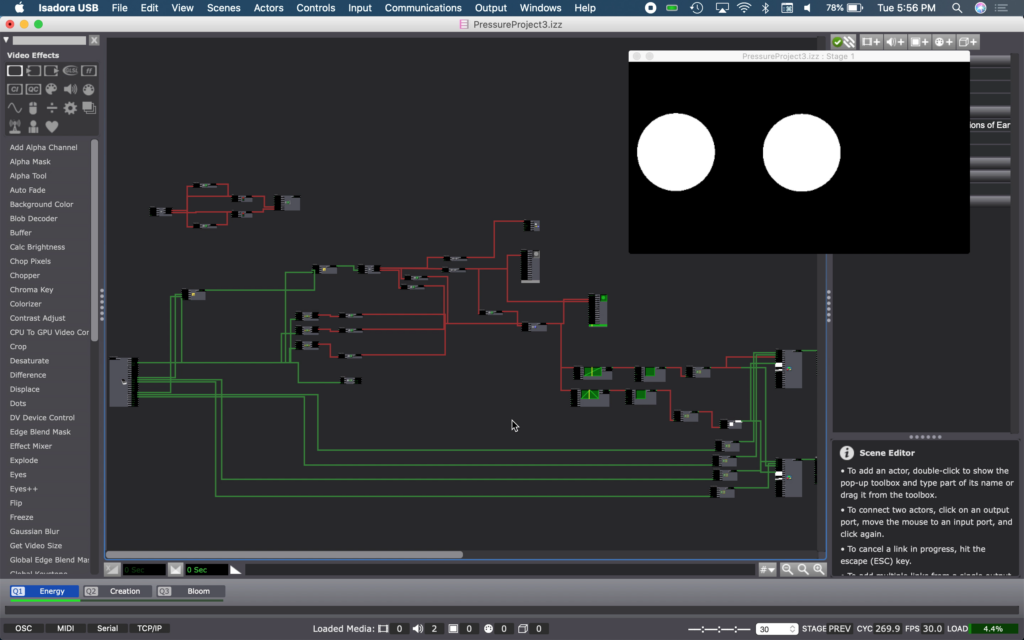
Posted: March 11, 2021 Filed under: Assignments, Pressure Project 3, Sara C Leave a comment »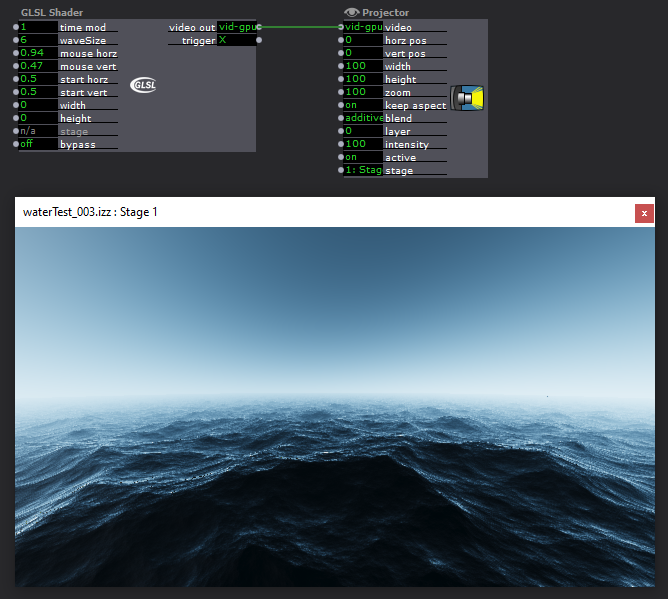
I plucked out the story I wanted to tell and the accompanying audio I wanted to use within half an hour of beginning. If only the remaining eight and a half hours spent on Pressure Project 3 had progressed as fluidly. Oh, well, Lawrence Halprin tells us “one of the gravest dangers we experience is the danger of becoming goal-oriented;” I don’t think anyone would accuse me of forgoing the process in favor of a goal over the course of this meandering rumination on how I’ve grappled with 3/11 in the ten years since the disaster.
First, the parts of the assignment that flowed easily:
Alex told us the deadline was Thursday, March 11. 3/11 marks the tenth anniversary of the Tōhoku earthquake and tsunami that in turn led to the Fukushima Daiichi Nuclear disaster. I was completing an undergraduate study abroad program in Shiga Prefecture at the time. As the earthquake struck and the tsunami was thundering towards the shore, I was shopping for a pencil case at a mall near Minami-Hikone Station. I was utterly oblivious to the devastation until I walked into my host family’s living room and saw a wave sweeping across airport runways.
So, yes, when Alex told us the deadline for this project was March 11, I knew there was only one “story of significant cultural relevance” I could tell.
After my study abroad program was summarily canceled, and we were forced to scramble for airfare back to the States, I spent a good deal of time adrift. Somewhere along the way, I decided I wanted to get in my car and head west. So I did. I drove west for a week, making it as far as the Badlands of South Dakota before turning around. Sometime later, I took a creative nonfiction course and wrote a piece about grappling with memories, grief, and coming unmoored. The writing was selected for my university’s literary journal, and so the audio you hear is my voice from all those years ago.
Now, onto process:
The piece was more than five minutes long, so I dumped the file into Audition and pruned it to meet Alex’s 3.5-minute requirement. Ensuring that the work still told a cohesive story after excising large swaths of it took half an hour.
After that is where things became tricky. We were told we didn’t have to use Isadora. I’ve been interested in dabbling with Godot for our upcoming Cycles project, so I was tempted to get a headstart and move directly into using the software. I jotted down the following notes:
“User plays with water while listening to audio?”
“3D water?”
Alex graciously explored GLSL shader options in Isadora with me. Unfortunately, I was 1.) stubborn and interested in Godot, and 2.) felt personally removed and emotionally remote from the visual experience. The waves were lovely, but I didn’t mold them myself. I wanted to dig my hands in the electronic clay.
I started watching Intro to Godot videos and quieted any voices in my head wondering if I was falling too far into the weeds. Four hours and fifteen minutes later, I had an amorphous blob of nothing. I wrote the following note:
“Do I press forward with Godot? Do I return to Isadora? Do I crawl back to my roots and make an animatic?”
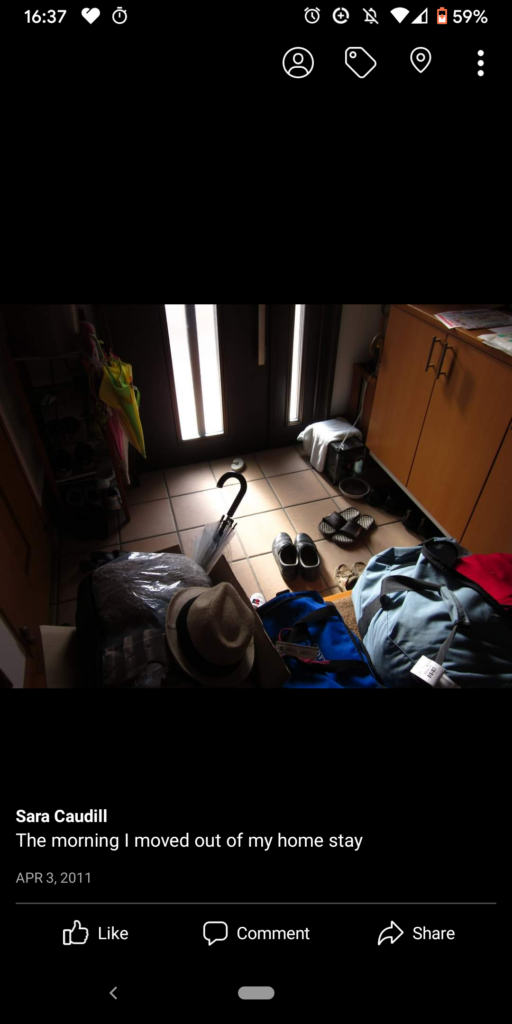
A few months ago, I had dabbled in 3D panoramas in Photoshop using equirectangular projections. I thought that perhaps that might be a way to bring the audience closer to the story without the kitsch of “splash around in fake water with your Leap Motion while listening to young, lost Sara.” I didn’t want to Google “3/11 Triple Disaster” and sift through the wreckage like a disaster tourist, so I instead looked up photos of Lake Biwa. The school where I studied squatted right on its shore. The Google results felt inert, so I then cracked open my defunct Facebook and went back to the albums I haven’t looked at in years. I found a photo of the entryway at my homestay strewn with boxes, luggage, and shoes. The caption read: “The morning I moved out of my homestay.”
Even after all this time, it hit me like a punch to the gut. I immediately started sketching it. I didn’t know what I was actually going to do with it, but drawing was a visceral, physical relief.
After making a messy sketch, I played with palettes. Eventually, I settled on the Japanese national red as the mid-tone and bumped the lights and darks around from there. I got even messier. I wanted the colors to sort of hurt the eyes; I wanted the whole thing to feel smudgy.
All right.
I had an audio clip.
I had an illustration.
Now what?
I found more old photos. I sketched more. I emailed my host family. I cried. Eventually, I found myself with half an hour to go and disparate, disconnected images and sounds. Finally, I listened to the wind outside the trees, thought about how it sounded like waves along the shore, and jumped into Premiere to make an audio-visual composition.
I don’t really feel like I created this work so much as wrenched it loose. Truthfully, I’m grateful for the opportunity.
Pressure Project 2 (Nick)
Posted: March 2, 2021 Filed under: Nick Romanowski, Pressure Project 2 Leave a comment »I remember hearing about the LEAP motion when it was originally posted on KickStarter. One of the things that I was initially interested in was the idea of interacting with objects in virtual, 3D space. That’s the direction I head with this pressure project as I attempted to build a sort of 3D interaction interface.
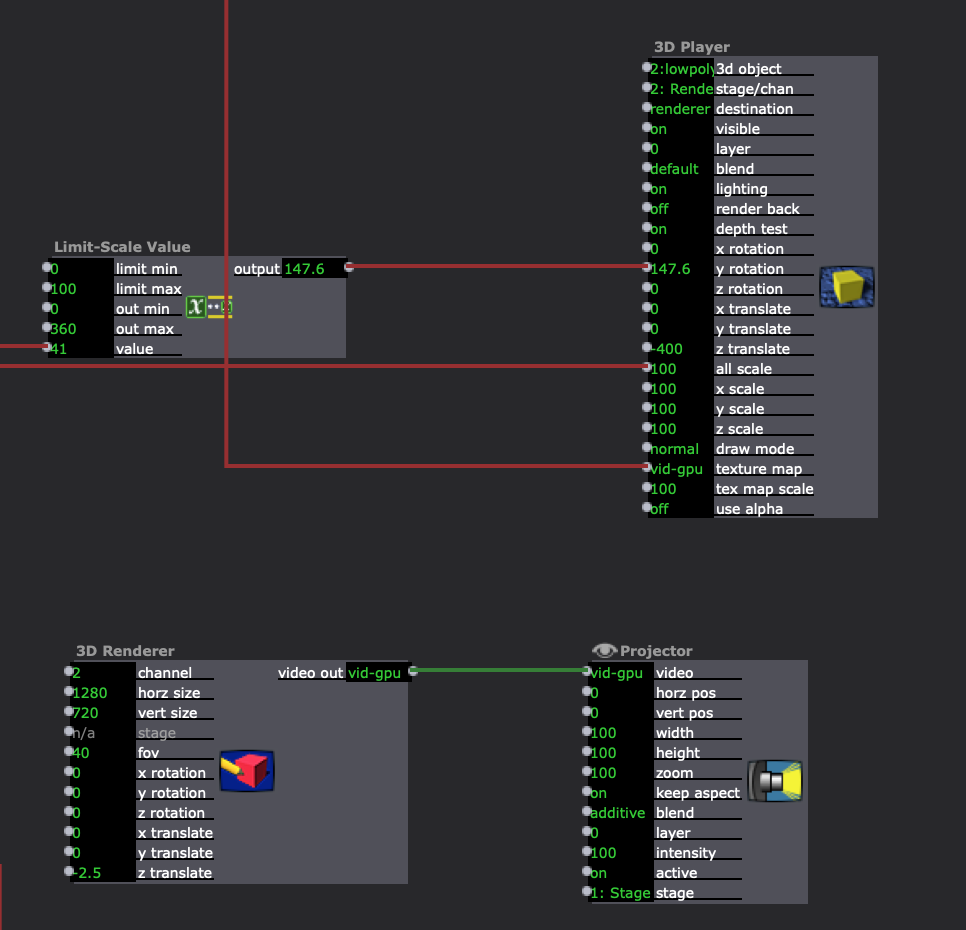
I began going about this by first creating a way to visualize hands in the scene, knowing that this had to be handed off to someone I thought that forcing them to launch the LEAP visualizer would bee sort of clunky. I instead used the x and y values from each hand to generate hold values that I changed with a limit scale and fed into projectors on some images of sprite hands I found online. I used rutt etra to rotate them as well, grabbing the roll value from the LEAP and feeding it into that actor.
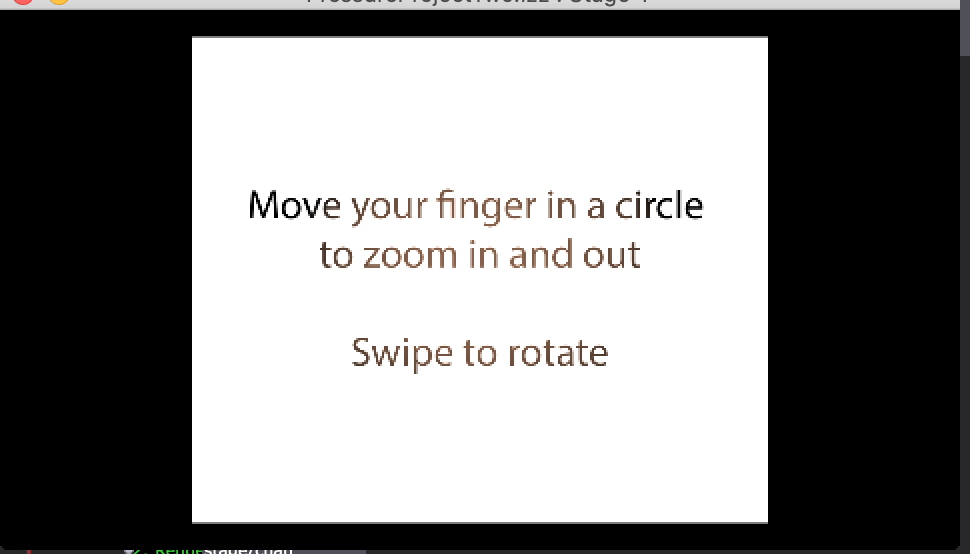
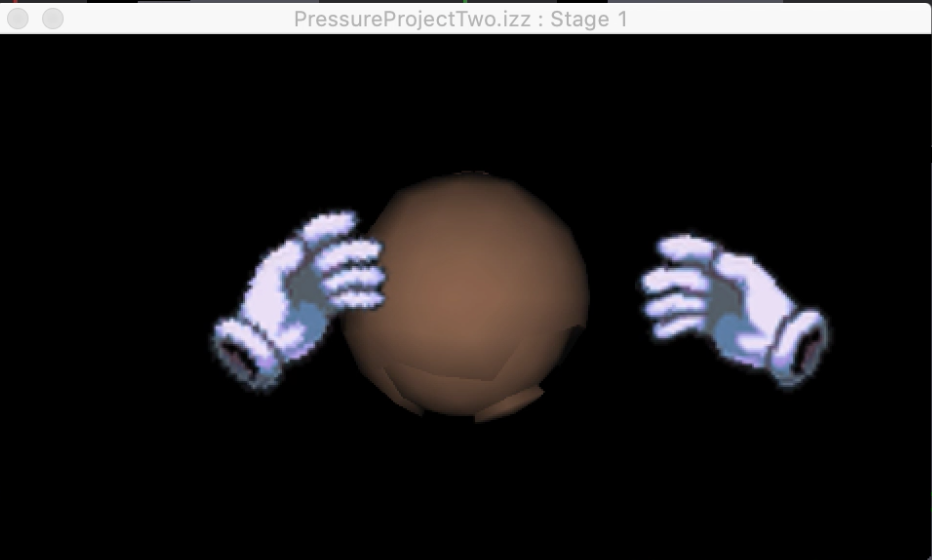
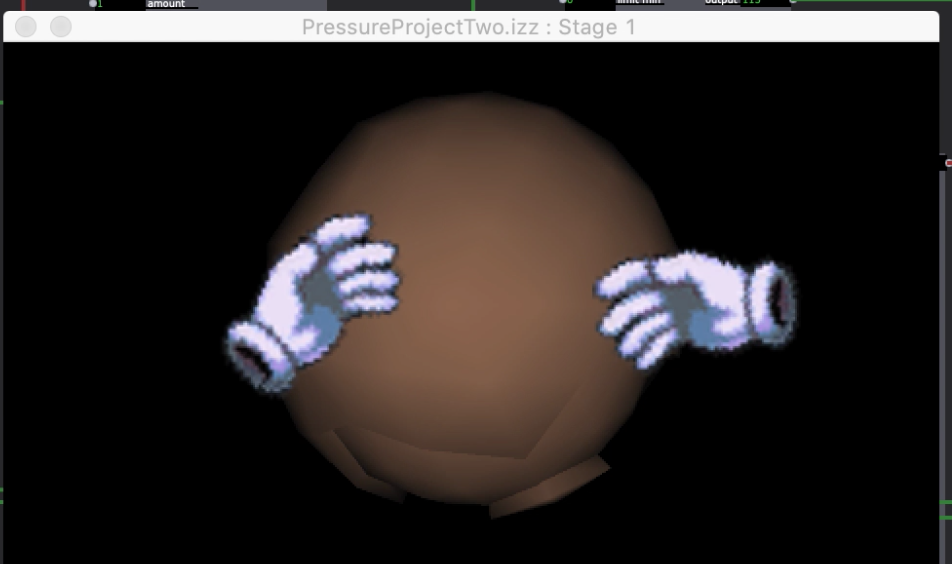
I spent a lot of time building some clunky logic gates to help make my interactions more intuitive. I wanted it to be so that if you made a circle with a finger one way, it zoomed in, but if you did it the other, it zoomed out. That required quite a bit of playing around with until I devised a system that always let the “circle” trigger through but changed whether it was adding or subtraction from the total zoom based on whether the direction was pumping out a 1 or 2. I then used a similar system to do the same thing for swiping to rotate. All of that data was plugged into a 3D player that was set to a Render which was plugged into a projector. Again, with passing this to someone else in mind, I added some quick instructions that hold on the screen until both hands are present.
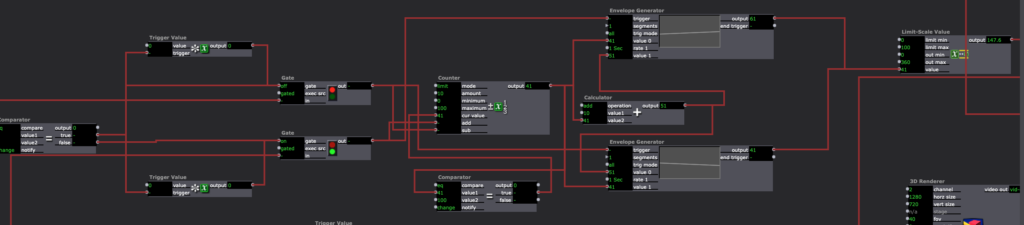
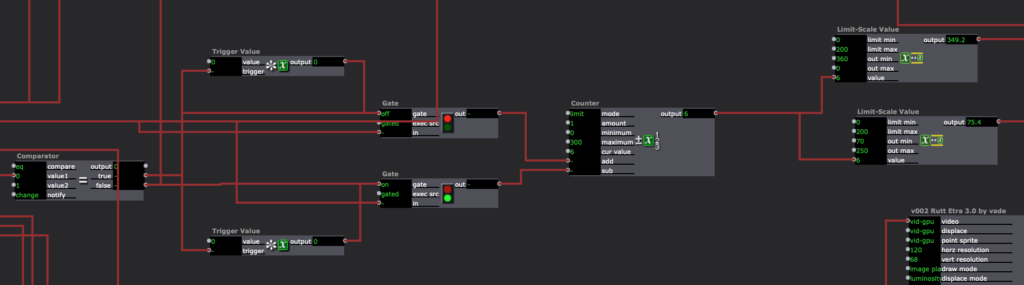
Figuring out the logic gates and the 3D were probably the most difficult portions of this pressure project. In the future I think I will go with Alex’s suggestion which is to just build my logic in a javascript actor to save the trouble of using 10+ logic-esque actors passing values back and forth. I’m happy I at least got a taste of 3D as I’d like to pursue working with it further in my final project. Rutt etra was also interesting to play with as it seems to be able to take traditionally 2D objects and add a Z-axis to them, which I think will also be helpful in my final project.