Cycle 2 – Stanford
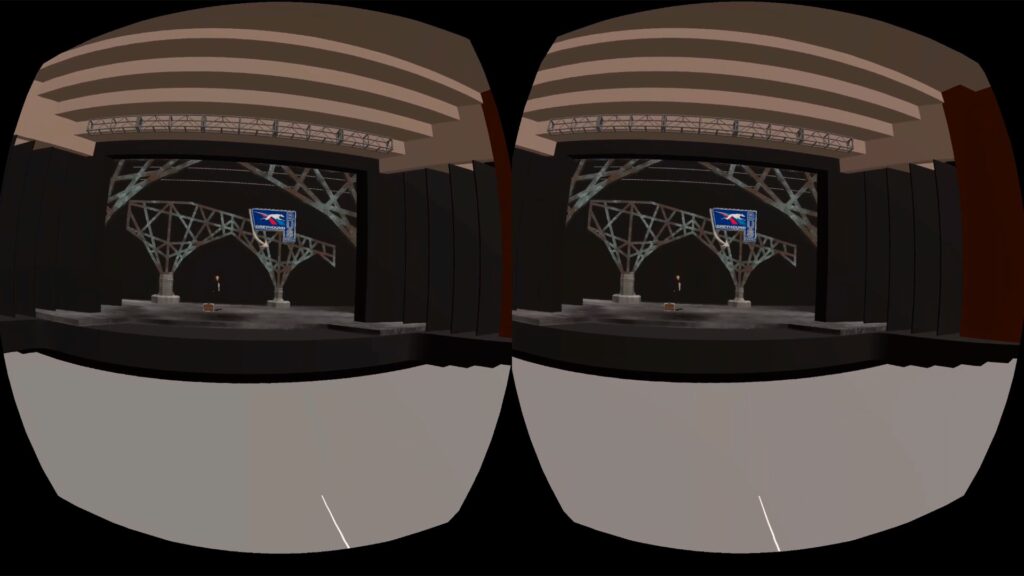
Posted: November 30, 2020 Filed under: Uncategorized Leave a comment »I the Sketchup file I had been working on and put it in VR. I did this using a program called Sentio VR. After I created an account, I was able to install a plugin for Sketchup that allowed me to export scenes. Once the scenes were exported, I could go to the app on the Oculus Quest and input my account code to view my files.
I also had to find a way to mirror the Quest to my MacBook. I used the process outlined by the link below.
https://arvrjourney.com/cast-directly-from-your-oculus-quest-to-macbook-e22d5ceb792c
This gave me a mirrored image, but the result was not what I was looking for. I did not want to see two circles of image, so after I recorded the video, I cropped it to give a better product.
Cycle 1 – Stanford
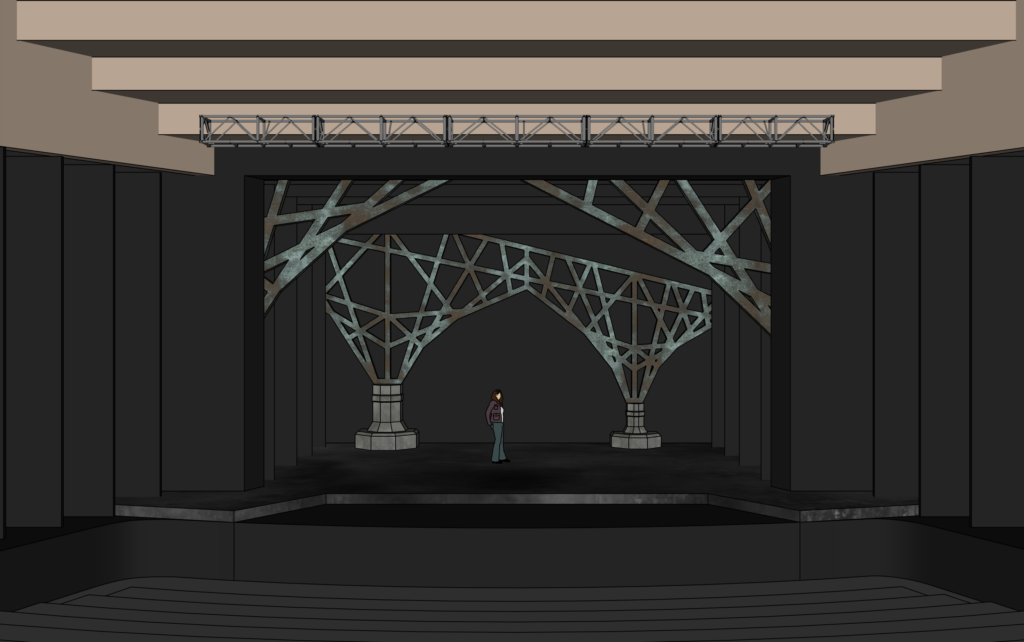
Posted: November 30, 2020 Filed under: Uncategorized Leave a comment »My final project is to create take a design (scenic) that I had done in the past and put it in VR so that you can walk around it and see it from both the audience and actor view. I focused on my Sketchup file for the first cycle.
The design is for a show called Violet. It is a musical set in the South in 1964. It is about a woman named Violet that has a huge scar across her face and she is traveling by bus to see a TV preacher in hopes that he can heal her.
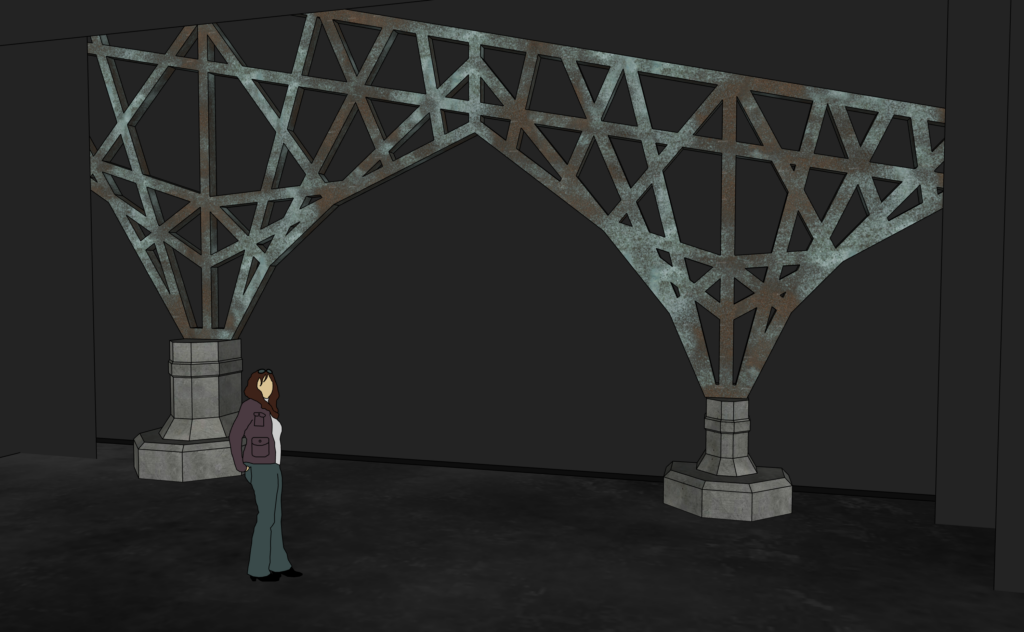
I started from a base Sketchup file that had the Thurber already created.
PP2 – Stanford
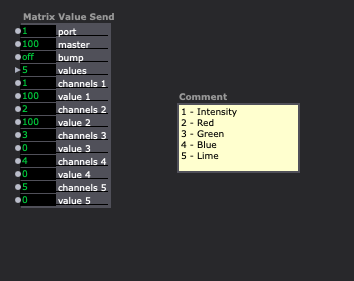
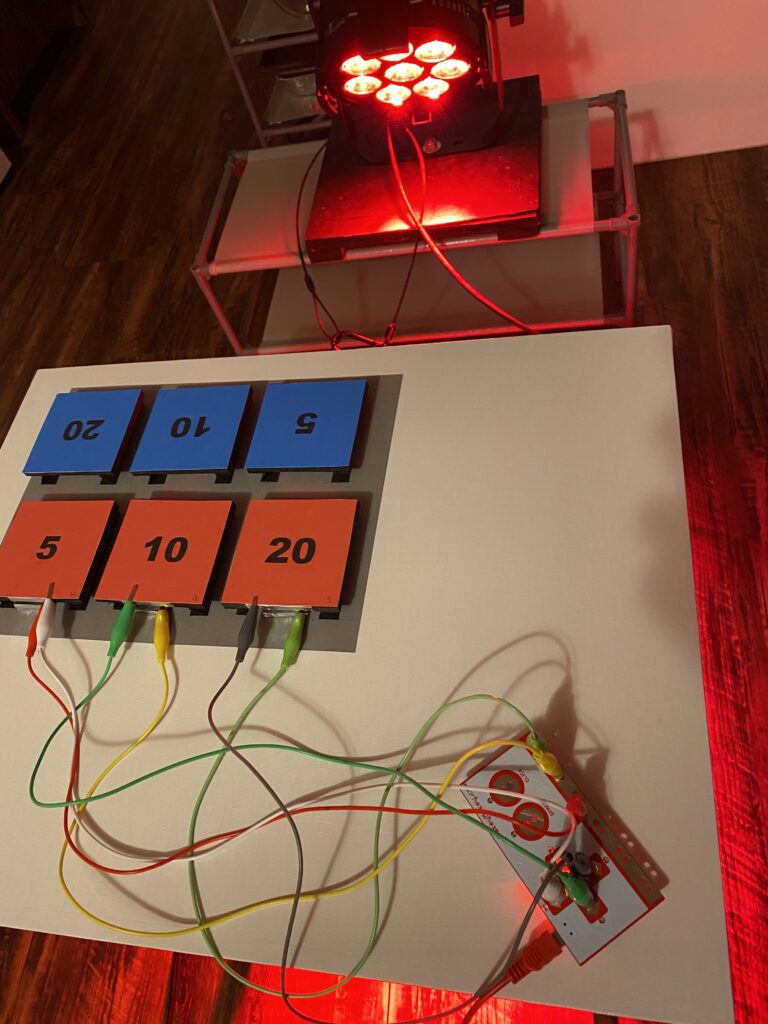
Posted: November 30, 2020 Filed under: Uncategorized Leave a comment »For this assignment, I used the Makey Makey to count the points of a card game. I created 3 buttons for each team with the labels 5, 10, and 20. These are the point values of the cards in the game. My goal was to have Isadora count the points for each team and when one reached the winning amount, a light would light up in the winning team’s color.
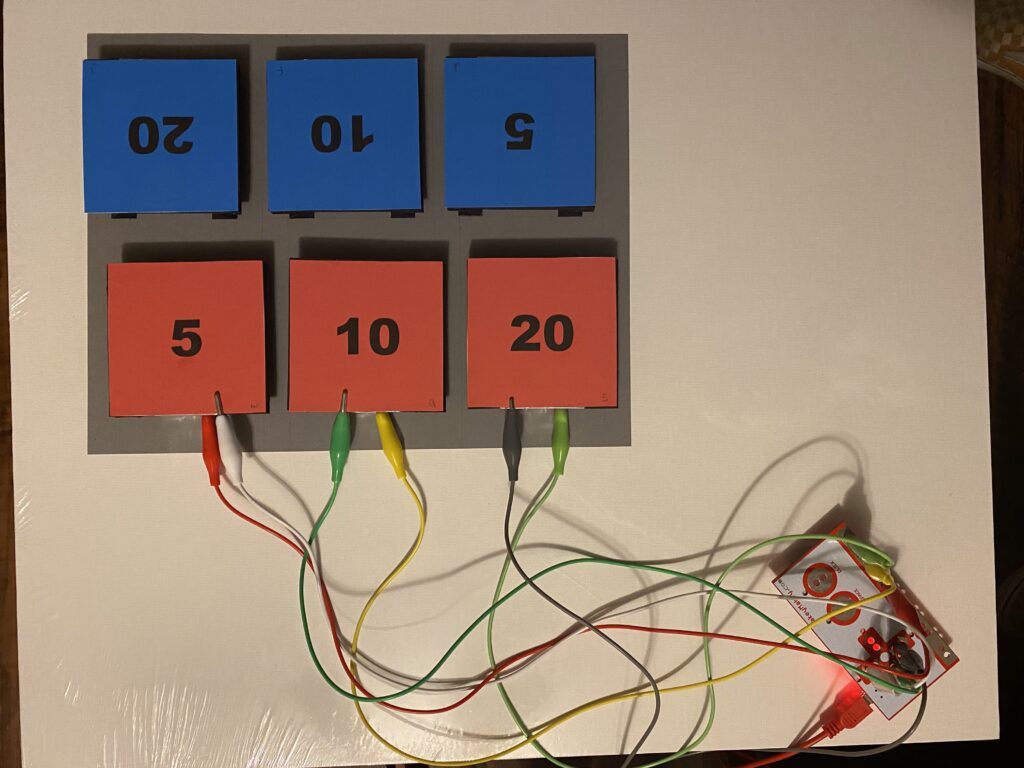
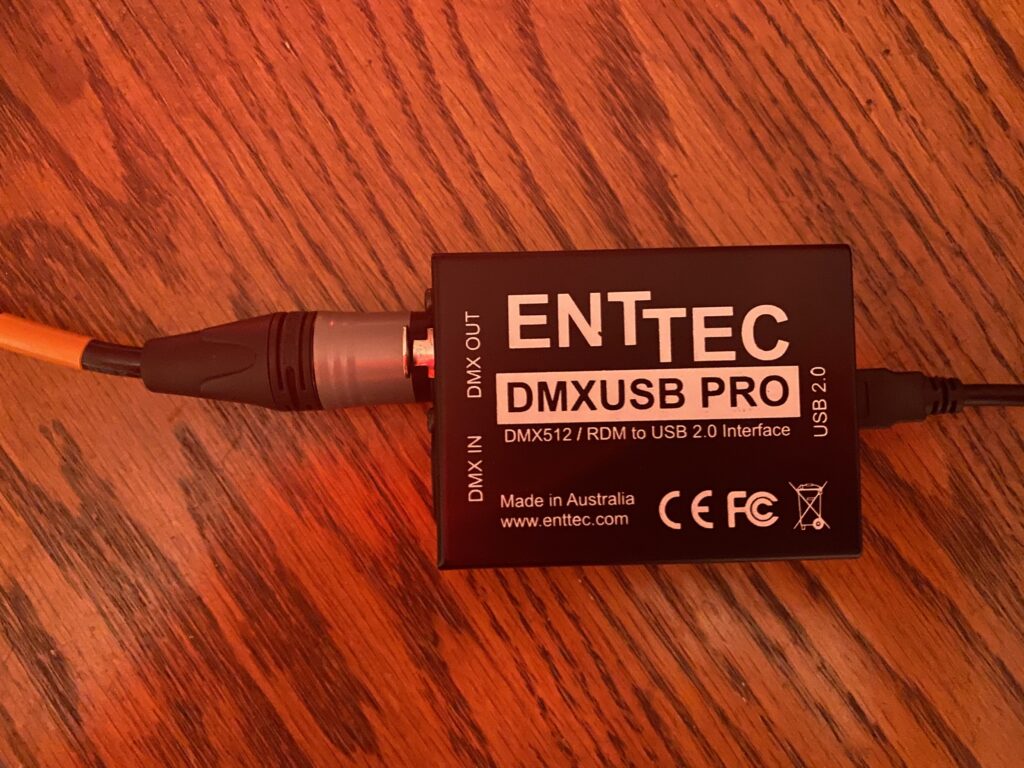
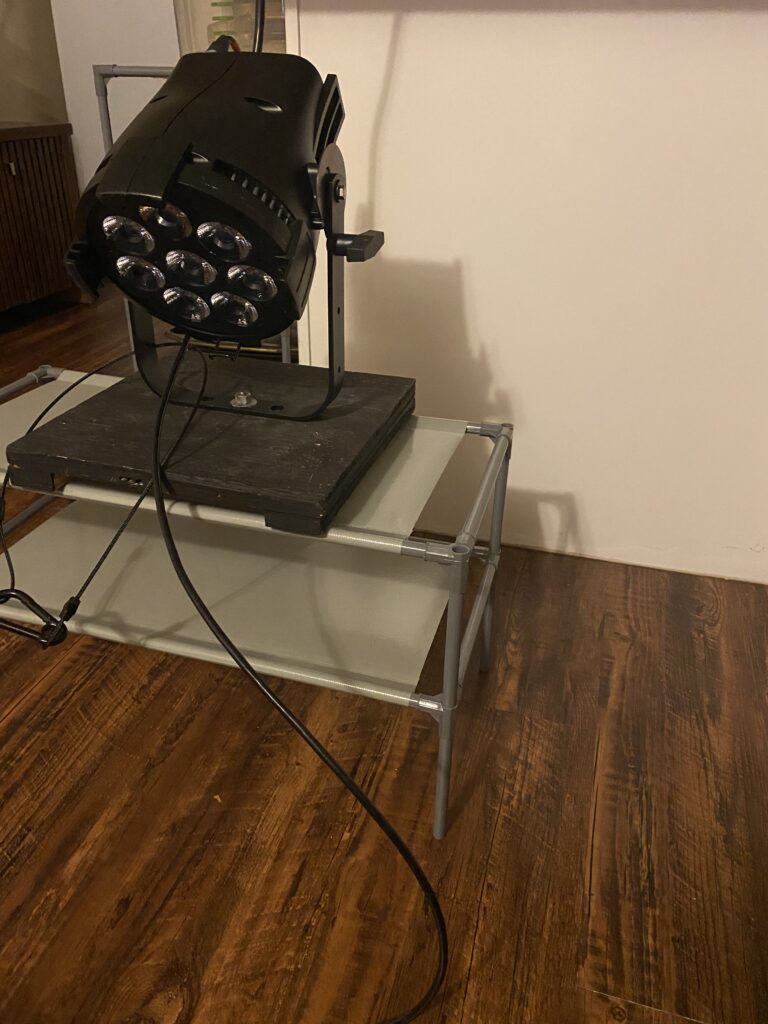
In addition to the Makey Makey, I used an ENTTEC Pro. This allowed me to send a signal to an LED fixture from my computer.
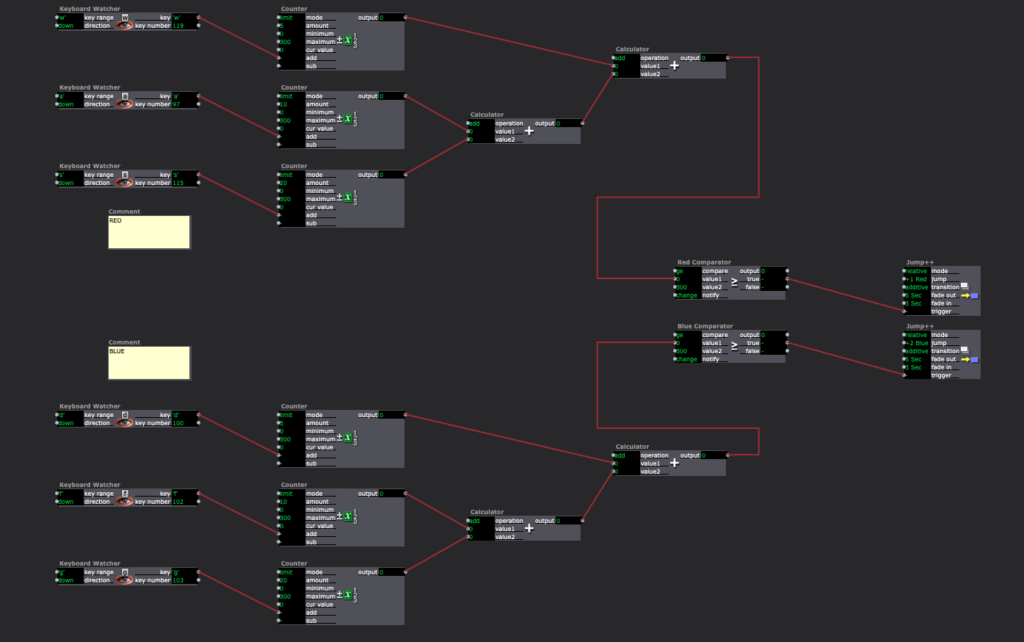
Each of the buttons were assigned a different letter on the Makey Makey. My patch used each letter to count by the value of the button it was associated with. It then added each team’s values together and a comparator triggered a cue to turn on the light fixture in either red or blue when a team reached 300 points or more.
Tara Burns – Cycle Two
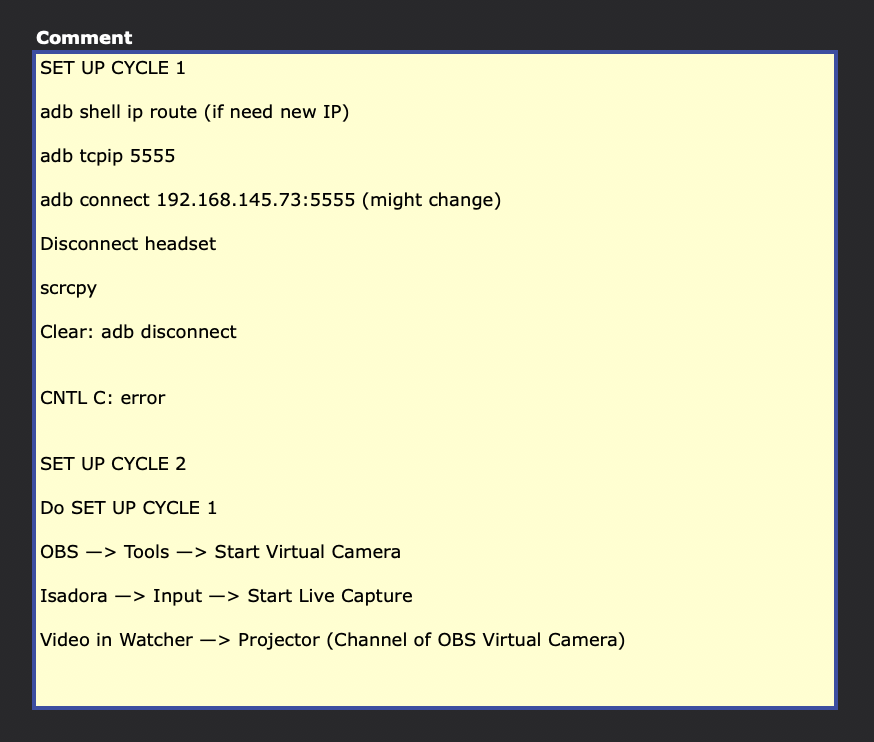
Posted: November 27, 2020 Filed under: Uncategorized Leave a comment »Goals
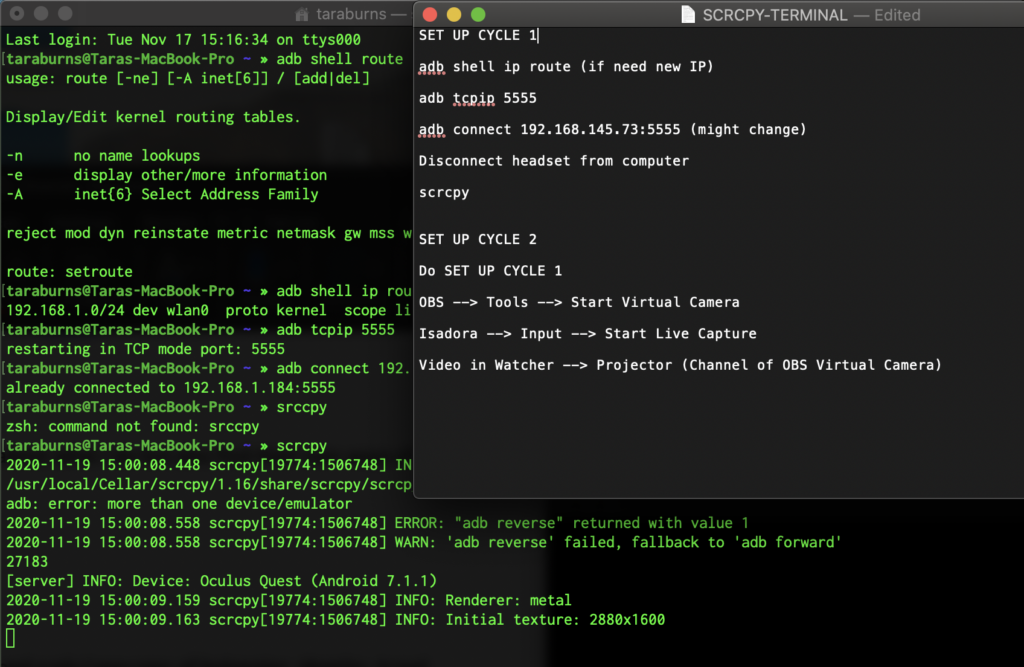
– Using Cycle 1‘s set up and extending it into Isadora for manipulation
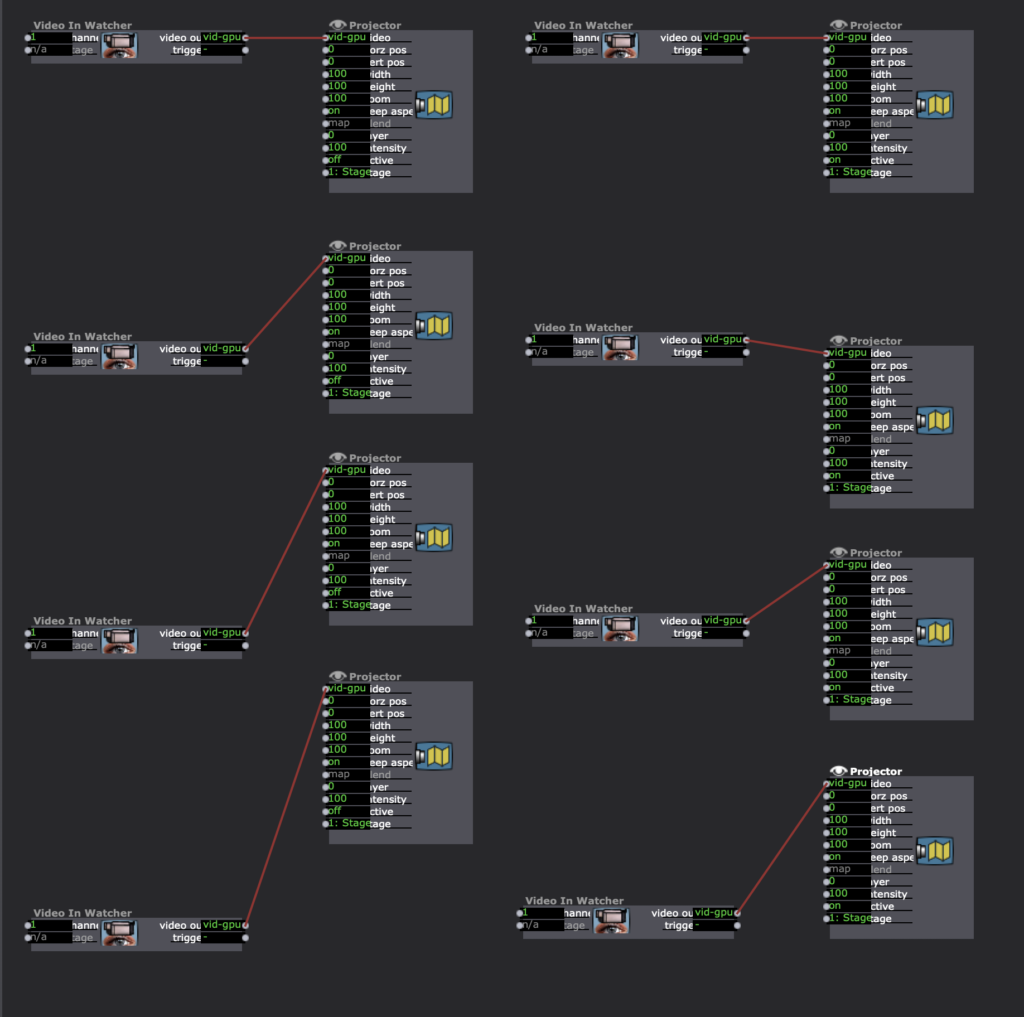
– Testing and understanding the connection between Isadora and OBS Virtual Camera
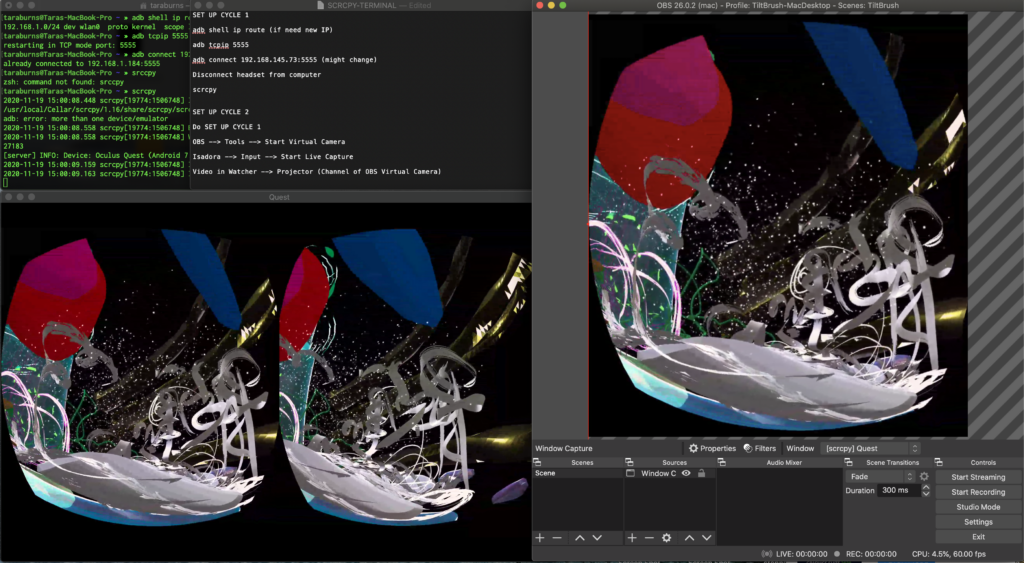
– Testing prerecorded video of paintings and live streamed Tilt Brush paintings in Isadora
– Moving to a larger space for position sensitive tracking through Isadora Open NDI Tracker
– Projection mapping
Challenges and Solutions
– Catalina Mac OS doesn’t function with Syphon so I had to use OBS Virtual Camera in Isadora
– Not having a live body to test motion tracking and pin pointing specific locations required going back and forth. I wouldn’t be able to do this in a really large space but for my smaller space I put my Isadora patch on the projection and showed half the product and half the patch so I could see what was firing and what the projection looked like at the same time.
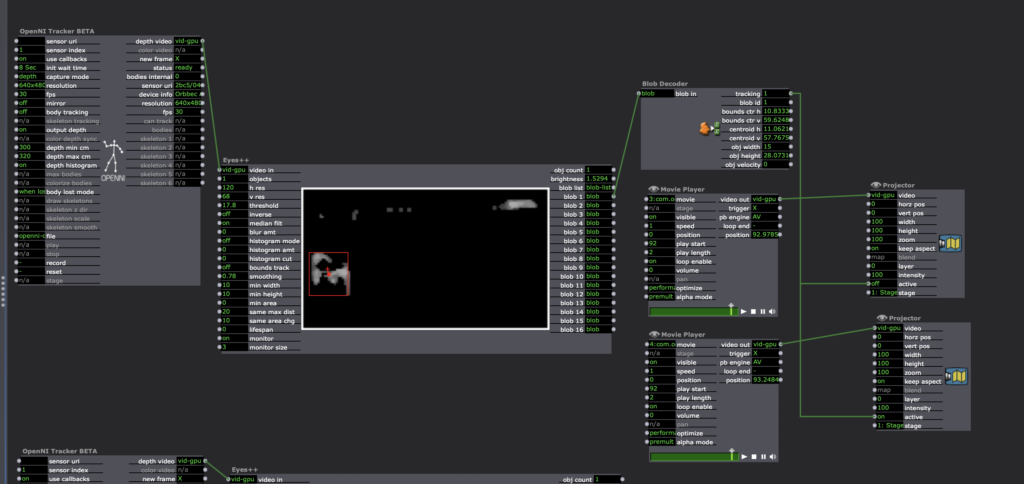
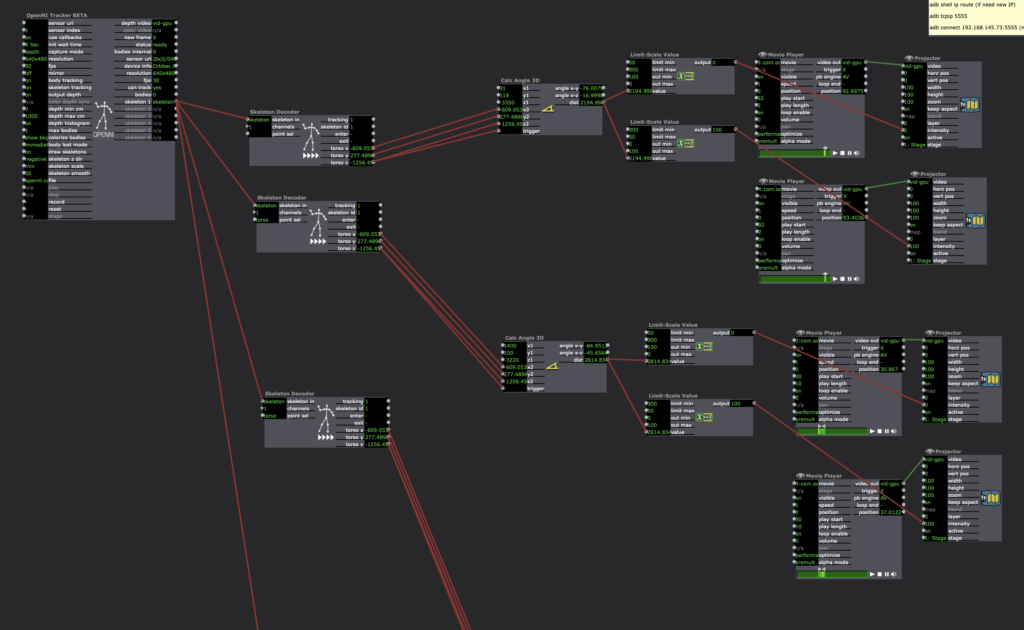
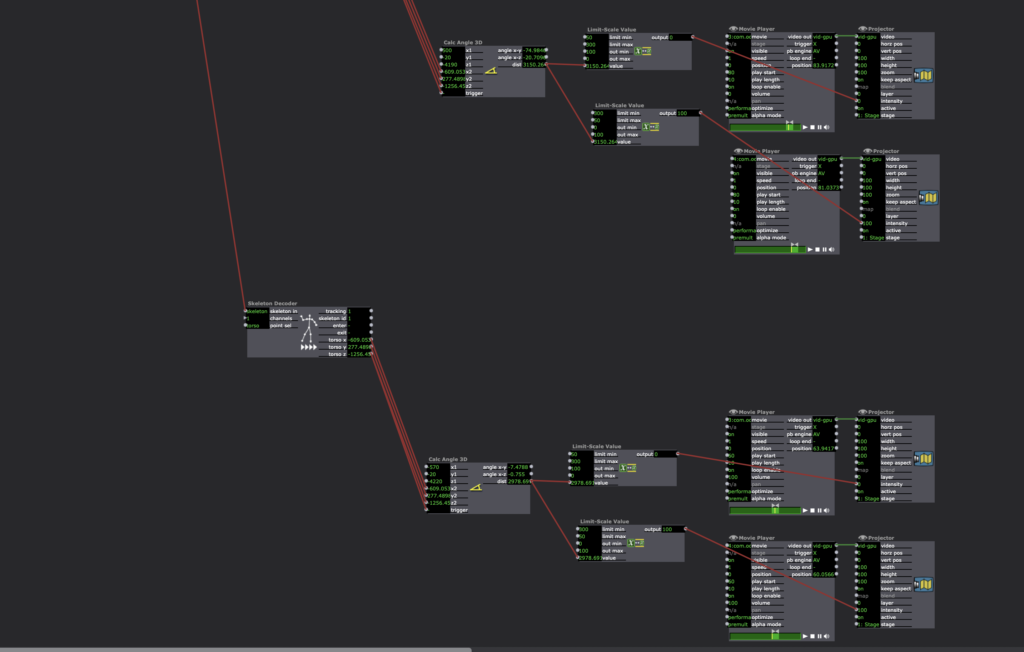
– Understanding the difference between the blob and skeleton trackers and what exactly I was going for took a while. I spent a lot of time on the blob tracker and then finally realized the skeleton tracker was probably what I actually needed in the end.
– I realized the headset will need more light to track if I’m to use it live.
Looking Ahead
The final product of this goal wasn’t finished for my presentation but I finished it this week which really brought about some really important choices I need to make. In my small space, if I’m standing in front of the projection it is very hard to see if I’m affecting it because of my shadow, so either the projection needs to be large enough to see over my head or my costume needs to be able to show the projection.
I am also considering a reveal, where the feed is mixed up (pre-recorded or live or a mix – I haven’t decided yet) and as I traverse from left to right the paintings begin to show up in the right order (possibly right to left/reverse of what I’m doing). Instead of audience participation, I’m thinking of having this performer triggered; my own position tracking and triggering the shift in content perhaps 3-4 times and then it stays in the live feed. Once I get to the other side, it is a full reveal of the live feed coming from my headset. This will be tricky as the headset needs light to work (more than projection provides), which is a reason I switched to using movies in my testing as I didn’t have the proper lights to light me so the headset could track and you could see the projection. I also was considering triggering the height of the mapped projection panel (like Kenny’s animation from class) and revealing what is behind that way. Although I do want to keep the fade in and out.
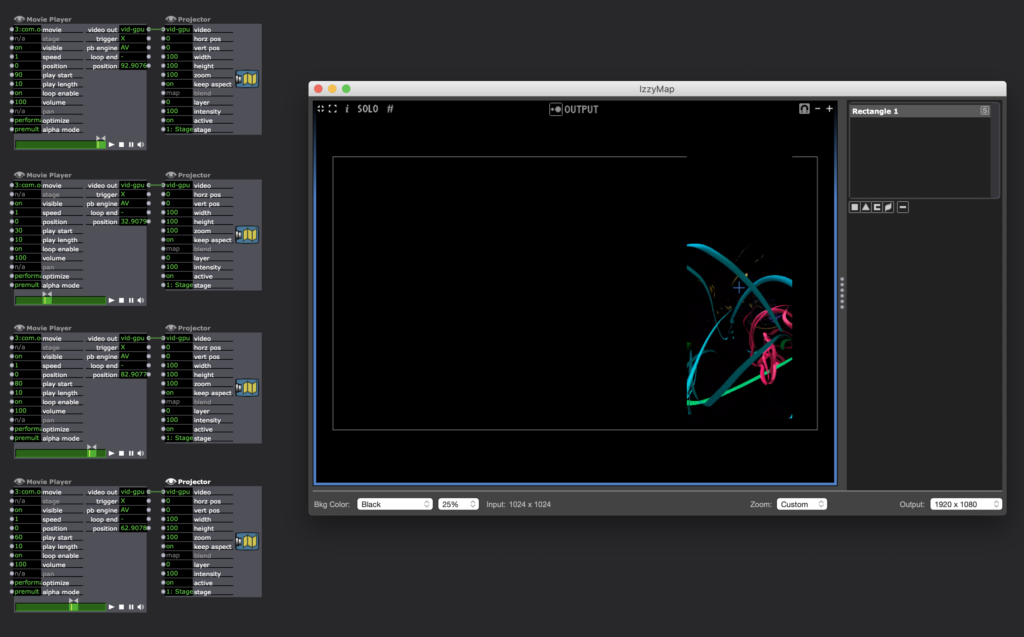
Movement Meditation Room Cycle 2
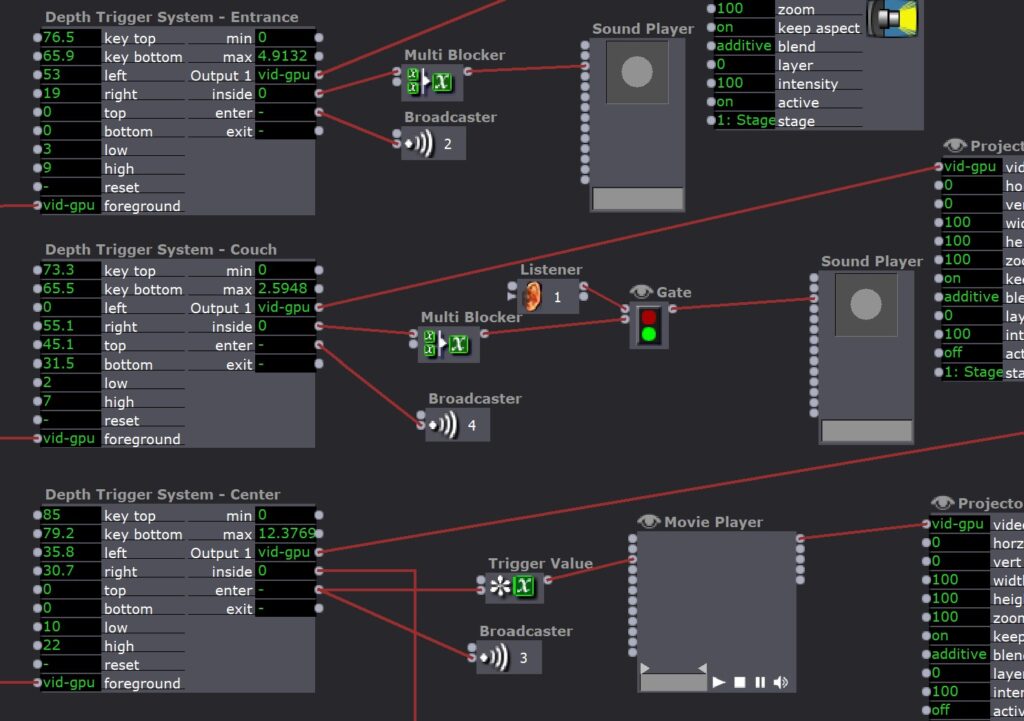
Posted: November 24, 2020 Filed under: Uncategorized Leave a comment »Cycle 2 of this project was to layer the projections onto the mapping of each location in the room. I started with the backgrounds which would fade in and out as the user moved around the room. A gentle view of leaves would greet them upon entering and when they were meditating, and when they walked to the center of the room it shifted to a soft mossy ground. This was pretty easy because I already had triggers built for each location so all I had to do was connect the intensity of the backgrounds to a listener that was used for each location. The multiblockers were added so that it wouldn’t keep triggering itself when the user stayed in the location, they are timed for the duration of the sound that occurs at each place.
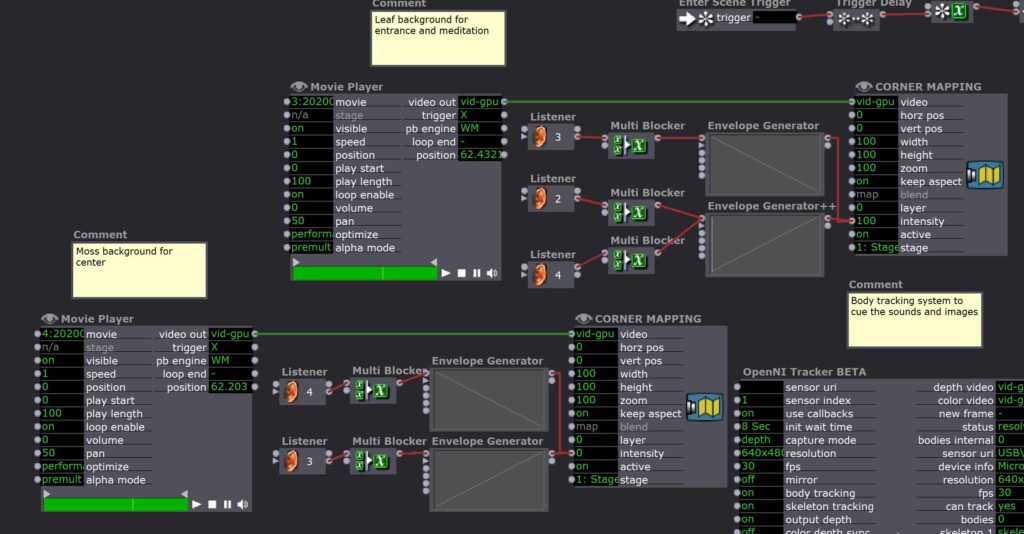
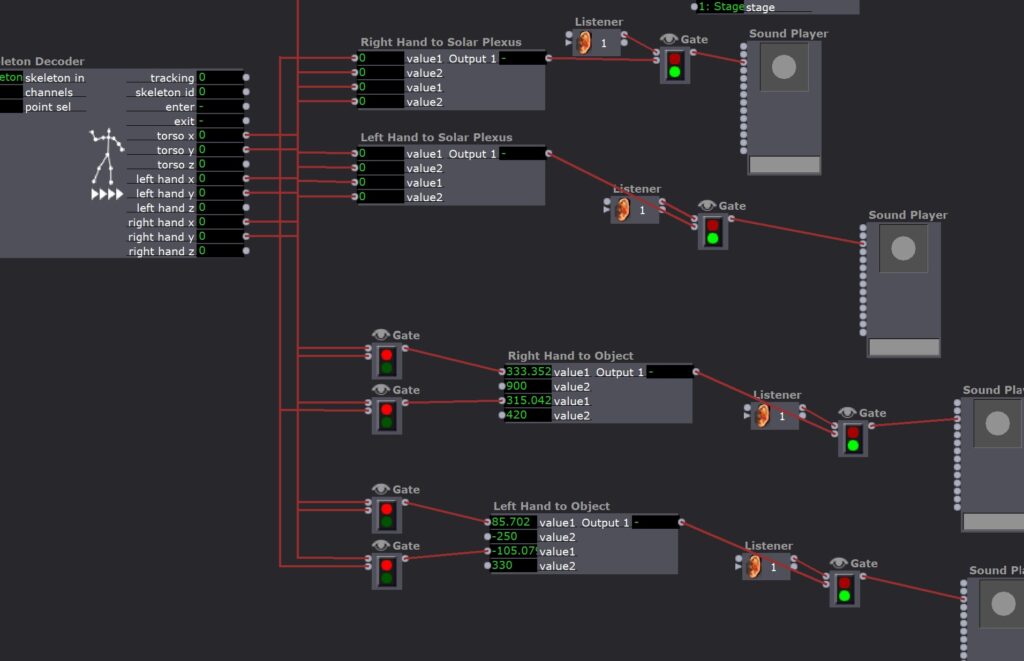
The part that was more complicated was what I wanted for the experience in the center. I wanted the use to be able to see themselves as a “body of water” and to be able to interact with visual elements on the projection that made them open up. I wanted an experience that was exciting, imaginative, open-ended, and fun so that the user would be inspired to move their body and be brought into the moment exploring the possibilities of the room at this location. My lab day with Oded in the Motion Lab is where I got all of the tools for this part of the project.

I rigged up a second depth sensor so that the user could turn toward the projection and still interact with it, then I created an alpha mask out of that sensor data which allowed me to fill the user’s body outline with a video of moving water. I then created an “aura” of glowing orange light around the person and two glowing globes of light that tracked their hand movements. The colors change based on the z-axis of the hands so there’s a little bit to explore there. All of these fade in using the same trigger for when the user enters the center location of the room.
I am really proud of all of this! It took me a long time to get all of the kinks out and it all runs really smoothly. Watching Erin (my roommate) go through it I really felt like it was landing exactly how I wanted it to.
Next steps from here mean primarily developing a guide for the user. It could be something written on the door or possibly an audio guide that would happen while the user walks through the room. I also want to figure out how to attach a contact mic to the system so that the user might be able to hear their own heartbeat during the experience.
Here is a link to watch my roommate go through the room: https://osu.box.com/s/hzz8lp5s97qw5q47ar32cgblh5hus8rs
Here is the sound file for the meditation in case you want to do it on your own:
Tara Burns – Iteration X: Extending the Body – Cycle 1 Fall 2020
Posted: November 19, 2020 Filed under: Uncategorized Leave a comment »I began this class with the plan to make space to build the elements of my thesis and this first cycle was the first iteration of my MFA Thesis.
I envision my thesis as a three part process (or more). This first component was part of an evening walk around the OSU Arboretum with my MFA 2021 Cohort. To see the full event around the lake and other projects click here: https://dance.osu.edu/news/tethering-iteration-1-ohio-state-dance-mfa-project
In response to Covid, the OSU Dance MFA 2021 Cohort held a collaborative outdoor event. I placed my first cycle (Iteration X: Extending the Body) in this space. Five scheduled and timed groups were directed through a cultivated experience while simultaneously acting as docents to view sites of art. You see John Cartwright in the video above, directing a small audience toward my work.
In this outdoor space wifi and power were not available. I used a hotspot on my phone to transmit from both my computer and VR headset. I also used a battery to power my phone and computer for the duration.
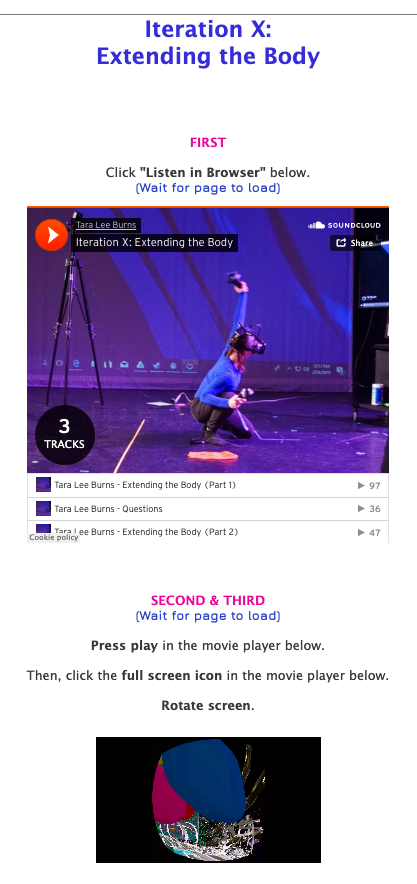
Iteration X: Extendting the Body asked the audience to follow the directions on the screen to listen to the soundscape, view the perspective of the performer, and imagine alternate and simultaneous worlds and bodies as forms of resistance.
Meditation Room Cycle 1
Posted: November 10, 2020 Filed under: Uncategorized Leave a comment »The goal for my final project is to create an interactive meditation room that responds to the users choices about what they need and allows them to feel grounded in the present moment. The first cycle was just to map out the room and the different activities that happen at different points in the space. There were two ways that the user can interact with the system: their location in space and relationship of their hands to various points.
There were three locations in the room that triggered a response. The first was just upon entering, the system would play a short clip of birdsong to welcome the user into the room. From there the user has two choices. I am not sure as of right now if I should dictate which experience comes first or if that should be left for the user to decide. I think that I can make the program work either way. One option they could choose was to sit on the couch which would start an 8 minute guided meditation and focuses on the breath, heartbeat, and stillness. The other option is to move to the center of the room which is more of a movement experience where the user is invited to move as they like (with a projection across them and responding to their movement to come in later cycles). As they enter this location there is a 4 minute track of ambient sound that creates the atmosphere of reflection and might inspire soft movement. This location is primarily where the body tracking triggers are used.
Two of the body tracking triggers are used throughout the room, they trigger a heartbeat and a sound of calm breathing when the user’s arms are near the center of their body. This isn’t always reliable and seemed like too much sometimes with all of the other sounds layered on top so I am thinking of shifting to just work upon entry and maybe just the heartbeat in the center using gates the same way that I did with the triggers used in the center of the room. The other two body tracking triggers use props in the room that the user can touch. There is a rock hanging from the ceiling that will trigger the sounds of water when touched and there is a flower attached to the wall that will trigger the sound of wind when touched. These both will only have an on-gate when the user is in the correct space at the center of the room.
Overall I feel good about this cycle. I was able to overcome some of the technical challenges of body tracking and depth tracking as well as timing on all of the sound files. I was able to prove the concept of triggering events based on the user’s interaction with the space which was my initial goal.
The next steps from here are to incorporate the projections and possibly a biofeedback system for the heartbeat. I also need to think about how I am going to guide the experience. I think I will have some instructions on the door that help users understand what the space is for and how to engage with it and what choices they may make throughout. I also am not really sure how to end it. Technically I have the timers set up so that if someone finished the guided meditation, got up and played with the center space, and the wanted to do the guided meditation again, they totally could. So maybe that is up to the user as well?
Here is a link to me interacting with the space so you can see each of the locations and the possible events that happen as well as some of my thoughts and descriptions throughout the room (the sound is also a lot easier to hear): https://osu.box.com/s/iq2idk432jfn2yzbzre91i2gp3y4bu9d