Cycle One: The Movement-Based Sound Explorer
Posted: April 13, 2026 Filed under: Uncategorized | Tags: cycle 1, FluCoMa, MaxMSP, MediaPipe, touchdesigner Leave a comment »As I began thinking about what I wanted to make my cycles about, I found myself gravitating towards a question I had previously been interested in when beginning to work on my senior project at the beginning of the year: How might technology allow for the creation of new modes of musical interface, where the relationship between audience and performer is almost entirely dissolved?
My primary resource was Max/MSP, as I know it best of all the computer music softwares, and I find it very useful for the development of new ways of making music.
Going into this cycle I knew one of the central resources that I could use to help me answer this question was Google MediaPipe–a real time motion capture software that uses webcam input as opposed to dedicated hardware/software that requires mo-cap suits. This allows for systems which anyone can easily interact with, even without knowing how the system works or what each mo-cap landmark is controlling. I handled this part of my patch in TouchDesigner, as the Max integration of MediaPipe has some difficulties I don’t have time to get into here.
My main goals for this cycle were to create an interface to interact with sound that was fun, interesting, but also left room for potential emergent behavior when left in the hands of different users.
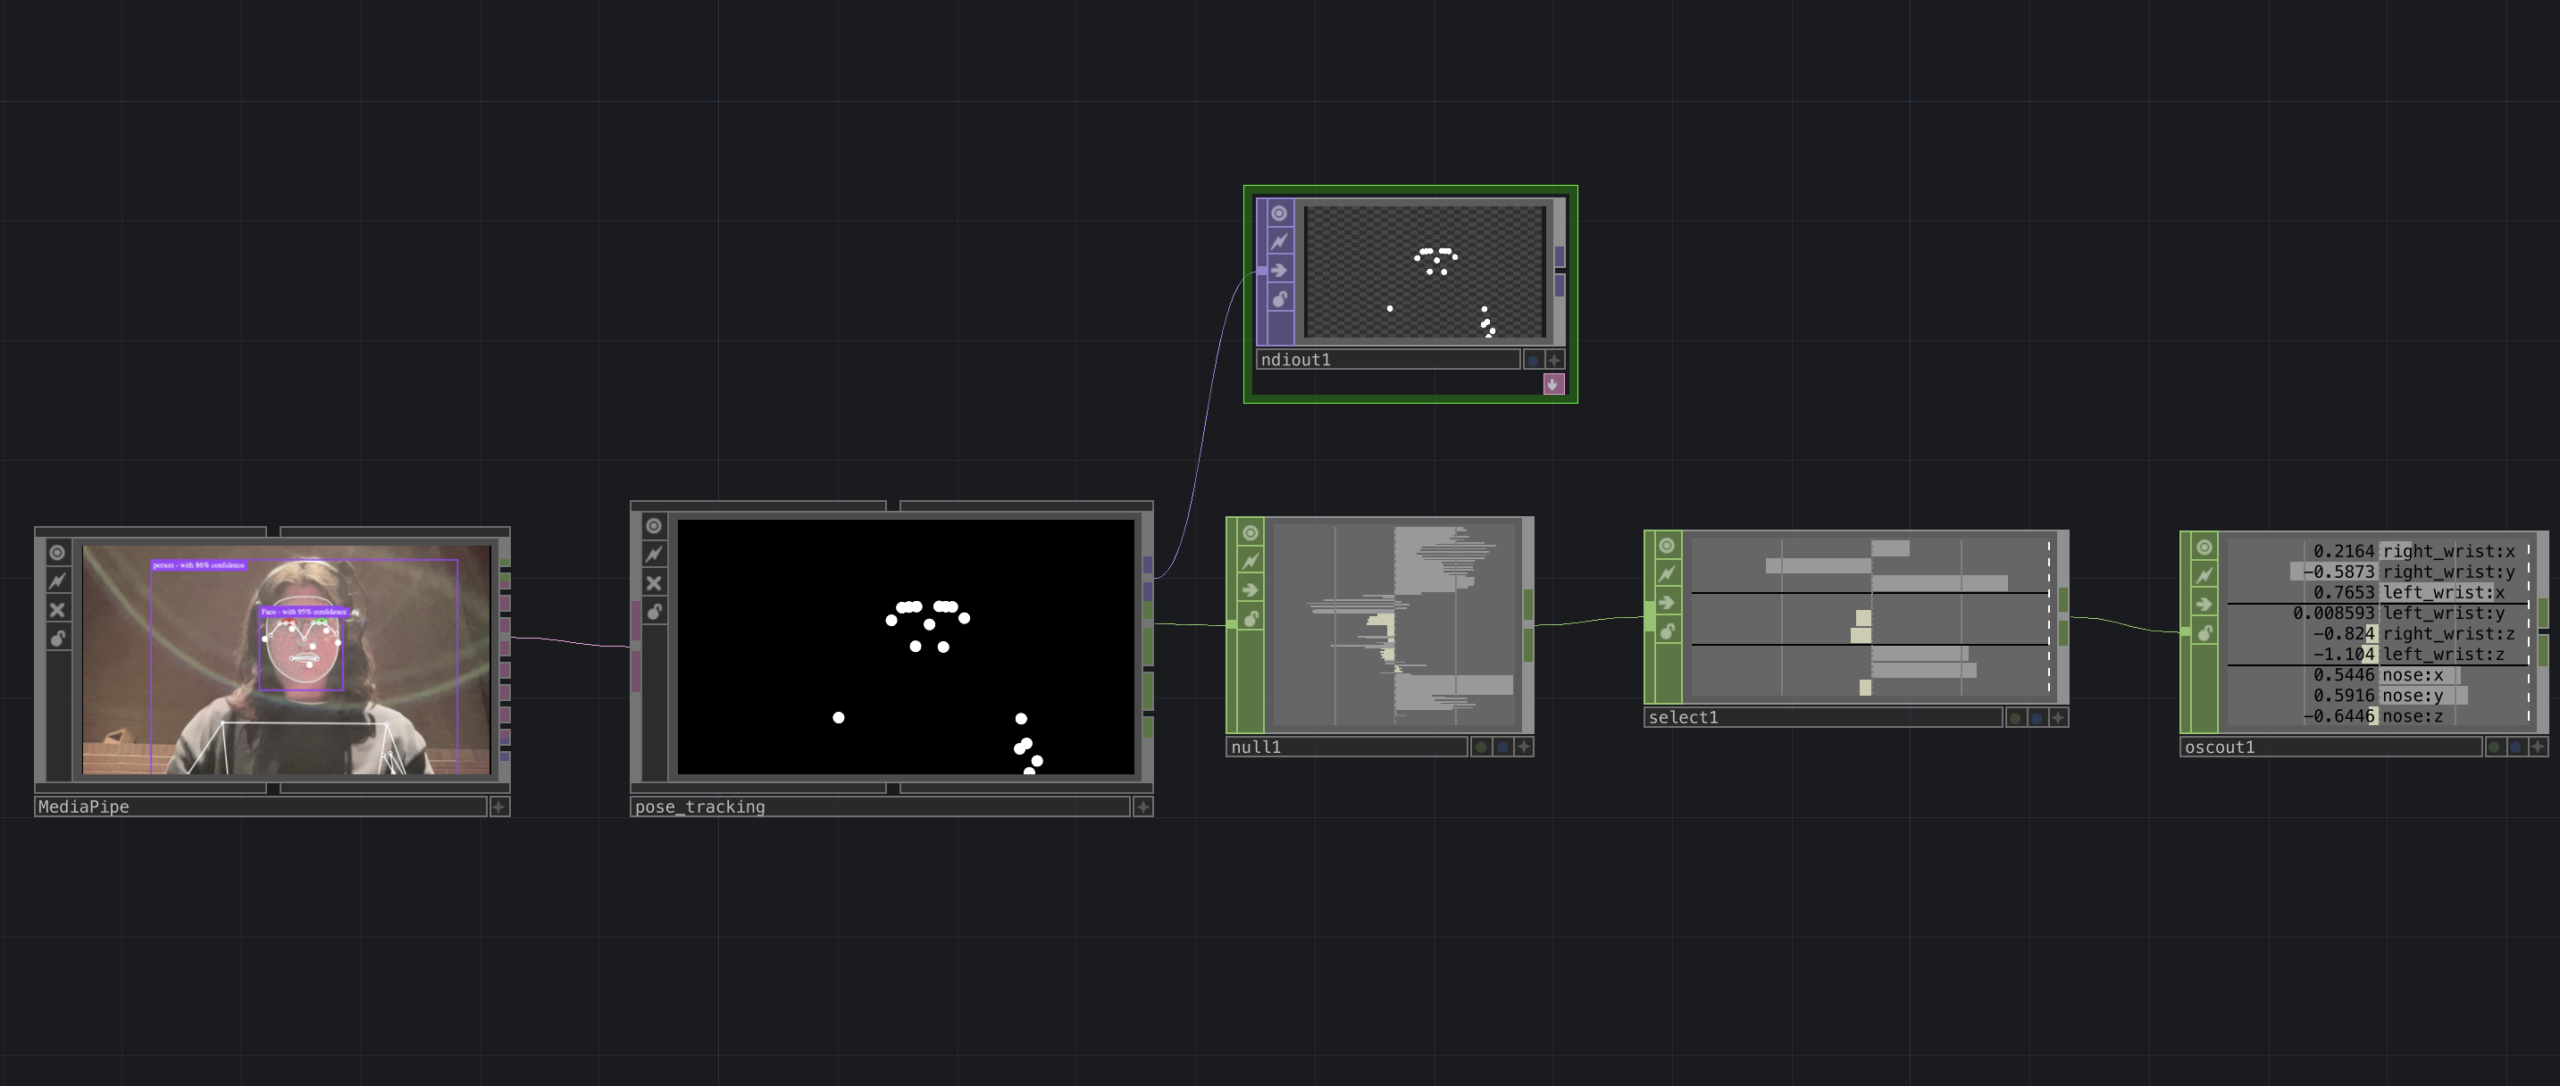
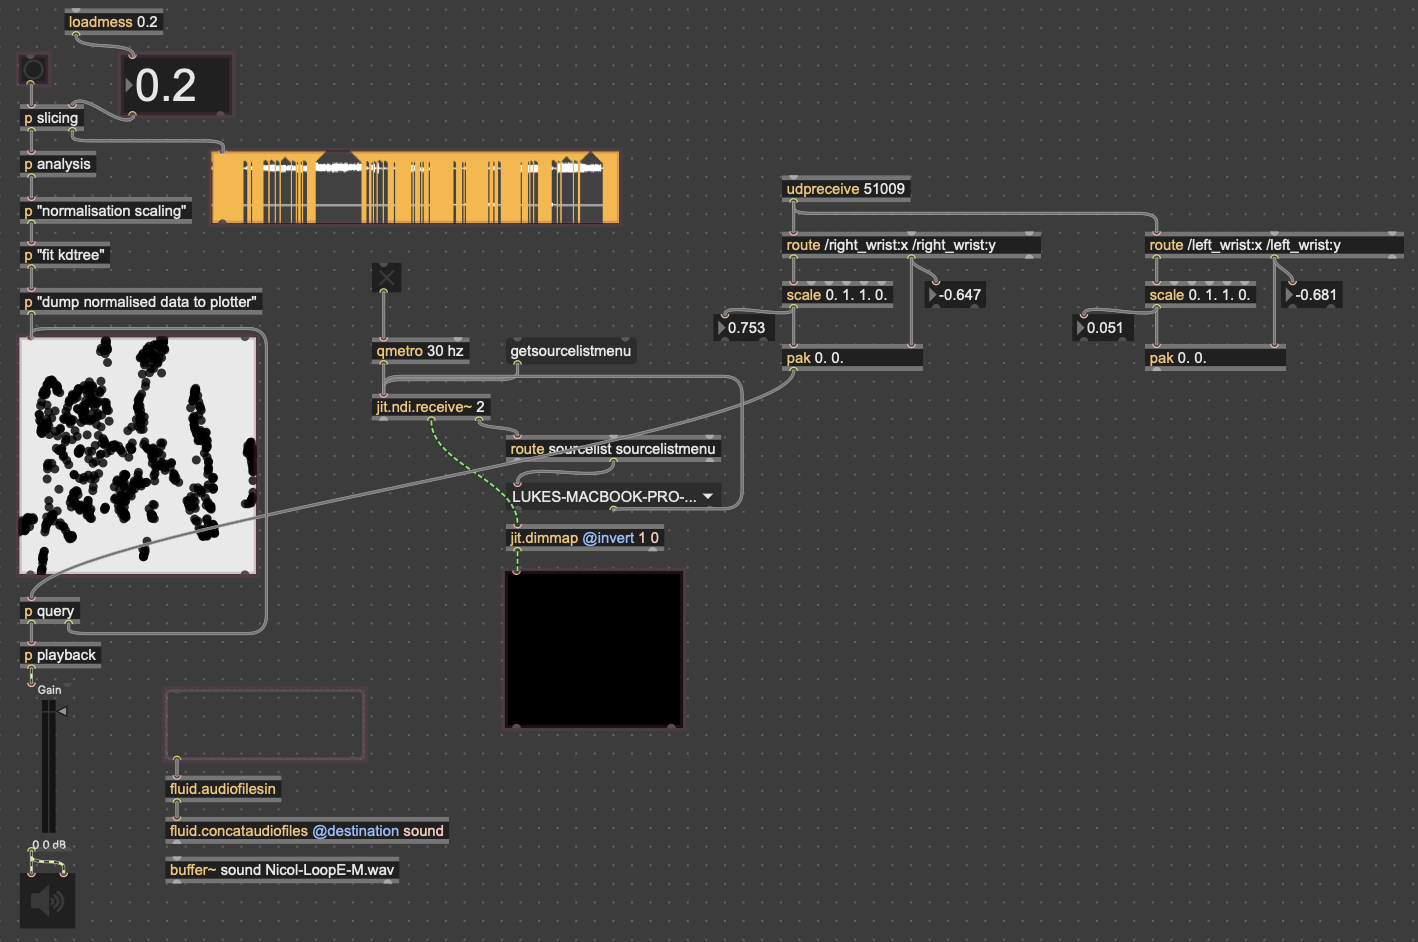
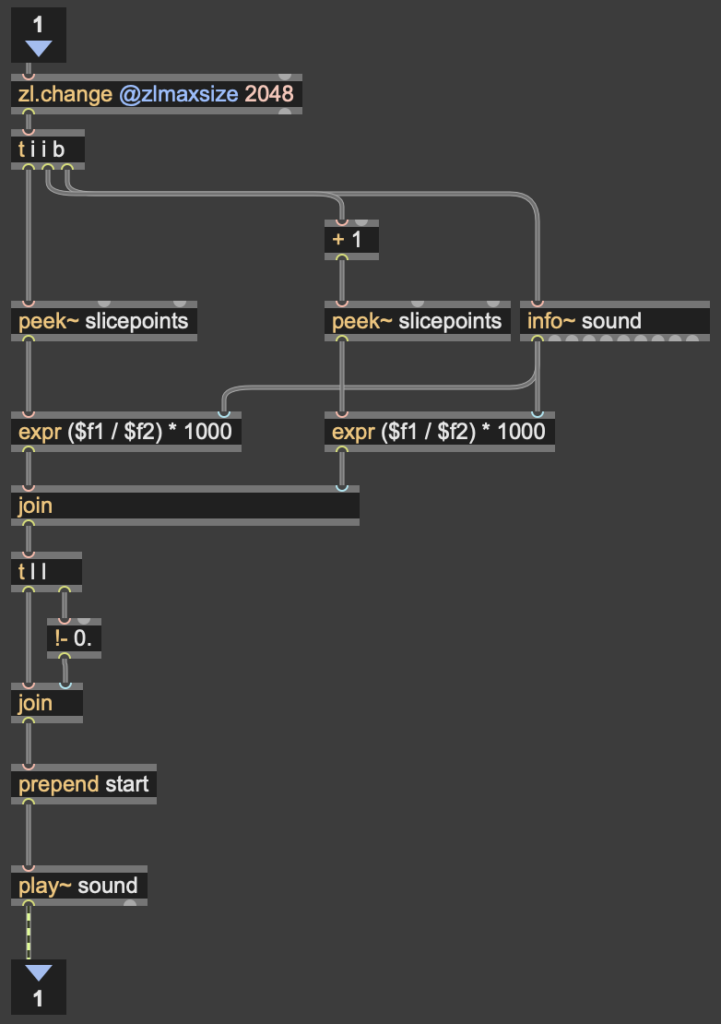
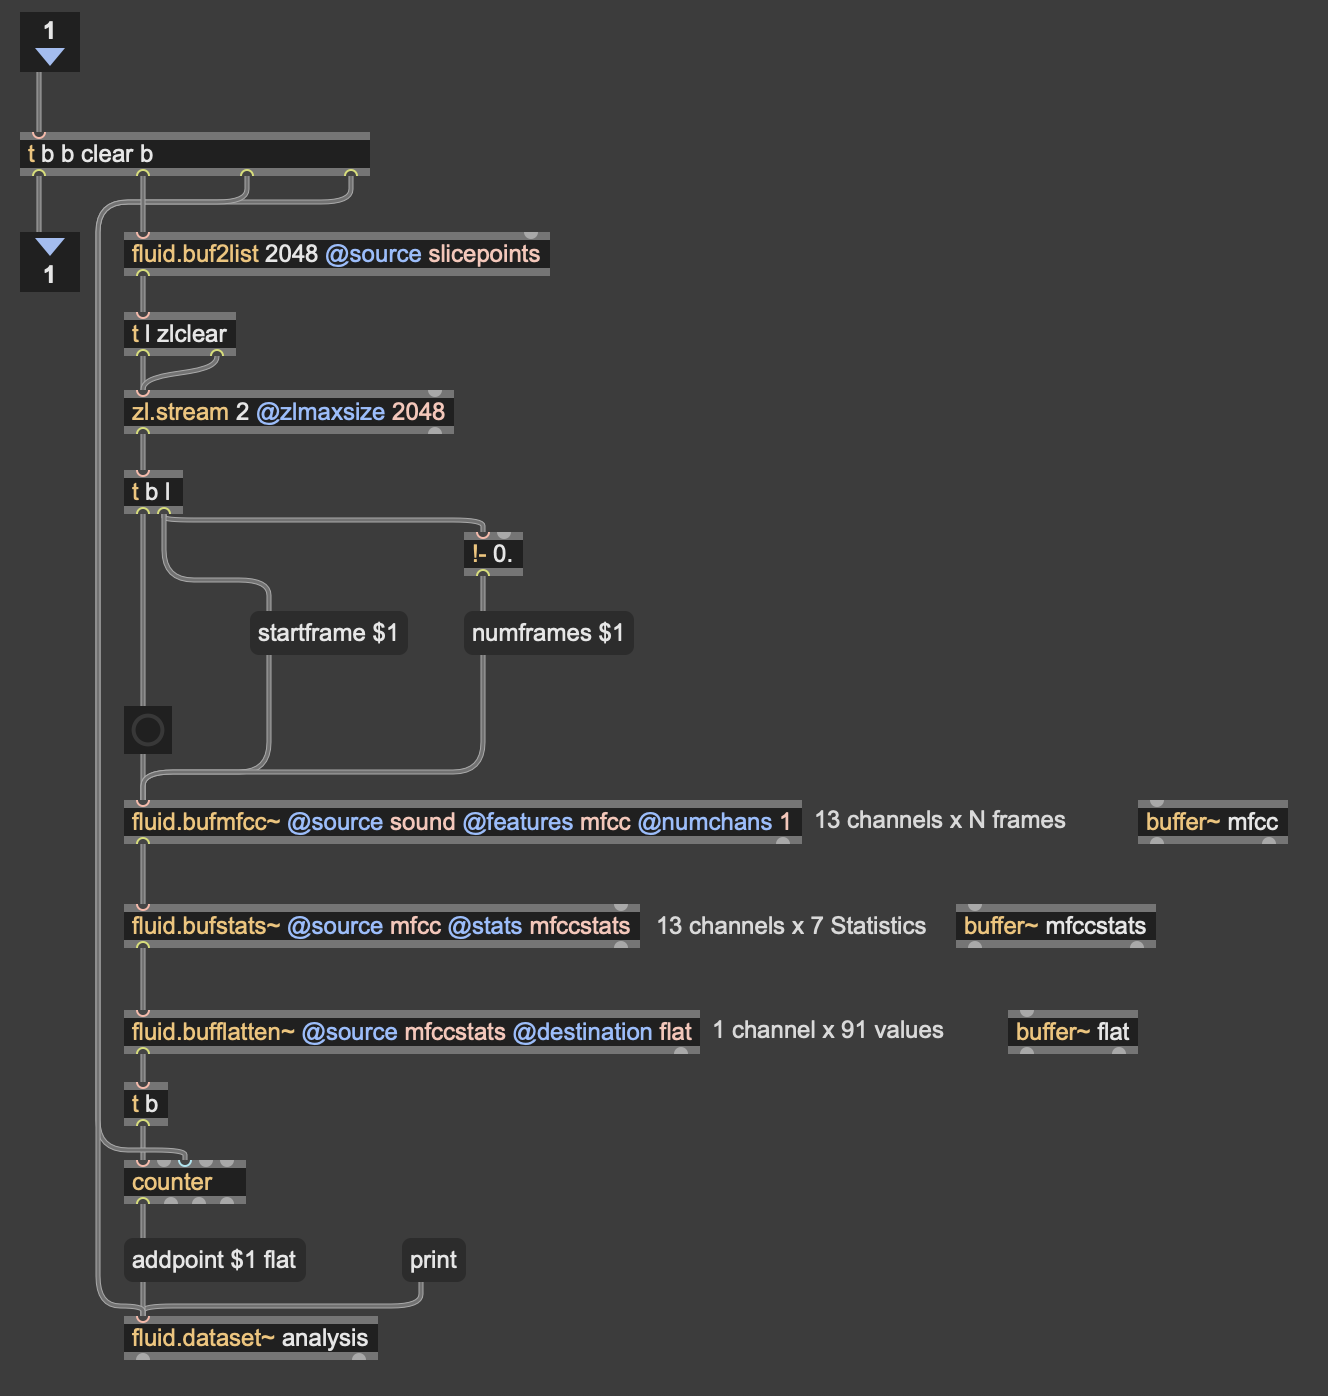
The second major piece of software I used was the Fluid Corpus Manipulation (FluCoMa) toolkit for Max/MSP (also available in SuperCollider and Pure Data). This toolkit uses machine learning software to analyze, decompose, manipulate, and playback a large collection (or corpus) of samples. I initially chose this piece of software as one of its modes of playback is a 2D plotter which can map two different aspects of the sample analysis on to an X and Y axis. I thought this would be a perfect interface for MediaPipe control as the base 2D plotter uses mouse input, which I found to be detrimental to using it as an “instrument.”
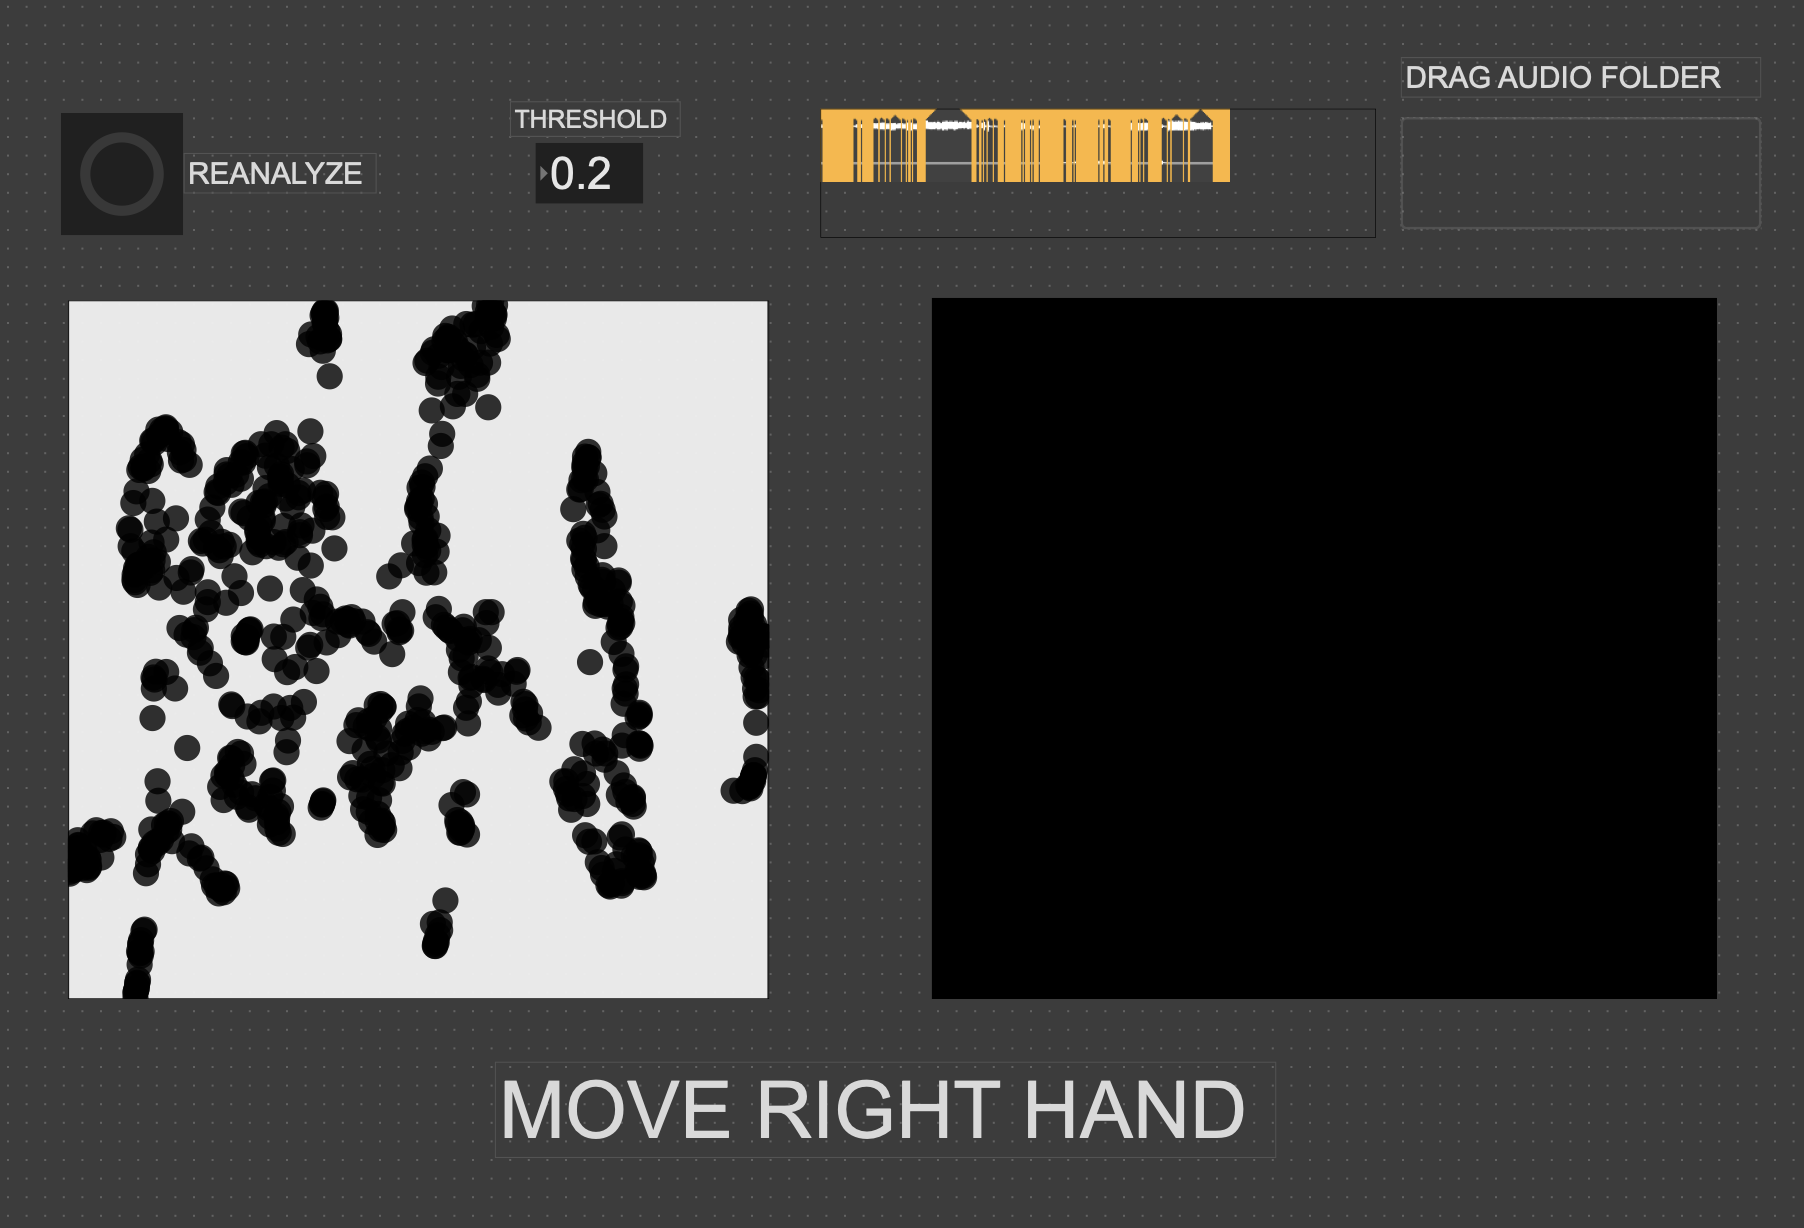
I had initially wanted to expand the idea of the 2D plotter to a 3D one, as I felt being able to interact with the patch in a 3D space would be much more natural. However, I found expanding the logic to work in 3 dimensions was a much more difficult task than I’d thought, so I decided to stick with the 2D plotter for this cycle.
Results
I thought that I was mostly very successful with the goals I set out to accomplish. Everyone wanted to try out the patch, which I thought was a testament to the “fun” and “interest” aspects of it. The controls were also quickly picked up on, which was a goal of mine, as I’m interested in systems that audiences can interact with regardless if they’re conscious of the mechanics of that interaction or not. I was most interested to see how different people had their own unique ways of interacting with it as well. Chad, for example, was really trying to make something rhythmic and intelligible out of it, while others were going all over the place, or looking for specific sounds.
Some missed opportunities that I want to expand on in future cycles is the use of the Z dimension in controlling the playback of samples, as well as the use of multiple limbs to control playback. As you can see in the video, users were somewhat restricted in how they could control the patch by the Z direction not doing anything, as well as the fact that only the right hand could trigger sounds. By expanding this idea to 3D, instead of two, and allowing for the use of multiple limbs, I think it’ll give people more freedom in how they interact with the corpus of sounds.
This was the first real project I’ve done with FluCoMa, and thus I learned a ton about its mechanisms, particularly the storage of non-audio data in buffers. This is a concept used a lot more in environments like SuperCollider or Pure Data, as Max has some other objects for storing that kind of information. However because of the way the machine learning tools in FluCoMa work, it needs to store all of the information it may need in RAM. This was also the first project I’ve done sending OSC data between different apps on my computer, which had a bit of a learning curve as I discovered OSC data sends as strings, instead of floating point numbers. This didn’t create any real difficulty, as the conversion took no time, but it did make me aware of an important aspect of using OSC (particularly with Max, as certain objects process strings/floats/integers differently).
Cycle 1 -Solo (but at this moment) Paper Plate DJ
Posted: April 9, 2026 Filed under: Uncategorized Leave a comment »What is up?
Here is my cycle one post 🙂
I started this cycle with the hopes and dreams of creating a live performance experience that challenges the user to piece together a story from a song with lyrics they can’t understand. This branches from two research interests/questions.
1. How can interactive technology facilitate meaning-making and engagement with works of art?
2. How can designers best utilize interactive/immersive experiences to invoke a sense of power within their participants?
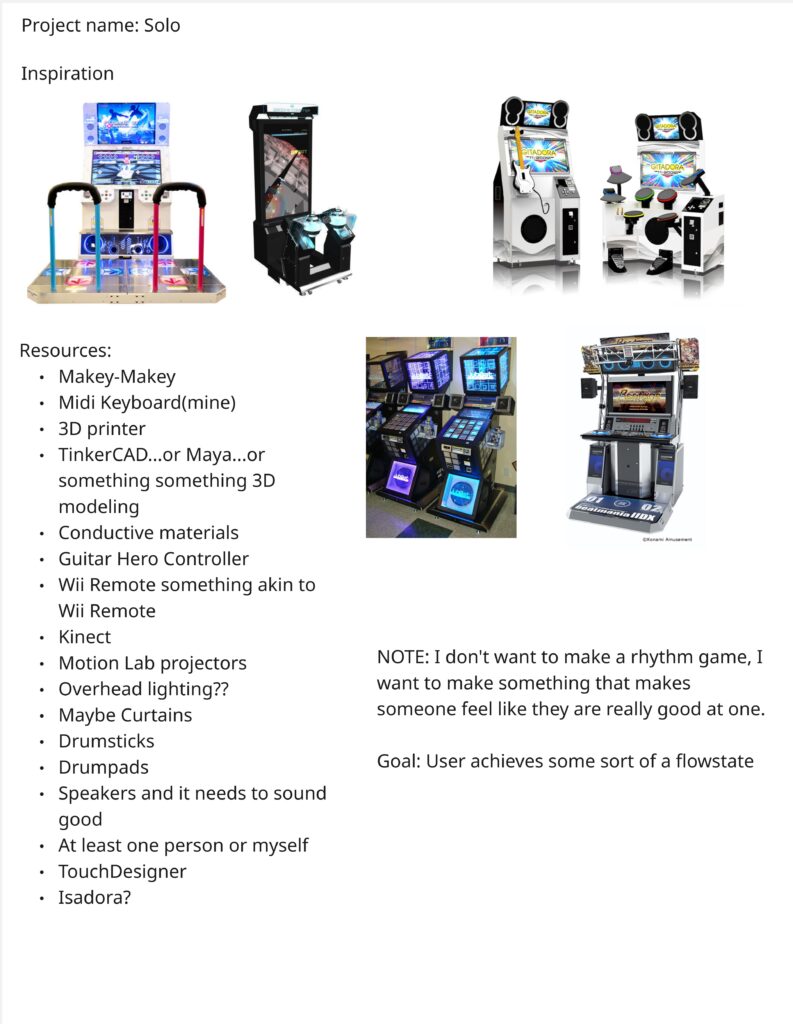
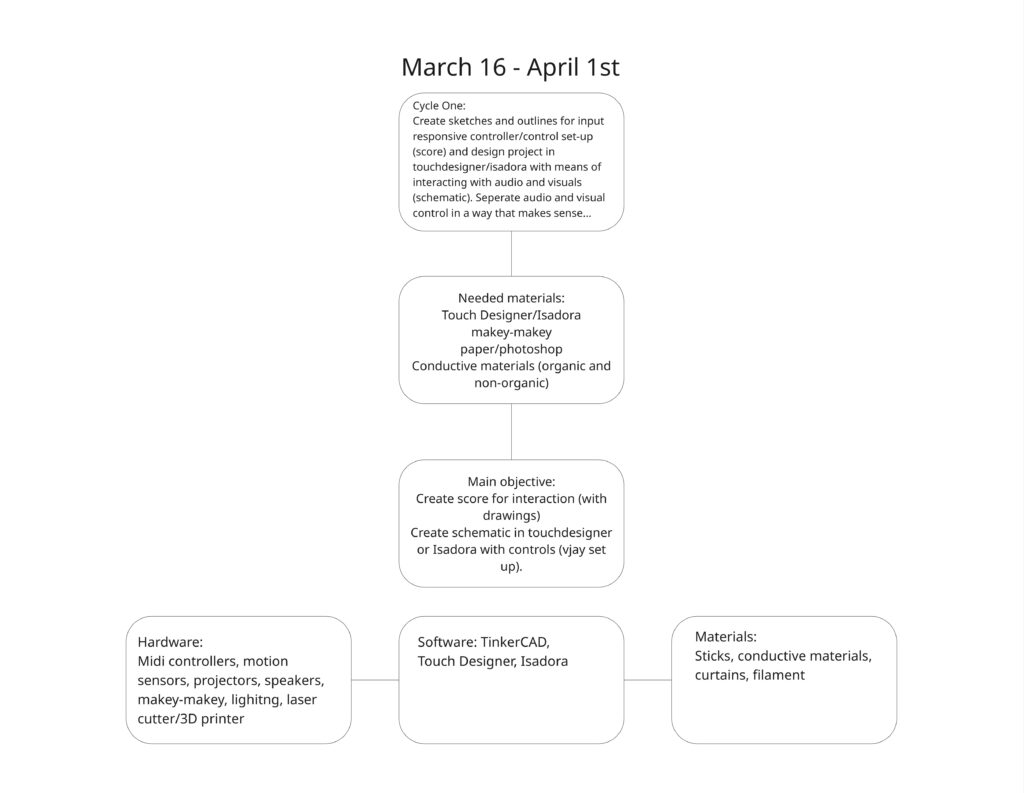
I tapped into my own personal lived experiences to explore these questions; I feel the most powerful when moving to music and playing rhythm games. So I set out to recreate that feeling of being pretty good at a rhythm game. Demonstrated in the brainstormed documents below 🙂
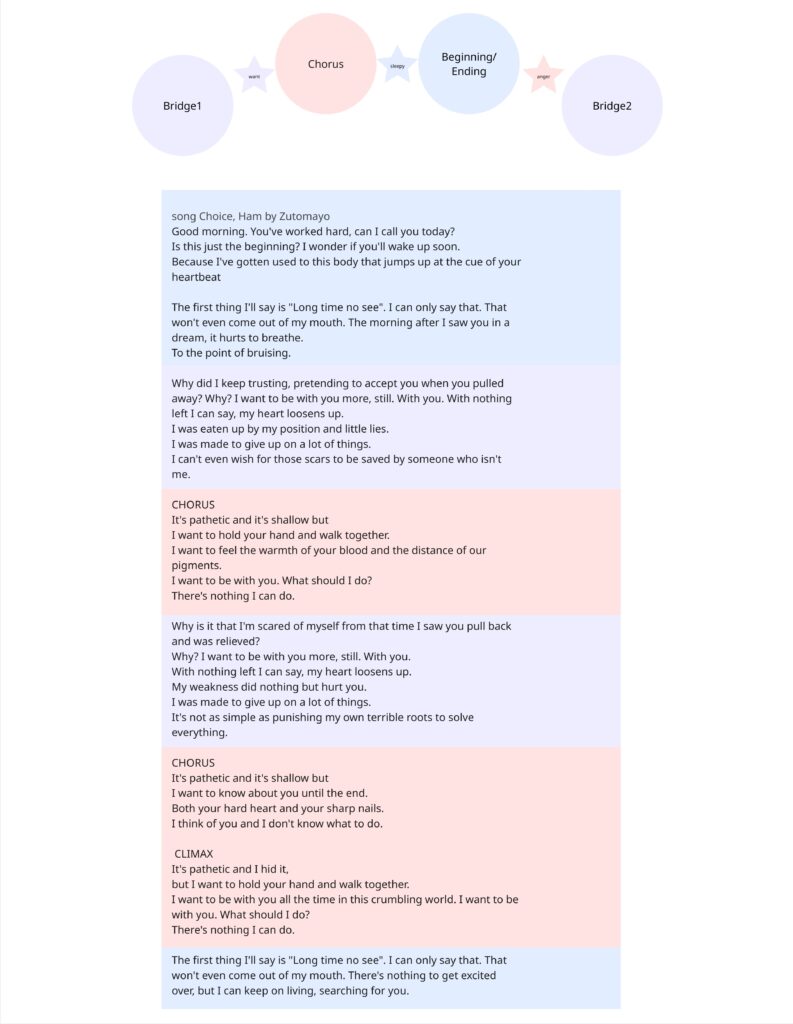
I chose a song that is entirely in Japanese, with the knowledge that no one in my class knows Japanese. I sectioned off a translation of the lyrics to attach to 4 different inputs that align with the imagery described. I also used the music video as a reference. I also planned to buy buckets. The user drums on various parts of the bucket that are labeled with lines of lyrics from the song. They will keep the tempo in the area of the drum where they believe the lyrics are being sung.
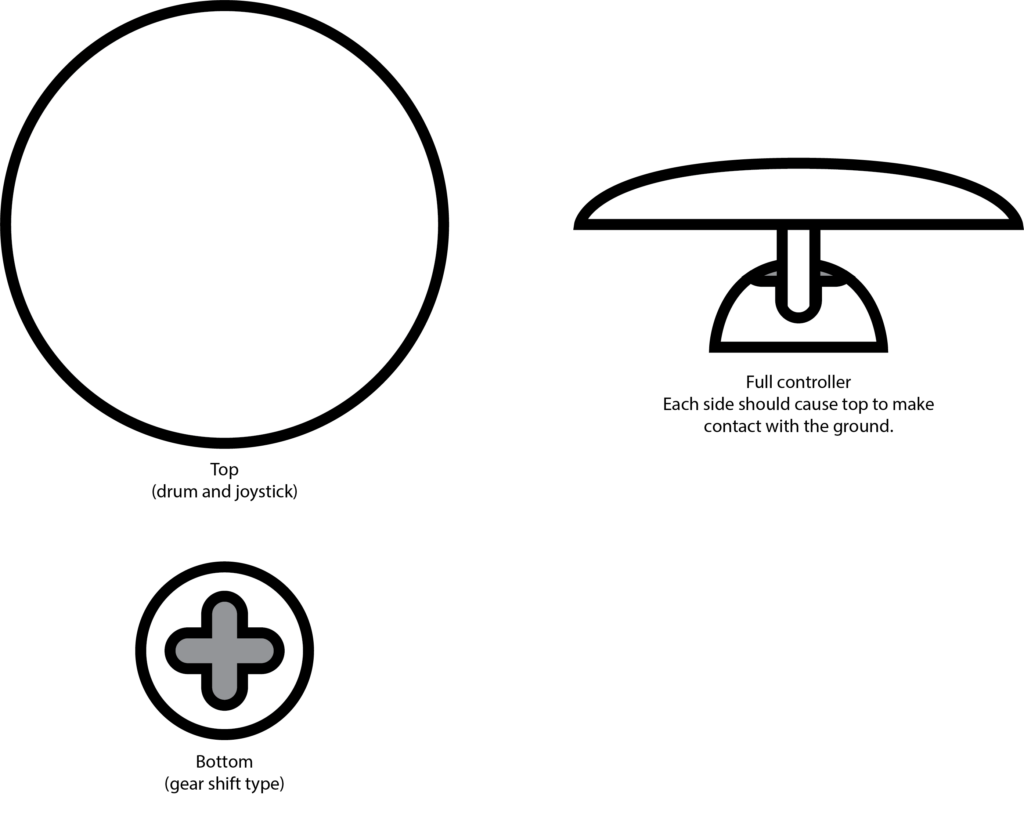
I decided to create the control scheme first – focusing entirely on that before setting up the physical controller.
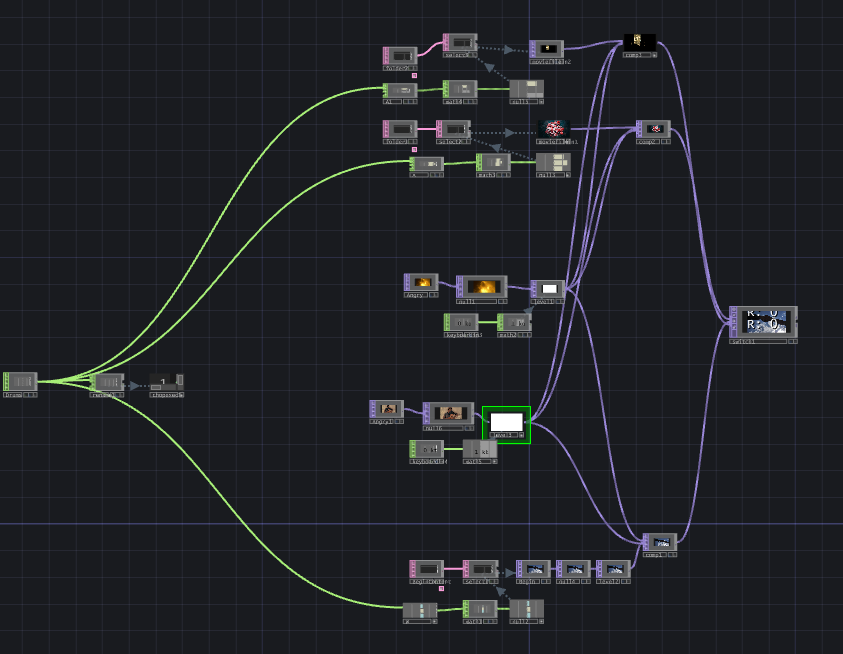
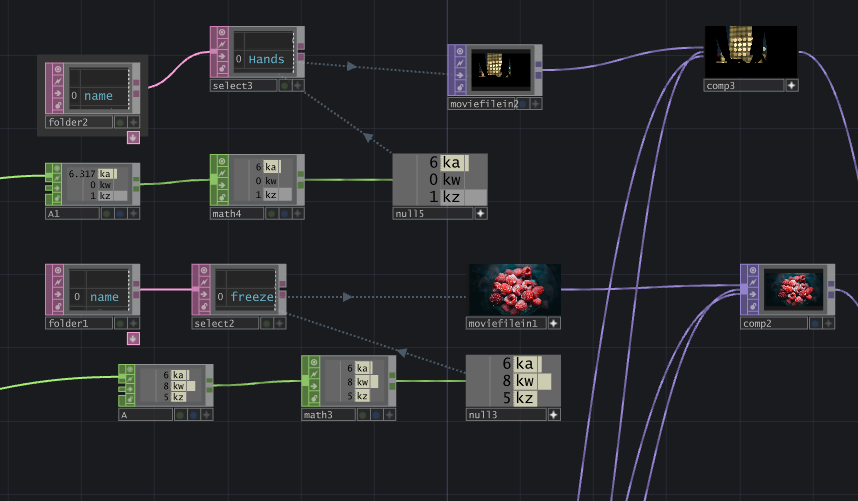
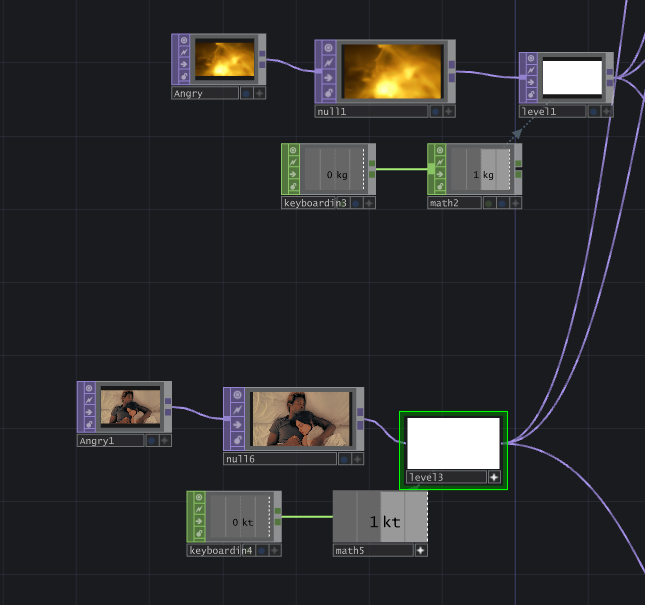

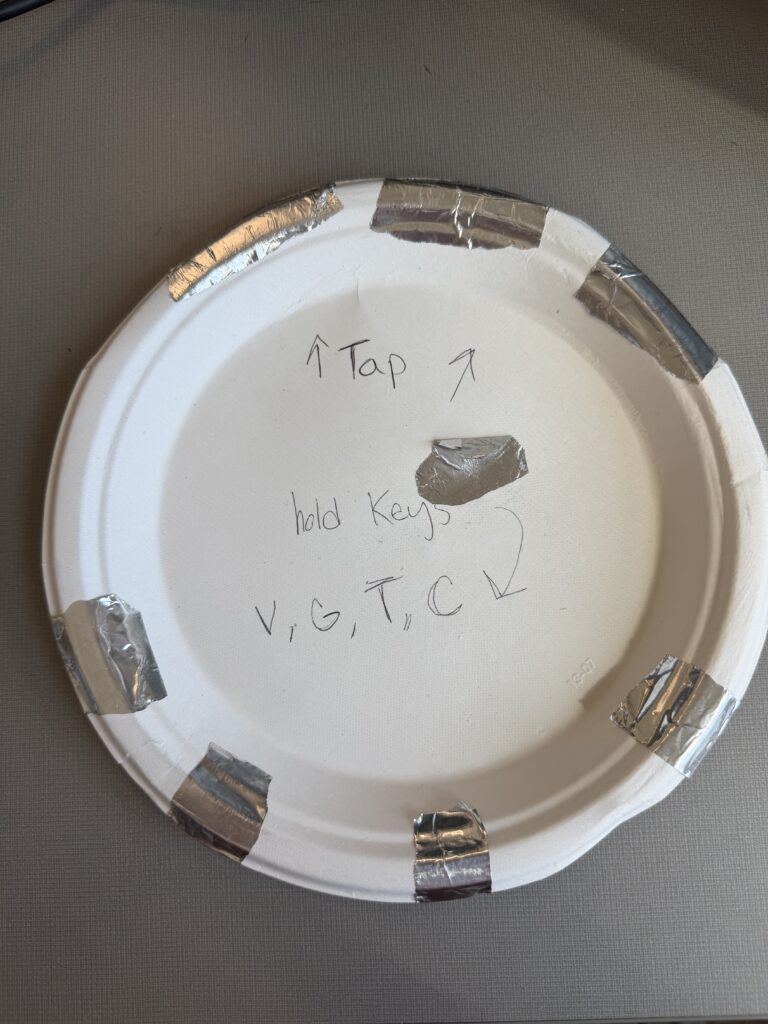
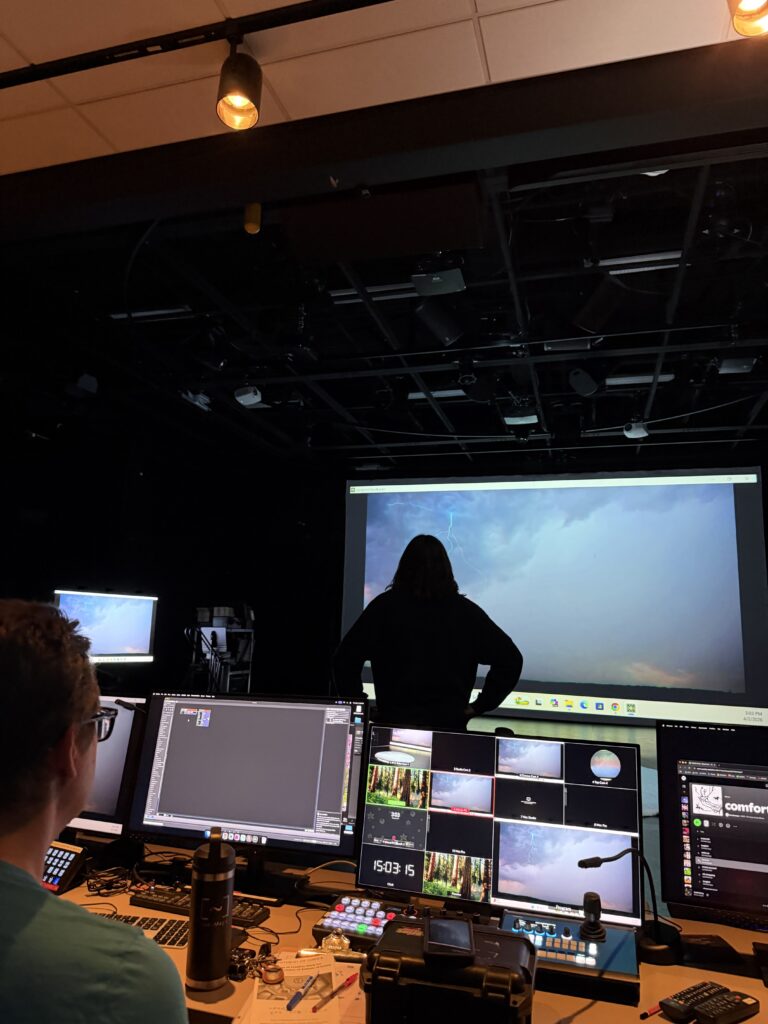
This test was accompanied by instrumental music. I didn’t want to reveal the song yet, and wanted to focus on the physical reactions with the controls to influence how I construct the controller in cycle 2. Most of the songs were slower-paced, but once a faster one came on, Chad (shown in the video above, but the specific moment wasn’t captured on film) stood up and rapidly switched between visuals, which contrasted with the slow, exploratory manner he had before when testing out the various interactions. The song I chose is a bit funkier and faster-paced than the music played before, so I think it will add some excitement to the interactions.
I received feedback that having the grounding element be the user holding their thumb to the center of the plate felt more natural than the watch, and avoiding tangled wires. I also received feedback on the controls being confined to the desk. I agreed as I plan to have the control be in the center of the room, but I didn’t have that prepared for this cycle… So on to the next…
Cycle 1: The (bad) Friend
Posted: April 7, 2026 Filed under: Uncategorized | Tags: cycle 1, touchdesigner Leave a comment »The Score
My idea for this cycle was simple (or atleast it seemed so in my head): make an AI-powered interactive experience where the user shares a space with an AI ‘presence’. It lives on a screen, but its there for you and it listens to whatever you have to say – or dont have to say. The score: a participant enters a space, speaks naturally, and the environment responds to the quality of what they shared through a particle system. No text output, no voice back. Just the space changing around them. The framing I gave participants was: “this is a friend you can talk to.” That framing is what became the main problem.
Resources
- TouchDesigner for the visual/particle system
- Python + PyAudio for microphone input
- OpenAI Whisper for speech-to-text transcription
- Claude API to interpret the speech and return atmospheric parameters (brightness, movement, weight, density) as JSON
- OSC to pipe values from Python into TouchDesigner
- Orbecc depth camera for body tracking (ceiling-mounted, blob detection)
- Motion Lab
- A Michael for troubleshooting (1)
Process and Pivots
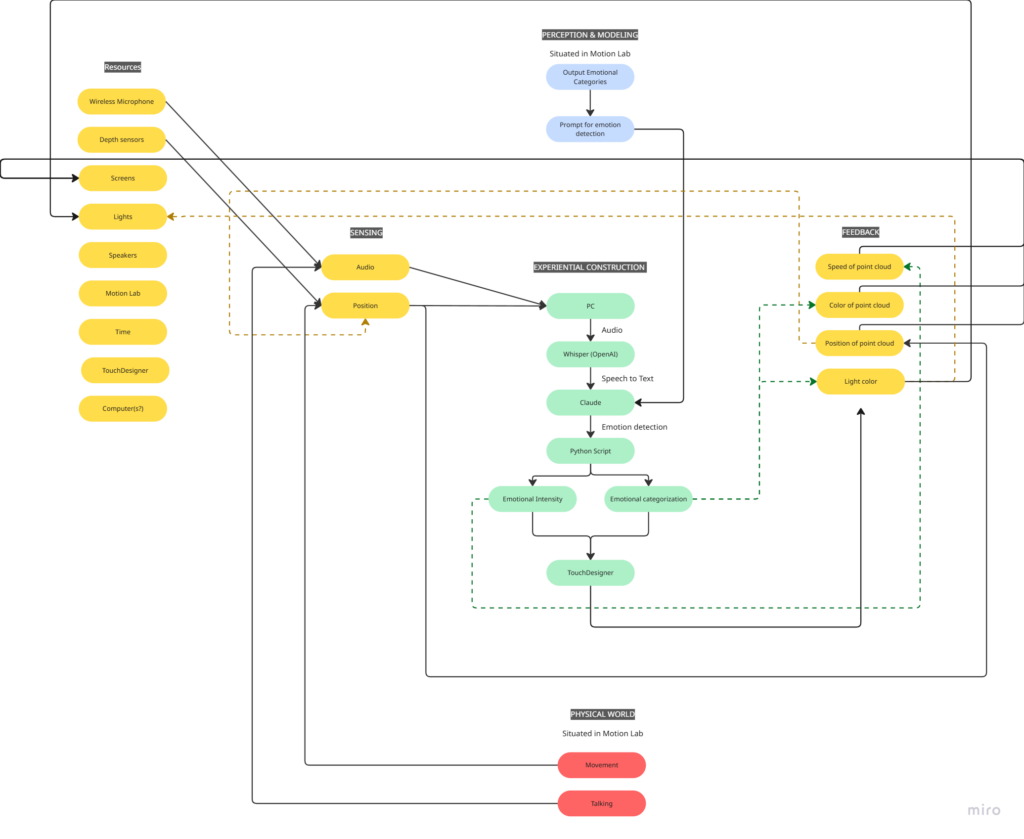
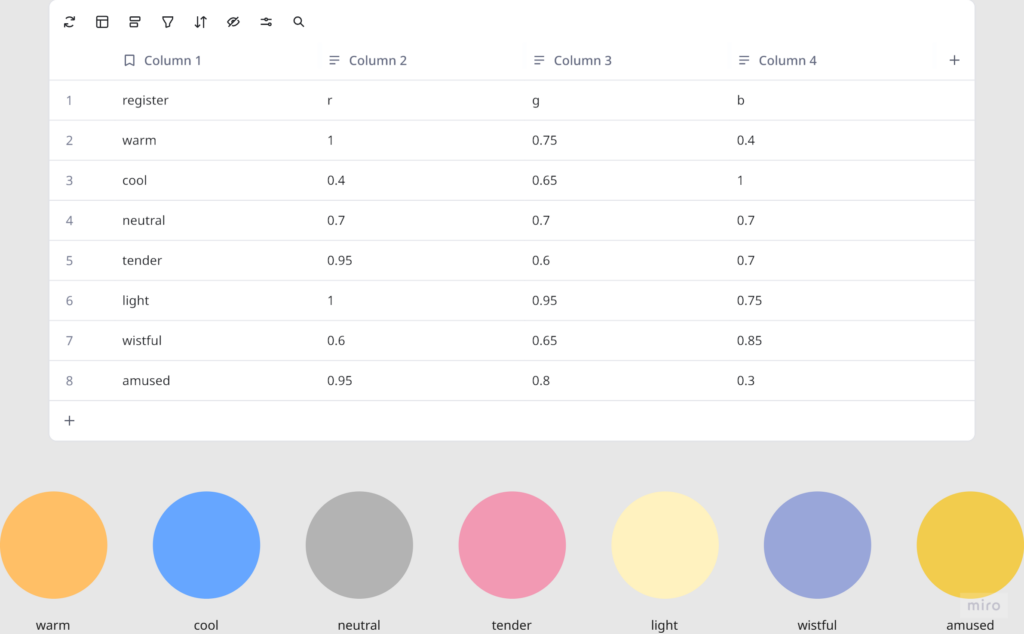
I wrote a python script that takes user input through the microphone, then uses OpenAI Whisper for speech-to-text transcription. It then sends the speech to claude in order to parse it according to the system prompt I gave it, which were metrics like emotional register, weight, intensity etc. The python script in turn sends these metrics to touchdesigner through OSC. Inside touchdesigner, I made table DATs that were storing the values of the incoming signals in order to apply those values to the visual system (a particle system). The values were suppsoed to effect the movement and color of the particle system.
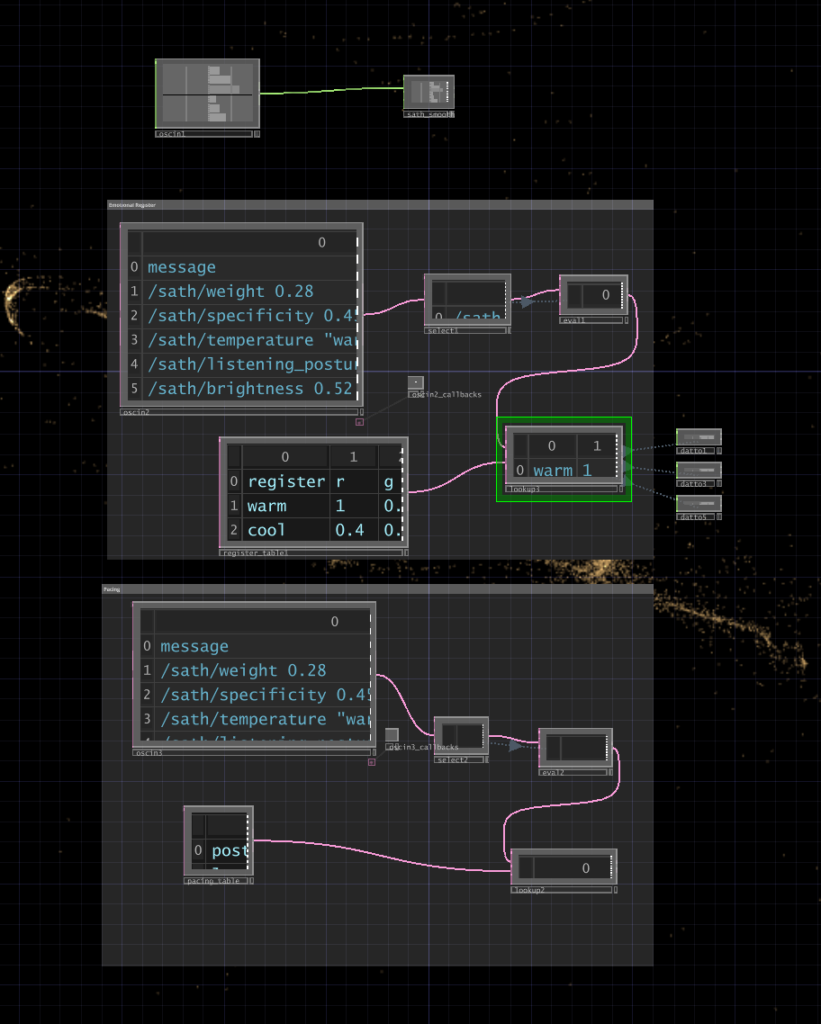

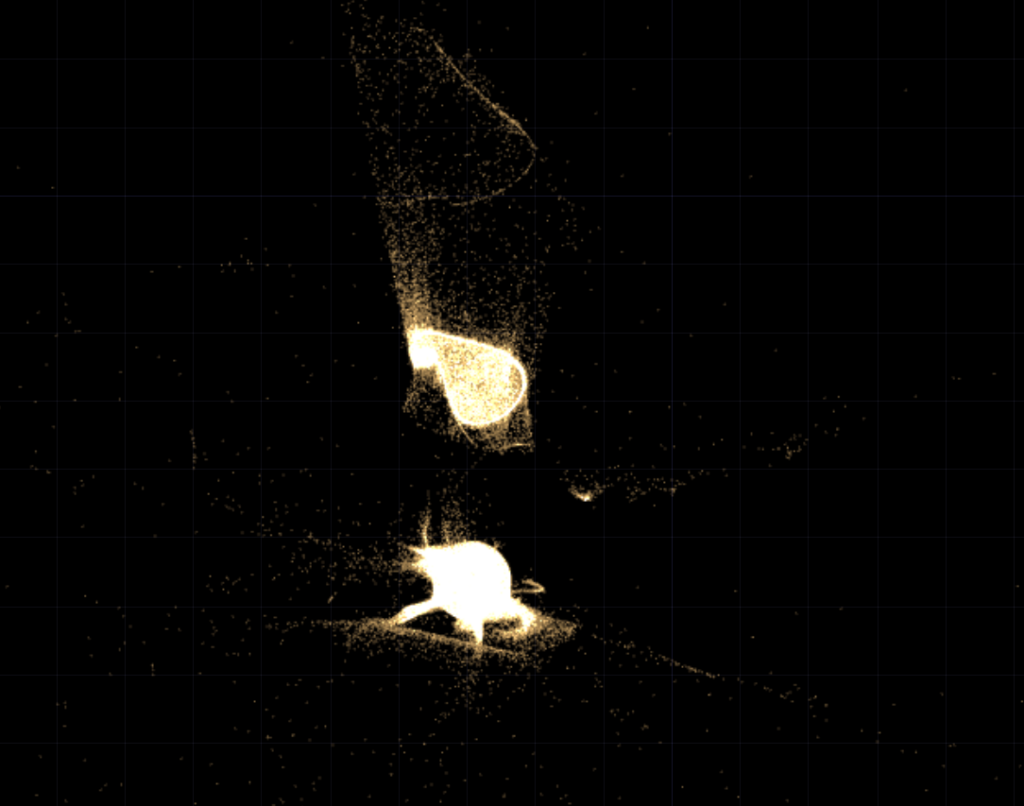
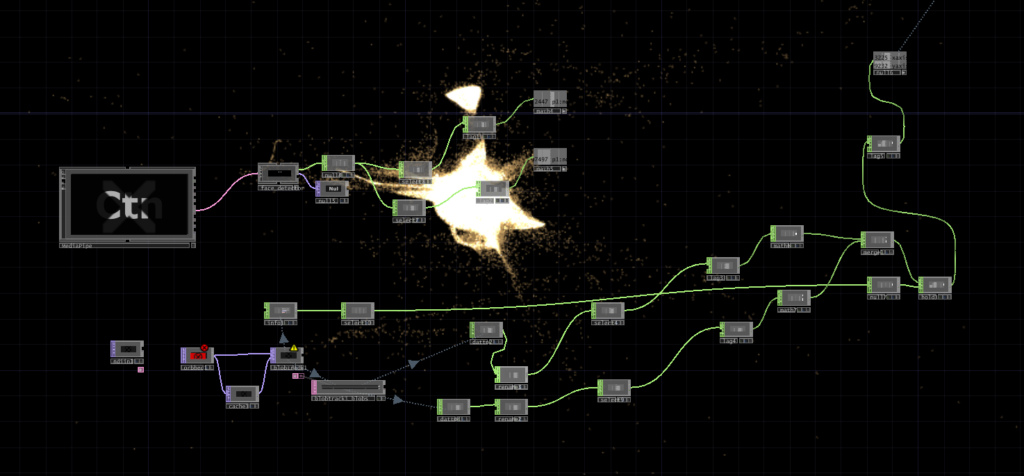
I initially built my system on MediaPipe for body tracking, but then when I shifted the system to the motionlab, I had revelations. The system worked fine for a laptop but for it to work in an open space and a big projection screen, it would need a camera directly in front of the participant’s face (and the screen) to work, which sounds horrible for an immersive experience. So, I switched to blob detection through the Orbecc ceiling camera. That took a while to get right. It wouldn’t even detect me and I couldn’t figure out why so I made the very obvious assumption that it hates me lol. Turns out it needs something to reflect off of and I was wearing all black.
The original prompt to Claude was trying to do an emotional analysis, as in read how the person was feeling and respond to that. At some point I rewrote it to just read the texture and quality of what was shared, not the emotional content. That was actually the most important design decision I made: the difference between “I understand you” and “I am here.” The particle system was jerking between states and it felt mechanical, so I also had to apply some smoothing for it to not act crazy.
What Worked, What Didn’t, What I Learned
What didn’t work: ALOT. I think apart from the framing of the system, I had not realized the amount of time I needed to properly do this. I had only gotten a limited amount of time in the MOLA so I was only able to troubleshoot the projection and not run through the whole pipeline. I did not anticipate alot of things as they went wrong the biggest example of this would be the lag. There’s bad bad latency in the pipeline (mic → Whisper → Claude → OSC → TouchDesigner) and it was long enough that participants got confused. They’d speak, nothing would happen, they’d speak again, then two responses would arrive at once. A few people got genuinely frustrated. The “friend you can talk to” framing made this much worse because it set up an expectation of conversational timing that the system couldn’t meet. Lou said it was a bad bad friend. Like one of those people who keep looking at their phone when you’re trying to talk to them.
What worked unexpectedly: The observers. People watching someone else use the system felt something – specifically, they felt empathy for the participant who was being poorly served by the AI. That observation became the most interesting research finding of the whole cycle.
What I learned: Time is the biggest resource, and you have to plan according to it. Instead of trying to force all of your bajillion ideas into the time that you have. Also, framing matters more than you think it does! Had the same system been framed a different way, I would’ve gotten away with it, but since I had framed it a specific way, there were specific expectations.
Pressure Project 2 – The Flipper
Posted: March 3, 2026 Filed under: Uncategorized Leave a comment »Description
The Flipper is a TouchDesigner patch that uses an audio input to create video, and uses a video input to create audio. When used in a network this “cell-block” acts independently by creating entirely new audio and video, instead of just modifying the audio and video it receives. Its modularity lies in its ability to provide other users in the cell-block network with new sources of audio and video, that are themselves generated from other audio and video over the network.
Collective Documentation
Pending
Individual Documentation

Overview of my cell-block’s network. This is connected to three inputs and outputs on the outside of the container, which connect to other cell-blocks on the network. While there’s a lot on screen, it breaks down into a few simple sections.

This portion of the network takes in audio from over the patch through the in_audio CHOP. The envelope, math, and audioparaeq objects slow the stream of data and boost high frequencies, respectively. This then is turned into a spectrogram and is sent directly to a chopto TOP.

This portion processes that audio spectrum into a new visual. Starting in the bottom left, I use a series of TOPs to create a flow-like visual, which is then composited with the spectrum. This new visual is colored using a series of ramps and a look up TOP. The ramps are cycled through using either an LFO or an input from in_osc over the network. An example of the visuals this produces is below.

Lastly, this portion of the patch processes video received over the network from the in_video TOP (or in this case, a camera input) into audio. While I didn’t get quite as interesting an audio output as I wanted, I still think I was effective in transforming video to audio. The video that is received gets sent directly to a topto CHOP, which reads RGB values over the X and Y planes of the video. the following objects then reduce the amount of data, and turns those waves into a stereo audio signal by the merge CHOP. This wave is given an envelope by the math objects (I attempted to control this with another osc input but failed to make it work) and is sent out over the network. An example of audio is included below.
Reflection
Since I knew I wanted to flip the audio and video signals inside my patch, the independence of the cell-block was semi-inherent the entire time I was working on it. In order to ensure it was connectable with others, however, I needed to ensure that whatever the patch did was interesting enough, while still clearly using audio and video to influence the opposite output, so that it didn’t just seem like I was generating something entirely new.
I made choices about what to include and exclude primarily by trying to figure out what I could accomplish that was reasonably within my ability, but still interesting. For example, I’ve worked with spectrogram imagery in the past, so I knew I would be able to incorporate that the easiest. On the opposite end of that, I attempted to integrate FM synthesis into the audio part of my patch to get some more interesting sounds. However, with my inexperience in TouchDesigner, I found it really difficult to make FM work, so I chose to exclude it.
One thing that surprised me was how even if cell-blocks didn’t work “perfectly” together, they still were able to have some sort of interaction, even having unexplainable interactions. I was also a bit surprised how underutilized the OSC data we were sending was. I know I was personally having difficulty in doing something interesting with the OSC signals, but it was interesting that it was a widespread problem. I think this might come from the fact that the other signals we were working with were both very tangible. Since the OSC input was just a number, I think we were a bit less motivated to find an interesting way to use it, as opposed to the audio and video, which we could immediately do interesting things with.
I think we didn’t have quite enough time to experiment with combining our cell blocks in different ways for a lot of emergent behavior to emerge. But one that I enjoyed seeing was how the visuals would layer together through 2, 3 or 4 cell-blocks. I thought that all of the cell blocks were interesting on their own, but the most interesting visuals were created through the combination of several together. This relates to Halprin’s cell-block framework through the idea that we can each create our own module that does its own thing, but the most exciting behaviors only emerge once we begin to combine the different cell-blocks, and experiment with how they feed into each other.
Download Patch
Pressure Project #2 – Transcendence through Snares
Posted: March 3, 2026 Filed under: Uncategorized Leave a comment »- Description of my cell-block:
- Independently, my cell-block uses the snare of the audio provided to cycle through a set of mouth shapes to simulate lip syncing (albeit not realistic lip syncing). It also takes the video input and through Ramp and Displace, warps the image based on the “mid” registered from the audio as well. Without outside input the audio used is “Position Famous” by Frost Children, and the video is a looping timelapse POV of a subway traveling underground. This was to create a sense of motion and exhilaration (the movement of the subway and displacement), and playfulness (the lip syncing).
- Collective documentation:
- Video/photos of the assembled system: Admittedly, I forgot to take footage of the showcase. I was a bit more nervous about this project, worried about everything working properly with the other cell-blocks. Once it was my turn, I only focused on presenting my work. I plan to reach out to classmates to see if they recorded footage.
- Process reflection:
- The cell-block was self-contained but, on the exterior, was connected to incoming TOP and CHOP inputs as well as feeding those inputs out. So, on its own, the block would play as planned, but once outside audio and video were fed in, they would then take the effects of the previous media. There were some issues with feedback loops when testing this out, but mostly, it worked. The lips were a last-minute add and therefore independent…so no matter what, the lips stayed on screen; how it reacted depended on the audio input.
- I made the choice to control the level of flashiness and movement with my visuals. It’s easy to fall into producing loud and flashy imagery with programs like TouchDesigner or even After Effects, however, I try to use media responsibly, and I also didn’t want to give myself a headache. I’ve made materials that are hard for photosensitive people to take in, and while some others loved the chaotic visuals, I wasn’t satisfied knowing a group of people wouldn’t be able to watch it (and enjoy it).
- I was surprised a lot of people didn’t use audio that contained a lot of snares (or used much audio at all)… I was also surprised that everything worked together for the most part (if you can’t tell, I was nervous).
- Everyone’s work offered me something new when combined. I would combine with Luke’s when I wanted the most cohesive combination, I would combine with Zarmeen’s when I wanted to destroy everything (or use her audio), I combined with Chad’s because I wanted to appear on his channels more, and I combined with Curtus when I wanted to see a dragon.
- This project was a new way to envision Halprin’s cell-block method, but in a strictly digital realm. The goal was to have every block exist on its own and influence others (multiply the possibilities of the content produced). I think we mostly did that, although networking still feels stressful to me; I at least know how it works (sort of).
- Individual documentation:
Pressure Project 1: The Musical Spiral
Posted: February 13, 2026 Filed under: Uncategorized Leave a comment »Description
The musical spiral is a self-generating patch that randomly generates shapes at different sizes and positions, and spins them in a random direction for a random-length cycle. When these shapes cross a line, they (are supposed) to trigger a random musical note.
Documentation
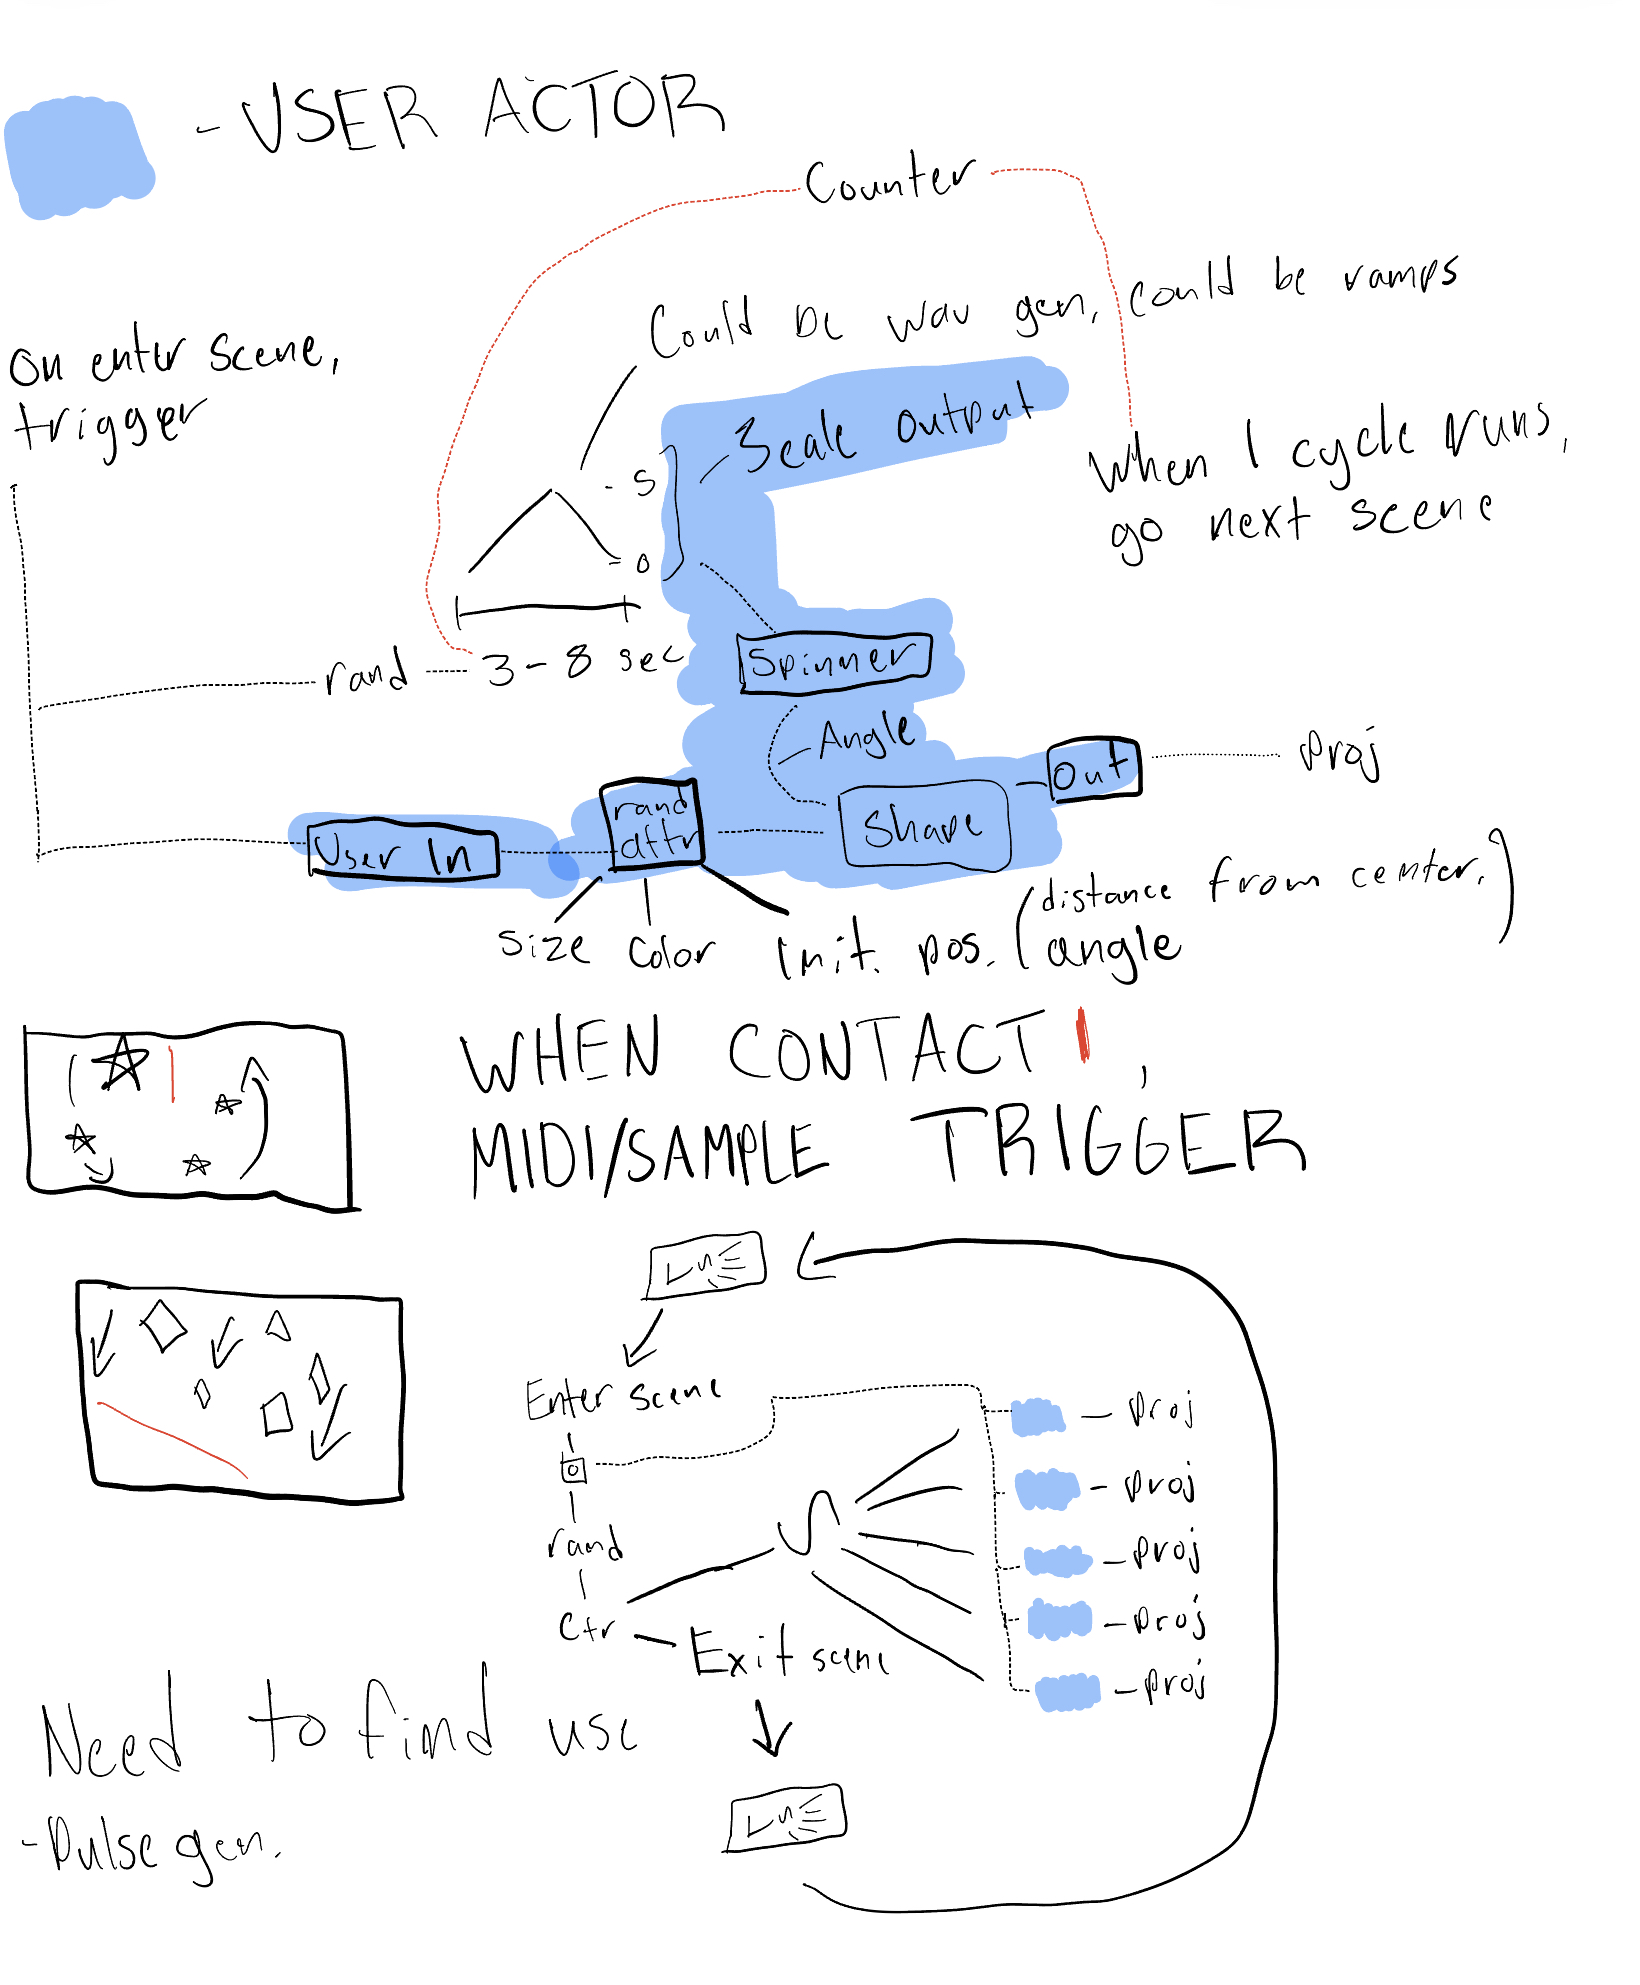
Before starting to code my patch, I did a quick sketch for my idea of what I generally wanted the patch to do to help me save time later. While I had to change and add a bit outside of this, this essentially became the outline of what my code would look like.
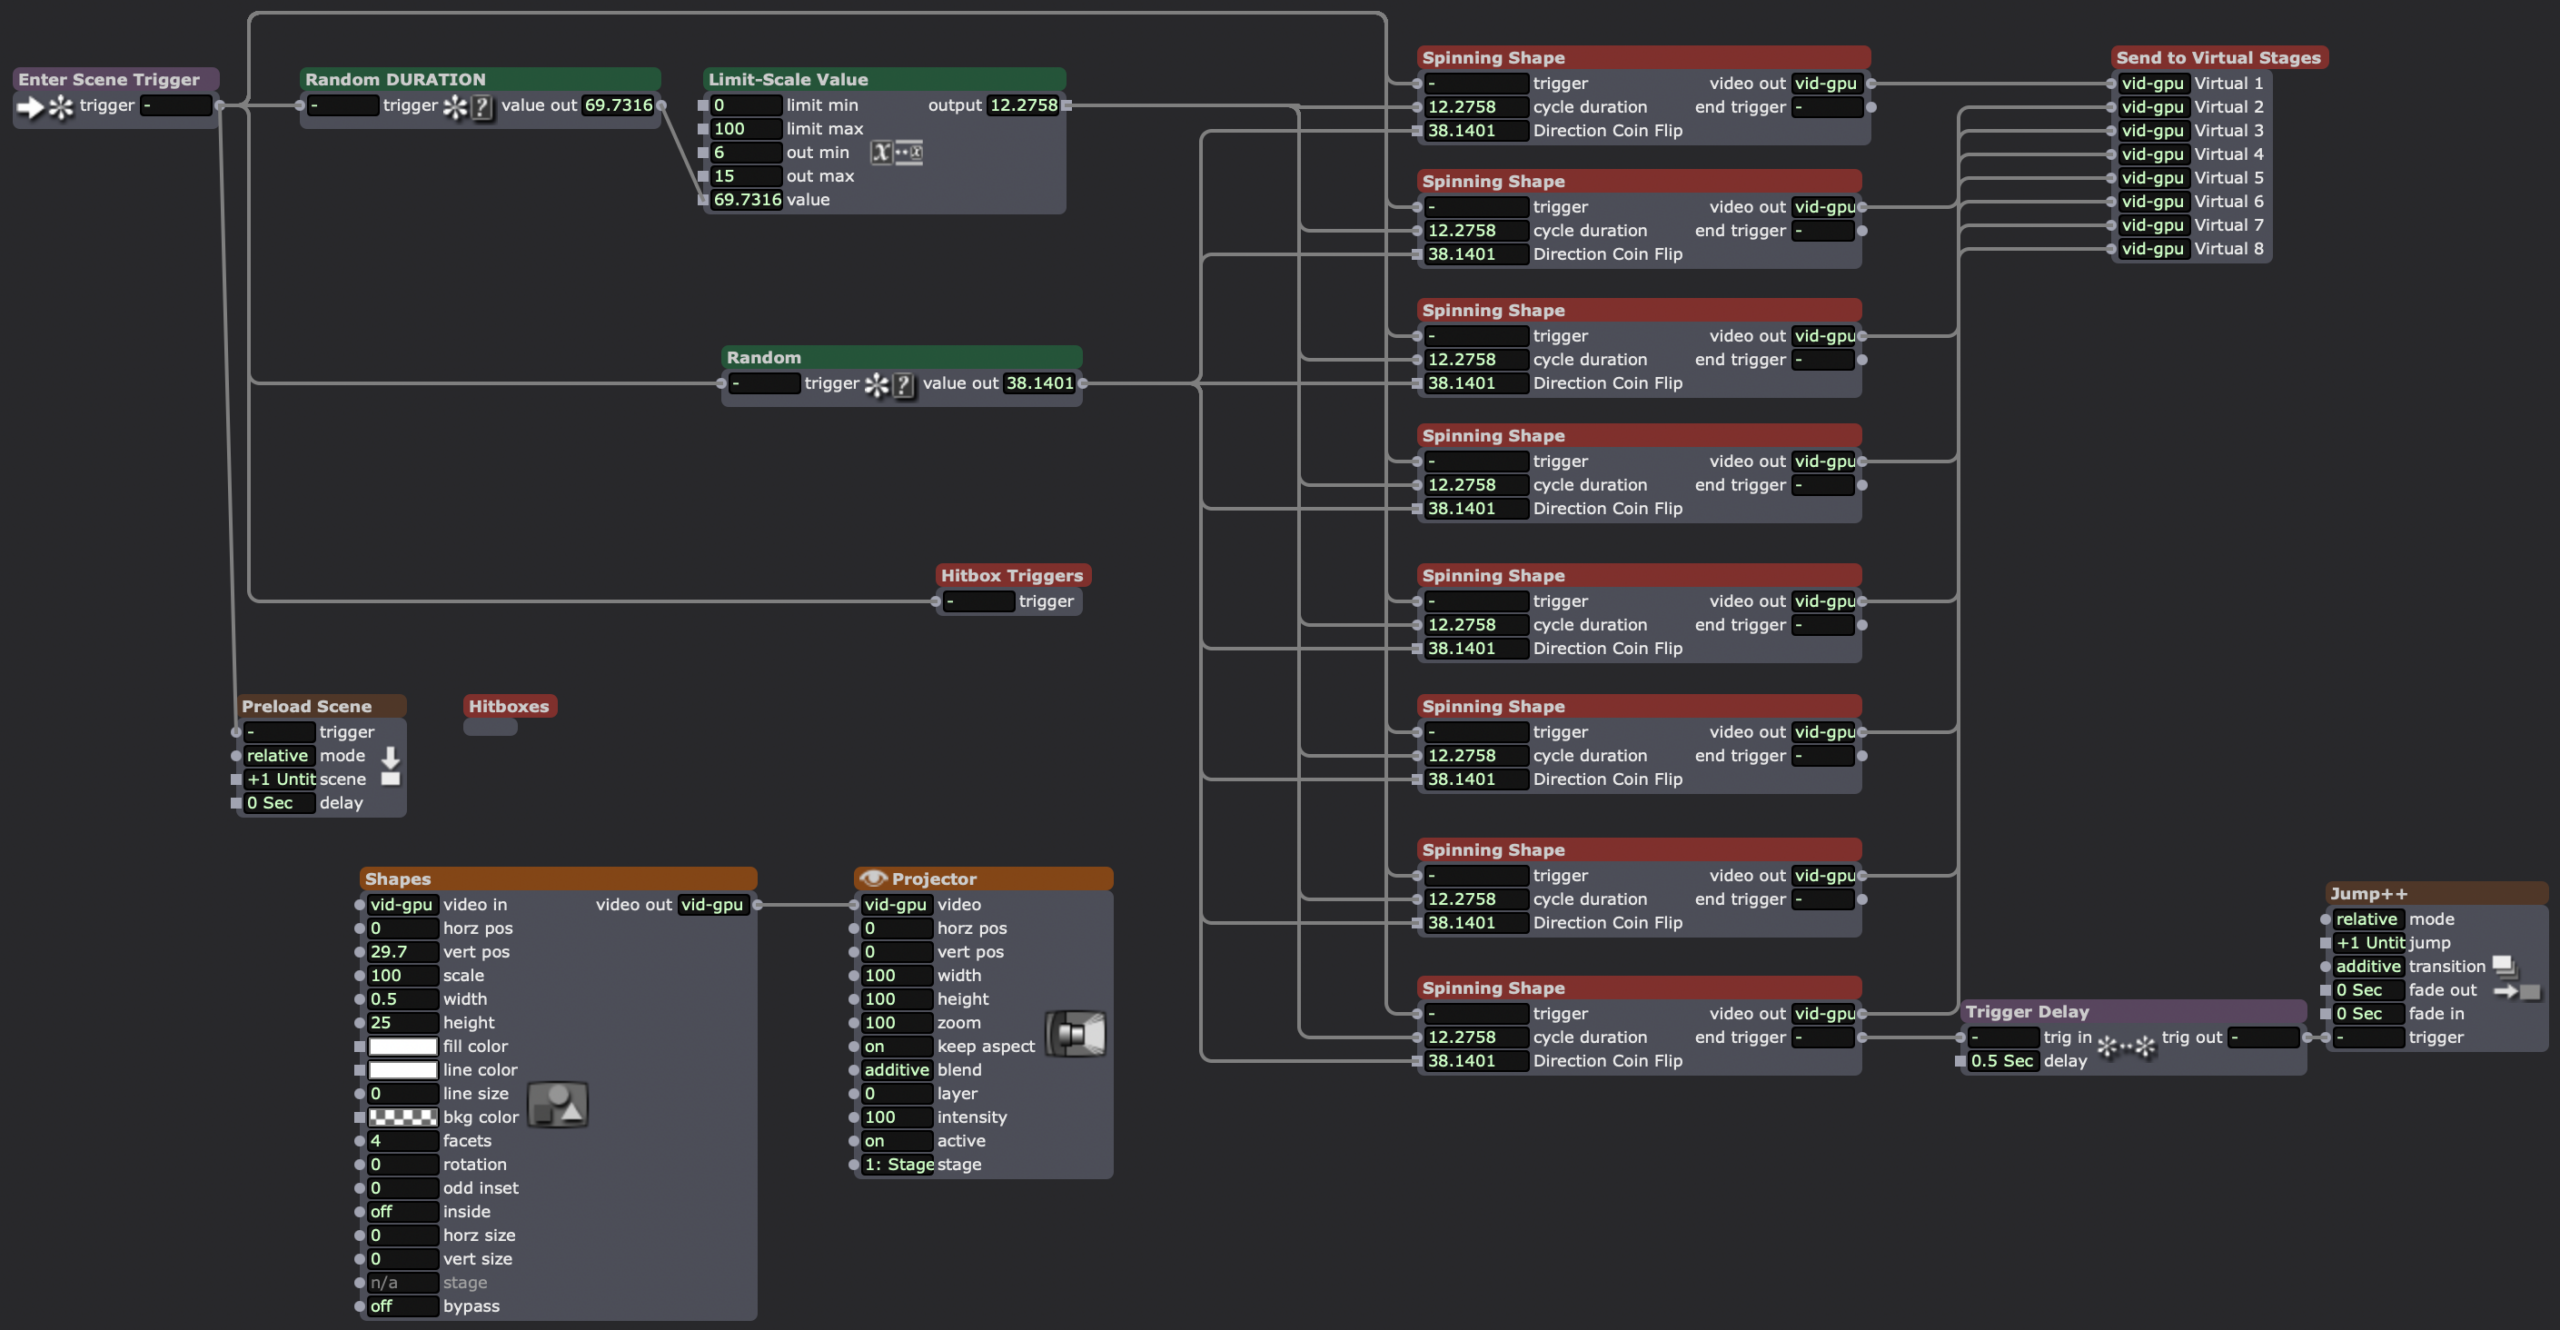
The overview of my patch, upon entering the scene, the random numbers for duration of the cycle and the direction of the spin are generated, since they’ll be applied to all of the shapes. When the cycle ends, the spinning shape user actor sends a trigger to the Jump++ actor, going to a duplicate scene, which jumps back to the first scene.
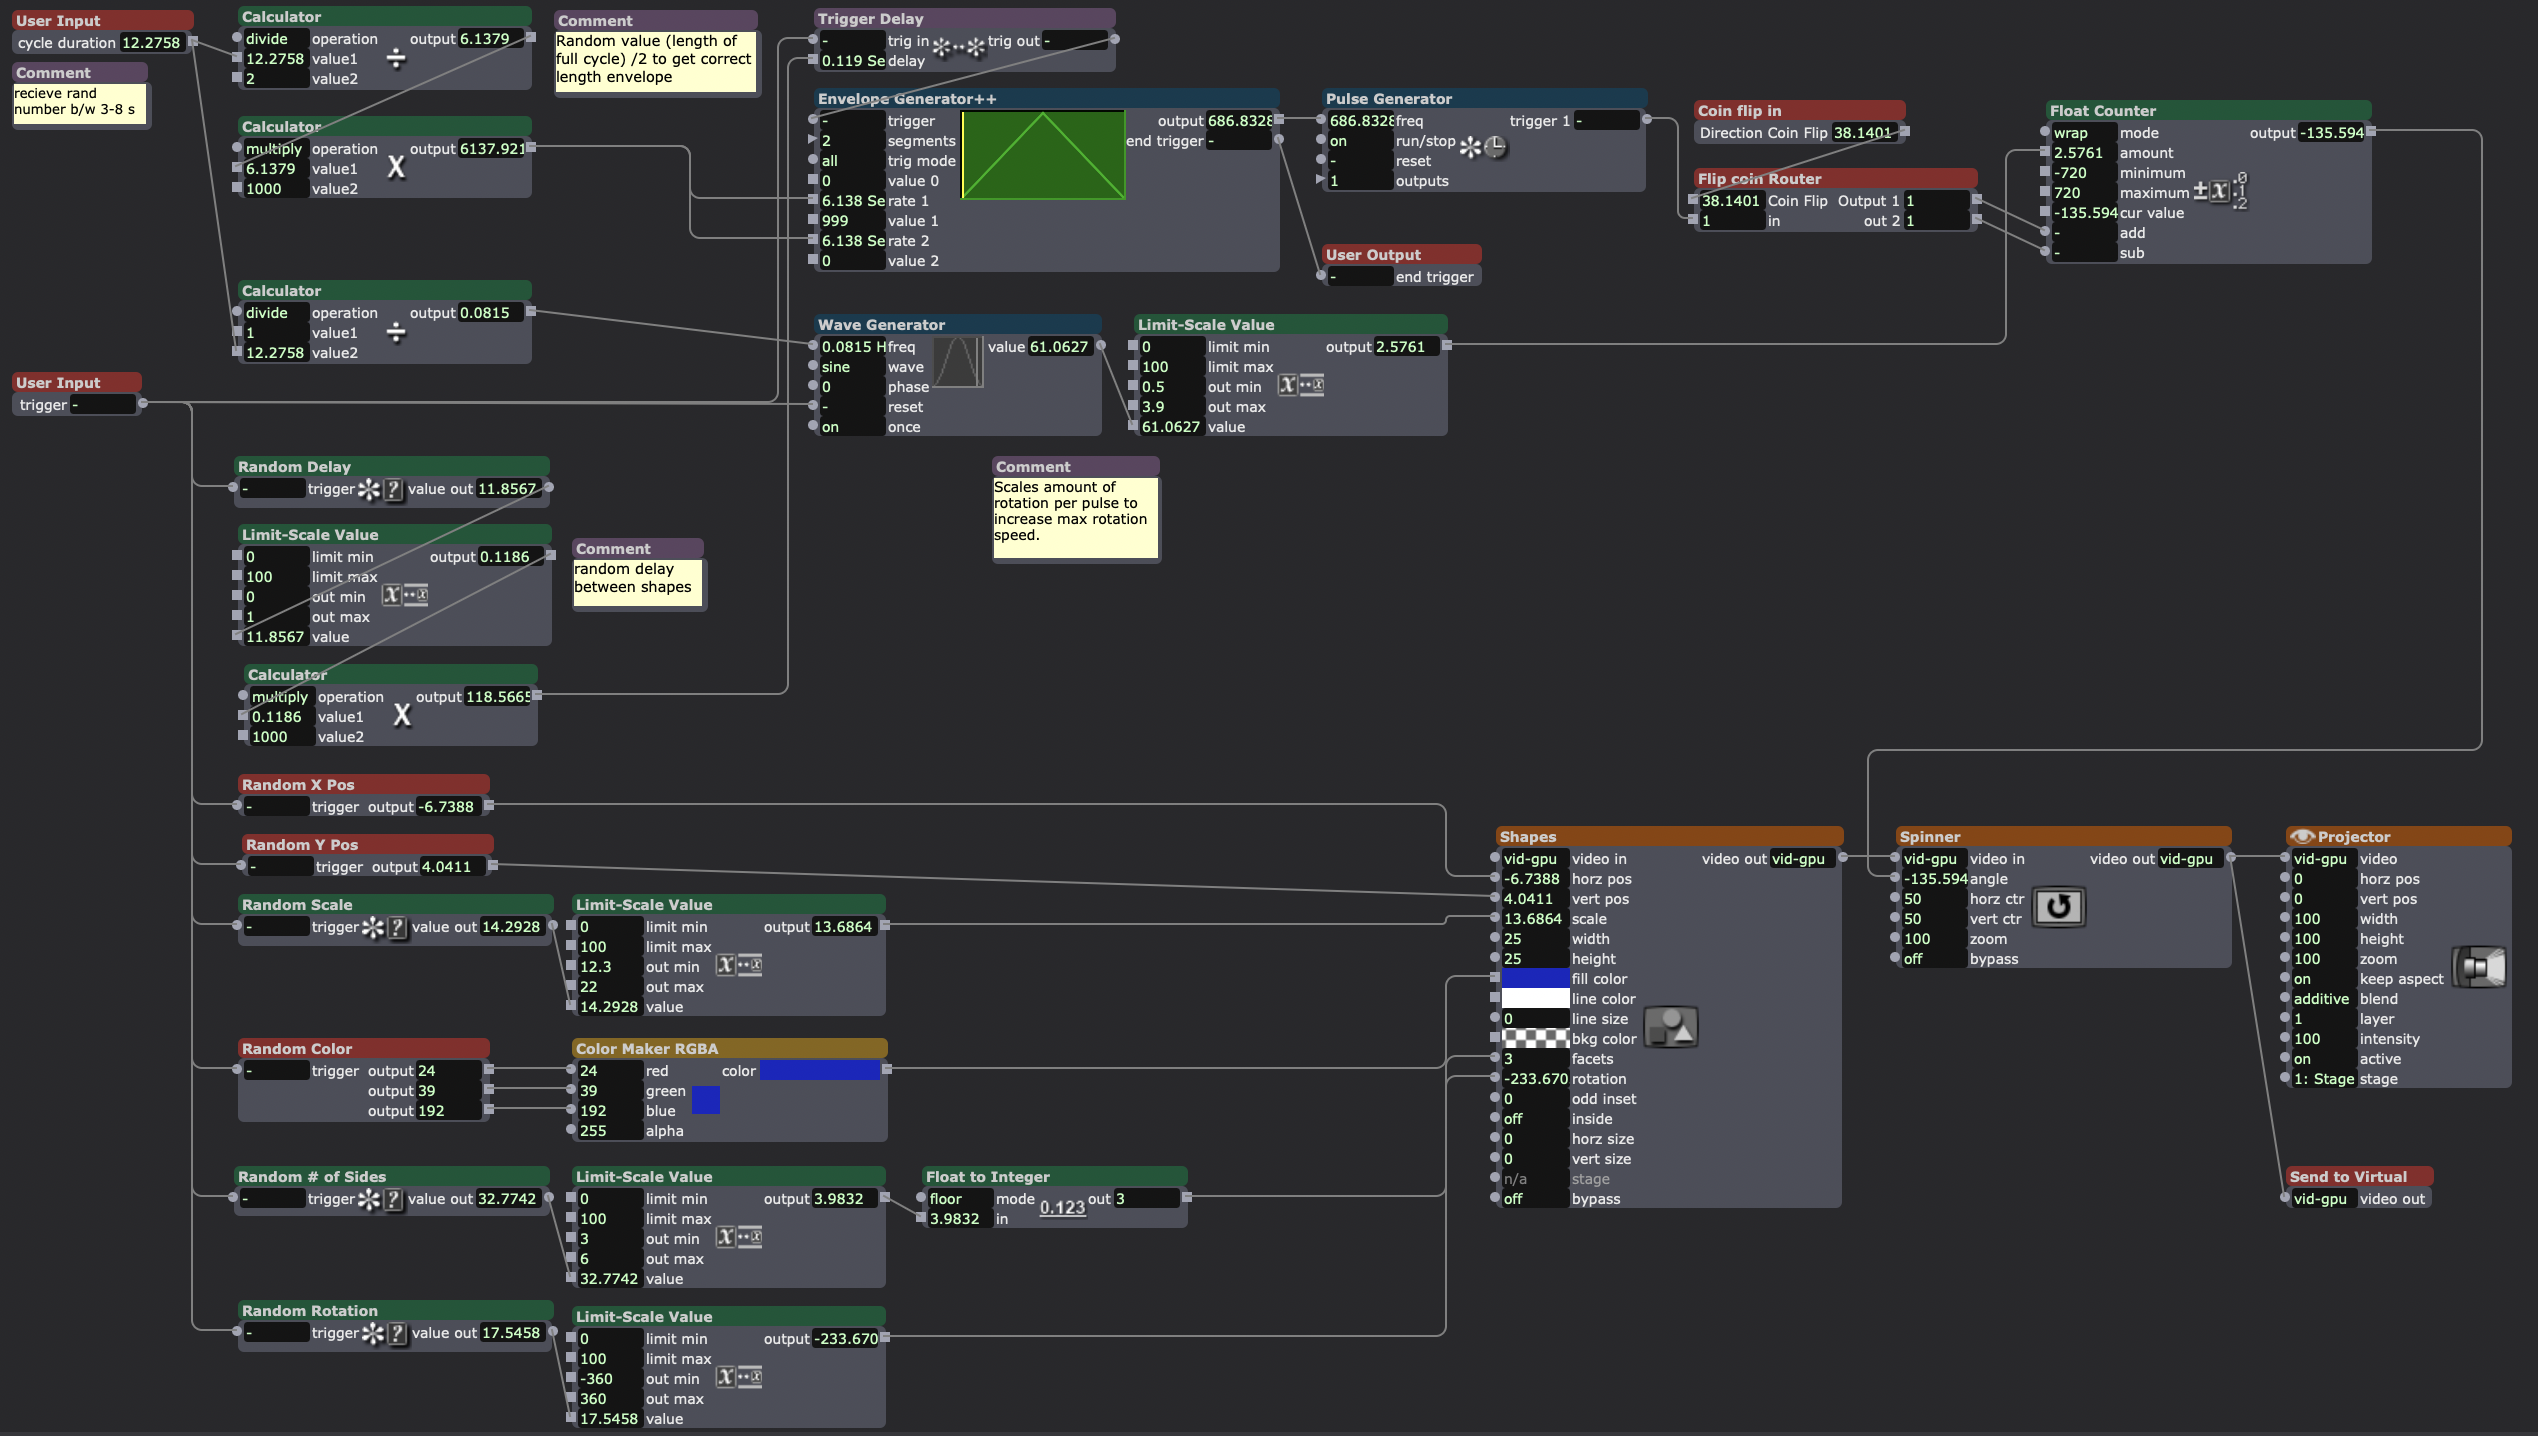
Inside my “spinning shape” actor, the final result of my original user actor sketch. The bottom 2/3rds of the screen contains the actors randomizing the attributes of the shapes actor. The top 3rd deals with spinning the shape clockwise or counter-clockwise (decided by the “flip coin router” user actor) for a cycle of random length with a random delay from shape-to-shape.
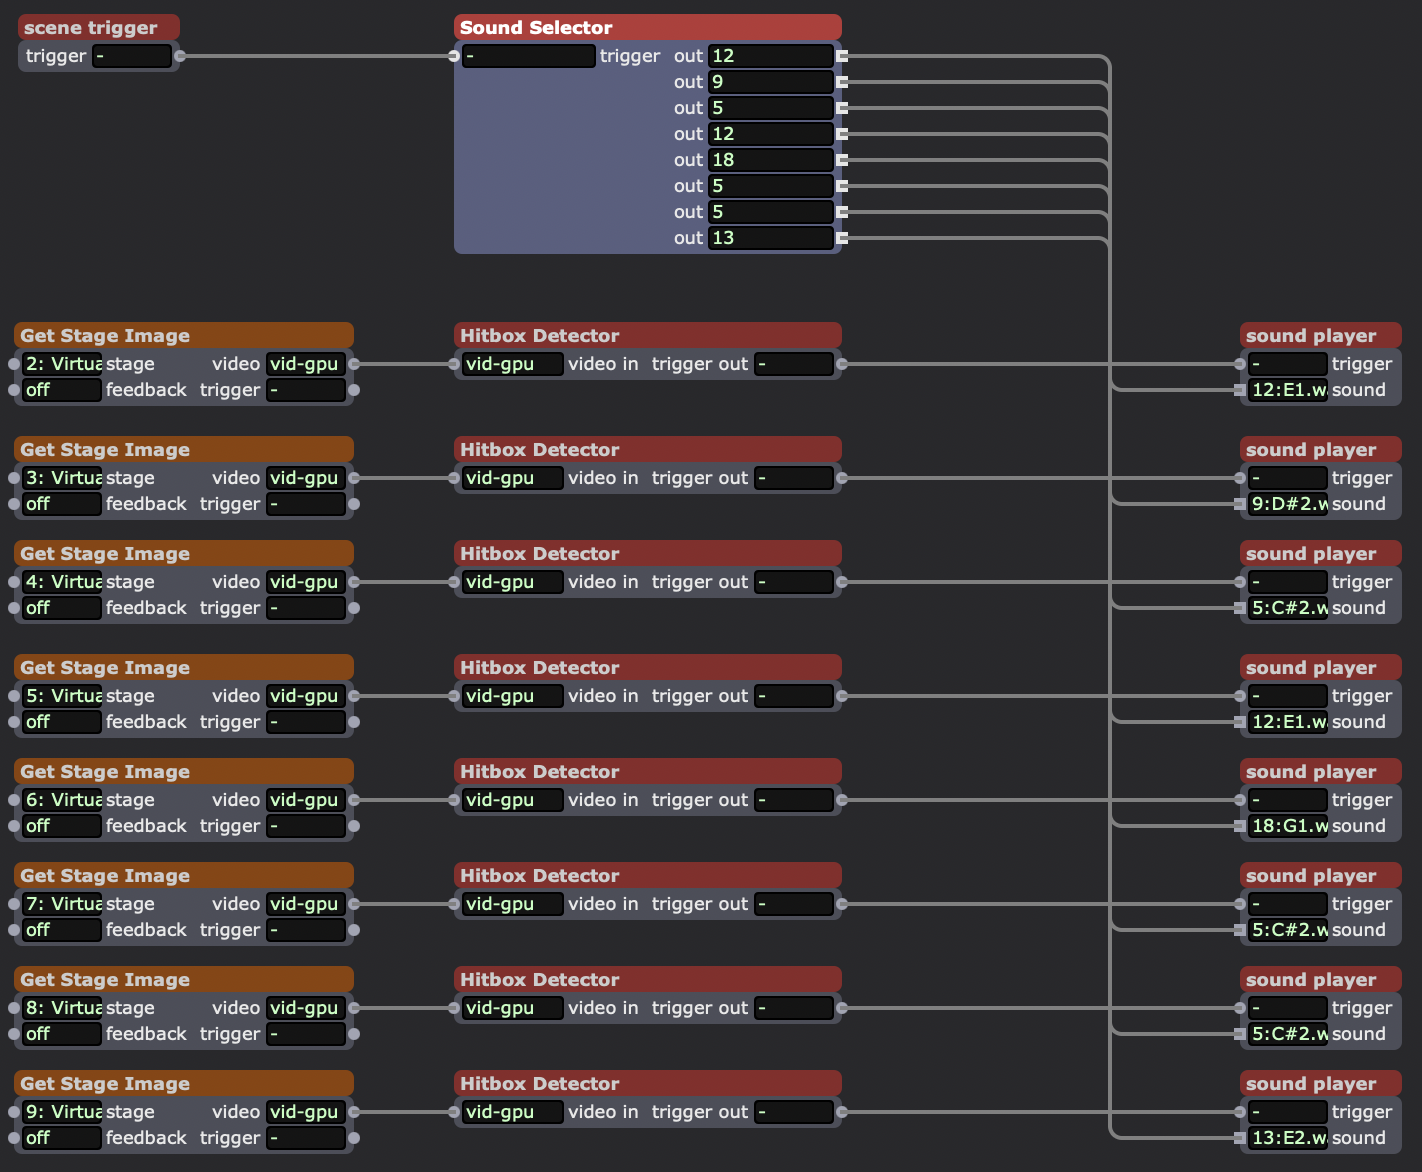
Inside my “hitbox trigger” user actor. This actor takes each shape (which has been sent to its own virtual stage) and looks for when it makes contact with a small white rectangle I sent to every virtual stage in the “hitboxes” user actor. When it makes contact, it was supposed to trigger a random sound in the “sound player” actor.
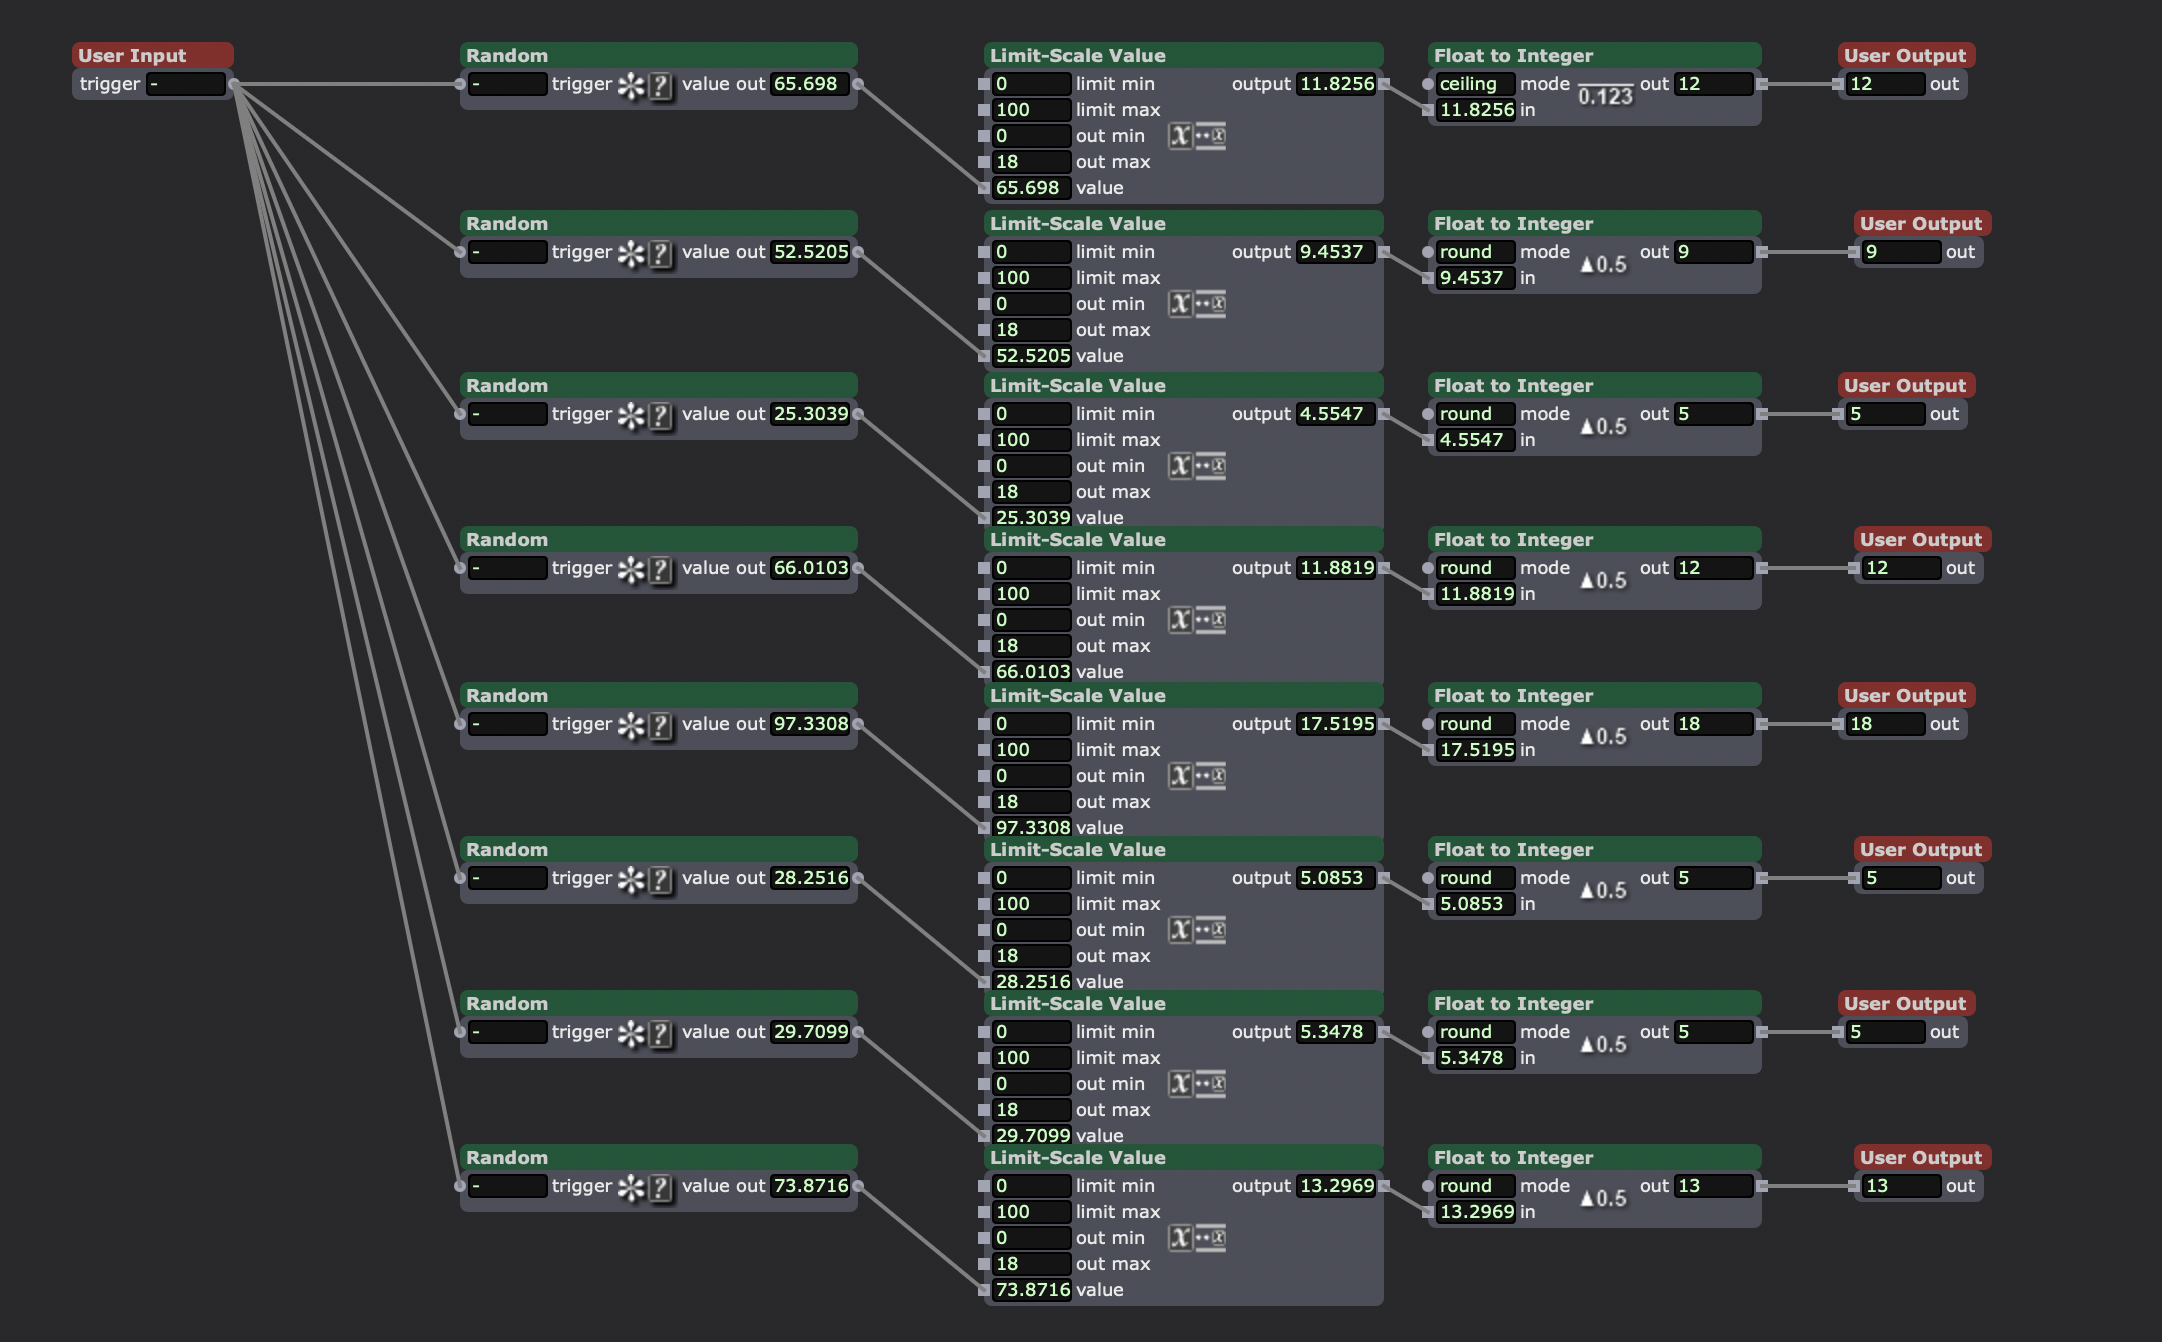
Random selection of 18 short samples of single notes. Chromatic from C3-F4.
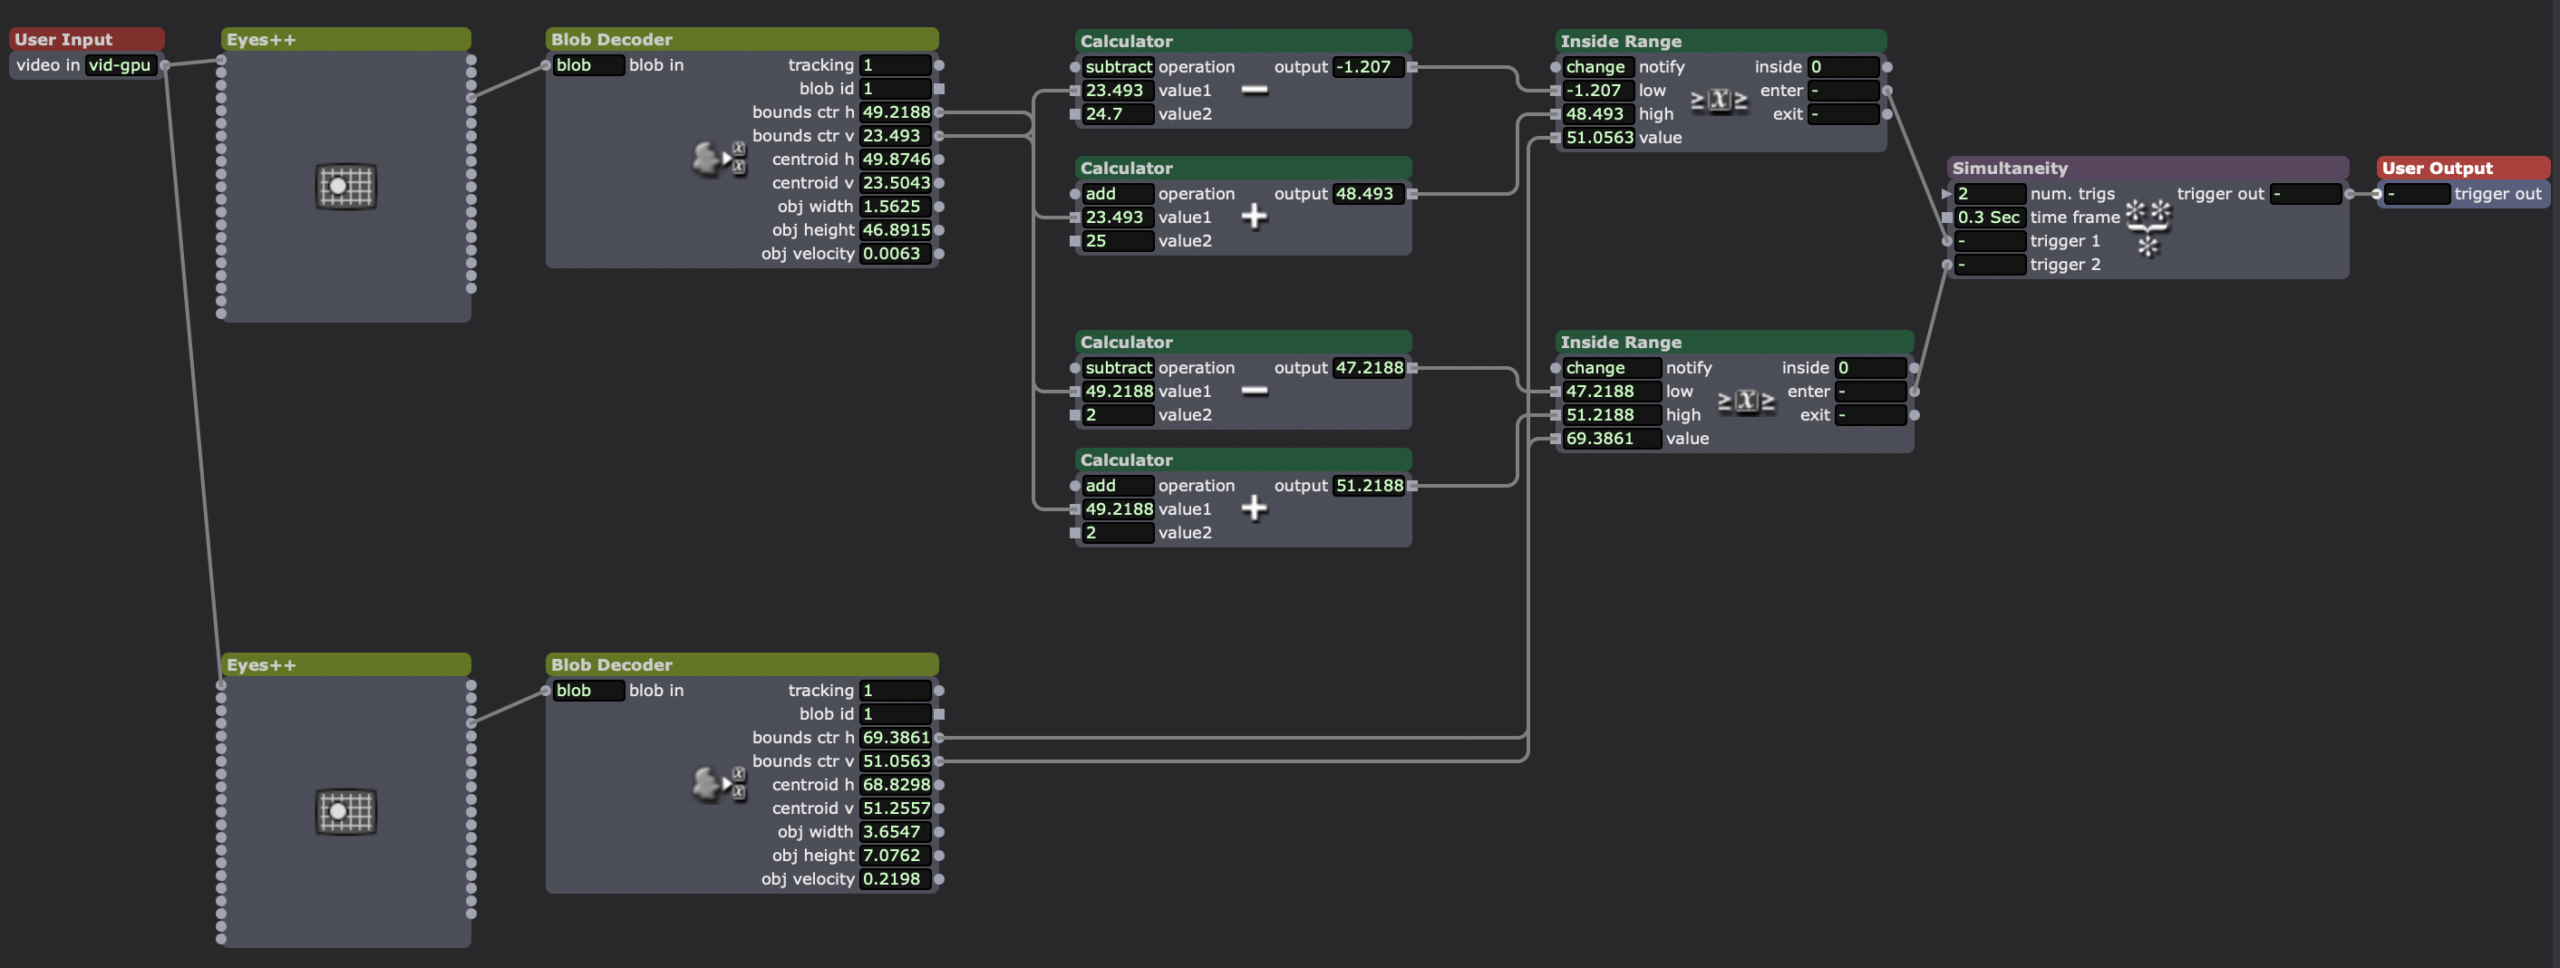
How I checked if one of the spinning shapes was inside the same area as the hitbox, sending a trigger when they “made contact.”

Sound playback user actor.
A sample of how the final version of the patch behaved. The white line (actually smaller than the hitbox) was left on screen to provide a reference for when the sound was supposed to trigger (despite it not working that way due to the high load of the patch).
Reflection
One of the best ways I managed the 5-hour time constraint was to make the sketch of my idea as seen earlier in this post. By working backwards from my initial idea to solve the problem the best I could on paper, I gave myself a framework to easily build off of later when problems or changing ideas arose. It also meant that I had a general idea of all the different parts of the patch I would need to build before I actually started working on it. This also guided what I would include/exclude in the patch.
While my patch didn’t end up working the way I wanted it to (sounds were supposed to trigger immediately when the shapes crossed the line, unlike what is seen in the above video) I was very surprised how this didn’t “ruin” the experience, and how it even created a more interesting one. With the collision of the shapes and the white line being decorrelated from the sounds, the class became seemingly became more curious about what was actually going on, especially when the sounds would appear to trigger with the collision after all. I was also interested to see the ways people “bootstrapped” meaning on to this patch. For example, Chad had noticed that in one of the scenes, the shapes were arranged in a question mark sort of shape, leading him to ask about the “meaning” of the arrangement and properties of the shapes, despite them being entirely random.
During the performance of the patch, I unlocked the three achievements concerning holding the class’s attention for 30 seconds. I did not make someone laugh, or make a noise of some sort, as I think the more “abstract” nature of my patch seemed to focus the room once it started.
Pressure Project #1 – A Walk In Nature
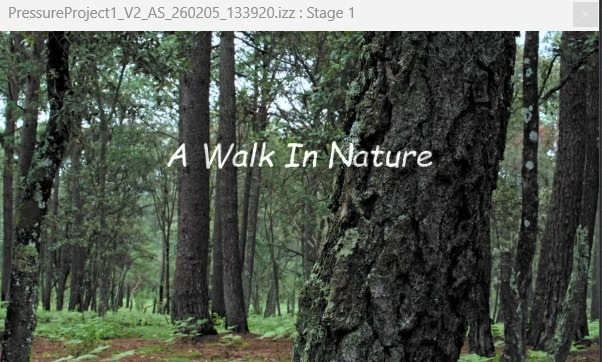
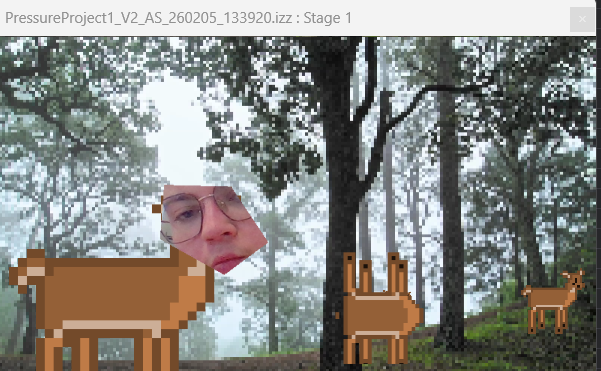
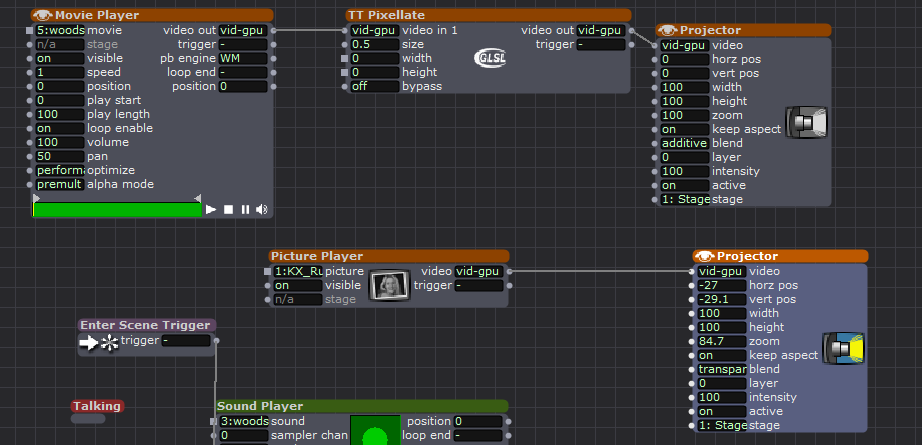
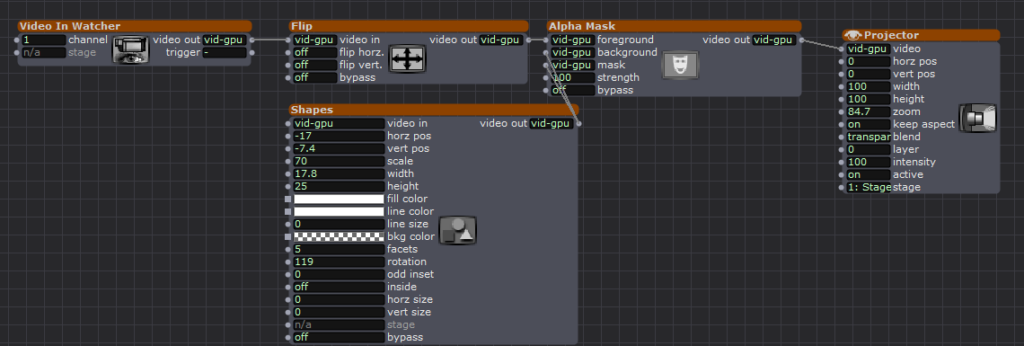
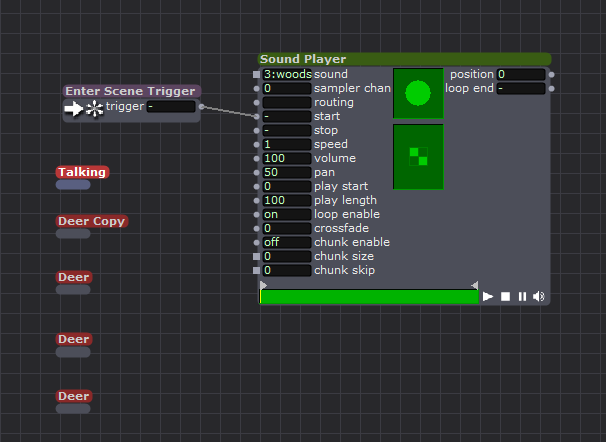
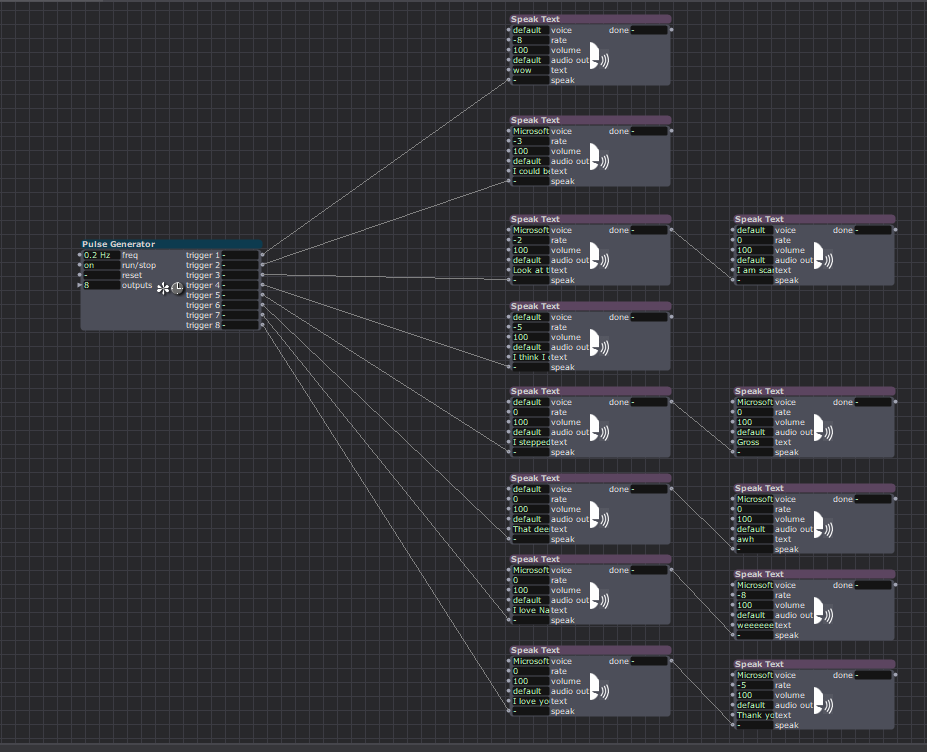
Posted: February 9, 2026 Filed under: Uncategorized Leave a comment »Description: “A Walk In Nature” is a self-generating experience that documents two individuals’ time together deep in the woods.
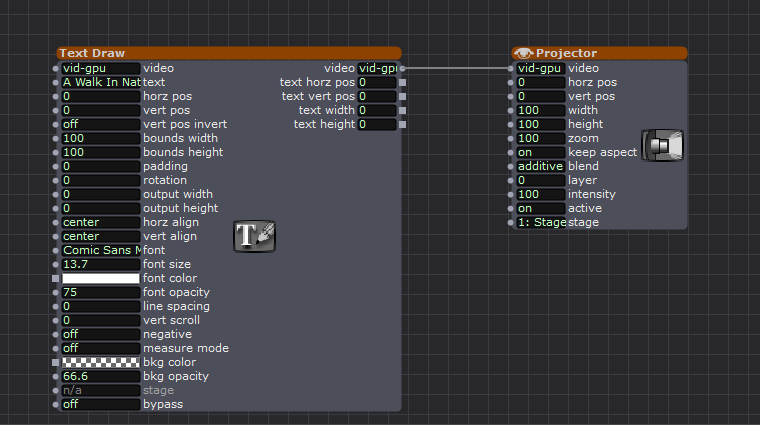
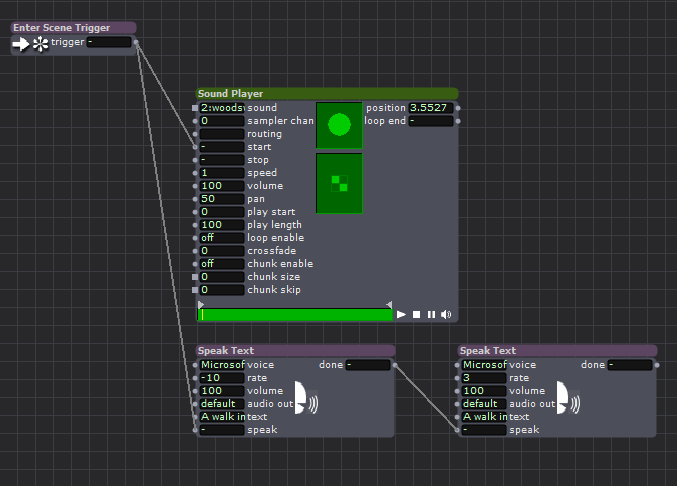
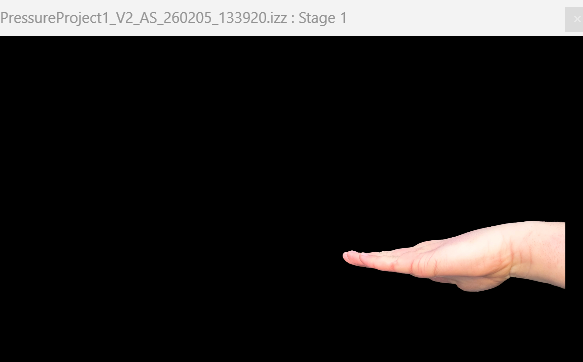
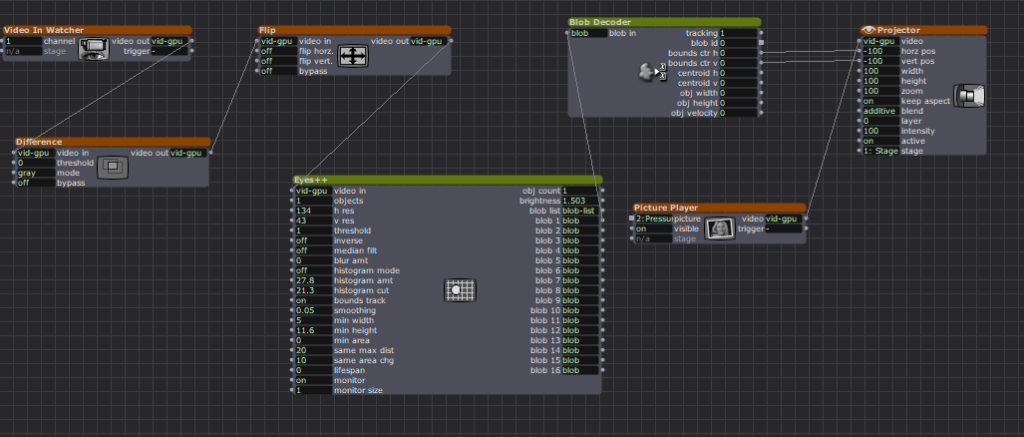
The Meat and Bones (view captions for descriptions):
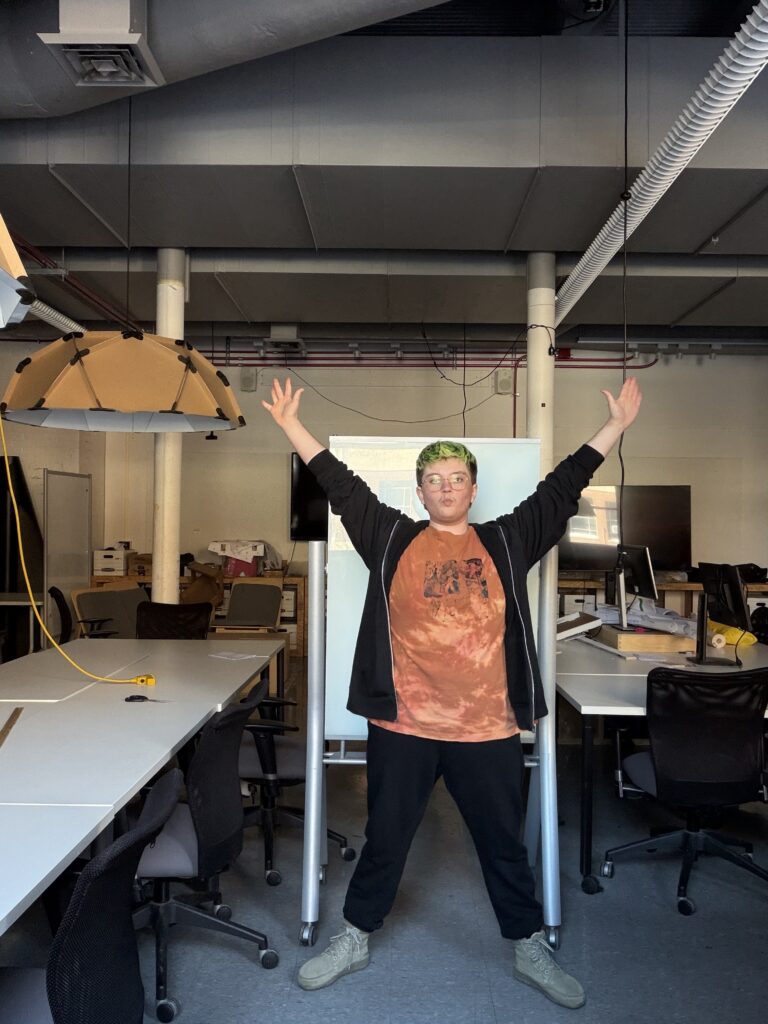
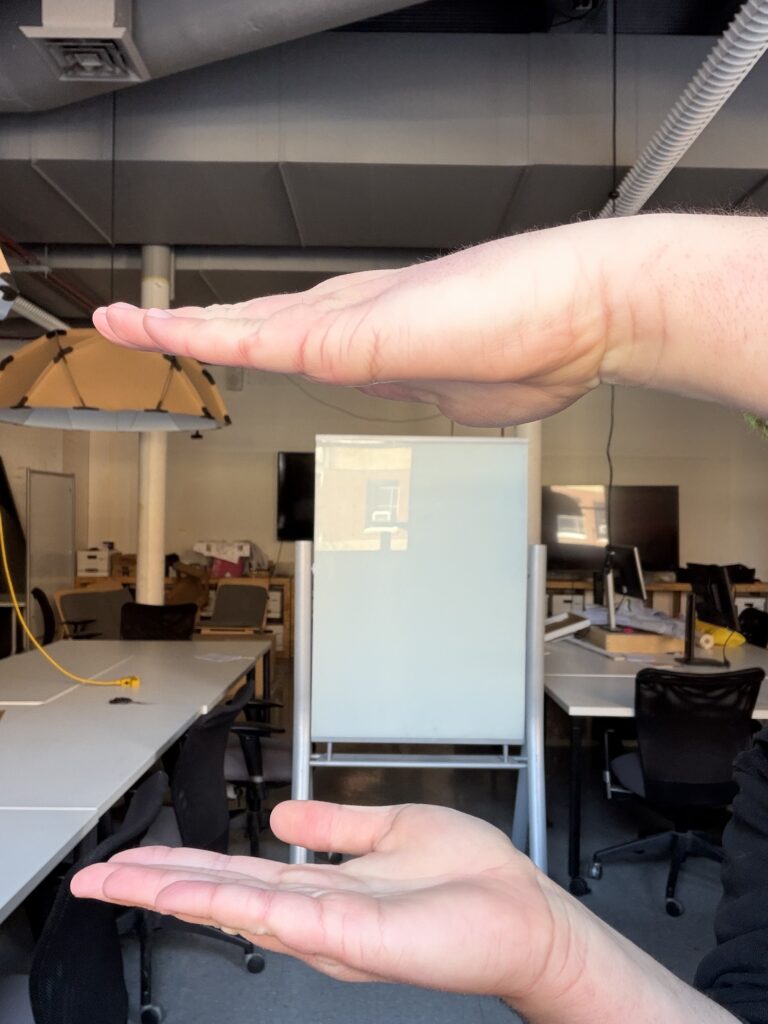
Photos I took before production (I had no real clue what I was going to do)


The Reactions:
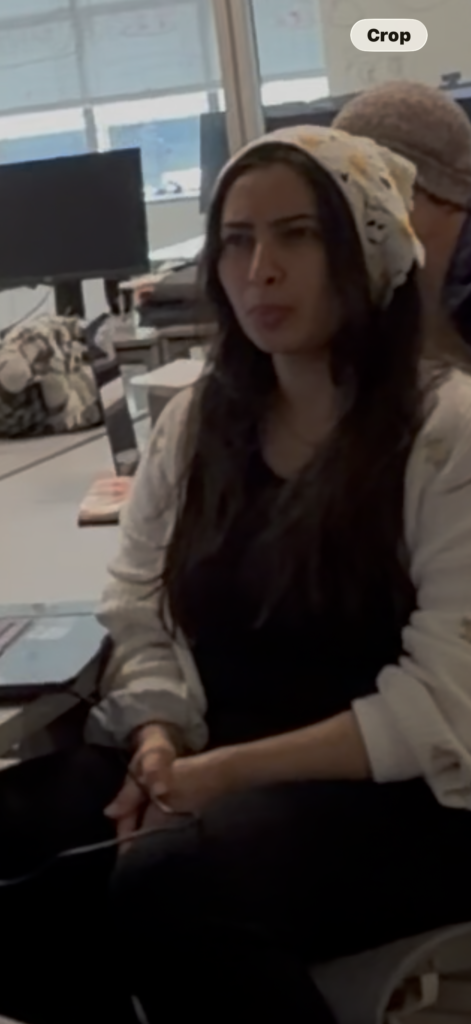
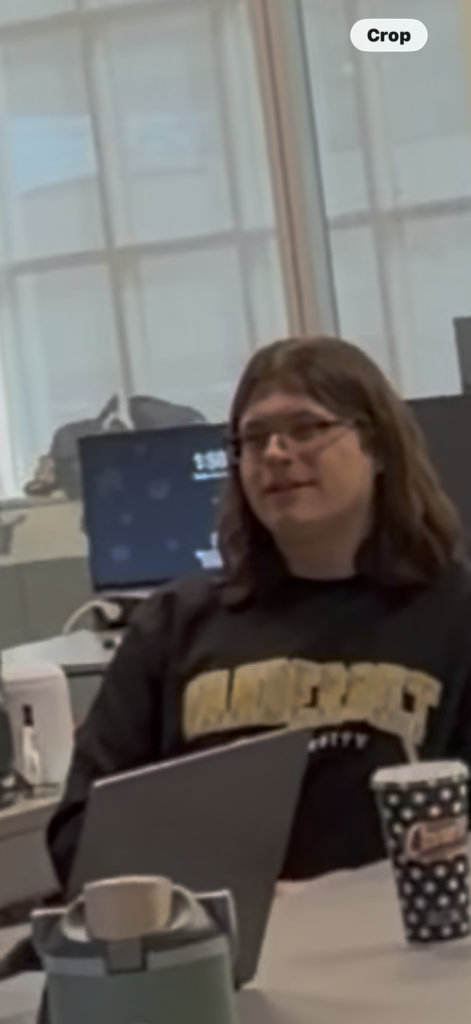
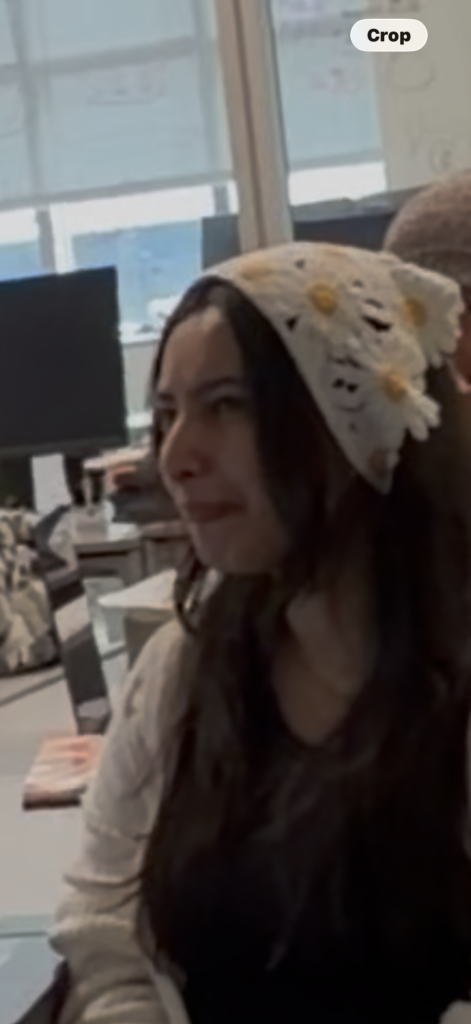

I am very thankful for Zarmeen’s presence, as I don’t know if I would’ve achieved all the bonus points without her. While I received relatively affirming verbal feedback at the end, without her talent of reacting physically, I would have felt way more awkward showing this messed-up video.
Reflections:
I was actually extremely relieved to have a time limit on the project, as I am very limited on time as a grad student with a GTA and part-time job (it’s rough out here). I loved the idea of throwing something at the wall and seeing what sticks. I chose to do the majority of the work in one setting, figuratively locking oneself in a room for five hours and leaving with a thing felt correct. I did note ideas that popped up throughout the week, but I didn’t end up doing any of them anyway.
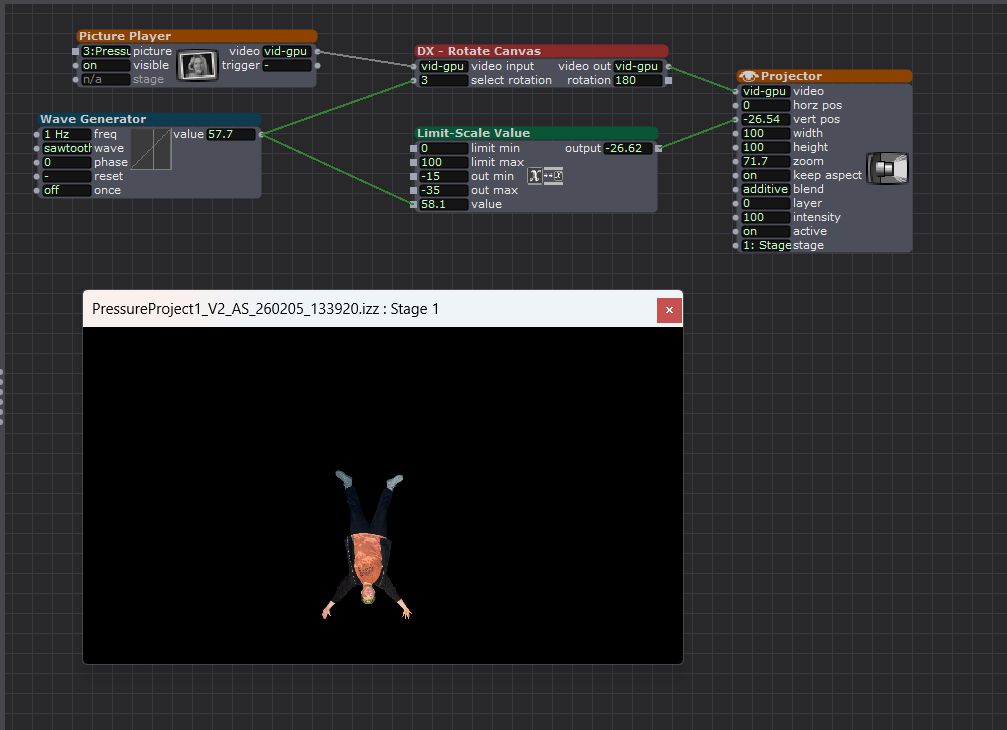
I was far too hung up on the idea of making sure people pay attention; original ideas had the machine barking orders at the viewers to “not look away”, but that felt mean. So I went with the idea of making everyone so uncomfortable that they forget to look away, like how I feel watching Fantastic Planet. Towards the last hour, I realized that aside from robots talking, I needed user interaction to make this feel whole. However, the cartwheel and petting action didn’t work out as pictured above. So what if the audience could be the deer?
The last hour was me messing with an app to use my camera as the webcam (Eduroam ruined my dreams there). So I grabbed a webcam from the computer lab the day of. (sorry Michael) I knew I was going to choose one lucky viewer to hold the camera, and choosing Alex was improvised I just thought he would be most excited to hold it. I was pleasantly surprised that there were expressions of joy while watching, as when I showed my partner, she was scared and mad at me. I am glad my stupid sense of humor worked out. 🙂
AI EXPERT AUDIT – DANDADAN
Posted: February 5, 2026 Filed under: Uncategorized Leave a comment »I chose the anime DanDaDan as my topic. I believe I am an expert in a lot of anime/manga related topics because I have been reading manga and watching anime for more than a decade now. I love DanDaDan especially because it’s one of the few series lately that’s a little different in a world of overly saturated genres like the leveling-up games. DanDaDan is a breath of fresh air and super weird and fun filled with all sorts of absurdity. So, in order to train notebook LM about this topic, I used some YouTube videos. The videos focused on the storyline, major arcs, characters, and why is it such a hit.
1. Accuracy Check
I wasn’t so surprised that it got the gist of the story correct. I did give it sources where the youtubers summarized the whole storyline and talked about its characters, arcs and resolutions. So, it wasn’t a bad generic overview, I would even say it was good for a summary. It’s only when you’ve been thoroughly into a certain subject area that you start understanding the nuances and tiny details of it. I think it didn’t say something outright absurd if we were to talk about what it got wrong. It’s just that it sometimes mispronounced some names. With the names being Japanese, I am not surprised that they might be mispronounced, but the AI used a range of mis-pronunciations for the same name.
One of the voices in the podcast was too hung up on making the story what it is not. I mean sure it was justified at some points but it insisted that the real ideas behind this absurd adventure-comedy are deeper themes like teenage loneliness, and that it’s actually a romance story while it’s not. (It’s a blend of scifiXhorror) Sure there are sub-themes like in all anime, but it’s not the main theme. The other voice sometimes did agree with this idea. The podcast was not focused enough on just keeping it fun and light- which is what DanDaDan really is.
2. Usefulness for Learning
If I was listening to this topic for the first time, I feel like this podcast wouldn’t be a bad starter. Like I mentioned earlier, it gave a pretty decent summary of the whole plot. I think it definitely gets you started if you need a quick explanation of a subject area. I found the mindmap to be pretty decent too. It was a decent overview of the characters and the arcs. The infographic on the other hand… so bad. The design is super cringe and again, a lot of emphasis is on the romance and how it drives the action. Which I disagree with.
3. The Aesthetic of AI
Overall, the conversation was SO very cringe, and it was very difficult to get used to it in the beginning. I used the debate mode and they were talking so intensely about a topic that’s just nowhere as serious as the AI made it out to be. I had to just stop and remind myself it’s just a weird, fun anime they’re talking about. AI has this tendency to make everything sound intense, I guess.
4. Trust & Limitations
I would recommend AI to someone who wants a quick summary or overview of a topic. It’s what the AI is good at. What I wouldn’t recommend is to dwell on the details that the AI talks about. If anyone wants details or wants to form an opinion about a topic, they should look into it themselves.
Link to the podcast:
AI-Generated Visuals:
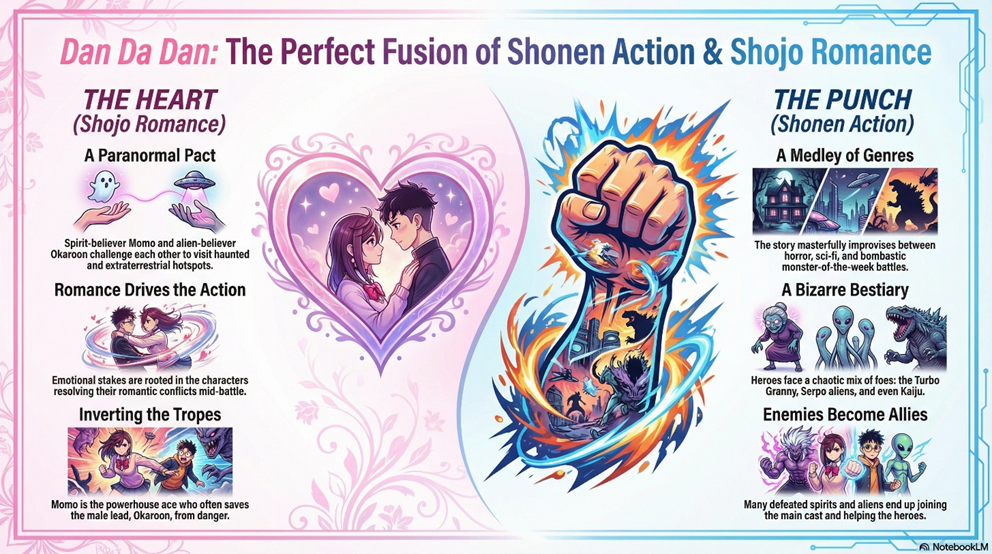
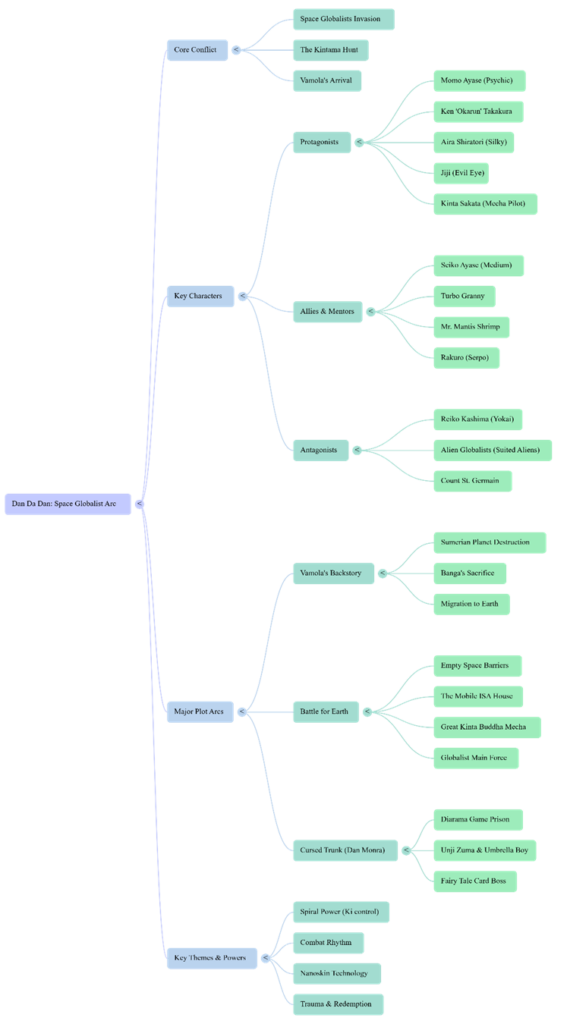
Sources:
https://youtu.be/8XdTF5tnMVU?list=TLGG7J2IoA7cY1QwNTAyMjAyNg
AI Expert Audit – The Elder Scrolls
Posted: February 5, 2026 Filed under: Uncategorized Leave a comment »Source Material
Since for my topic, I chose to pick a game which already has a wealth of in-universe literature written, my primary source was a pdf of every book that exists in the series, found at LibraryofCodexes.com. I also chose to upload a small document I found giving a general timeline of the series and its history, as well as a short video covering the history of the world.
I chose this topic as over the course of the last 10 years, I’ve likely played up to (or over) 1000 hours of these games over 3 different games. Even more so, I’ve listened to countless hours of videos doing deep-dives on the world’s lore as background videos while working or driving. I think the reason I find myself so drawn to it is the relationship between world-building and experience in RPGs. As I learn more about the world, the characters I play can have more thought out backgrounds and motivations, improving my experience, which makes me want to learn more about the universe. I was also interested to see how the AI would handle sources not about the game itself, but rather about a range of topics that exist *inside* the game.
The AI-Generated Materials
Podcast
Prompt: Cover a broad history, honing focus on the conflict between men and elves
Infographic
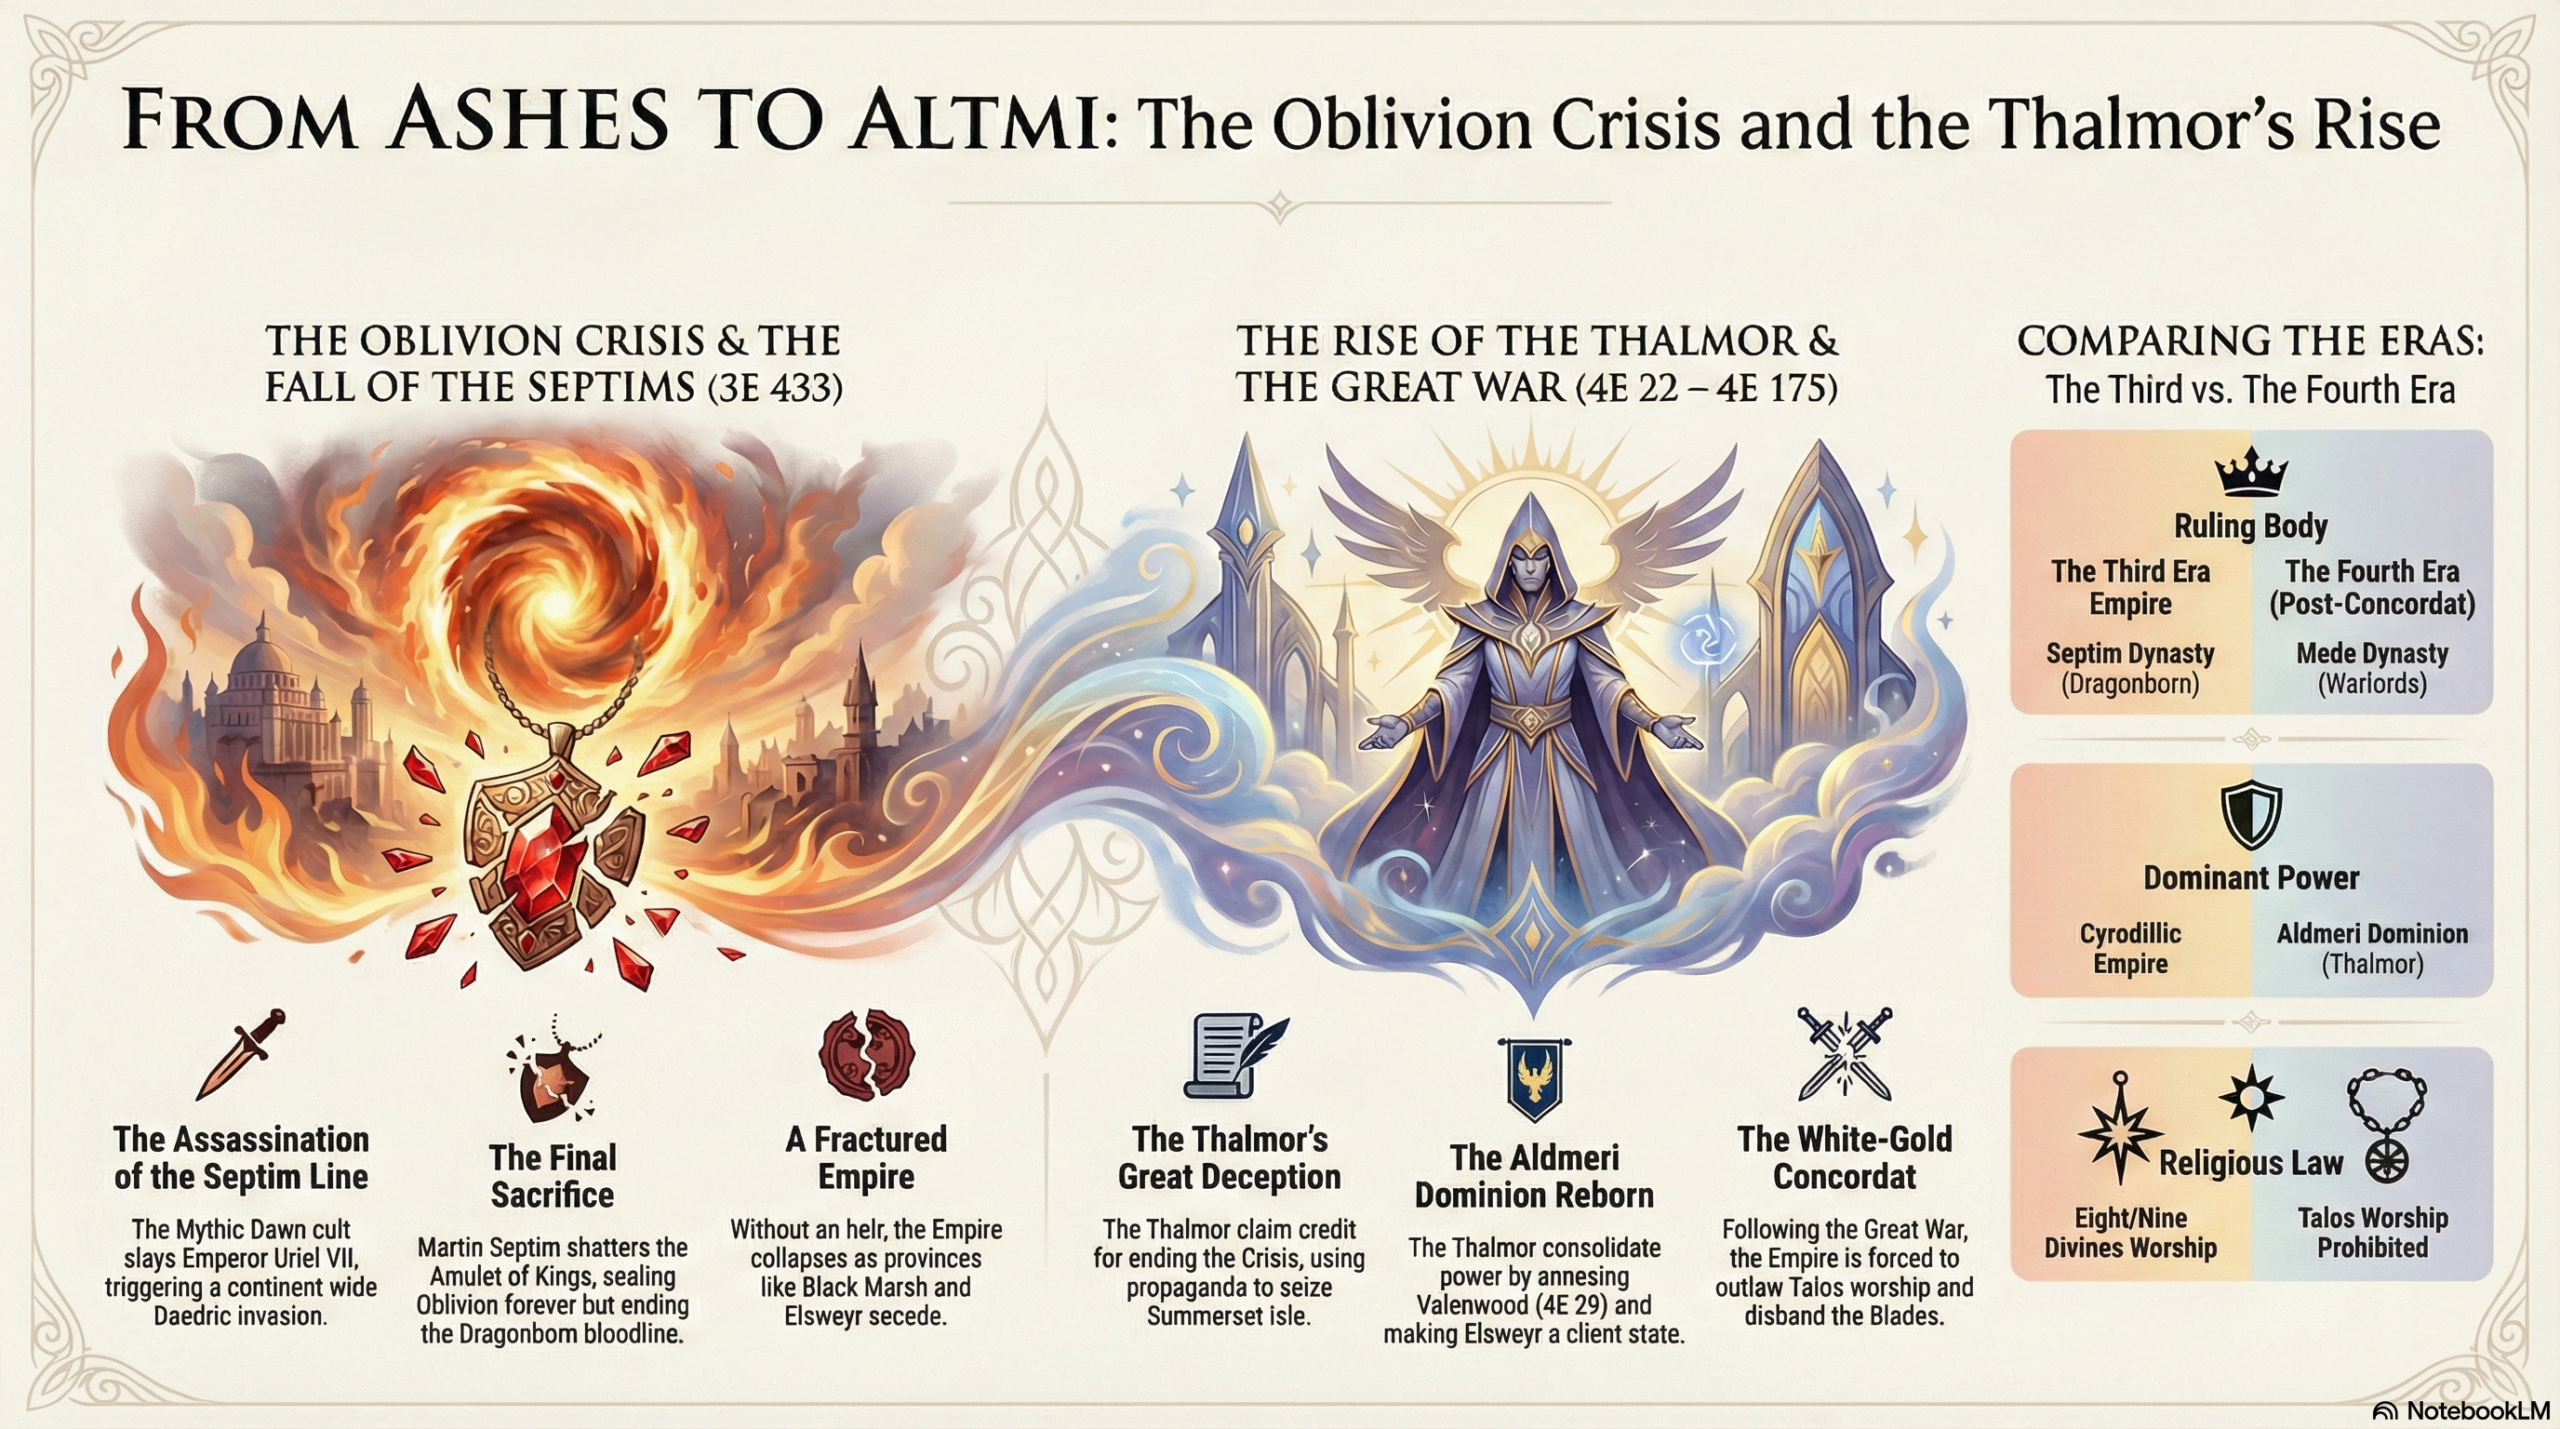
Prompt: Make an infographic about the Oblivion Crisis and how the High Elves capitalized on it.
Mind Map
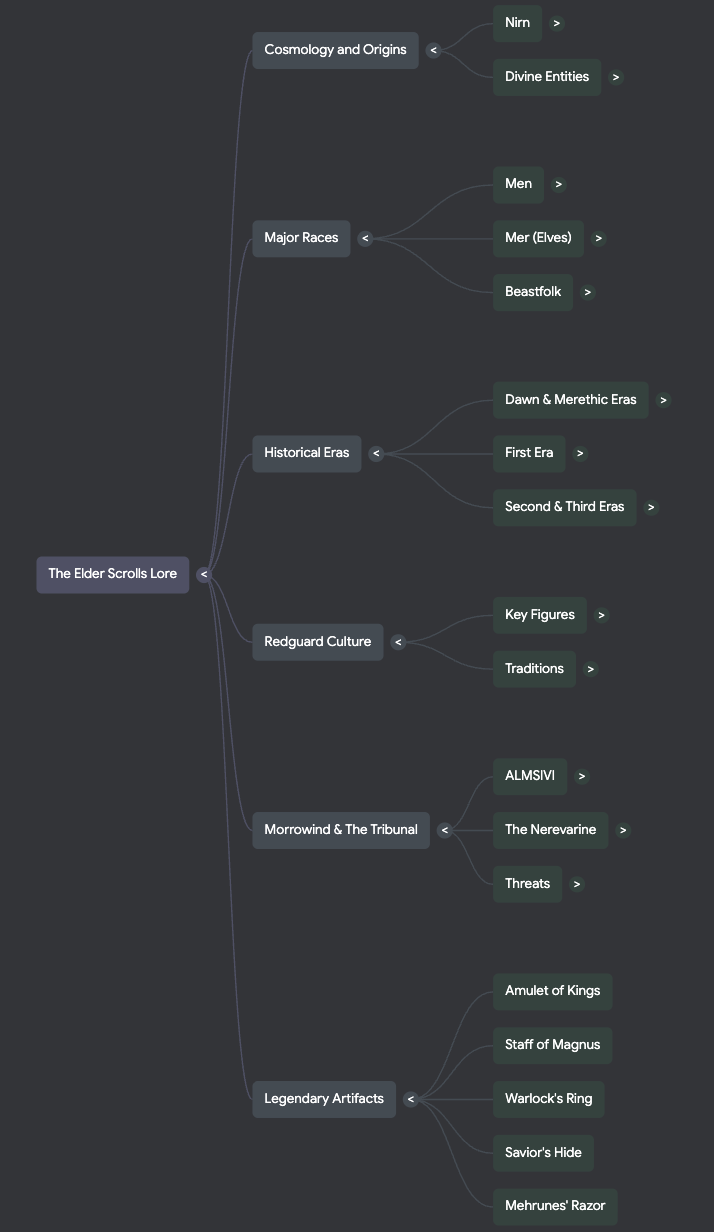
Audit
1. Accuracy Check
Overall, the AI got a lot right about the historical origins and monumental events in the world of the game. There are some topics that are somewhat confusing that I was surprised it got mostly right. It didn’t get much wrong, but it did make a few strange or even incorrect over-generalizations. For example, in the podcast it said that the difference between the two types of “gods” in this world is “the core takeaway for how magic works”, which it is not. Even weirder, it got the actual origin of magic in the games correct later on.
2. Usefulness for Learning
I do think that these sources would be incredibly useful for someone with no prior knowledge of this series to easily learn about the world they exist in. The podcast does a good job at simplifying the most important events for understanding what’s happening and the motivations of different factions. However there are a lot of nuanced ideas that it completely misses, which could be due to the length being set to normal. The mind map does a really good job at connecting important ideas of the universe together. However, it also places too much importance on certain topics, such as a handful of weapons, only one of which has any real importance to the larger plot. Lastly I thought that the infographic did a nice job at laying out the events that I prompted it to, but there were a few spelling errors.
3. Aesthetics of AI
One of the strangest things I encountered doing this was the ways that the AI would try to make itself sound more human during the podcast. For instance, it would stutter, become exasperated at certain abstract topics, and even make references to memes not found in the sources. The AI definitely has a certain voice to it. I don’t know how to exactly describe it, but in the podcast it seems to talk like everything it mentions is the most important thing ever, and the other AI “voice” always seems to be surprised at what the other one is saying. I actually thought that the AI did a pretty good job at emphasizing the same things a human expert would. However it somewhat glosses over the actions of the player characters during the games, which I think a person would focus a bit more on.
4. Trust and Limitations
From this, I would probably warn a person against trusting the importance the AI might place on certain topics as well as the connections it makes between topics in generated educational materials. It also seems to avoid any sort of speculative ideas whatsoever, which I found odd since there were books in the sources which do theorize on certain unknown events or topics. I’d say the AI seems the most reliable in taking the information you give it and organizing it into easily consumable chunks. However, this only seems to be at a surface level, and when it tries to draw conclusions about topics, it tends to fall flat or make incorrect assumptions. I think in this case, you’d be better off just watching a video someone has already made on the games.
AI Expert Audit: I made Notebook LM theorize about Five Nights of Freddy’s
Posted: February 4, 2026 Filed under: Uncategorized Leave a comment »The Source Material (I kind of went too far here):
we solved fnaf and we’re Not Kidding
https://www.reddit.com/r/GAMETHEORY/
How Scott Cawthon Ruind the FNAF Lore
https://freddy-fazbears-pizza.fandom.com/wiki/Five_Nights_at_Freddy%27s_Wiki
https://www.reddit.com/r/fivenightsatfreddys/
GT Live react to we solved fnaf and we’re Not Kidding
My Source Material, Why Did I Choose This?:
I actually chose materials that weren’t important to me, but they were when I was younger. I love listening to video essays and theories on various media. Whenever I was animating or doing a mundane art task in my undergrad, I would have that genre of video in the background to take a break from listening to the news (real important shit). It’s super silly stuff, but when I was a teenager, Game Theory first started getting BIG; seeing a huge channel discussing my favorite IPs, subverting and contextualizing their narratives felt very important. It really validated my feelings that video games were art.
However I am now grown, and I care far less about Five Nights of Freddy’s, now it feels like fun junk food for my brain. (Although teens and kiddos still care about the spooky animatronics, so it’s been a clutch move when bonding with the youths when I was a nanny.) I also hate AI, I hate it. I don’t hate automation; it makes life way better when done currently. I don’t think “AI” is done correctly; it’s mostly bullshit even down to the name. It’s a marketing strategy giving excuses to companies to fire workers and build giant databases that poison the land. I did not want to give Notebook LM anything “meaningful”. I didn’t want to let it in on the worlds I care about on my own volition. So, I gave it the silly spooky bear game that I know way too much about.
The AI Generated Materials
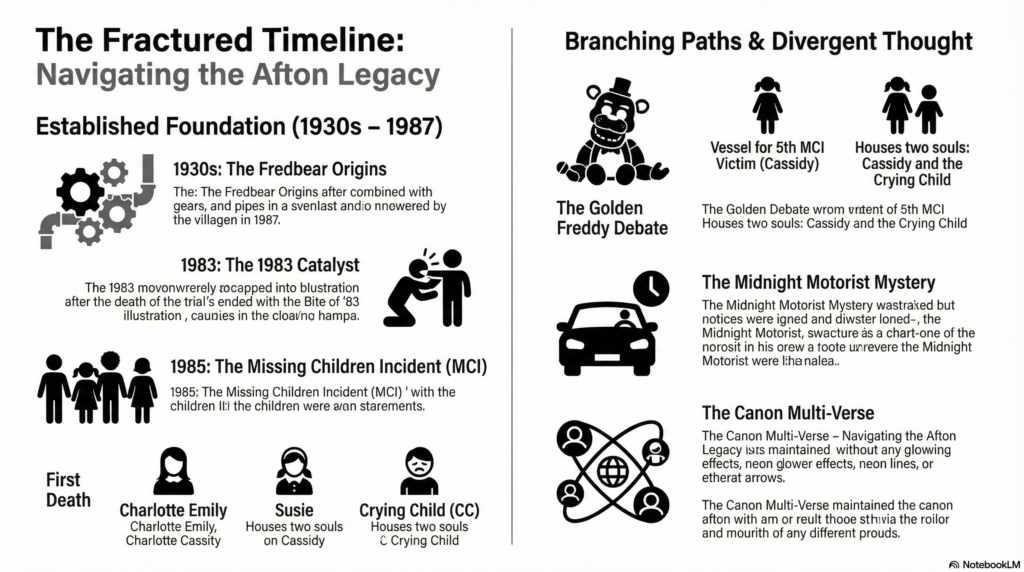
“Create an info graph of the official Five Night of Freddy’s Timeline with the information presented. Creating branches of diverging thought alongside widely agreed upon information.”
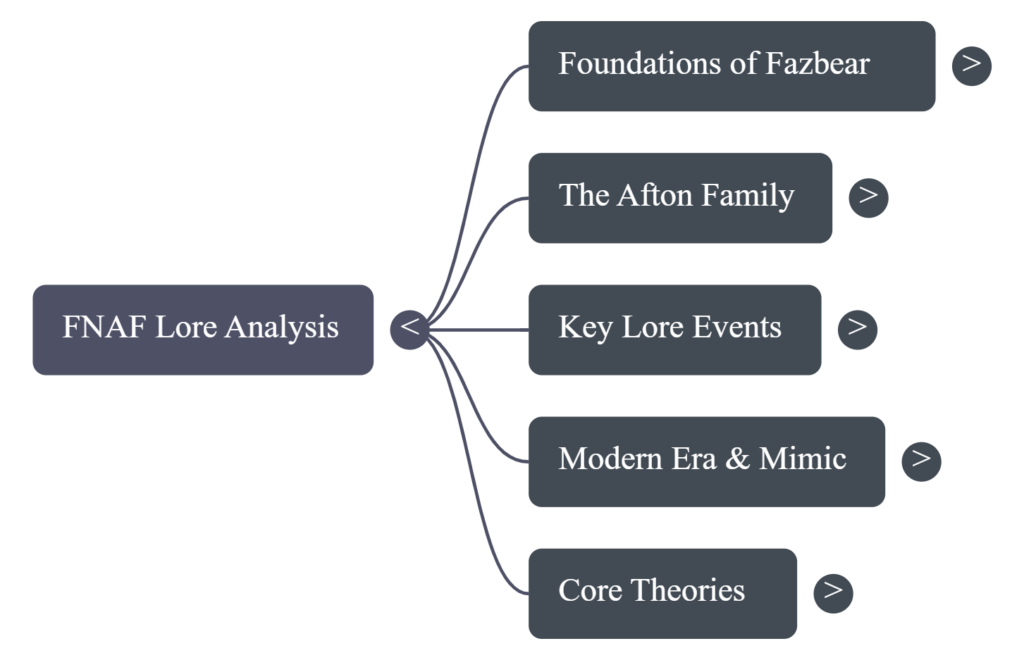
“Form a debate on what Timeline is the canon for FNAF.
Each host has to make their own original timeline.
Both hosts should sound like charismatic youtubers with dedicated channels to the video game and it’s lore.
Both Youtubers should use the words often associated with the Fandom and culture of FNAF.
Both hosts you have distinct personalities and opinions from one another.
Both hosts will have different opinions on whether the books should be used in lore making.”
1. Accuracy Check
What did the AI get right?
The basics. It was able to categorize the general hot topics (e.g., MCI or the Missing Child Incident, The Bite of 83’ and 87’, The Aftons…). It sometimes would match what theory goes with what Youtuber. It’s pretty efficient in barfing out information in bullet point fashion.
What did it get wrong, oversimplify, or miss entirely?
The transcripts from the videos aren’t great; they don’t separate who is saying what, so when trying to describe the multiple popular theories out there and how they conflict, it struggles. When I had it made an audio debate where two personalities choose a stance to argue about from the materials I provided. It was pretty much mincemeat. Yes, both were referencing actual game elements but in ways to make no sense to the actual theories provided, the “hosts” argued about points no real person would argue about. In the prompt, I instructed one personality to use the books as reference while the other did not, and it took that and made 70% of the podcast arguing about the books. The mind map struggles to clarify what theory is and what is a canon fact. The info graph was illegible.
Were there any subtle distortions or misrepresentations that a non-expert might not catch?
Going back to the mind map, and in other words it doesn’t cite its sources well. It does provide the transcript it referred to, but the transcripts aren’t very useful as described above. It flips flopped between stated what as a theory and what was canon to the game (confirmed by the creators). If someone were to read it without much knowledge, they would be bombarded with information that conflicts, isn’t organized narratively, and stated in context of its origin.
2. Usefulness for Learning
If you were encountering this material for the first time, would these AI-generated resources help you understand it?
Semi-informative but not at all engaging.
What do the podcast, mind map, and infographic each do well (or poorly) as learning tools?
Both podcast and mind map were at least comprehensible; the info graph was not.
Which format was most/least effective? Why?
The podcast is the most effective; there was some generated personality to distinguish the motivation behind certain theories, not great distinctions but more than nothing.
3. The Aesthetic of AI
It’s safe to say Youtubers and podcasters are still safe job wise. Hearing theories about haunted animatronics in the format and aesthetics of an NPR podcast was deeply embarrassing. Hearing a generated voice call me a “Fazz-head” was demoralizing to say the least.
They made pretty bad debaters too. The one who was presumably assigned the role of “I will only use the games as references” at one point waved away their opponent’s claim with the response, “yeah but that’s if you seriously take a mini game from 10 years ago”.
It took out all of the fun; there were no longer cheeky remarks of self-depreciating jokes about the silliness of the topic and efforts. Often theorists will acknowledge Scott Cawthon did not think these implications fully out, that this effort may be rooted in retcons and wishful thinking, but it’s still fun. The hosts and mind map acted like they were categorizing religious text, and it was remarkably unenjoyable to sit through.
4. Trust & Limitations
AI is good at taking (proven) information and organizing it in a way that is nice to look at. It’s great for schedules or breakdowns. It sucks at just about everything else. I only really have benefitted from AI when it comes to programming; it’s really nice to have an answer to what is wrong with your code (even if it’s not always right; it usually leads you past the point of being stumped).
When it comes to art, interpretation, and comprehension, I wouldn’t recommend AI to anyone. If you are making a quiz, make it yourself. The act of making a quiz based off study topics will increase your comprehension far more than memorizing questions barfed out to you. If you don’t have the time to produce something, then produce something you can with the time you have or collaborate with someone who can produce with you. Use AI to fix your grammar (language or code), use AI to make a schedule if you suffer from task paralysis, but aside from accommodations and quick questions, leave it alone.