Cycle 3 – Interactive Immersive Radio
Posted: May 1, 2025 Filed under: Uncategorized | Tags: Cycle 3 Leave a comment »I started my cycle three process by reflecting on the performance and value action of the last cycle. I identified some key resources that I wanted to use and continue to explore. I also decided to focus a bit more on the scoring of the entire piece, since many of my previous projects were very loose and open ended. I was drawn to two specific elements based on the feedback I had received previously. One of which was the desire to “play” the installation more like a traditional instrument. This was something that I had deliberately been trying to avoid in past cycles, so I decided maybe it was about time to give it a try and make something a little more playable. The other element I wanted to focus on was the desire to discover hidden capabilities and “solve” the installation like a puzzle. Using these two guiding principles, I began to create a rough score for the experience.

I addition to using the basic MIDI instruments, I also wanted to experiment with some backing tacks from a specific song, in this case, Radio by Sylvan Esso. In a previous project for the Introduction to Immersive Audio class, I used a program called Spectral Layers to “un-mix” a pre-recorded song. This process takes any song and attempts to separate the various instruments into their isolated tracks, to varying degrees of success. It usually takes a few try’s, experimenting with various settings and controls to get a good sounding track. Luckily, the program allows you to easily unmix and separate track components and re-combine elements to get something that is fairly close to the original. For this song I was able to break it down into four basic tracks; Vocals, Bass, Drums and Synth. The end result is not perfect by any means, but it was good enough to get the general essence of the song when played together.
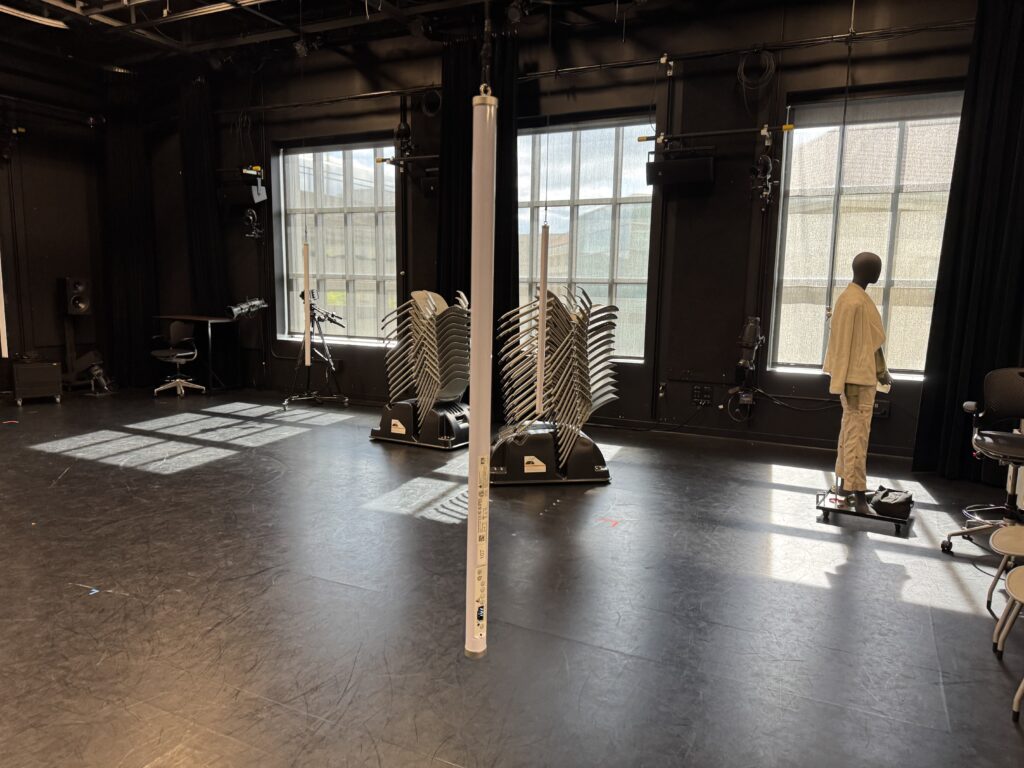
Another key element I wanted to focus on was the lighting and general layout and aesthetic of the space. I really enjoyed the Astera Titan Tubes that I used in the last cycle and wanted to try a more integrated approach to triggering the lighting console from Touch Designer. I received some feedback that people were looking forward to a new experience from previous cycles, so that motivated me to push myself a little harder and come up with a different layout. The light tubes have various options for mounting them and I decided to hang them from the curtain track to provide some flexibility in placement. Thankfully, we had the resources already in the Motion Lab to make this happen easily. I used spare track rollers and some tie-line and clips left over from a previous project to hang the lights on a height adjustable string that ended up working really well. This took a few hours to put together, but I think this resource will definitely get used in the future by people in the Motion Lab.

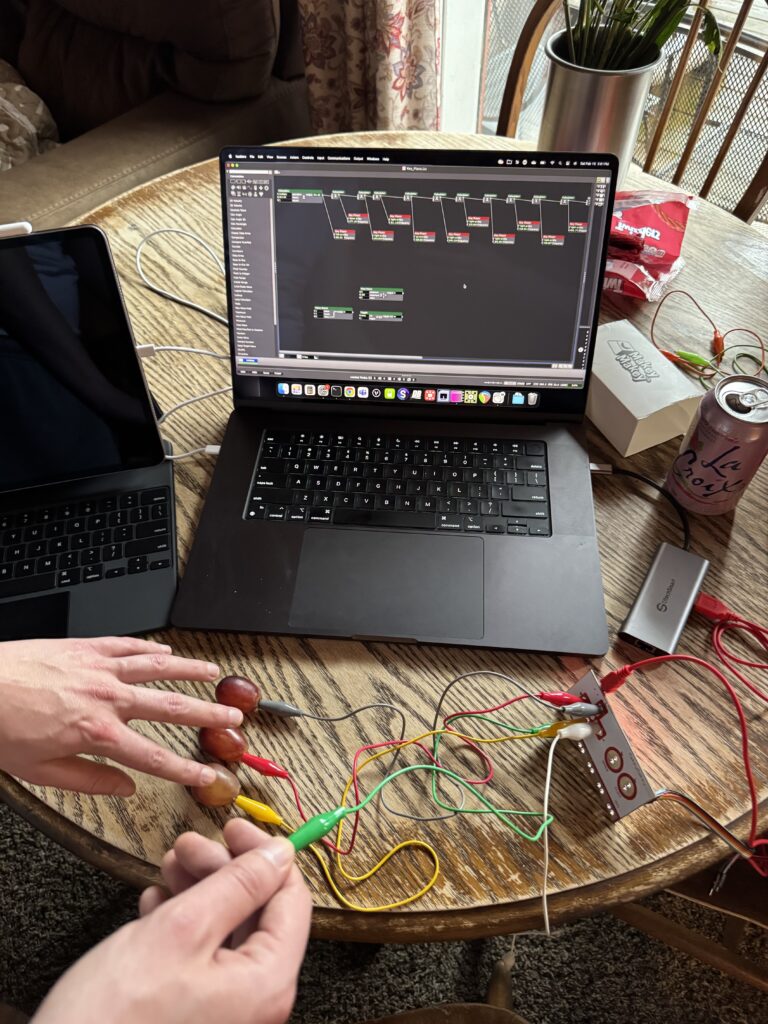
In order to make the experience “playable” I decided to break out the bass line into its component notes and link the trigger boxes in Touch Designer to correspond to the musical score. This turned out to be the most difficult part of the process. For starters, I needed to quantify the number of notes and they cycles they repeat in. Essentially, this broke down into 4 notes, each played 5 times sequentially. Then I also needed to map the boxes that would trigger the notes into the space. Since the coordinates are Cartesian x-y and I wanted the boxes arranged into a circle, I had to figure out a way to extract the location data. I didn’t want to do the math, so I decided to use my experience in Vectorworks as a resource to map out the note score. This ended up working out pretty well and the resulting diagram has an interesting design aesthetic itself. My first real life attempt in the motion lab was working as planned, but the actual playing of the trigger boxes in time was virtually impossible. I experimented with various sizes and shapes, but nothing worked perfectly. I settled on some large columns that a body would easily trigger.
The last piece was to link the lighting playback with the Touch Designer triggers. I had some experience with this previously and more recently have been exploring the OSC functionality more closely. It took a few tries, but I eventually sent the correct commands and got the results I was looking for. Essentially, I programmed all the various lighting looks I wanted to use on “submaster” faders and then sent the commands to move the faders. This allowed me to use variable “fade times” by using the “Lag” Chop in Touch Designer to control the on and off rate of each trigger. I took another deep dive into the ETC eos virtual media server and pixel mapping capabilities, which was sometimes fun and sometimes frustrating. It’s nice to have multiple ways to achieve the same effect, but it was sometimes difficult to find the right method based on how I wanted to layer everything. I also maxed out the “speed” parameter, which was unfortunate because I could not match the BPM of the song, even though the speed was set to 800%.

I was excited for the performance and really enjoyed the immersive nature of the suspended tubes. Since I was the last person to go, we were already running way over on time and I was a bit rushed to get everything set up. I had decided earlier that I wanted to completely enclose the inner circle with black drape. This involved moving all 12 curtains in the lab onto different tracks, something that I knew would take some time and I considered cutting this since we were running behind schedule. I’m glad I stuck to my original plan and took the extra 10 minutes to move things around because the black void behind the light tubes really increased the immersive qualities of the space. I enjoyed watching everyone explore and try to figure out how to activate the tracks. Eventually, everyone gathered around the center and the entire song played. Some people did run around in the circle and activate the “base line” notes, but the connection was never officially made. I also hid a rainbow light cue in the top center that was difficult to activate. If I had a bit more time to refine, I would have liked to make more “easter eggs” hidden around the space. Overall, I was satisfied with how the experience was received and look forward to possible future cycles and experimentation.
Pressure Project 2
Posted: March 5, 2025 Filed under: Uncategorized Leave a comment »For pressure project two, I took my main inspiration from “A Brief Rant on the Future of Interaction Design” by Bret Victor. I was drawn to the call for tactile user interfaces and the lamentation of a lack of sensation when using our hands and fingers on touch screen “images below glass.” I wanted to create something that not only avoided the traditional user interface, but also avoided the use of screens all together. For this reason, I choose to focus on sound as the main medium and created the experience around the auditory sensation.
Having seen the Makey Makey’s around the Motion Lab for over a year, I was excited to finally use one and see what all the fuss was about. I was immediately inspired by the many options that became available to be used as a means of interacting with the computer. Anything that had even the slightest ability to exchange electrical charges could be used to trigger events on the computer.
Knowing that I wanted to focus on sound, I started off this exploration by recreating the popular Makey Makey example of the banana keyboard. Since I didn’t want to ruin multiple bananas for an experiment, I decided to use grapes instead. I was able to map the grapes to the tone generator actor in isadora and then it was just a matter for figuring out the frequencies of each note, which it turns out is quite specific and requires hard coding each note as a separate actor.
Since I considered this a simple proof of concept, I didn’t bother to create the whole keyboard and was satisfied with being able to play “hot cross buns” using the three notes I had programmed. When I finally had the patch working well, I quickly realized that the tone generator in Isadora was very one dimensional. It produced a pleasant sine wave but the result was something that sounded very robotic and computational. This was one component that I knew would need further refinement. While enjoyed the grapes as an instrument (and a snack) I knew I wanted something a bit more meaningful. I had considered using brail to spell out the notes, but I ended up deciding I would like to deviate further from the “keyboard” example and instead trigger sounds in a more abstract way.
Having successfully complete the basic outline of a patch, I took a few days to think about the different ways I could modify and expand the concept so that it no longer resembled a piano. I was encouraged to explore the “AU” actors in Isadora to expand the functionality of the audio handling in Isadora. I found these actors to be useful, but also a bit mysterious since I could not find any help documentation readily accessible. Through a process of trial and error, I found the actors that worked for my purposes and was able to have the control needed to complete the patch.
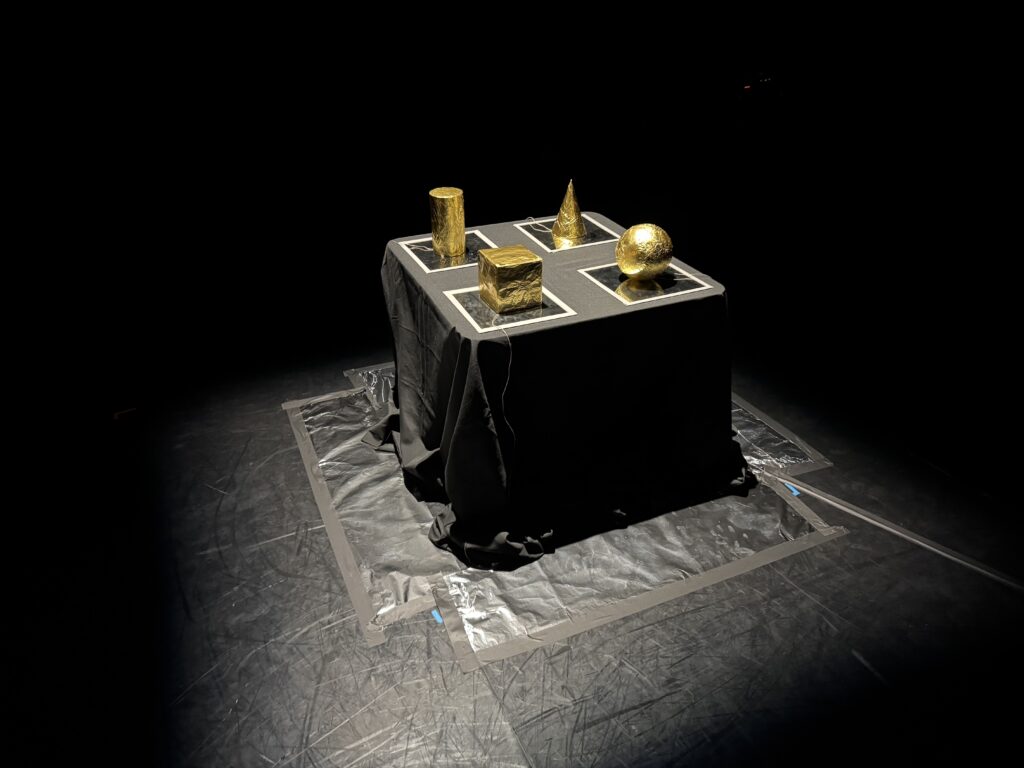
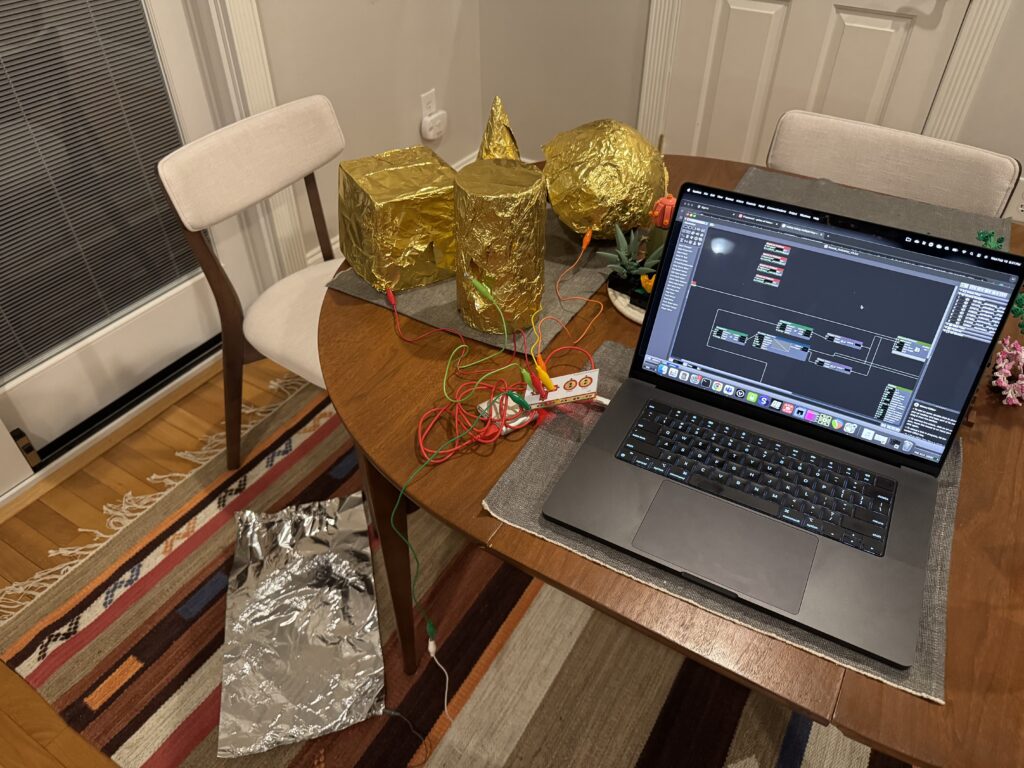
For the tactile inputs I was reminded of some basic 3 dimensional shapes that have been laying around in the Motion Lab. I don’t know their exact origin, but I liked the simple sphere, cube, cone and cylinder’s size and overall appearance, so I decided to use them as the human facing element of the project. The shapes simple form reminded me of some ancient truths as if they were the basic elements of the universe. When these basic building blocks are combined, the mystery will be revealed. At last, I found a way to fulfill the overarching requirement of pressure project 2.
Since I choose to make this a sound centric project, deciding on the sound effects that would be played was one of the most important aspects. I wanted something booth soothing and mysterious and was reminded of the souvenir “Tibetan singing bowls” that I had seen in the Christmas Markets of Europe. When the rim of the bowl is rubbed with a stick, the bowl starts to resonate like a bell and reverberates loudly in a very calming tone.
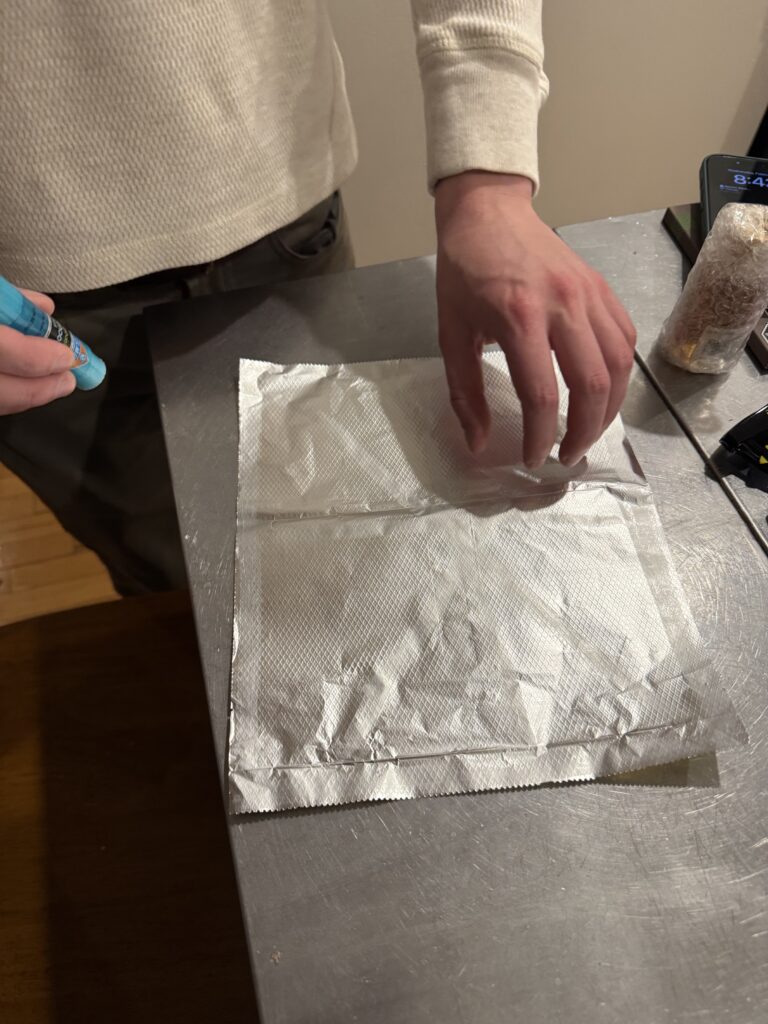
I downloaded some pre-recorded singing bowls from freesounds.org and after a bit of research, decided to cover the “singing shapes” in gold foil so that they resembled the metal bowls, but also so they would conduct electricity for the Makey Makey. Wiring everything up was a breeze and the basic patch I had made before only needed a few tweaks. The most difficult part was revealing the final “mystery” when all four shapes were activated at the same time, a 5th sound of a choir singing was activated.
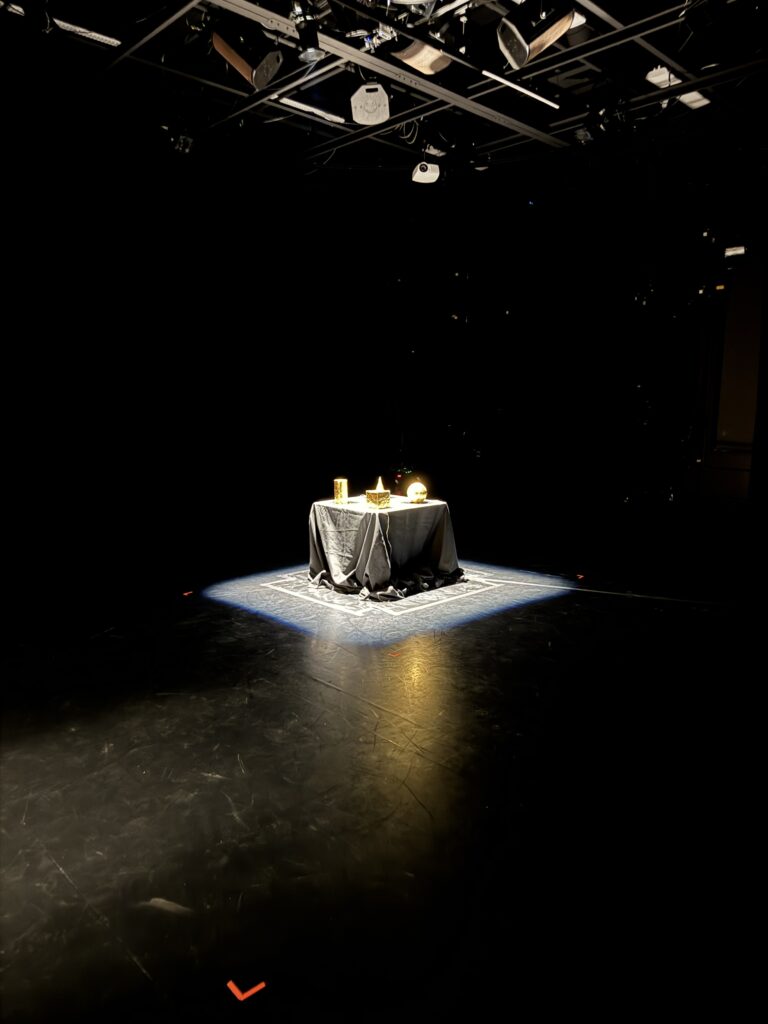
Finally, for the actual project presentation, I found myself with an extra hour to spare and an empty Motion Lab, so I decided to take the project to the next level and present a polished version to the class. I had this larger vision ahead of time, but was not planning on implementing it since I didn’t think I would have the opportunity, but I’m glad I did. A few mirrors that I found in the same box as the shapes, and an fortuitously focused lighting special added the finishing touch.
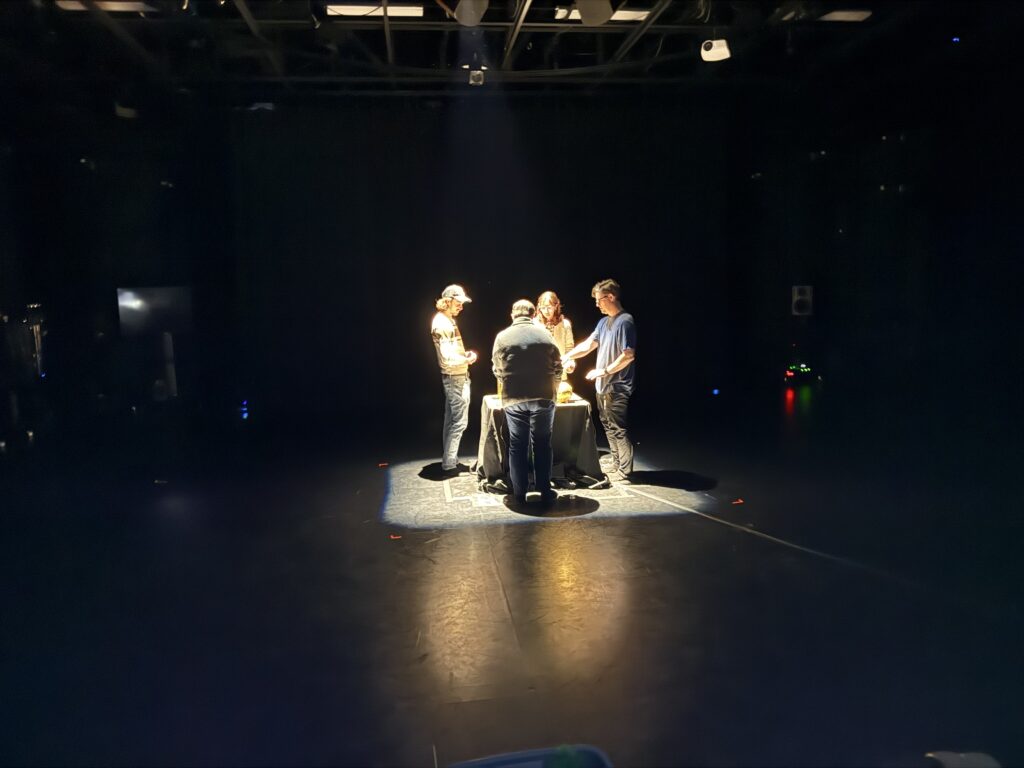
I was happy to watch the class interact with the singing shapes and it quickly became clear they were putting a lot more thought into the “mystery” than I did. There were a few theories about which shape did what function and if what order you pressed them in mattered, in reality they played the exact same sound every time and the order made no difference. Eventually they all were activated the same time and the choir began to sing. I don’t think it was obvious enough, because it was noticed, but there was no “ah ha” moment and I think people were expecting a bit more of a pay off. Either way, I had fun making it, and I think others had fun experiencing it, so overall I think it turned out well.