Cycles 2+3 (Maria)
Posted: April 30, 2021 Filed under: Maria B Leave a comment »Intent
The overall intent for my cycles was to create an interactive experience using the LEAP motion. For the first cycle and a lot of the second, I focused more on the types of interactions that would happen and their intuitiveness. Starting in the second cycle, I started thinking more about how I could use a narrative to tie these interactions together and give them meaning. My overall goal was to explore what it means to design UX for motion interaction devices.
It took me awhile to land on a story I liked and made sense to me. I pulled inspiration from escape room plots, different video games, movies, and the simple aesthetic that naturally arises in Isadora by using simple shapes. I ended up taking a lot of influence from the game “There is No Game,” which was really fun in the way it broke the 4th wall with the users. I combined that with the simple, almost 8-bit aesthetic to make a story where the person playing the game is taking part in ‘user testing’ for a new, immersive video game and ends up getting trapped. Then, depending on which ‘door’ they choose, they either win, lose, or break the game
Process
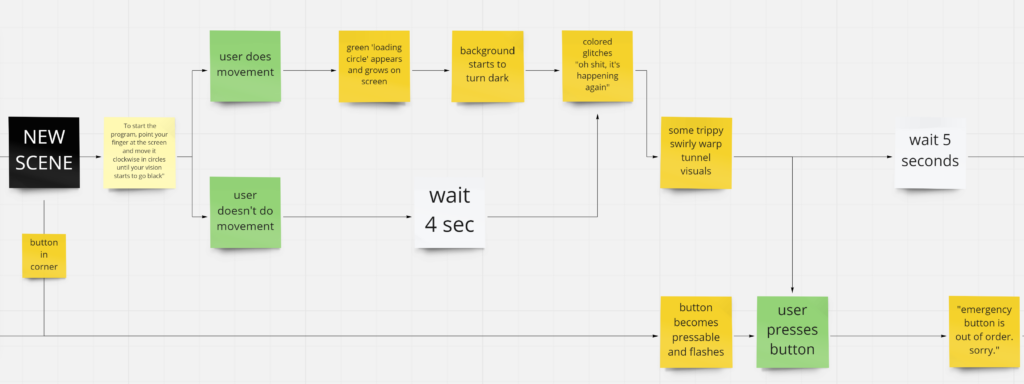
I made a wireframe of my storyboard in Miro, writing out what narration and game objects were in each scene, and how it responded to different actions of the user.

Next, I went into Isadora to mock everything up. The individual activities I made in cycle 1 and the beginning of cycle 2 proved really helpful because, even though I didn’t use all of the exact activities, I used a lot of similar bits of code that I was able to pull and apply to the new ones. The original goal was to do a second pass-through and add better assets, but I ran out of time.
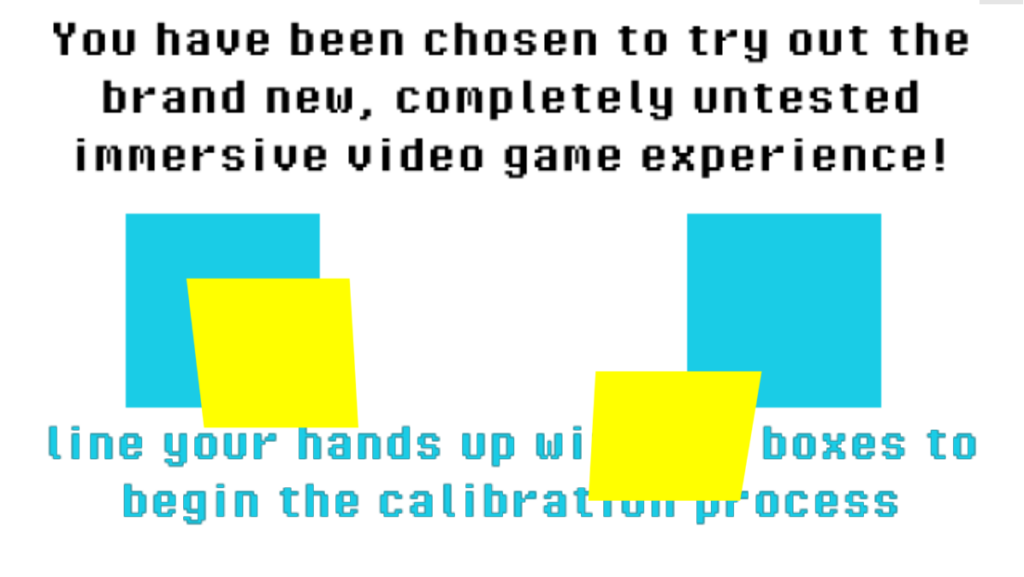
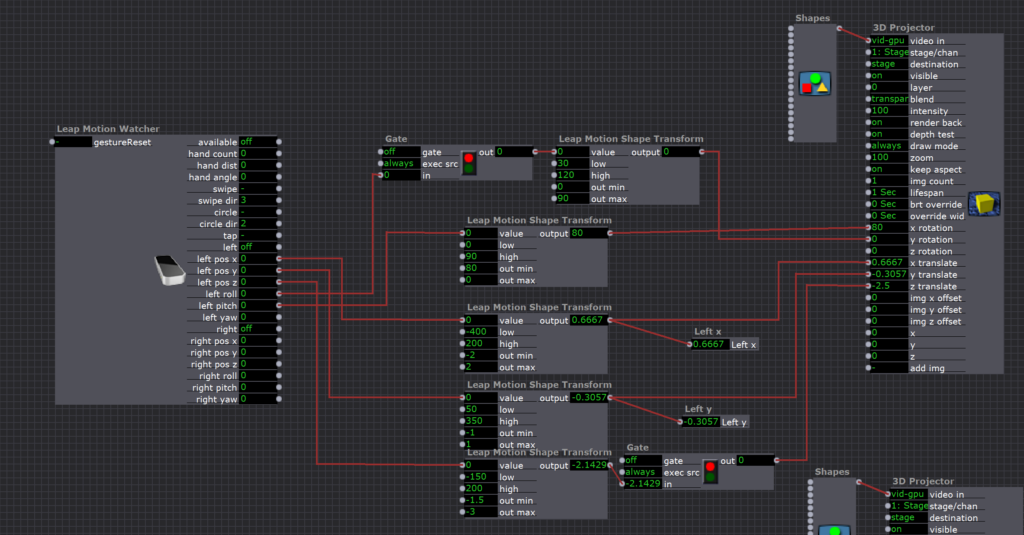
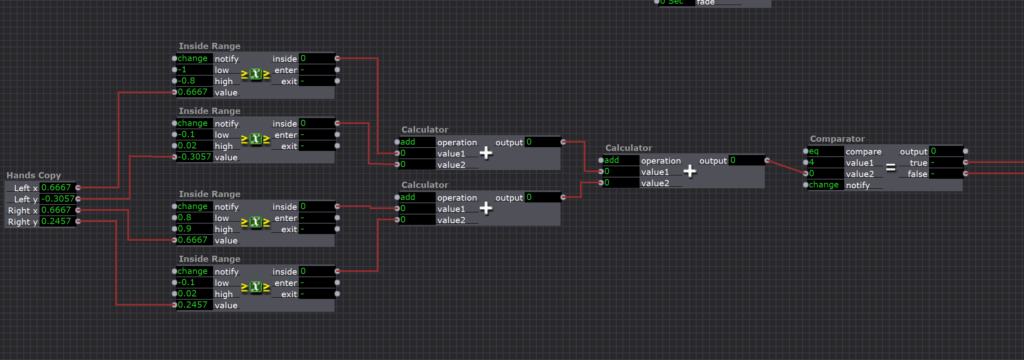
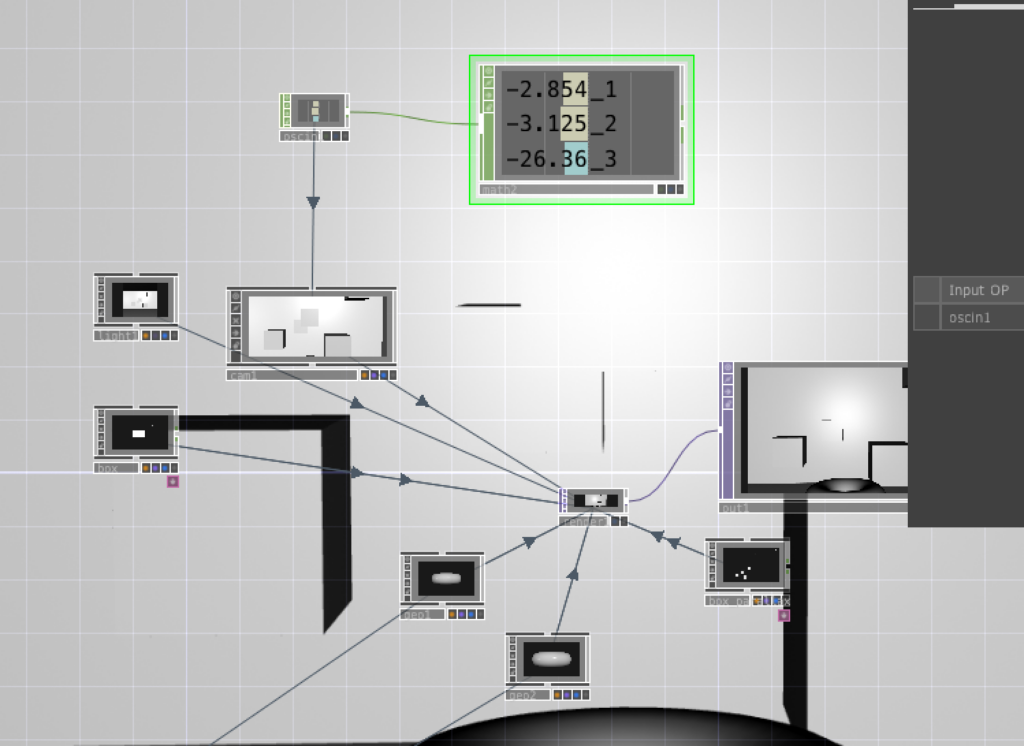
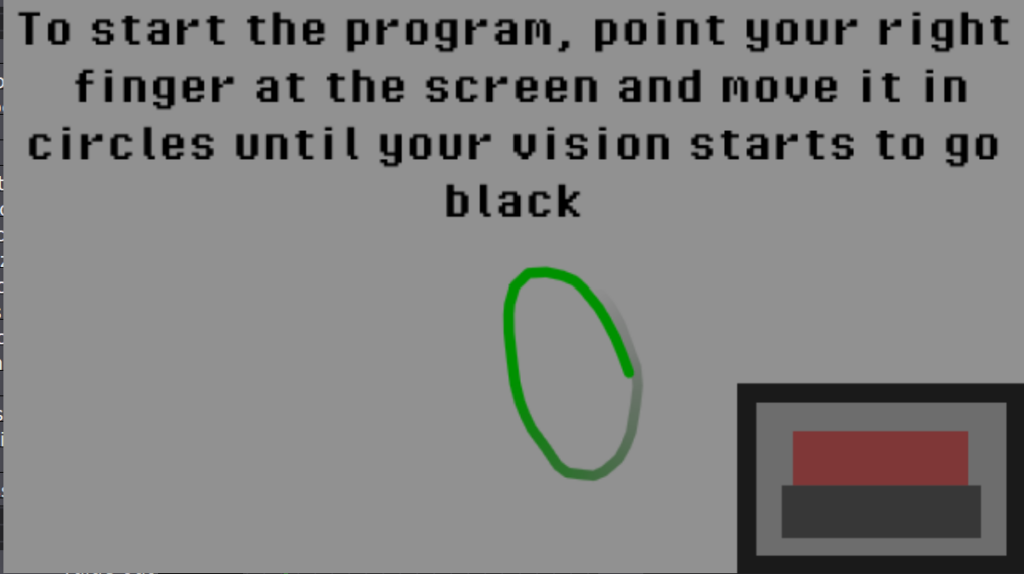
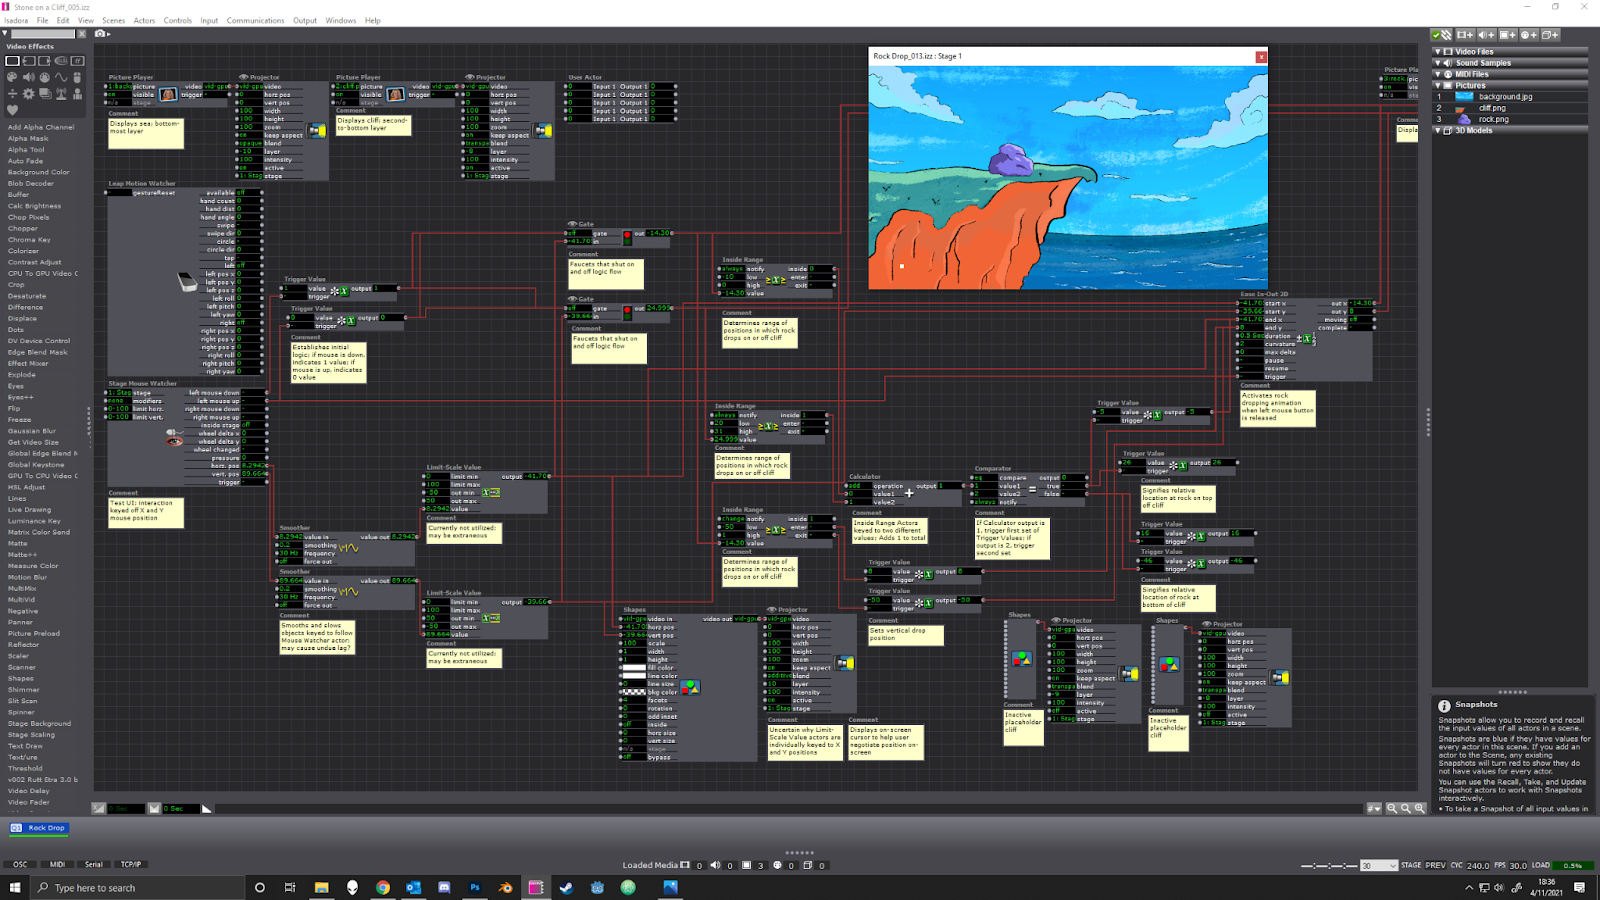
In the first scene, I made a hand tracker that tracked the angle and position of the player’s hands using a LEAP motion and a 3D projector. I used a series of Inside Range Actors and calculators to track when the hands were inside the boxes, and when they were it sent a signal to jump to the next scene
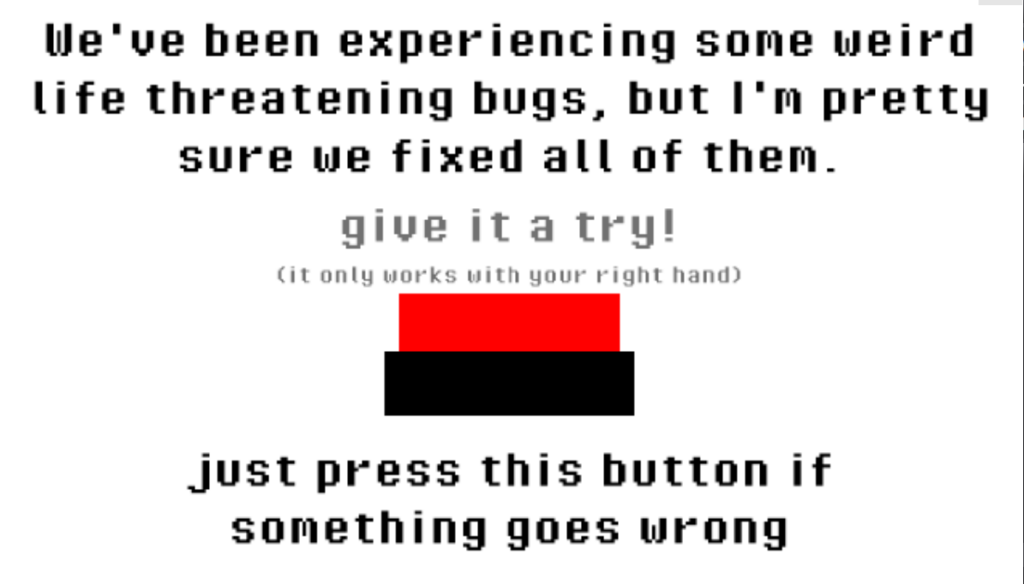
The second scene was just a copy of the button press scene I made in cycle 1.
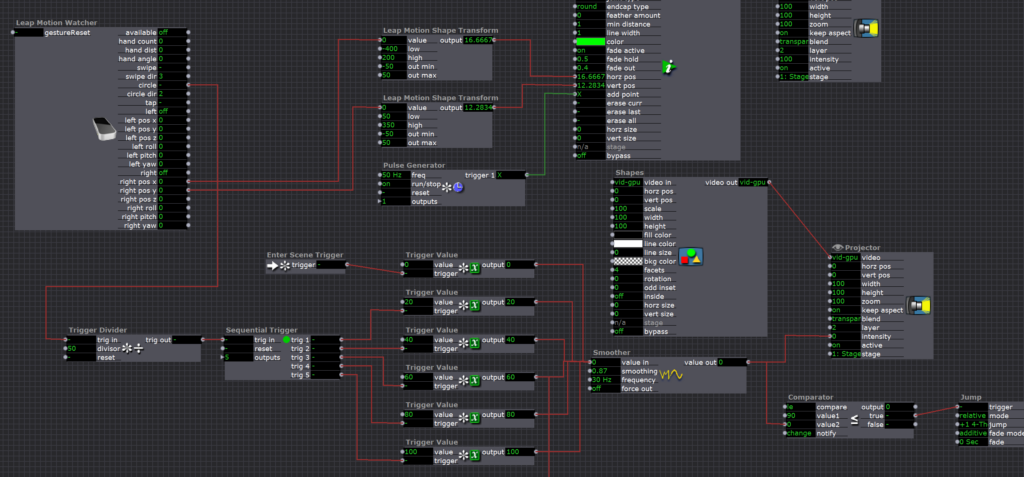
The third scene used a Live Drawing actor to make the circles, and the circle trigger on the Leap Motion Watcher actor to set of sequential triggers that gradually made the scene darker as the user drew circles
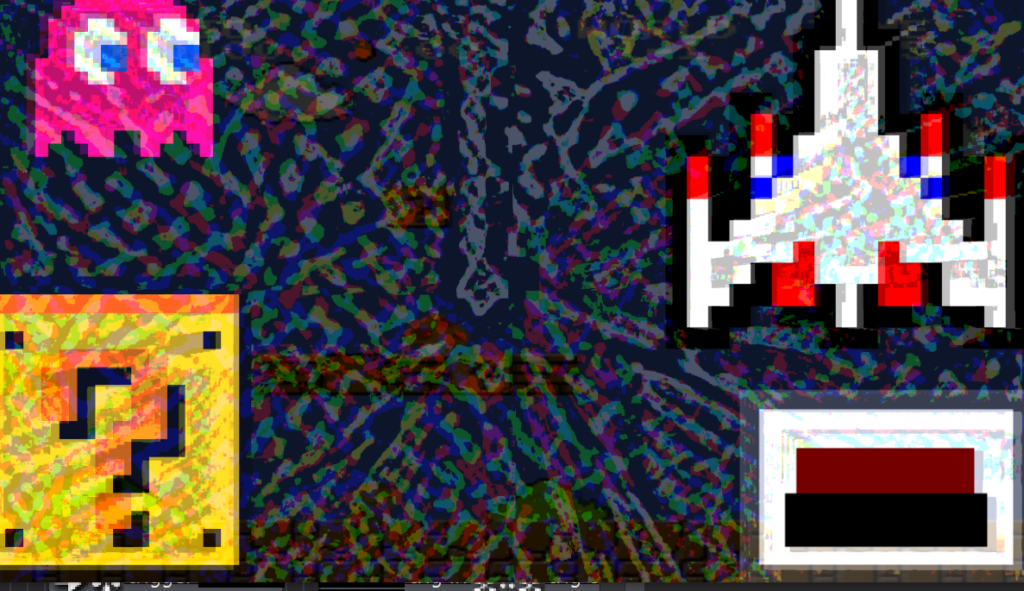
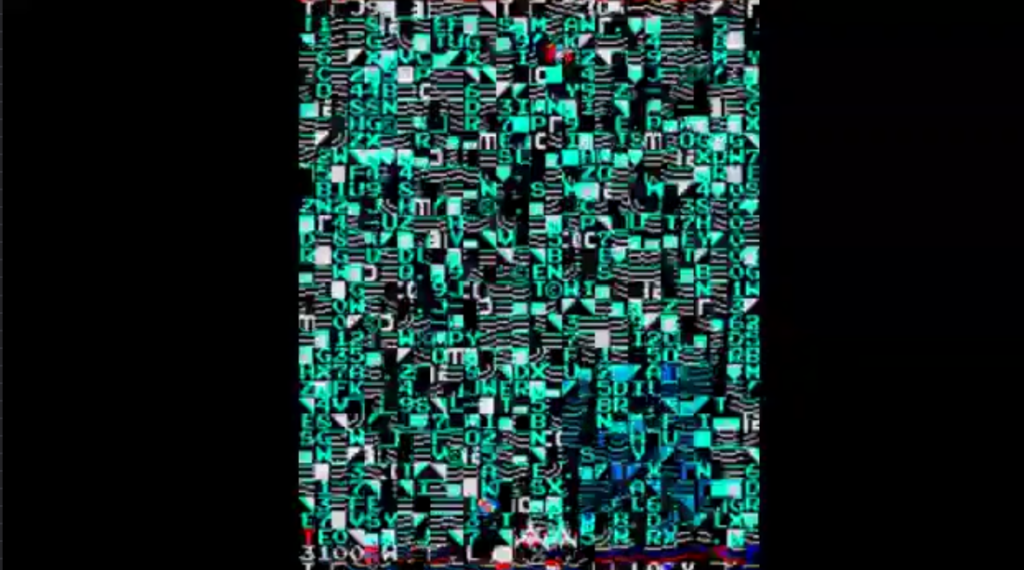
Scene 4 was a bunch of chaos that was made to be the ‘glitch’ in the program. I initially didn’t have sound in this scene, but adding it made a huge difference in recognizing that the program was glitching out. I was really happy to see that users recognized that the situation was an ’emergency’ and everyone who played it attempted to press the ’emergency button’ that was introduced a few scenes earlier (yay successful UX design!).
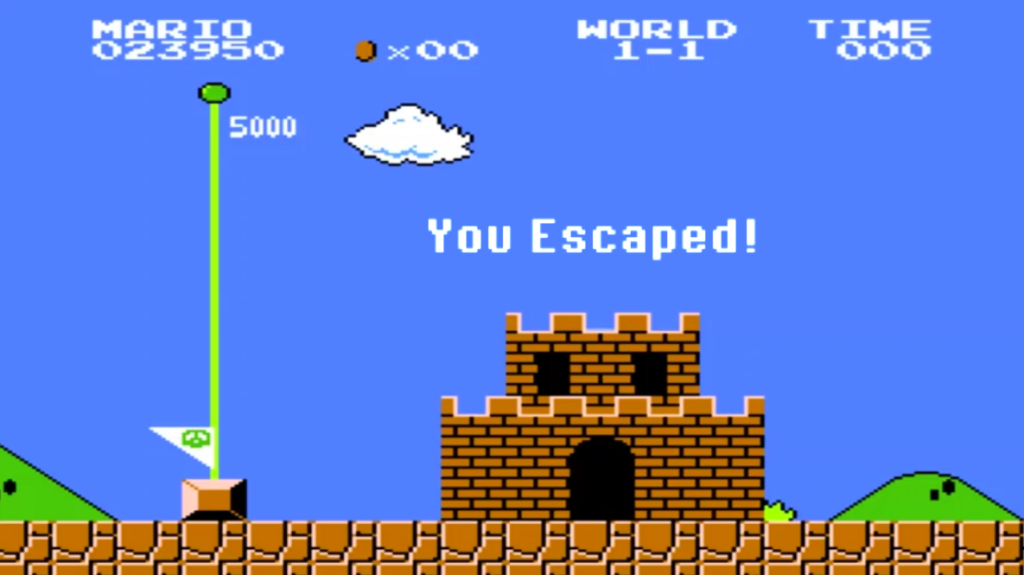
If you look closely you can see a super mario bros level in the background (music from the game is also playing) — this is an ‘easter egg’ that gives users a hint for later in the game!

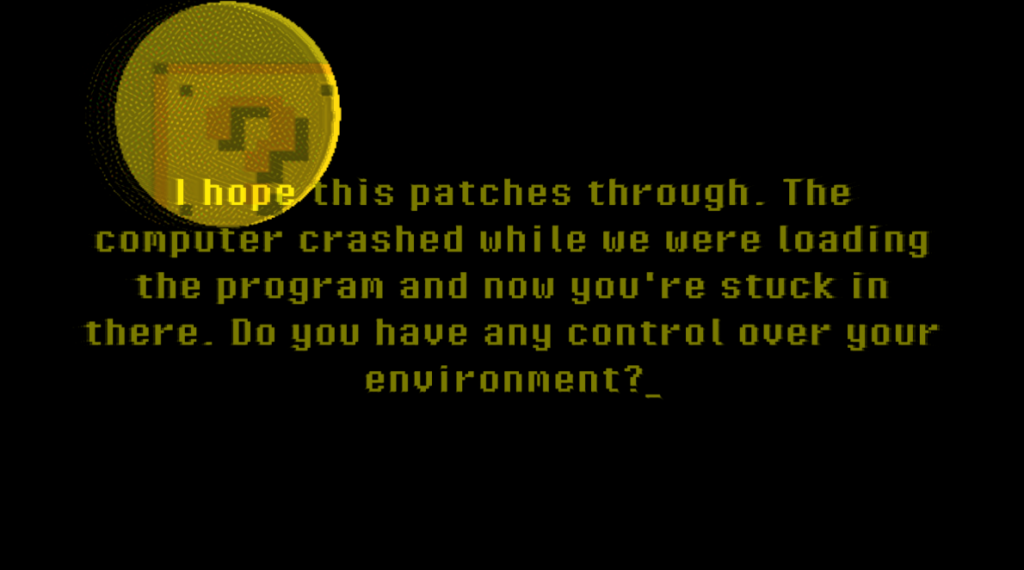
If the users pressed the button, they were taken to this scene. Basically acknowledging that the user pressed the button, but it did no good because the button was out of order. If the user didn’t press the button, the patch automatically jumped from scene 4 to scene 6 after about 8 seconds.
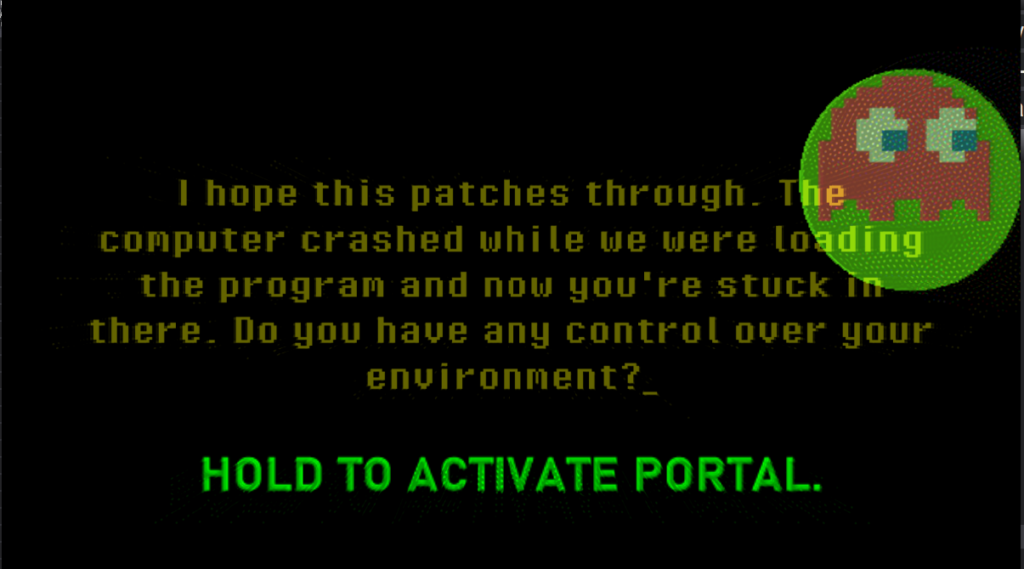
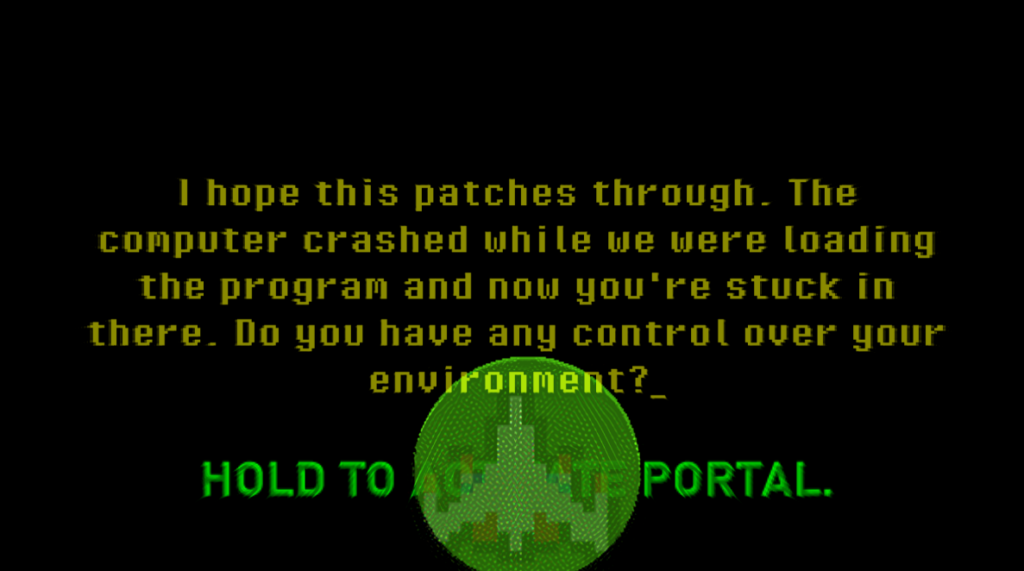

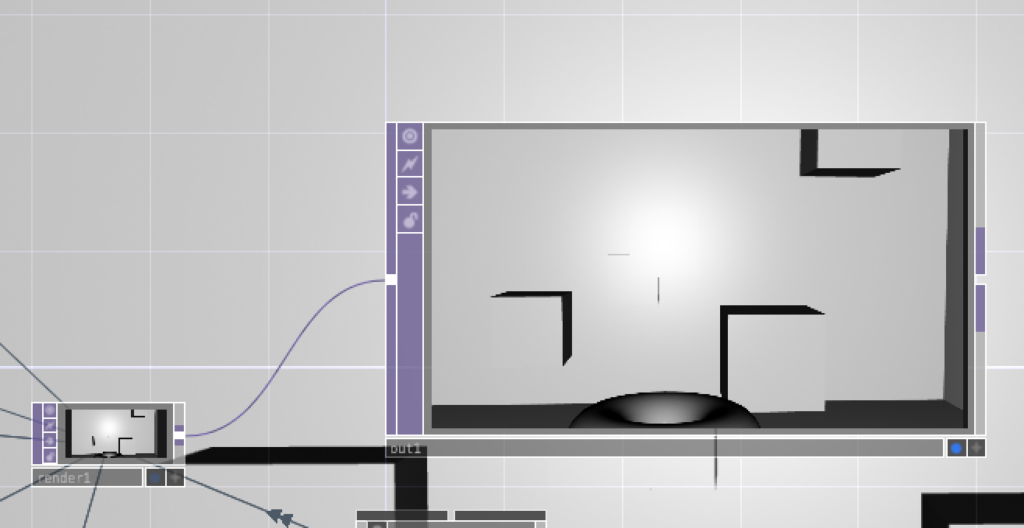
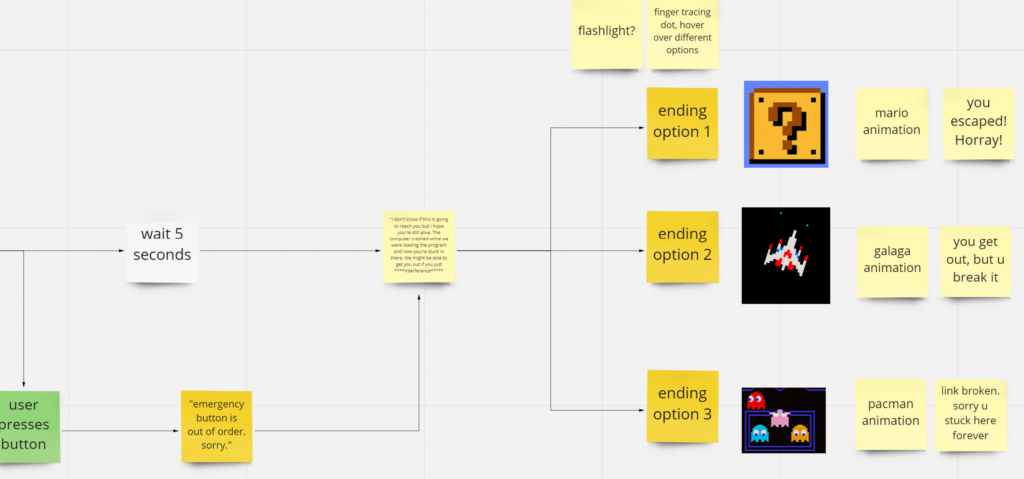
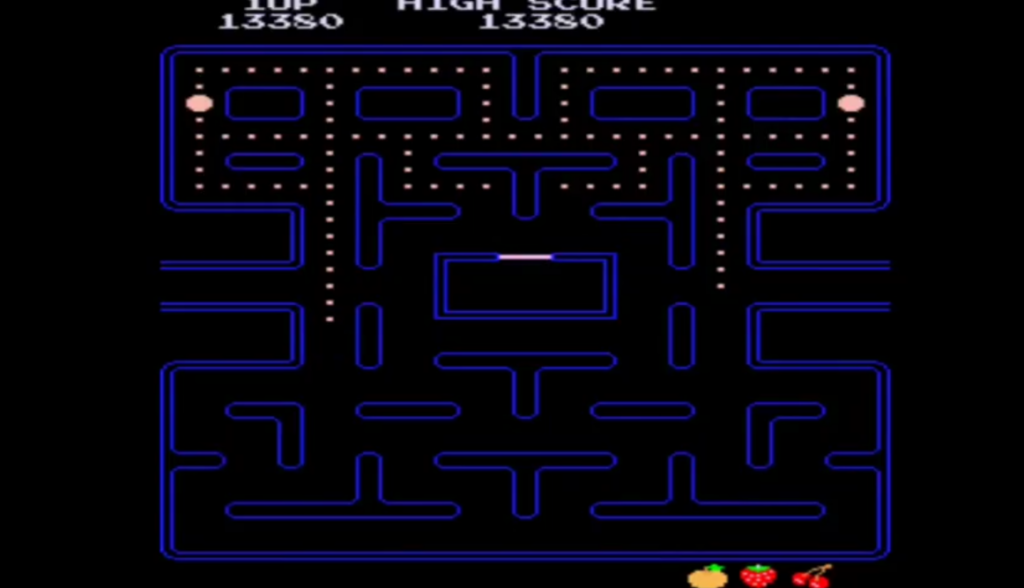
This is the scene where user choice comes in. There is a yellow circle (a ‘flashlight’) that responds to the position of the users hand movement. Hidden in the darkness are 3 ‘portals’: a pacman ghost, a galaga ship, and a mario ‘?’ block. Each of these portals leads to a different ending! The light turns green and a green message pops up when the user holds the light directly above the object, and if they hold it for 3 seconds it takes them to the associated ending.
To make the ‘flashlight’ in Isadora, I used a chroma key. Basically, when the foreground layer is a specified color (in this case yellow), it reveals the background layer that holds the hidden object, BUT if the foreground layer isn’t the specified color, you only see the foreground layer. To keep the flashlight from disappearing completely, I slightly offset the flashlight color from the ‘key hue,’ making the flashlight slightly transparent and still revealing the background.
To send the user to the appropriate ending when their hand/the yellow dot was inside a specified range, I used the same method as I did back in the first scene with the hand tracking, but I made a different one for each of the three hidden icons.
Challenges
One of the biggest challenges of this project was choosing/creating a story that would give meaning to and make sense with the kinds of interactions I wanted to make. A lot of the stories I was coming up with were a lot more complex than I had time for or just didn’t really make sense with the context of these interactions. I found myself succeeding when I just picked a story and ran with it. Even though the initial story I ran with didn’t end up fitting with the interactions exactly, it helped me come up with a similar story with a different context that made a lot of sense with the LEAP motion-based interactions!
Another challenge I faced was the attempt to make motion-based interactions with the LEAP Motion in Isadora that (1) Worked, and (2) made intuitive sense to the users. When I was originally storyboarding, I came up with all these interactions like pinching to grab, clapping, etc. that just didn’t work. I ended up sticking to more basic motions like moving your hand around that was associated with a dot on the screen or moving your hand up and down to push a button.
Adding on to the challenge of making motion-based interactions that works and made intuitive sense, it was hard to get a feel for how the users would respond to the prompts without user testers, and I could’ve really benefitted from getting more frequent feedback from others. One big example of issues with this was the button press scene. Some users didn’t really understand how they were supposed to ‘press’ the button without physically pressing it. They would try pressing their hand towards the screen or just pause in confusion. Once they figured out how they were supposed to press it (downward motion with your hand like you’re pressing an invisible button on the desk in front of you), users often tried to press it really fast and/or continued the motion until their hand hit the table. This made a lot of sense upon seeing others do it, but it was never something I realized when creating the patch on my own. I knew that the LEAP wouldn’t detect my hand motion if I moved too fast and that it would lose the position of my hand if I set it down on the table next to the device, so when I was testing it I was sure to move my hand slow and keep it in range–but people who have never used the device before have no way of knowing that!! I’ve come to really enjoy thinking about how to design/problem solve for these intricacies and edge cases that come up when designing for motion detection 🙂
Another challenge I faced was just how long each of these scenes seemed to take, and it really started to make me feel bogged down and unmotivated because I felt I wasn’t getting anywhere. It was additionally frustrating because I was working on a project using another visual coding platform at the same time, and it was hard trying to shift my brain back to working in Isadora. However, as the project went on, I found it a lot easier because I had more ‘tricks’ up my sleeve (bits of code that I had used in other scenes) that I could use in future scenes! I also found it a lot easier to do when I had a more detailed plan. Something like a post-it note or two in Miro spelling out exactly what I wanted to accomplish in the scene and, even better, writing out the basic logic/actors I’m going to use to accomplish it.
Accomplishments
I was really proud of the intuitiveness I was able to accomplish with some of the interactions. The top two were the user knowing to press the ’emergency’ button when the screen started glitching out, and the scene where the message asks if the user “has any control over their environment” and the user has to figure out what to do with the yellow orb they can move around with their hands (this one could’ve been smoother with some more testing, but I liked how it introduced a sort of puzzle to the users). Basically I was just really excited about anything I could get the user to do without explicitly telling them to do it!
I was also really happy with the narrative I ended up coming to, and the way it engages with the users. I really enjoy how it breaks the fourth wall and gives the user the sense that they are an integral part of the story that has an impact on what happens. If I had a cycle 4,5,6, etc, I would love to push this further and give the user even more sense of choice and decision-making.
Finally, by the end of this project I felt like I had a really good handle on Isadora and figuring out new things to accomplish with it. Although I probably won’t be using Isadora much in the future, I can totally see this way of thinking benefiting me when using other coding languages!! I may even go and try to teach myself java 🙂
Observations/Takeaways
I feel like there are a lot of ‘observations’ sprinkled throughout this article, but I’ll try to sum some up here!
- Even though Isadora isn’t necessarily built for my field, it serves as a great learning tool that helped me realize some of the creative powers of coding!
- Planning is KEY, and I need to work on it (take advantage of Miro!)
- Reflecting is also key to learning, so I’m glad I’m doing this 🙂
- Pick something and run with it! Just because you make a decision now doesn’t mean you can’t change things later down the road
- Engaging multiple senses (even just adding sound) adds SO MUCH to an experience
- Giving users a sense of choice makes them more engaged
- You have to give users a REASON to do something (which is why having a narrative is key)
- Coding (even visually) is a design in itself. It is so satisfying and exciting when you get something to work! I love the thinking and logic that goes into it, and I want to keep on doing it!
- I really enjoy finding creative ways to engage users!
- I really enjoy the problem-solving process of making interactions intuitive to users
Cycle 3
Posted: April 29, 2021 Filed under: Nick Romanowski Leave a comment »Cycle 3 was all about bringing everything together and completing my game environment. My original plan with this project was to replicate the Spider-Man web-slinging attraction coming to Disney California Adventure. That meant adding a story, goals, a set duration, etc. Unfortunately, things proved to be slightly more difficult than I had hoped and I instead just created the basic mechanics and environment for the aforementioned game to take place in.
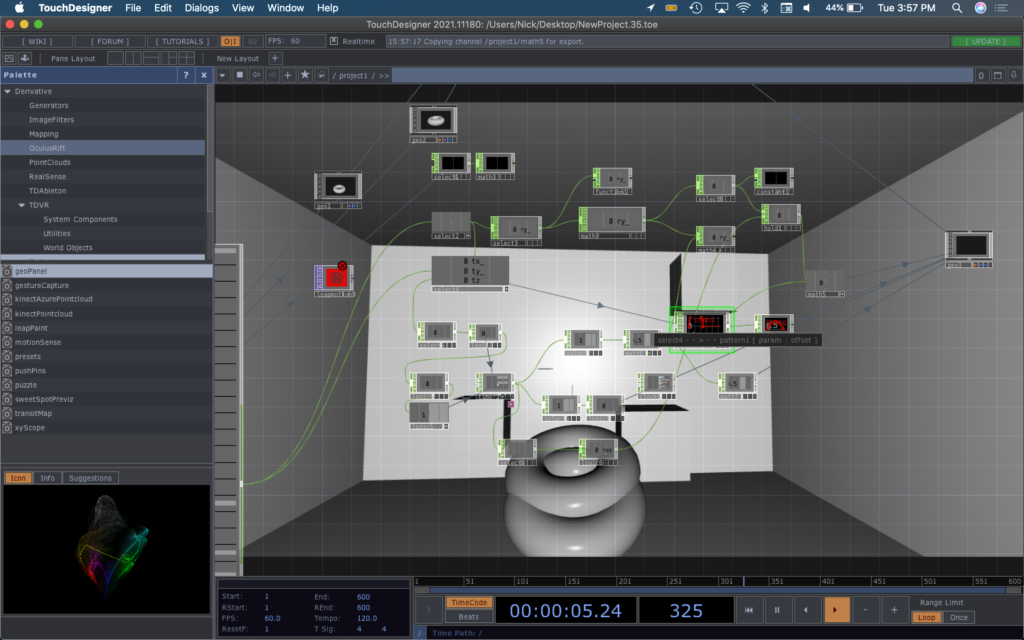
Picking up where I left off in Cycle 2: My original launch system was a series of complicated algebra equations all tied together to tell a project (a torus) how it should launch. Essentially, a timer would tell the torus what it’s z values where and then it would scrub over a parabola to provide y values and use a slope equation to calculate the x values. The largest problem with this system is that it didn’t create a super realistic launch. The torus would move on its arc path and then just abruptly stop at the end. To create the effect I wanted, I needed to incorporate physics into the project.
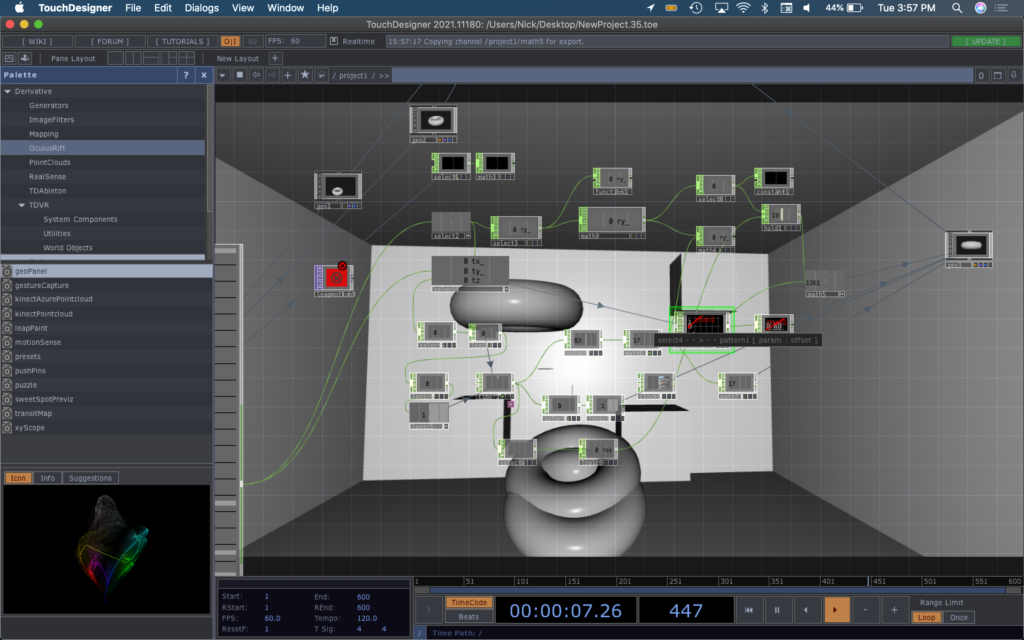
Enter the Bullet Solver: TouchDesigner has a COMP entitled Bullet Solver, which is essentially a physics environment based off of an open source physics engine of the same name. How the Bullet Solver works is that it allows you to put “actors” inside of it that have different physics settings (rigid or dynamic) and then when you run the COMP it allows them to interact with one another. This mean that I could launch a projectile and then let it interact with its surrounding environment and forces (mainly gravity) – creating a realistic environment.
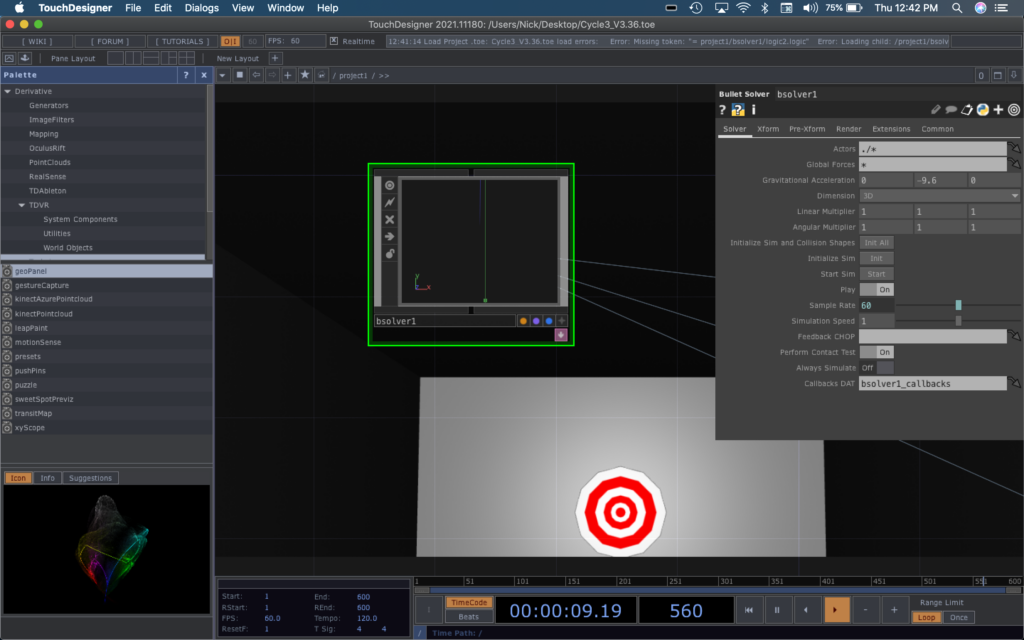
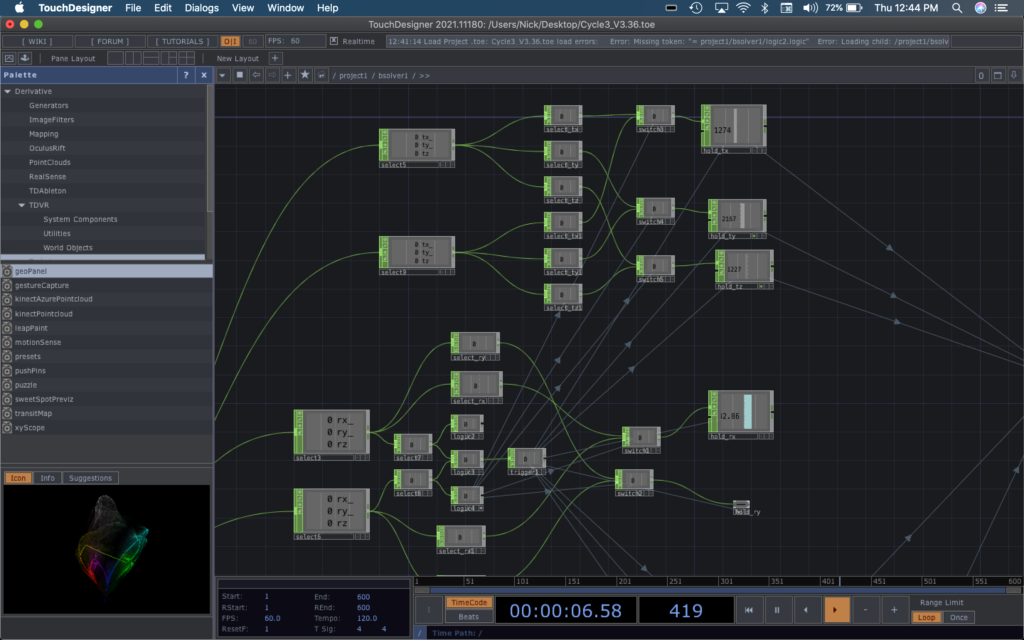
The new launching mechanism I constructed bypassed the complex algebra from Cycle 2. This one works by taking in palm rotation values from the leap motion and using those as multipliers on a Force operator inside the Bullet Solver. The Force operator creates a “force” that can influence and propel dynamic bodies inside the solver. A series of timers tell the projectile when it should allow itself to be solely affected by the force and when it should let gravity take over and “fall”.
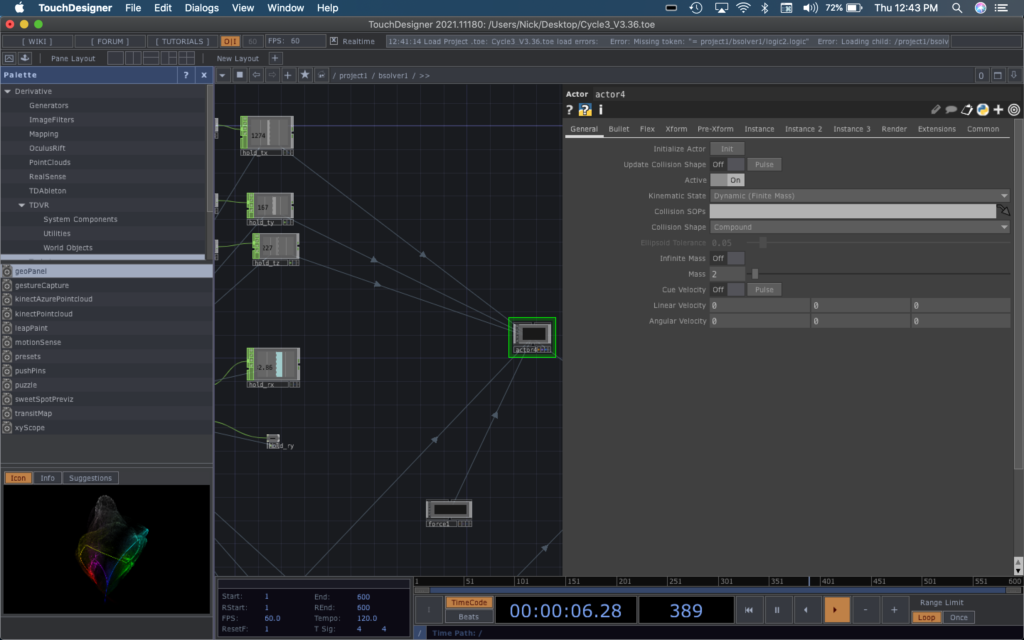
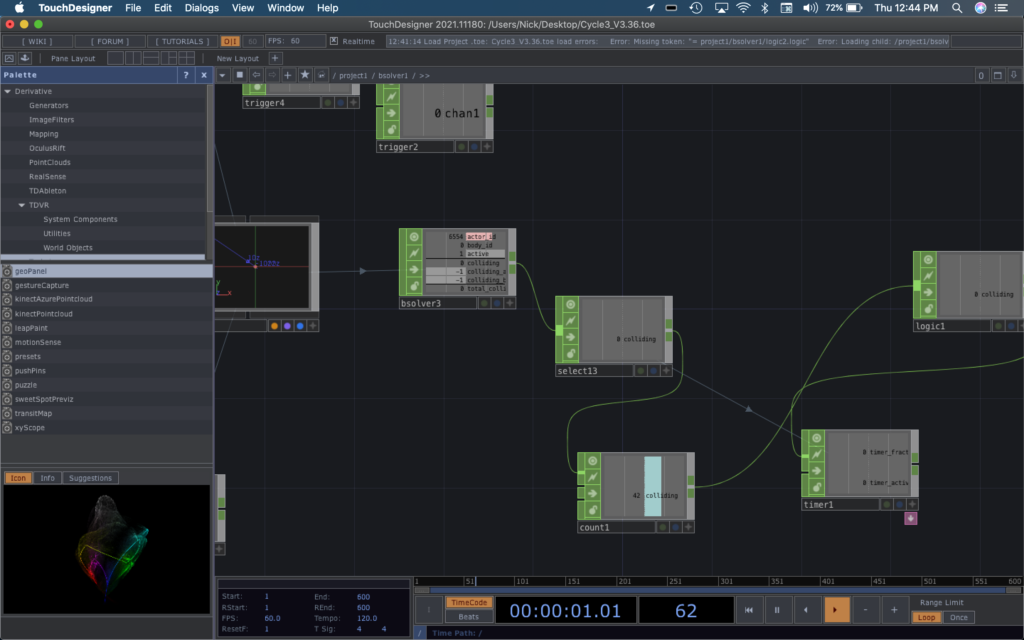
A randomly placed circle inside the game is the target that you should aim to hit with the projectile. Each time you fire a projectile, it regenerates in a random place calculated by the operator network shown below.
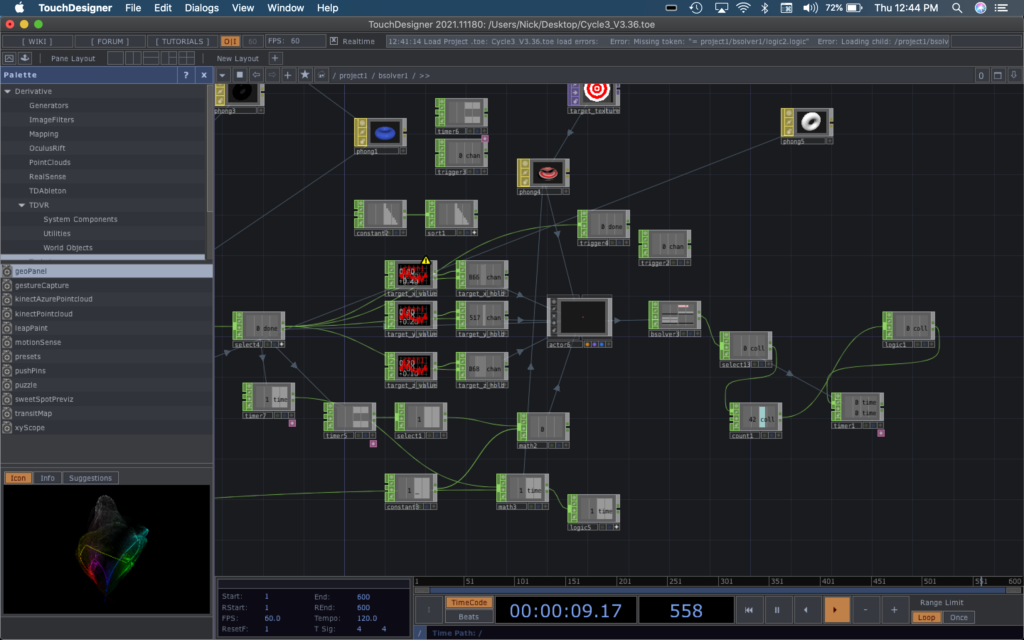
The collisions are detected with another operator that detects when the dynamic body that is target collides with something. The target often spirals out of place and collides with the rigid container shape which are also counted as collisions. To remedy that problem, a counter operator that only allows itself to be increased every so many seconds ensures that only the first collision is counted as a score. When a collision is recorded, it tells a text geometry to render itself in the foreground and showcase the score.
A series of logic gates are used to calculate whether the hands detected by the Leap are the right or left and tells the hand geometries how to display themselves. Another set of gates determines which hand has entered launch position and uses switches to tell the projectile to grab that hands orientation and placement values.
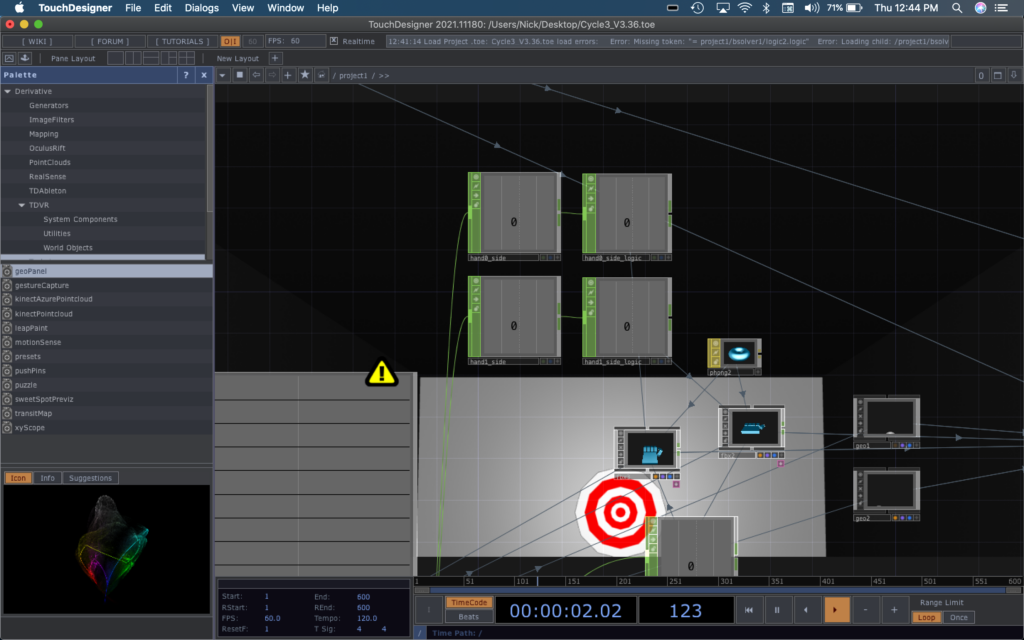
To conclude: the environment allows a player to put their hand perpendicular to the ground and use this gesture to aim and launch a ball at a randomly generated target. They can also move their head around to activate a parallax effect powered by a Kinect connected to Isadora that sends its values via OSC to TouchDesigner. If I were to further this project with a Cycle 4, I would like to add a story and a definitive beginning and end to the game. I created some basic aesthetics with this cycle, using phong materials to add color or basic textures, but I would love to take things further in a way that supported a storyline.
Pressure Project 3 (Murt)
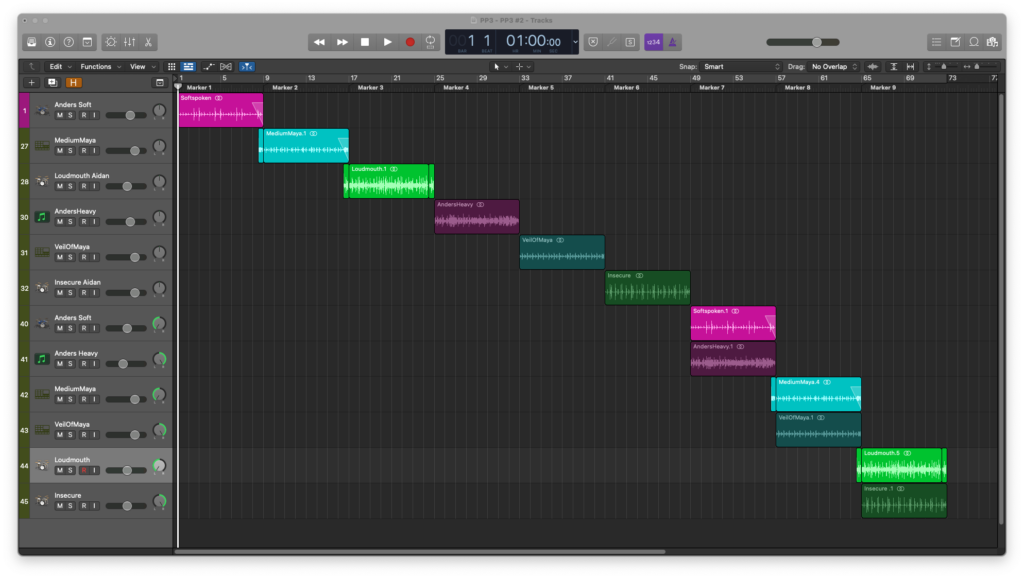
Posted: April 28, 2021 Filed under: Uncategorized Leave a comment »For this project, I wanted to explore the use of spatial effects to distinguish the inner states-of-mind of different characters from their outward presentation. Within Logic Pro X, I set up three of the “smart drummers”(an oxymoron, depending who you ask). Each drummer plays an outer-world part, and inner-world part with some form of reverb/delay, and a third section where the two parts are combined but panned hard to opposite sides of the binaural field.
Anders is Logic’s metal drummer, but I used him to play something steady and subdued(soft-spoken) outwardly. For the inner section, I used an instance of EZDrummer2 Drumkit from Hell with a reverb and dub delay to create the inner metalhead.
Maya is a retro 80s drummer with a rad WYSIWYG vibe.
Aidan is indie rock oriented. He is constantly overplaying and it doesn’t suit the music. In other words, he is a loud mouth.

Based on the critique session, it seemed that the project might read better if I put each drummer’s parts in their own sequence rather than three external-> three internal-> three discrepancy.
Cycles 1-3
Posted: April 28, 2021 Filed under: Uncategorized Leave a comment »For the duration of the current millennium, I have been working in the live audio field. I have also been involved in a handful of theatre events. It is through this work that I have grown attached to the practice of providing support to performers. Within the pandemic milieu, I have been severed from my Allen & Heath digital audio console for the longest period yet. More importantly, I have no access to performers to support. I am not much of a performer myself, so I have resorted to the lowly wooden train set.
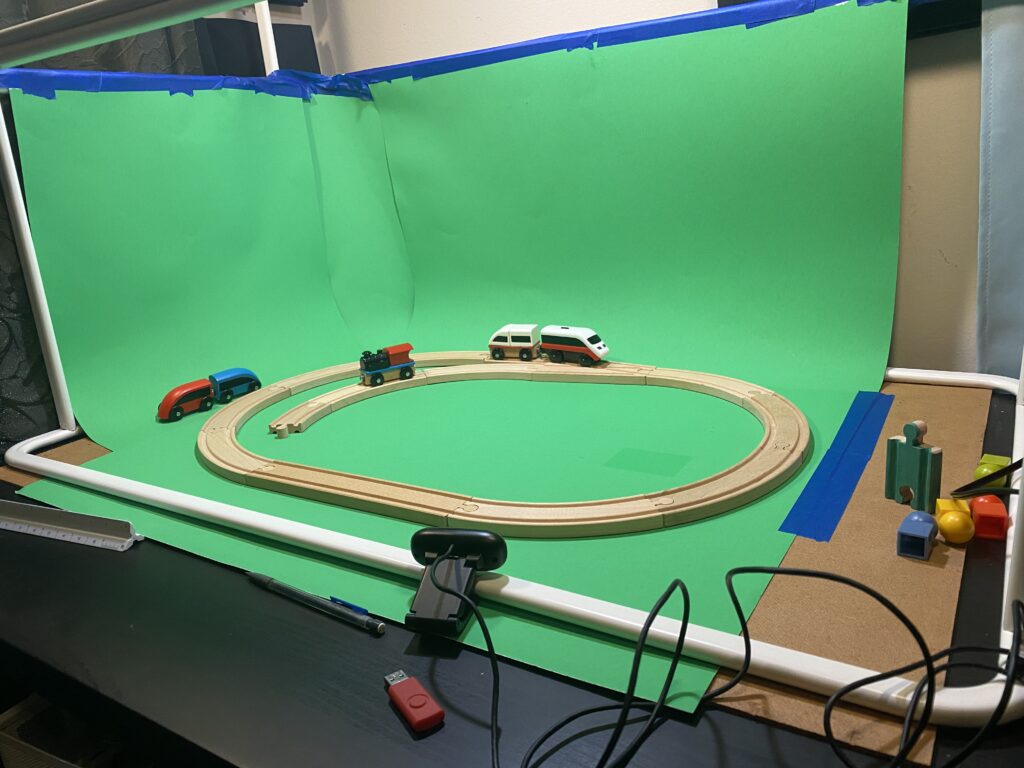
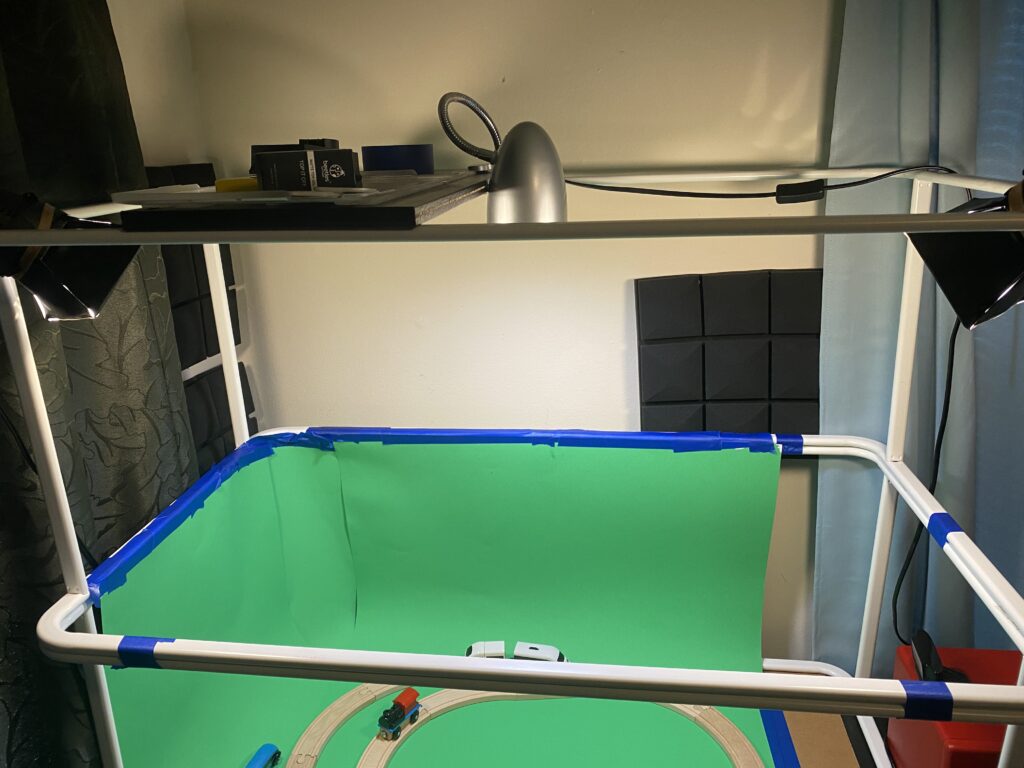
In Cycle 1, I created a green box setup for the purpose of chromakeying my train into an interactive environment. It was a simple setup: 2 IKEA Mulig clothing racks to provide a structure for mounting lights and cameras, 3.5 sheets of green posterboard, 2 Logitech webcams(1 of which is 1080p), a pair of mini LED soft box lights for key lighting and a single soft LED for back lighting.

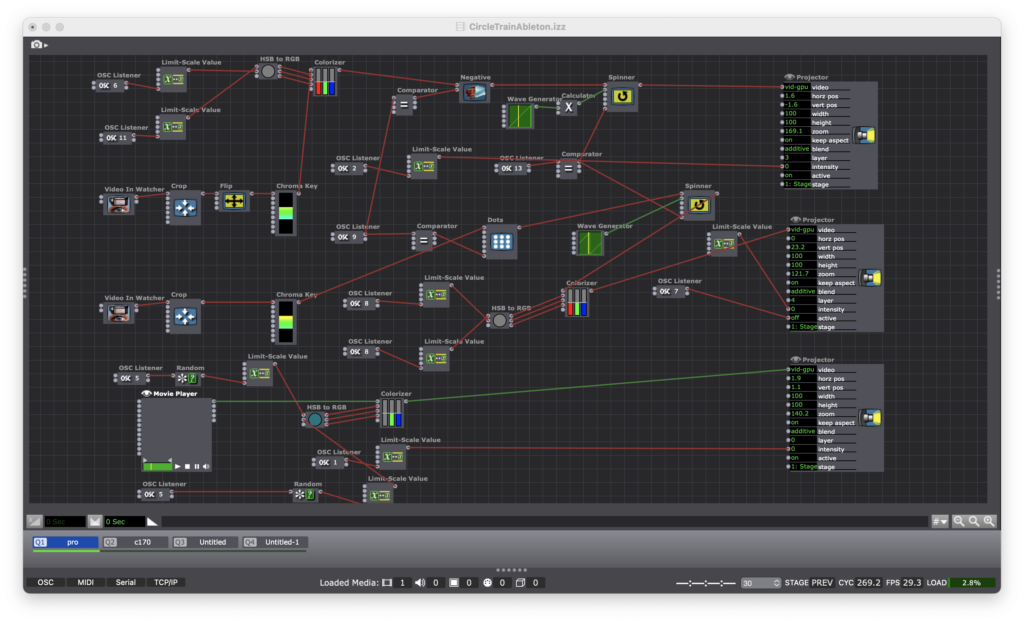
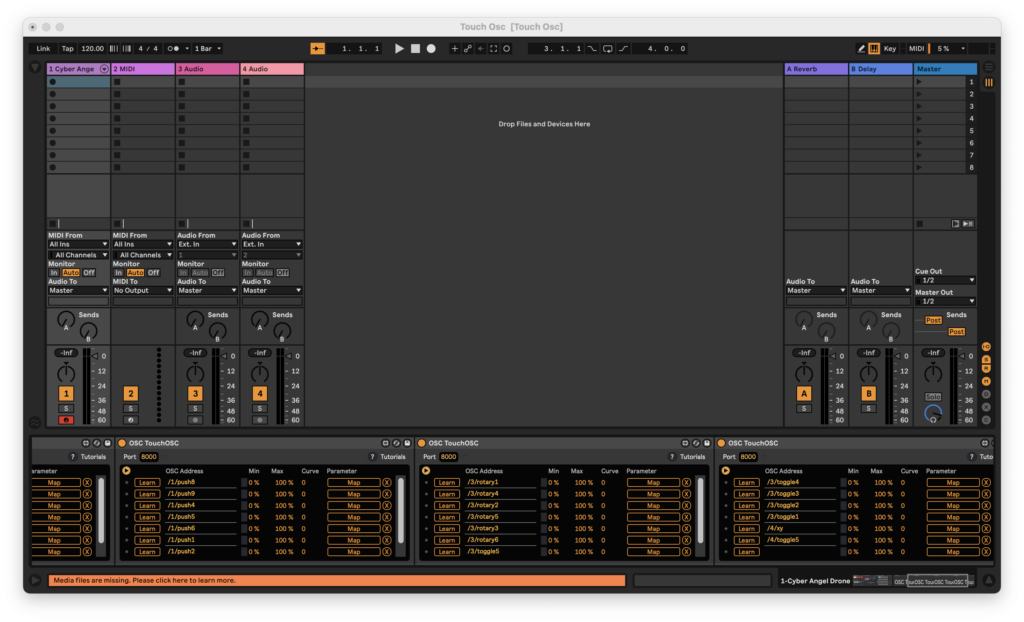
Within Isadora, I patched each of the webcams into a distinct video effect, a spinner actor, and a master RGBA/Colorizer. Using the “Simple” preset in TouchOSC on an iPad and an iPhone, I was able to set OSC watchers to trigger each of the effects, the spinner and the colorizer. The effects were triggered with the MPC-style drum pad “buttons” in TouchOSC on the iPad and the colorizer was set to an XY pad on the iPhone. All of this is layered over a blue train themed video. The result is a patch that makes the train a true “performer” dancing to a Kick and Snare beat…that no one can hear…yet.
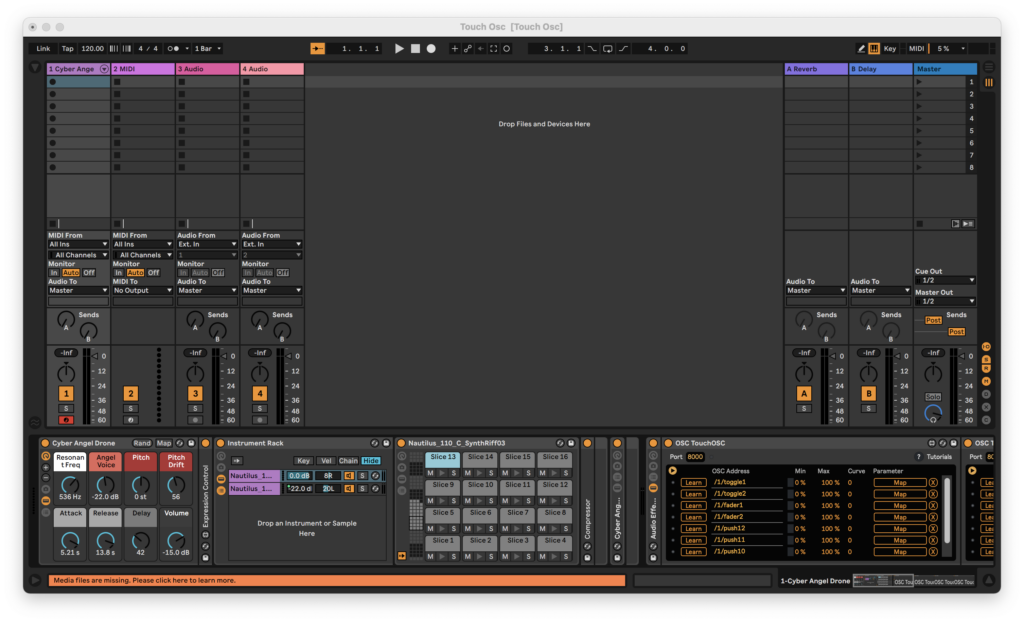
Cycle 2 began with the untimely death of my green box in a gravity related accident. In dealing with this abrupt change in resources, the cycle saw the implementation of Ableton Live. Woven into the Cycle 1 patch is a change of OSC channels in order to line up with the MIDI notes of a Kick and Snare in Ableton. I built in some ambition into my Ableton set by assigning every button in the “Simple” TouchOSC preset. The result is a similar video performance by the train, but now we can hear its music.
Cycle 3 began with a number of deviations from the train theme. I was looking for new ways to integrate my previous discoveries in a manner that would be less constrained by the physical domain existing solely in my house. I toyed around with some inverse chromakey patches that would sense the head of a blue-yarn mallet and trigger a sound. In returning to the train theme, I attempted to make an overlay that would use blob tracking and proximity targets to trigger sounds.
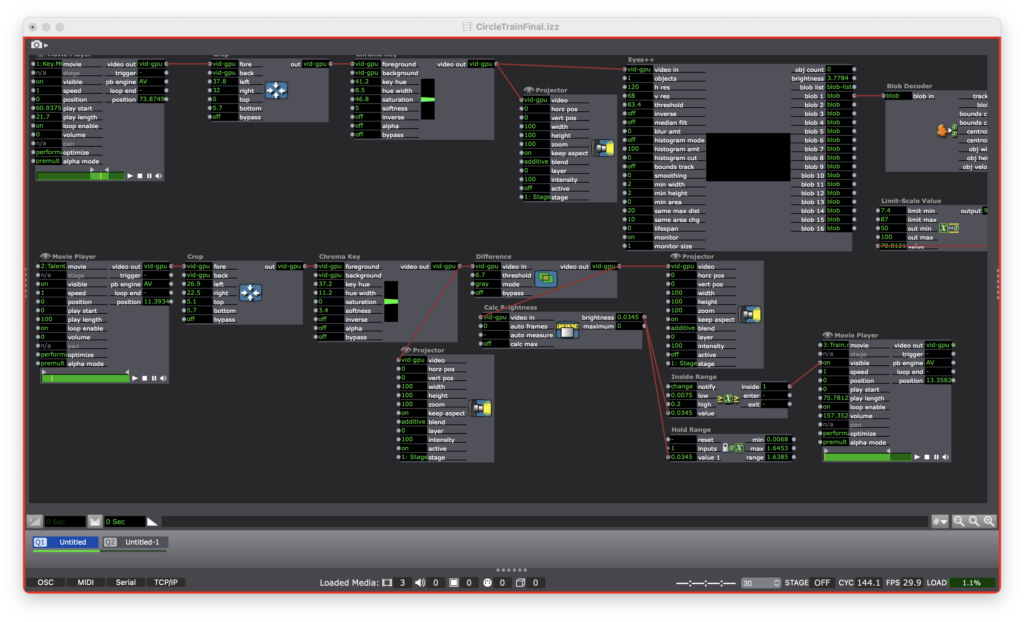
Ultimately, I resurrected the green box…and it the product looks and behaves a bit like a zombie. I went with a different Eyes++ setup in tandem with a simple motion tracker. As it turns out, I messed up the Eyes++ to the point that it wasn’t doing anything at all. In my final patch, the motion sensor is simply turning a train sound on and off as the train enters the frame of the camera. I intended to implement an cartoon overlay that would follow the train around the track thanks to the Eyes++ rig. Alas, the Roger Rabbit train is Sir Not-Appearing-in-This-Film thanks to a supply chain disruption of that most important of resources: time.
In this patch, I used video of the train from two different angles: bird’s eye and slightly downward. This made the patch easier to work with since I wasn’t constantly turning the train on and off. It also zombified the Cycle a bit more with the train no longer being a live performer. However, I justify this decision with the idea that the train was only ever a stand-in for a live performer.
On a final note, I will be packaging the final patch for future enjoyment to be accessed on this site.
Cycles 2+3 (Sara)
Posted: April 28, 2021 Filed under: Assignments, Sara C | Tags: Godot Leave a comment »Intent
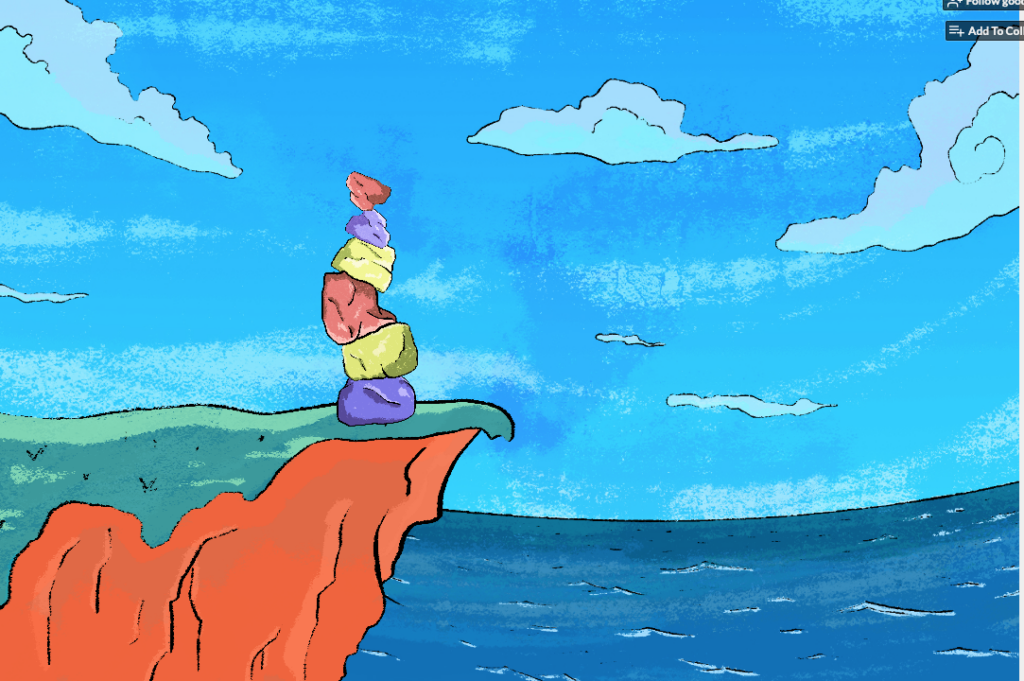
Originally, I intended to call this project “Cliffside Cairn.” My goal was to build an ambient, meditative game in which the user could pick up and stack rocks as a way to practice slowing down and idly injecting a moment of calm into the churn of maintaining a constant online presence in the current global pandemic. I took inspiration from the Cairn Challenges present in Assassin’s Creed: Valhalla. While I haven’t been able to maintain the attention necessary to tackle a new, robust open-world game in some time, my wife has been relishing her time as a burly viking bringing chaos down upon the countryside. Whenever she stumbled upon a pile of rocks on a cliff, however, she handed the controller over to me. The simplicity of the challenge and the total dearth of stakes was a relief after long days.

As the prototype took shape, though, I realized that no amount of pastels or ocean sounds could dispel the rock stacking hellscape I had inadvertently created. I showed an early version to a graduate peer, and they laughed and said I’d made a punishment game. Undeterred, I leaned into the absurdity and torment of watching teetering towers tumble. I slapped the new name Rock Stackin’ on the project and went all in.
Process
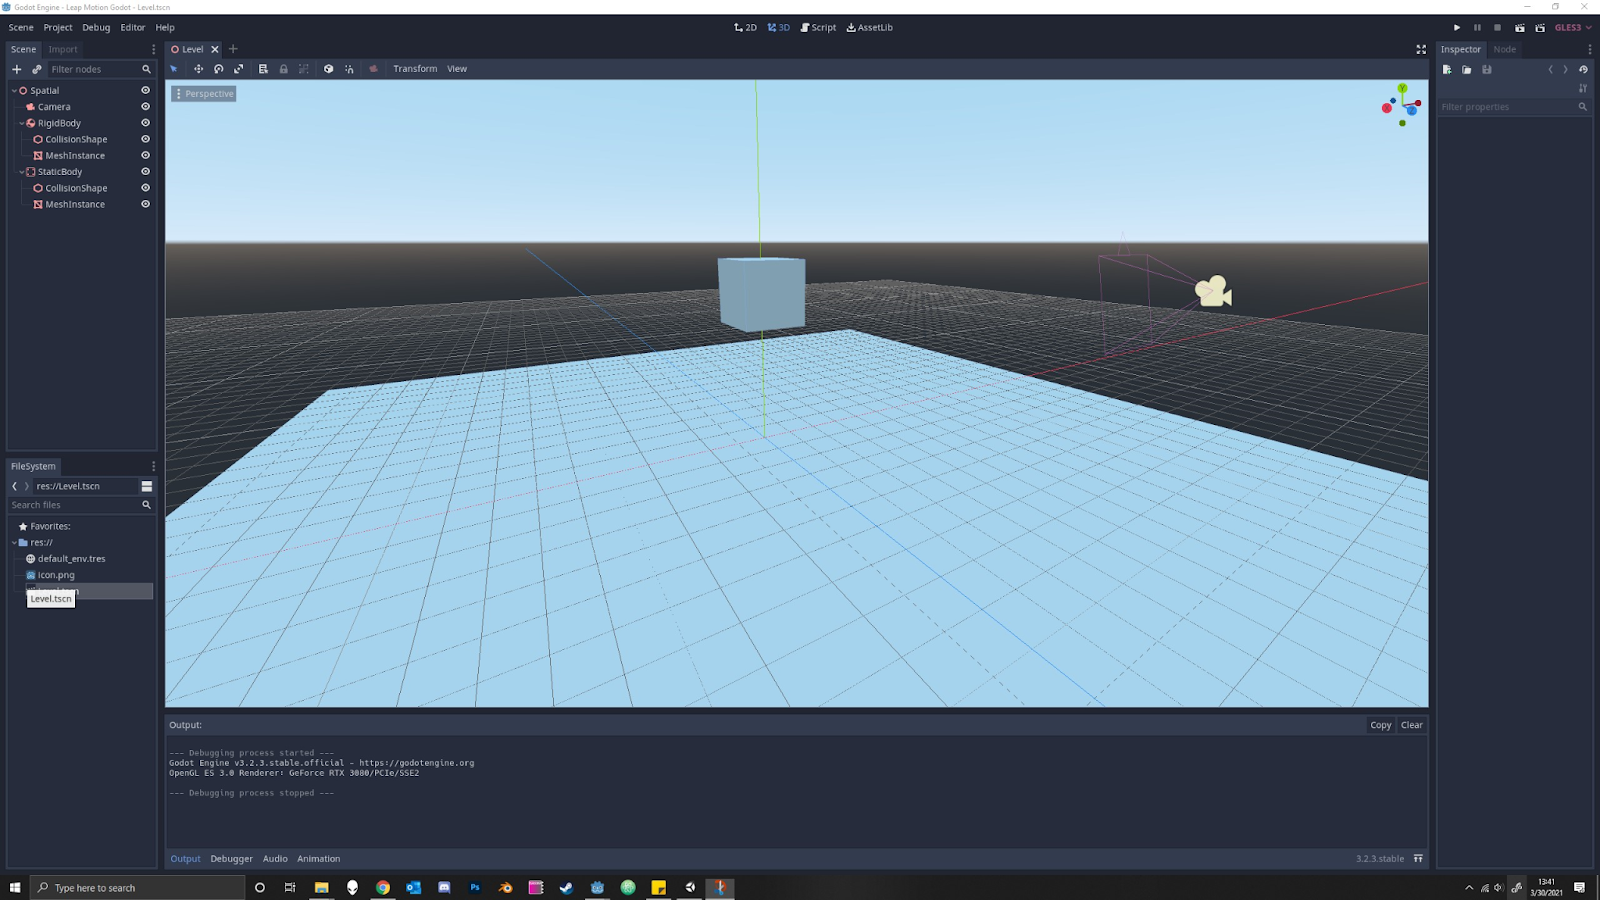
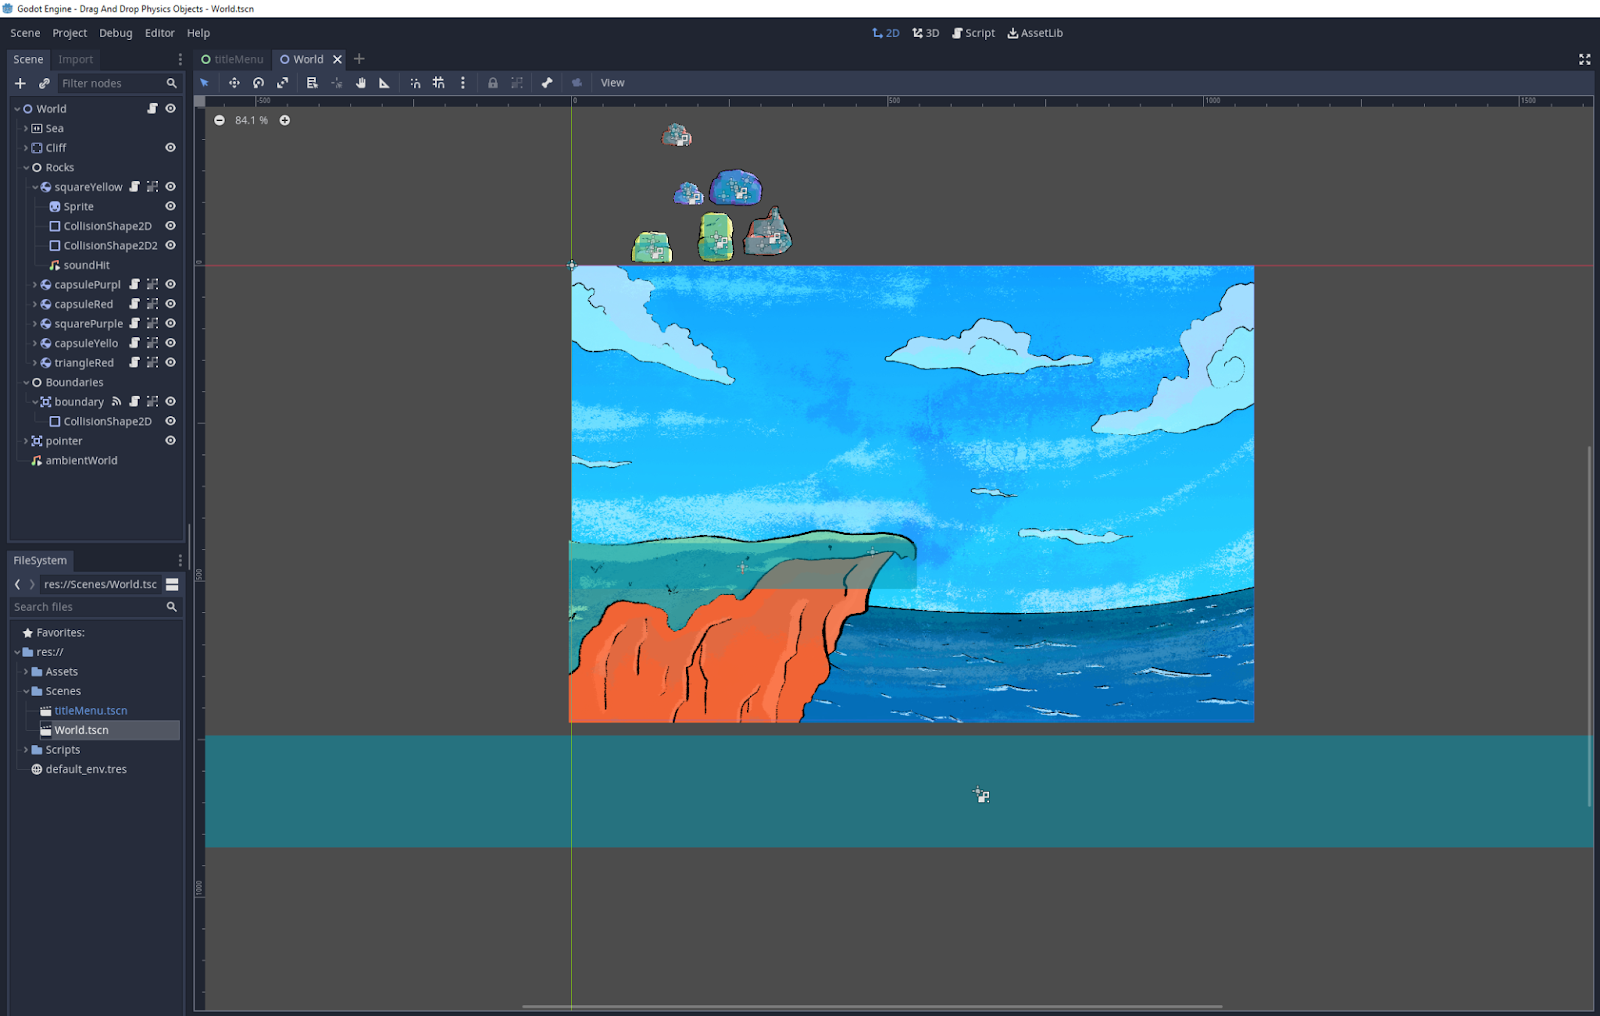
Initially, I sought to incorporate Leap Motion controls into the Godot Game Engine, so the user could directly manipulate 3D physics objects. To do so, I first took a crash course in Godot and created a simple 3D game based on a tutorial series. With a working understanding of the software under my belt, I felt confident I could navigate the user interface to set up a scene of 3D rock models. I pulled up the documentation I had barely skimmed the week before about setting up Leap Motion in Godot—only to find that the solution required a solid grasp of Python.
After it became clear that I would not be able to master Python in a week, I briefly toyed around with touch-and-drag controls as an alternative before setting Godot aside and returning to Isadora. Establishing Leap Motion controls in Isadora was straightforward; establishing physics in Isadora was not. Alex was remarkably patient as I repeatedly picked his brain for the best way to create a structure that would allow Isadora to recognize: 1. When a rock was pressed, 2. When a rock was released, and 3. Where the rock should fall when it was released. With his help, we set up the necessary actors; however, incorporating additional rocks presented yet another stumbling block.
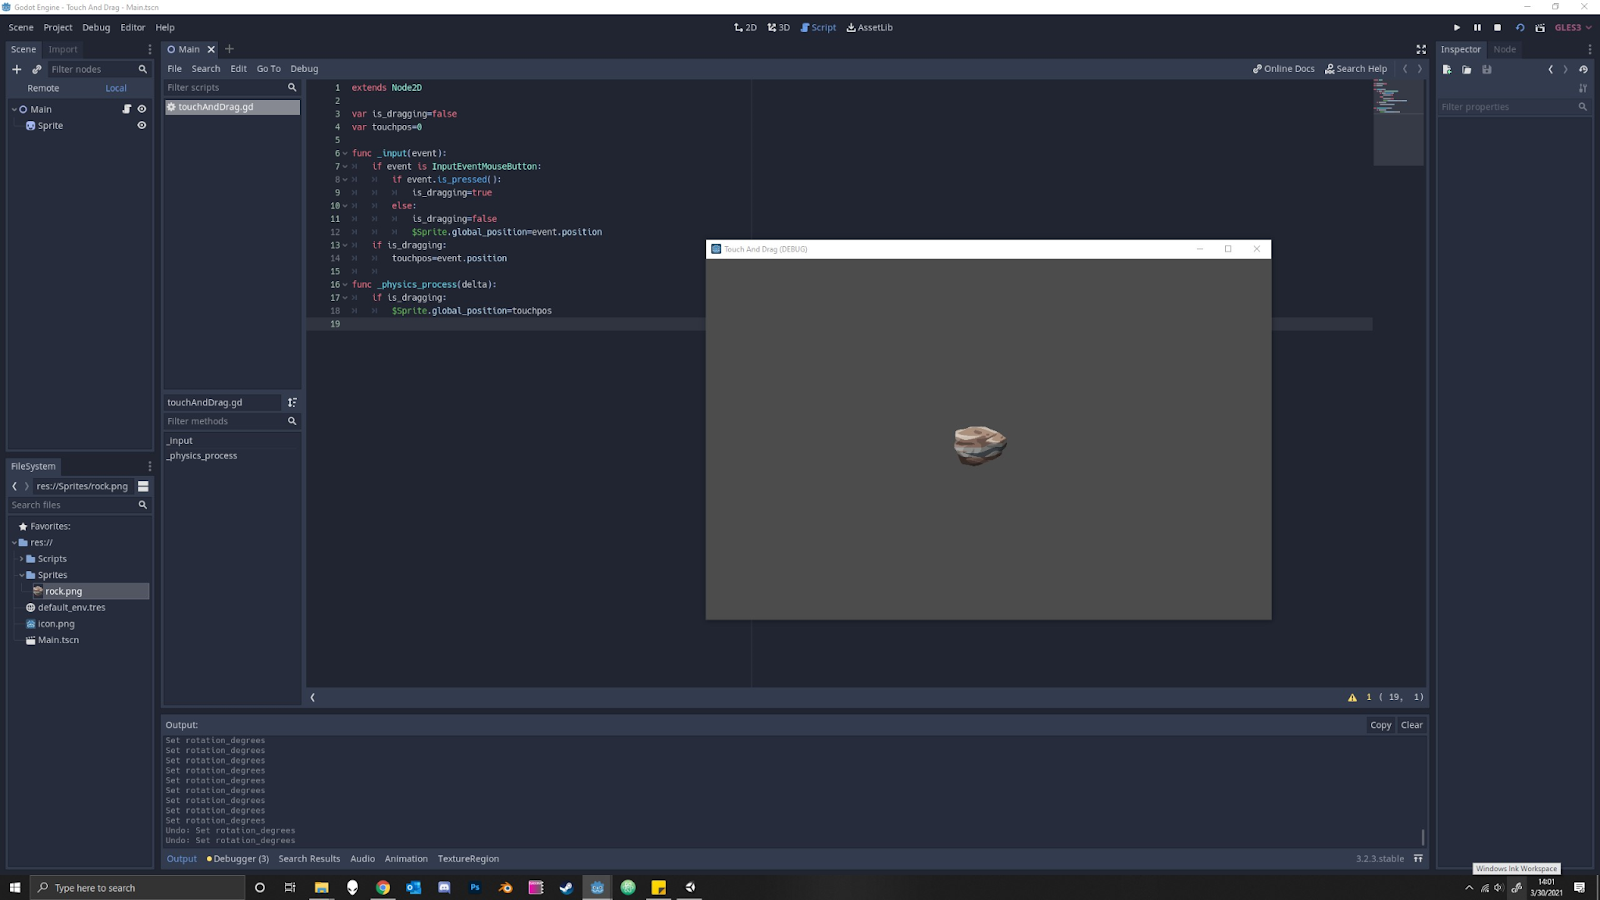
I returned to my intent: stack rocks for relaxation. Nowhere in that directive did I mention that I needed to stack rocks with the Leap Motion. Ultimately, I wanted to drag and drop physics objects. That was not intuitive in Isadora, but it was in Godot, so at the 11th hour, I returned to Godot because I believed it was the appropriate tool for the job.
Challenges
As a designer, I know the importance of iteration. Iterate, iterate, iterate—then lock it in. The most significant challenge I faced with this effort was the “locking it in” step. I held onto extraneous design requirements (i.e., incorporate Leap Motion controls) much longer than I should have. If I had reflected on the initial question and boiled it down to its essential form sooner, I could have spent more time in Godot and further polished the prototype in time for the final presentation.
Additionally, when I did decide to lean into the silliness of the precariousness of the rock stack, I decided I wanted to insert a victory condition. If the user could indeed create a rock stack that stayed in place for x amount of time, I wanted to propel them to a “You Win!” screen. I thought I would replicate the boundary reset script I successfully implemented, but I realized one could game the system just by dragging an object into the Area2D node.
Finally, while I did incorporate ambient wave sounds, I struggled to add additional sound effects. The rock splash sound was only supposed to trigger when it hit the water, but it fired when the scene began as well. I faced similar challenges when trying to add rock collision sound effects.
Accomplishments
Challenges aside, I’m incredibly pleased with the current prototype. I successfully implemented code that allowed for dragging and dropping of physics objects that interacted with colliders. Without that, Rock Stackin’ would have been impossible. Furthermore, I established a scene reset script if the user flings a rock off the edge. At first, I prevented the user from being able to drag a user off the screen with the inclusion of multiple invisible colliders. However, I wanted some tension to emerge from the potential of a tumbling tower, and a reset seemed like a gentle push. Lastly, I’m pleased with the rock colliders I added. Capsule colliders caused jitter, while rectangle colliders provided no challenge. Multiple rectangle colliders scaled and rotated to fit the rocks I had drawn and led to a pleasing amount of collision and groundedness.
Observations
As I mentioned previously, I was using software not ideally suited for my needs. My main observation stems from that realization:
Go where the water flows.
Identify the hierarchy in your design goals and use the best tools for the job. I spent a while bobbing against the shore before I pushed myself back into the stream to where the water flowed.
Cycle 2
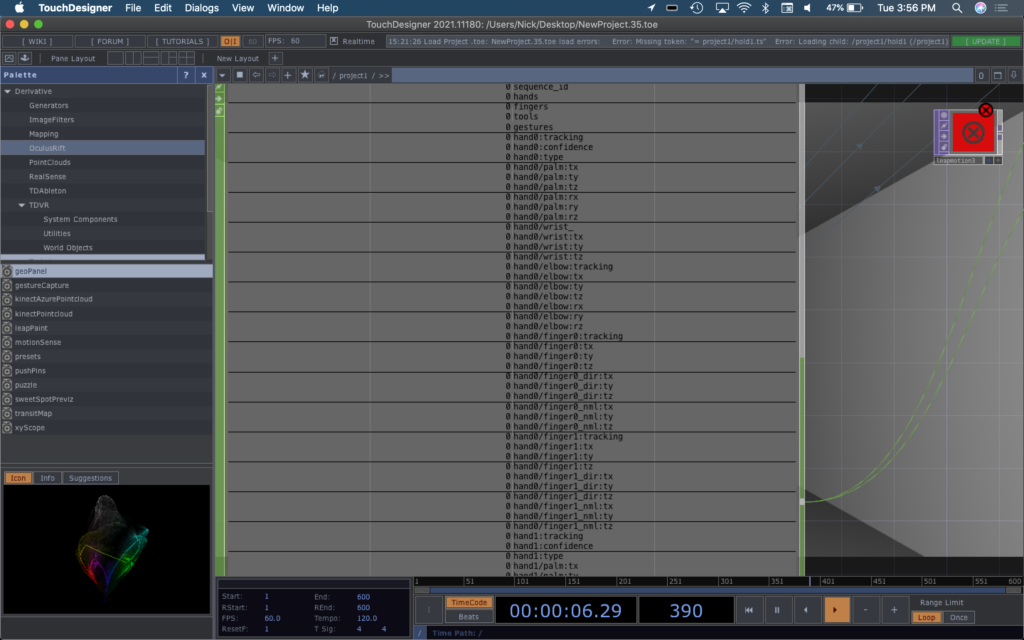
Posted: April 27, 2021 Filed under: Nick Romanowski Leave a comment »The goal with Cycle 2 was to create the leap-motion driven firing mechanism for the game environment. My idea was to use the leap-motion to read a user’s hand position and orientation and used that to set an origin of and trigger the launch of a projectile. TouchDesigner’s Leap operator had an overwhelming amount of outputs that read nearly every joint in the hand, but they didn’t quite have a clean way to recognize gestures. To keep things simple, the projectile launch is solely based on the x-rotation of your hand. When the leap detects that your palms is perpendicular to the ground, it sends that pulse that causes the projectile to launch.
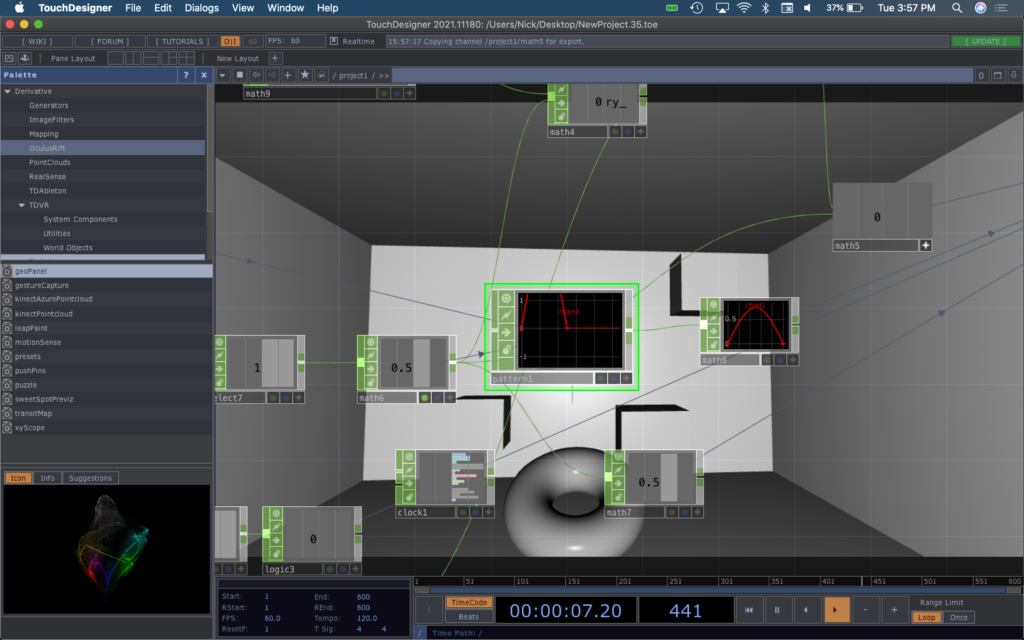
Creating launch mechanics was a bit of a difficult feat. The system I built in Cycle 2 had no physics and instead relied on some fun algebra to figure out where a projectile should be at a given time. When the hand orientation trigger is pulsed, a timer starts that runs the duration of the launch. When it’s running, a torus’s render is toggled to on and its position is controlled by the network shown below.
The timer numbers undergo some math to become the z-axis value of the torus. The value of a timer at a specific time feeds into a pattern operator formatted like a parabola to grab a y-axis value on said parabola and map it to the y-axis of the parabola. The x-axis of the user’s hand is used to manipulate that amplitude of the pattern operator parabola to cause the torso to go higher if you tilt your hand back. Using a slope formula: y=mx. the x-axis position of the torus is calculated. The timer value is multiplied by a value derived from the y-rotation of your hand to fire the torus in the direction that your aiming. When the timer run completes, it resets everything and puts the torus back at its start point.
Cycle 1/2 (Sean)
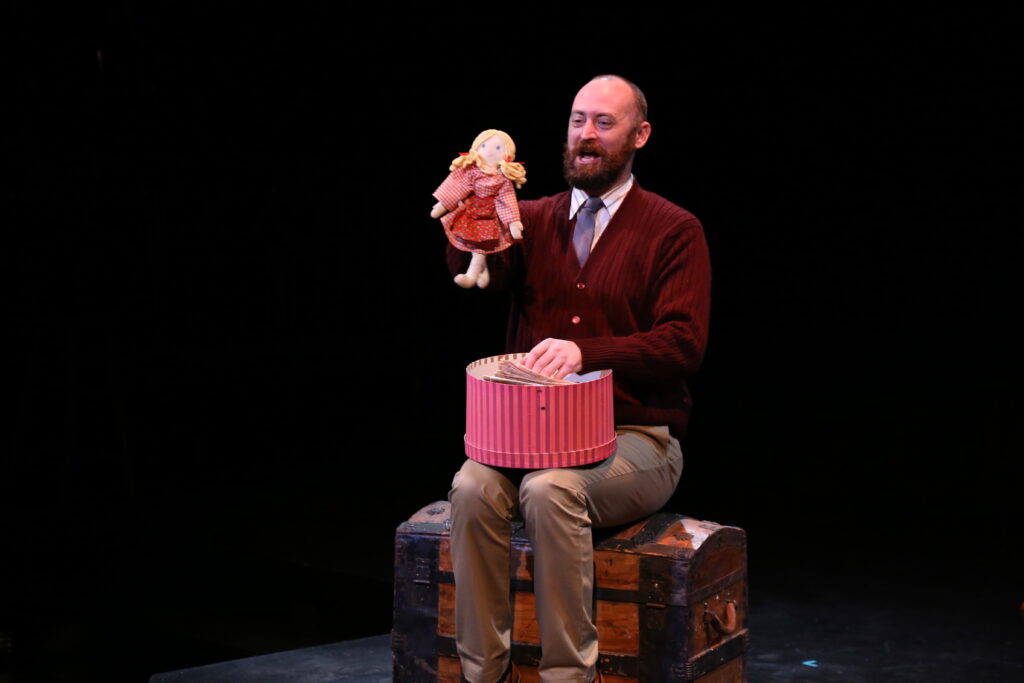
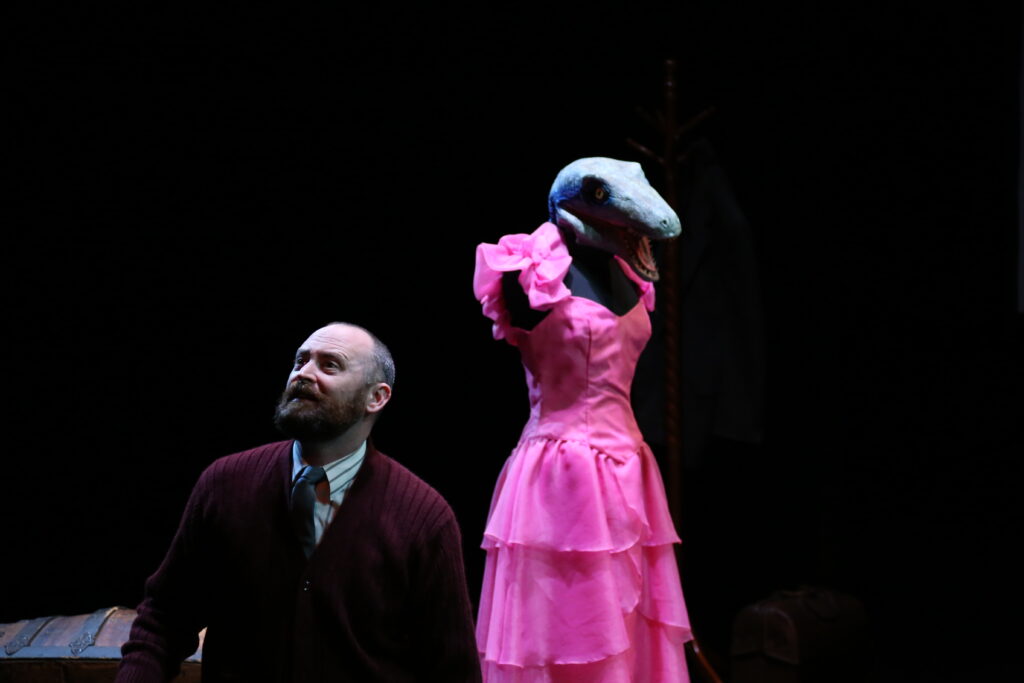
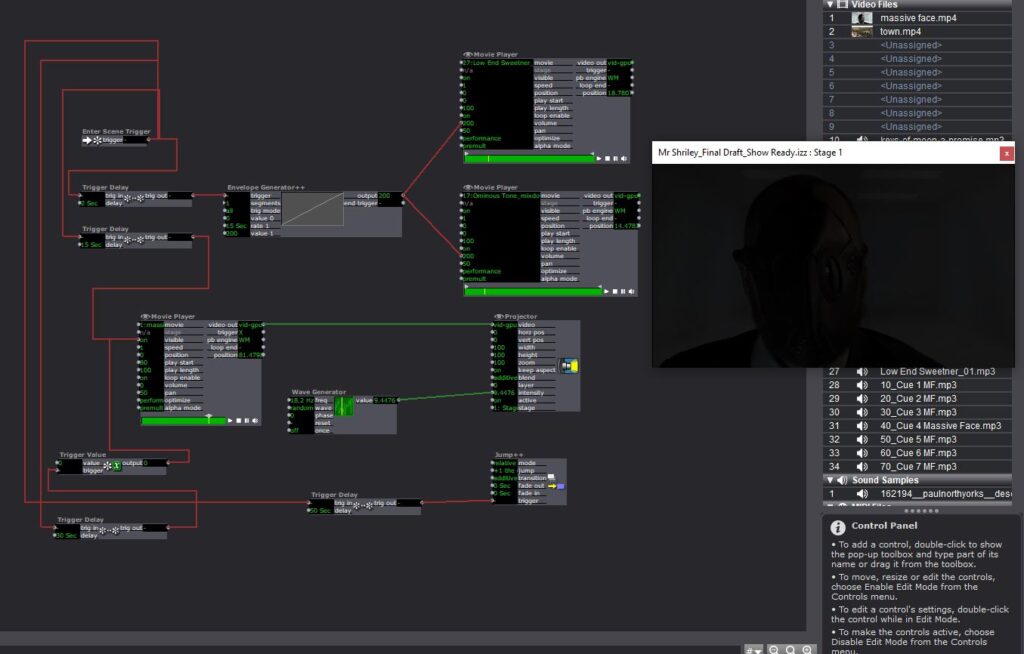
Posted: April 7, 2021 Filed under: Uncategorized Leave a comment »My first couple of cycles got mashed up a bit. I was working with the set deadline of tech rehearsal and performance of my solo thesis show, Mr. Shirley at the End of the World. In ordinary times, this would be presented live but due to the pandemic, I had to film the production for virtual presentation. The primary reason I enrolled in this class was to work with Isadora to program the sound and media in my show. Here are some images below.

Basically what I was trying to do was create a user friendly interface for the person running the media/sound for my show to just hit assigned buttons and make things happen on cue. I tried my best to automate as many transitions as I could to cut down on them having to think too hard about what do. For instance, to begin the show they just hit the space bar and the next could scenes cycled through automatically. A visual cue was noted in the program to let the Isadora operator know when to transition to the next scene by hitting the “Media Out” button I created.
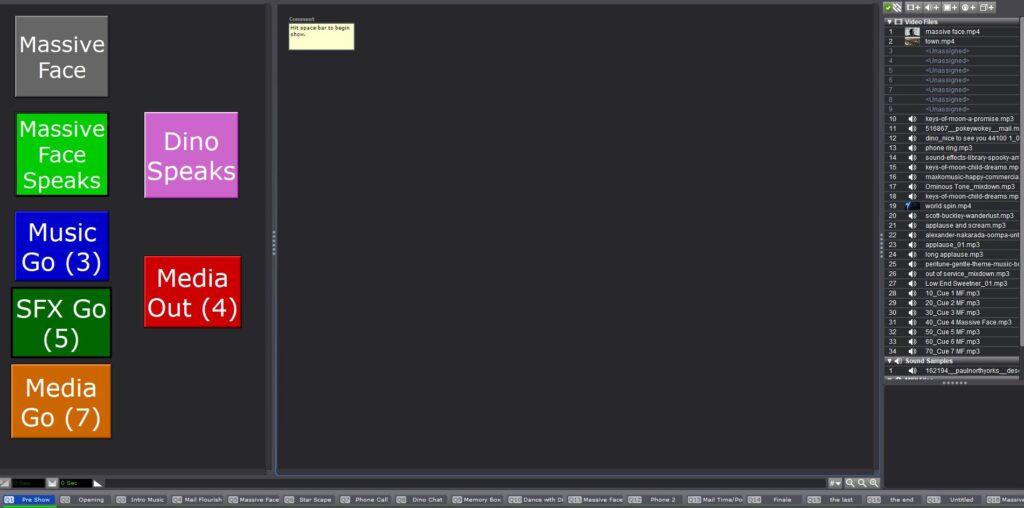
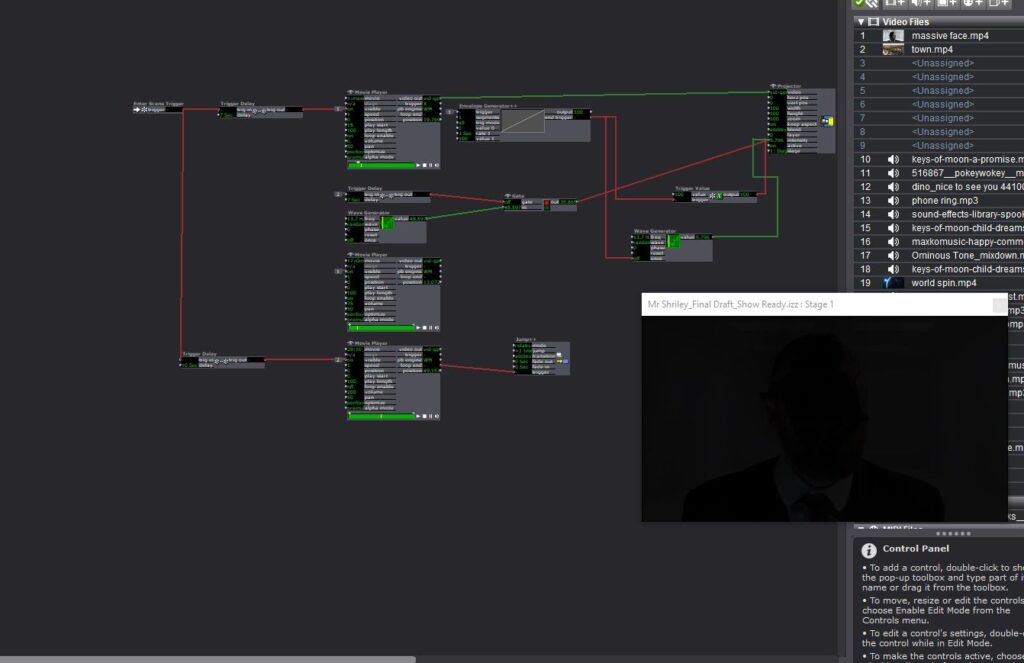
I made some fairly significant use of the envelope generators in this to control the fading of music and media images. I also created a User Actor that would act as a neutral background and repeat several times throughout the performance. I also utilized a router on several scenes so that I could use the same button to initiate separate MP3 files.
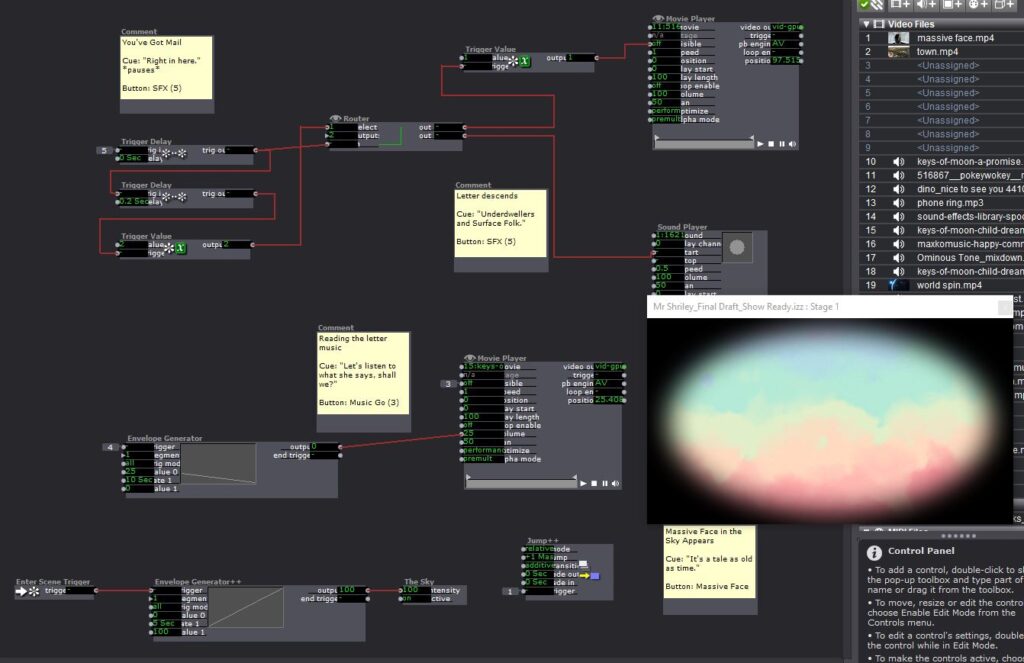
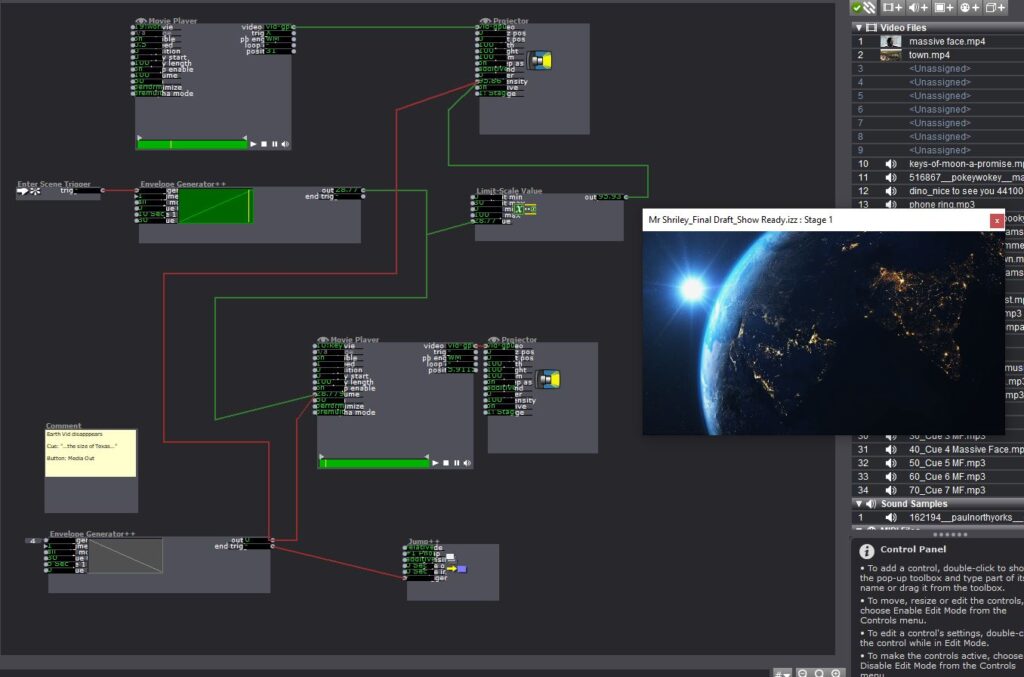
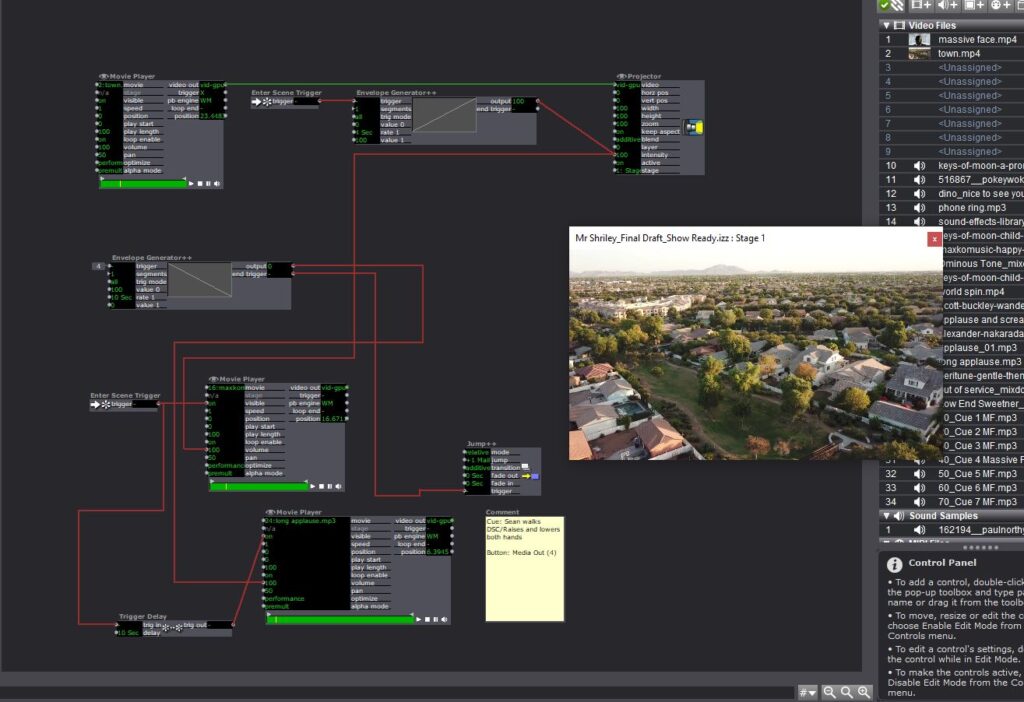
The next two slides are from the end of the show. After the last cue I’m able to let the rest of the show play out without having to manually hit any buttons.
Cycle 1
Posted: April 6, 2021 Filed under: Nick Romanowski Leave a comment »My overall goal for this final project is to create a video game like “shooting” environment that utilizes leap motion controls and a parallax effect on the display. Cycle 1 was focused on creating the environment in which the “game” will take place and building out a system that drives the head tracking parallax effect. My initial approach was to use basic computer vision in the form of blob tracking. I originally used a syphon to send kinect depth image from Isadora into TouchDesigner. That worked well enough, but it lacked a z-axis. Wanting to use all of the data the kinect had, I decided to try and track the head in 3D space. This lead me down quite the rabbit hole as I tried to find a kinect head tracking solution. I looked into using NIMate, several different libraries for processing, and all sorts of sketchy things I found on GitHub. Unfortunately none of those panned out so I fell on my backup, which was Isadora. Isadora looks at your skeleton and picks out the bone associated with your head. It then runs that through a limit scale value actor to turn it into values better suited for what I’m doing. Those values then get fed into an OSC transmit actor.
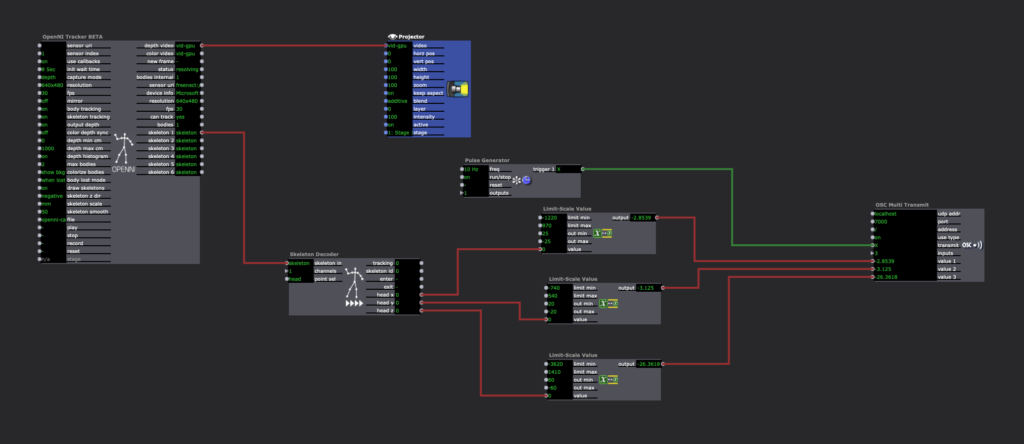
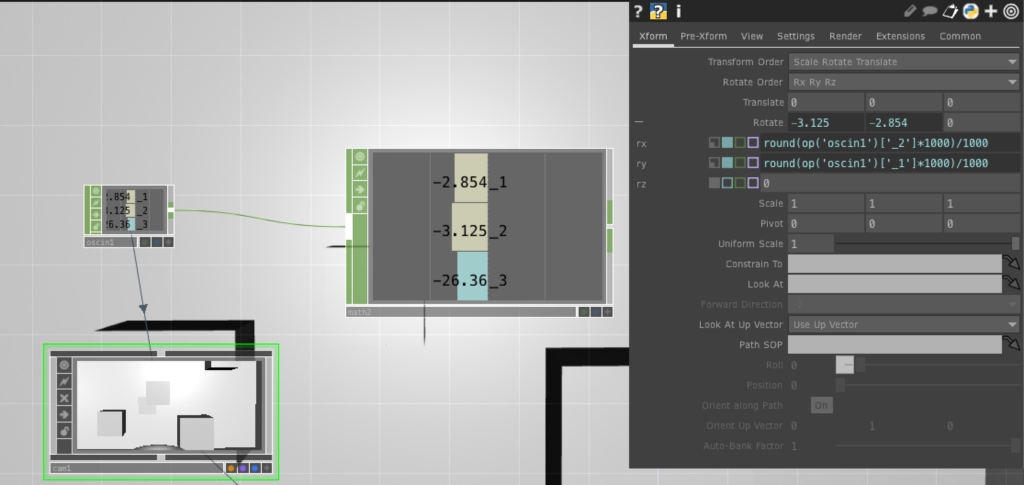
TouchDesigner has an OSCin node that listens for the stream coming out of Isadora. Using a little bit of python, a camera in touch allows its xRotation, yRotation, and focal length to be controlled by the values coming from the OSCin. The image below shows some rounding I added to the code to make the values a little smoother/consistent.
TouchDesigner works by allowing you to set up a 3D environment and feeding the various elements into a Render node. Each 3D file, the camera, and lighting are connected to the renderer which then sends that image to an out which can be viewed in a separate window.