Pressure Project#1: Pitch, Please.
Posted: February 10, 2026 Filed under: Pressure Project I | Tags: Interactive Media, Isadora, Pressure Project, Pressure Project One Leave a comment »Description: Pitch, Please is a voice-activated, self-generating patch where your voice runs the entire experience. The patch unfolds across three interactive sequences, each translating the frequency from audio input into something you can see and play with. No keyboard, no mouse, just whatever sounds you’re willing to make in public.
Reflection
I did not exactly know what I wanted for this project, but I knew I wanted something light, colorful, interactive, and fun. While I believe I got what I intended out of this project, I also did get some nice surprises!
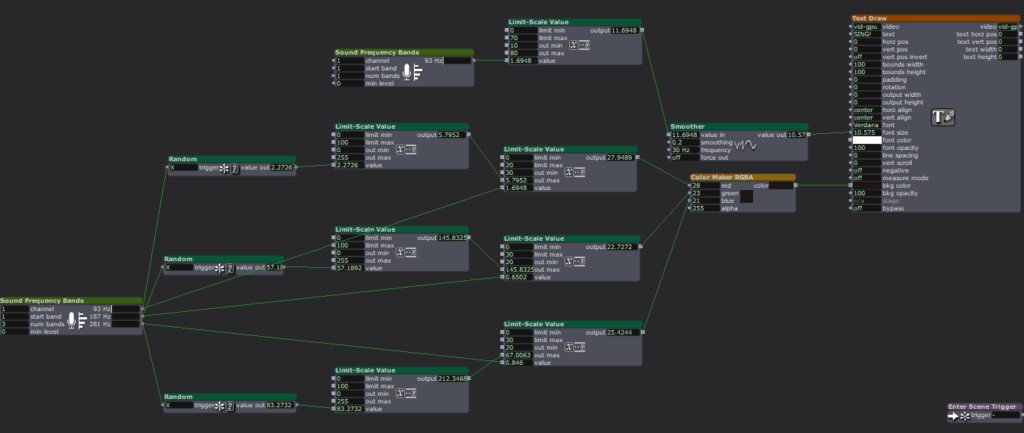
The patch starts super simple. The first sequence is a screen that says SING! That’s it. And the moment someone makes a sound, the system responds. Font size grows and shrinks, and background colors shift depending on frequency. It worked as both onboarding and instruction, and made everyone realize their voice was doing something.
The second sequence is a Flappy Bird-esque game where a ball has to dodge hurdles. The environment was pretty simple and bare-bones, with moving hurdles and a color-changing background. You just have to sing a note, and make the ball jump. This is where things got fun. Everyone had gotten comfortable at this point. There was a lot more experimentation, and a lot more freedom.
The final sequence is a soothing black screen, with a trail of rings moving across the screen like those old screensavers. Again, audio input controls the ring size and color. Honestly, this one was just made as an afterthought because three sequences sounded about right in my head. So, I was pretty surprised when majority of the class enjoyed this one the best. It’s just something about old-school screensaver aesthetic. Hard to beat.
What surprised me most was how social it became. I was alone at home when I made this and I didn’t have anyone test it so, it wasn’t really made with collaboration in mind, but it happened anyway. I thought people would interact one at a time. Instead, it turned into a group activity. There was whistling, clapping and even opera singing. (Michael sang an Aria!) At one point people were even teaming up, and giving instructions to each other on what to do.
When I started this project, I had a very different idea in my mind. I couldn’t figure it out though, and just wasted a couple hours. I then moved on to this idea of a voice controlled flappy-duck game, and started thinking about the execution it in the most minimal way possible (because again, time). This one took me a while, but I reused the code for the other two sequences and managed to get decent results within the timeframe. There’s something about knowing there is a time limit. It just awakens a primal instinct in me that kind of died after the era of formal timed exams in my life ended. In short, I pretty much went into hyperdrive and delivered. I’m sure I would’ve wasted a lot more time on the same project if there was no time limit. I’m glad there was.
That said, could it be more polished? Yes. Was this the best I could do in this timeframe? I don’t know, but it is what it is. If I HAD to work on it further, I’d add a buffer at the start so the stage doesn’t just start playing all of a sudden. I would also smooth out the hypersensitivity of the first sequence which makes it look very glitchy and headache-inducing. But honestly, with the resources that I had, Pitch, Please turned out decent. I mean, I got people to play, loudly, badly, collaboratively, and with zero shame, using nothing but their voice. Which was kind of the whole point.
Pressure Project 1: Bouncing Idle Screen
Posted: October 15, 2025 Filed under: Uncategorized | Tags: Isadora, Pressure Project Leave a comment »The idea for this pressure project came to me based on the “achievements” that Alex gave us to work towards. At first I was concerned about how I could possibly keep an audience engaged for over 30 seconds with something non-interactive. But then I thought about something completely noninteractive that does keep people engaged, and that’s the DVD bouncing idle screen. I specifically remember doing this myself whenever I saw it, but I knew other people liked doing it too from seeing it in internet memes or referenced in pop culture. This idea seemed perfect as it could definitely be done within Isadora.
The only issue was that it didn’t feel like it would be enough work for 5 hours. I then decided that because this idle screen plays on a TV, I could simulate someone changing channels. My first thoughts for other channels were full static and the color bars as obviously I can’t animate anything too complex (although maybe a live feed camera could have worked…). This was when I started creating the project in Isadora.
The first thing I made was the TV. I wanted an actual TV to be visible instead of just using the edges of the stage because it looks nicer but also because it just makes it feel more authentic. I also wanted it to be in the classic 4:3 resolution that old CRT TVs had. Another aspect of these older TVs that I wanted to emulate was the curved corners of the screen (technically the entire screen is bulging out but this is a 2D representation). With that plan in mind, I created the first TV with two boxes: the outer TV casing and the screen. I made the outer casing a darkish grey hue and the screen was a sort of dark grey/green thing that I associate with turned-off TVs of this type (the screen also has a thick black border so the entire thing doesn’t go from outer casing to the screen). The first issue came with adding the curved corners of the screen. The best way I could figure out how to do this was to use a shape with odd insets as that was the closest thing to a negative space curve. The issue with this however, was that it couldn’t be layered under border while on top of the screen, as those were both being represented by a single square. See below:

To solve this, I recreated the border casing as 4 individual rectangles so that the layering would allow the corner shape to be on top of the screen and under the border. The also allowed the entire TV itself to have softer edges as the rectangles ended up not perfectly flush. The TV was also made into a user actor where the color of the screen was controllable. The completed turned-off TV is below:

Next was to make the main attraction: the bouncing idle screen. The first thing I did was create a default white square. I used two wave generators for its vertical and horizontal position, with the wave generators in triangle mode as the movements should constant the entire time. To my surprise, this immediately worked in making the square bounce around the screen exactly as I wanted, the only exception is that it was bouncing around the borders of the entire stage. After some scaling and position subtracting (mostly done through trial and error) the square correctly bounced within the TV.
Now that I have something bouncing, it’s time to make that thing change colors every time it hits as edge. I did this by using an inside range actor connected to the wave generators. Every time the wave generators left the range of 0.5 – 99.5 it sent out a signal. This perfectly corresponds to when the shape bounces off a wall. I then connecting this signal to three random actors and connected those to a color maker RGBA actor’s red, green, and blue values to generator a random color for the shape. Now every time the square bounces off a wall, it also changes color.
The final thing I needed to do was replace the default square shape with something else. I didn’t want to recreate the original exactly, so I replaced the “DVD” text with “ACCAD” and just put a small empty oval underneath it similar to the original. I turned this into a user actor to simplify the views and after a few more operations it looked great. See below:

I was extremely happy with how this turned out, but I still needed a bit more to complete the project. The next thing I created was the static screen. At first I wanted it to be as accurate as possible by having a large number of shapes act as pixels, but this quickly showed to be not possible. At one point I had over a hundred little “pixels” that would get a random black and white color and position in the screen but the lag this caused was too great to continue. Not to mention the fact that it looked horrible! I then briefly thought about using several images of static screen and cycling between them, but I couldn’t remember how to display and swap images and this seemed like the easy approach any way. I ended up using a couple dozen large “pixels” to simulate a sort of static. By coincidence, they ended up in a similar pattern to how the color bars looked and so I was satisfied enough. The squares simply get a random black and white color in a pretty fast frequency. See below:

The last screen I made was the color bars. This was very simple as it was just static colors, although getting the exact correct positions was a little annoying sometimes.
Finally, I decided to simulate the TV turning off as it felt like a pretty iconic old TV action and a satisfying conclusion. For this animation, I used two wave generators set to sawtooth and to only play once. One wave generator squishes a big white square vertically into a line, and then the other squishes it horizontally until it’s gone. The end result was surprisingly satisfying! See below for the color screen into turning off:
Now that I had all the scenes complete, I needed to link them together. For the idle screen, I decided to start a counter for the number of times it bounces off the top or bottom wall. After 20 bounces it switches to static. For both static and the color bars I simply had a pulse generator activating a counter to switch after an amount of pulses. There was probably a better way to do this, but I was running out of time and there was one more thing I wanted to do.
The very last thing I added was channel text to the corners of the static and color bar scenes. This would further signify that this was a TV the viewer was looking at. Ideally, this would be solid and then slowly fade away, but given the time crunch it was just a very slow constant fade. Because these scenes only play briefly, it isn’t too noticeable.
The complete (although slightly shortened) result can be seen below:

The feedback I received on this project was amazing! I seemed like everyone made at least some noise while it was playing. One person said they were getting physically engaged in the idle bounces. Some people didn’t realize it was a TV until it changed channels which actually surprised me as it seemed obvious given the context of the idle bouncing. I hadn’t thought about how someone who wasn’t completely familiar with it wouldn’t know what was happening or what the border was supposed to represent. I was extremely happy when someone pointed out the curved corners of the screen as I thought nobody would even notice or care about it. There were also feelings of nostalgia and anticipation among the viewers as well.
This pressure project was a ton of fun! Isadora is just a blast to create things with and pushing its capabilities is something I loved exploring. If I had more time, I definitely could have done a lot more with this project, but I’m looking forward to creating more interactive experiences in future projects!
Cycle 3: It Takes 3
Posted: May 1, 2025 Filed under: Uncategorized | Tags: Cycle 3, Interactive Media, Interactive Shadow, Isadora, magic mirror Leave a comment »This project was the final iteration of my cycles project, and it has changed quite a bit over the course of three cycles. The base concept stayed the same but the details and functions changed as I received feedback from my peers and changed my priorities with the project. I even made it so three people could interact with it.
I wanted to focus a bit more on the sonic elements as I worked on this cycle. I started having a lot of ideas on how to incorporate more sonic elements, including adding soundscapes to each scene. Unfortunately I ran out of time to fully flesh out this particular idea and didn’t want to incorporate a half baked idea and end up with an unpleasant cacophony of sound. But I did add sonic elements to all of my mechanisms. I kept the chime when the scene became saturated, as well as the first time someone raised their arms to change a scene background. I did add a gate so this only happened the first time, to control the sound.
A new element I added was a Velocity actor that caused the image inside the silhouettes to explode, and when it did, it triggered a Sound Player with a POP! sound.This pop was important because it drew attention to the explosion to indicate that something happened and something they did caused it. This actor was also plugged into a Inside Range actor that was set to trigger a riddle at a certain velocity just below the range to trigger the explosion.

The other new mechanism I added was based on the proximity to the sensor of one of the users. The z-coordinate data for Body 2 was plugged into a Limit-Scale Value actor to translate the coordinate data into numbers I could plug into the volume input to make the sound louder as the user gets closer. I really needed to spend time in the space with people so I could fine-tune the numbers to the space, which I ended up doing during the presentation when it wasn’t cooperating. I also ran into the issue of needing that Sound Player to not always be on, otherwise that would have been overwhelming. I decided to have the other users have their hands raised to turn it on (it was actually only reading the left hand of Body 3 but for ease of use and riddle-writing, I just said both other people had to have them up).

I have continued adjusting the patch for the background change mechanism (raising the right hand of Body 1 changes the silhouette background and raising the left hand changes the background). My main focus here was making the gates work so it only changes one time while the hand is raised (gate doesn’t reopen until hand goes down), so I moved the gate to be in front of the Random actor in this patch. As I reflect on this, I think I know why it didn’t work; I didn’t program it to turn the gate on based on hand position, it only holds the trigger until the first one is complete, which is pretty much immediately. I think I would need an Inside Range actor to tell the gate to turn on when the hand is below a certain position, or something to that effect.

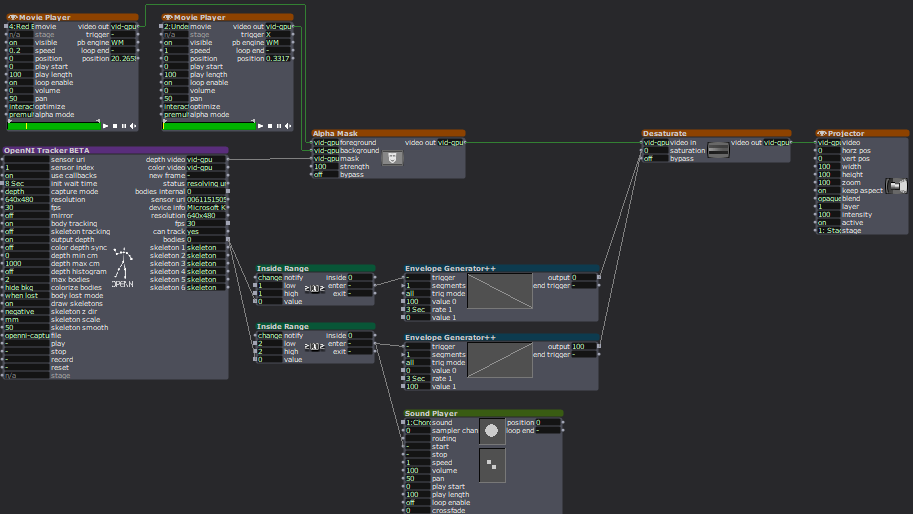
I sat down with Alex to work out some issues I had been having, such as my transparency issue. This was happening because the sensor was set to colorize the bodies, so Isadora was seeing red and green silhouettes. This was problematic because the Alpha Mask looks for white, so the color was not allowing a fully opaque mask. We fixed this with the addition of an HCL Adjust actor between the OpenNI Tracker and the Alpha Mask, with the saturation fully down and the luminance fully up.

The other issue Alex helped me fix was the desaturation mechanism. We replaced the Envelope Generators with Trigger Value actors plugged into a Smoother actor. This made for smooth transitions between changes because it allowed Isadora to make changes from where it’s already at, rather than from a set value.
The last big change I made to my patch was the backgrounds. Because I was struggling to find decent quality images of the right size for the shadow silhouettes, I took the information of one image that looked nice and created six simple backgrounds in Procreate. I wanted them to have bold colors and sharp lines so they would stand out against the moving backgrounds and have enough contrast both saturated and not. I also decided to use recognizable location-based backdrops since the water and space backdrops seemed to elicit the most emotional responses. In addition to the water and space scenes, I added a forest, mountains, a city, and clouds rolling across the sky.

These images worked really well against the realistic backgrounds. It was also fun to watch the group react, especially to the pink scene. They got really excited if they got a sparkle full and clear on their shadow. There was also a moment where they thought the white dots in the rainbow and purple scenes were a puzzle, which could be a cool idea to explore. I did have an idea to create a little bubble-popping game in a scene with a zoomed-in bubble as the main background.
The reactions I got were overwhelmingly positive and joyful. There was a lot of laughter and teamwork during the presentation, and they spent a lot of time playing with it. If we had more time, they likely would have kept playing and figuring it out, and probably would have loved a fourth iteration (I would have loved making one for them). Michael specifically wanted to learn it enough to manipulate it, especially to match up certain backgrounds (I would have had them go in a set order because accomplishing this at random would be difficult, though not impossible). Words like “puzzle” and “escape room” were thrown around during the post-experience discussion, which is what I was going for with the addition of the riddles I added to help guide users.
The most interesting feedback I got was from Alex who said he had started to experience himself ‘in third person’. What he means by this is that he referred to the shadow as himself while still recognizing it as a separate entity. If someone crossed in front of the other, the sensor stopped being able to see the back person and ‘erased’ them from the screen until it re-found them. This prompted that person to often go “oh look I’ve been erased”, which is what Alex was referring to with his comment.
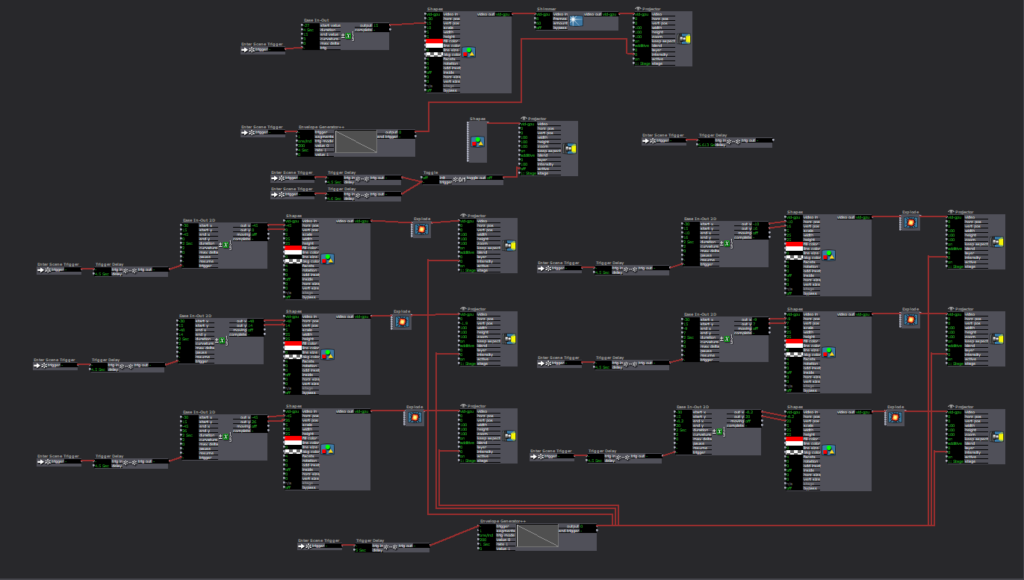
I’ve decided to include my Cycle 3 score here as well, because it has a lot of things I didn’t get to explain here, and was functinoally my brain for this project. I think I might go back to this later and give some of the ideas in there a whirl. I think I’ve learned enough Isadora that I can figure out a lot of it, particularly those pesky gates. It took a long time, but I think I’m starting to understand gate logic.
The presentation was recorded in the MOLA so I will add that when I have it :). In the meantime, here’s the test video for the velocity-explode mechanism, where I subbed in a Mouse Watcher to make my life easier.
Cycle 2: It Takes 2 Magic Mirror
Posted: April 12, 2025 Filed under: Uncategorized | Tags: Cycle 2, Interactive Media, Isadora Leave a comment »My Cycle 2 project was a continuation of my first cycle, which I will finish in Cycle 3. In Cycle 1, I built the base mechanisms for the project to function. My focus in this cycle was to start turning the project into a fuller experience by adding more details and presenting with larger projected images instead of my computer screen.
Overall, there was a great deal of joy. My peers mentioned feeling nostalgic in one of the scenes (pink pastel), like they were in an old Apple iTunes commercial. Noah pointed out that the recurrence of the water scene across multiple experiences (Pressure Project 2 and Cycle 1) has an impact, creating a sense of evolution. Essentially, the water background stays the same but the experience changes each time, starting with just a little guy journeying through space to interacting with your own enlarged shadows.
Alex asked “how do we recreate that with someone we only get one time to create one experience with?” How do we create a sense of evolution and familiarity when people only experience our work once? I think there is certainly something to coming into a new experience that involves something familiar. I think it helps people feel more comfortable and open to the experience, allowing them the freedom to start exploring and discovering. That familiarity could come from a shared experience or shared place, or even an emotion, possibly prompted by color or soundscape. Being as interested in creating experiences as I am, I have greatly enjoyed chewing on this question and its ramifications.
I got a lot of really great feedback on my project, and tons of great suggestions about how to better the experience. Alex mentioned he really enjoyed being told there was one detail left to discover and then finding it, so they suggested adding that into the project, such as through little riddles to prompt certain movements. There was also a suggestion to move the sensor farther back to encourage people to go deeper into the space, especially to encourage play with the projected shadows up close to the screen. The other major suggestion I got was to use different sounds of the same quality of sound (vibe) for each action. Alex said there is a degree of satisfaction in hearing a different sound because it holds the attention longer and better indicates that a new discovery has been made.
I plan to implement all of this feedback into my Cycle 3. Since I do not think I will be creating the inactive state I initially planned, I want a way to help encourage users to get the most out of their experience and discoveries. Riddles are my main idea but I am playing with the idea of a countdown; I am just unsure of how well that would read. Michael said it was possible to put the depth sensor on a tripod and move the computer away so it is just the sensor, which I will do as this will allow people to fully utilize the space and get up close and personal with the sensor itself. Lastly, I will play with different sounds I find or create, and add fade ins and outs to smooth the transition from no sound to sound and back.
As I mentioned earlier, the base for this project was already built. Thus, the challenges were in the details. The biggest hurdle was gate logic. I have struggled with understanding gates, so I sat down with the example from what we walked through in my Pressure Project 2 presentation, and wrote out how it worked. I copied the series of actors into a new Isadora file so I could play around with it on its own. I just followed the flow and wrote out each step, which helped me wrap my brain around it. Then I went through the steps and made sure I understood their purpose and why certain values were what they were. I figured out what I was confused about from previous attempts at gates and made notes so I wouldn’t forget and get confused again.

After the presentation day, Alex sent out a link (below) with more information about how gates work with computers, and a video with a physical example in an electric plug, which was neat to watch. I think these resources will be valuable as I continue to work with gates in my project.


Because I spent so much time playing with the gate and the staging, I did not get as far as I wanted with the other aspects. I still need to fix the transparency issue with the shadow and the background, and I realized that my videos and images for them are not all the right size. Aside from fixing the transparency issue, I will probably make my own backgrounds in Photoshop so I can fully ensure contrast between the shadow and background. The main mission for Cycle 3 will be adding in discoverable elements and a way to guide users towards them without giving away how.

The galaxy background is very clearly visible through the shadow, a problem I was not able to fix by simply changing the blend mode. I will likely have to do some research about why this happens and how to fix it.
Cycle One: Immersive Theatre
Posted: April 3, 2025 Filed under: Uncategorized | Tags: adobe, cycle 1, immersive theatre, Isadora, premiere pro, theater, theatre Leave a comment »For cycle one, I wanted to take the tools I had been equipped with over the first half of the course and utilize them in a theatrical context.Knowing that I would only be working with a bite sized chunk of work, I decided to revisit a play I had developed in a composition class my first year. It was a 20-ish minute play called The Forgotten World of Juliette Warner. It is a piece that juxtaposes the heroine’s journey with the stages of Alzheimer’s diseases. A theatrical convention of this piece in its initial construction was an ever changing set, meant to reflect the mind of the titular character where nothing is truly settled. Having actor’s move literal mats and blocks constantly was a barrier when establishing the suspension of disbelief. So recently trained in projection mapping, I developed a score around mapping the environments and bringing the audience inside the world.
My original score:
Resources Needed:
- Software: Isadora
- Hardware: Projector, long HDMI cables
- Space & Physical Elements: MOLA access, boxes, rolling boards, or curtains
Steps to Achieve This:
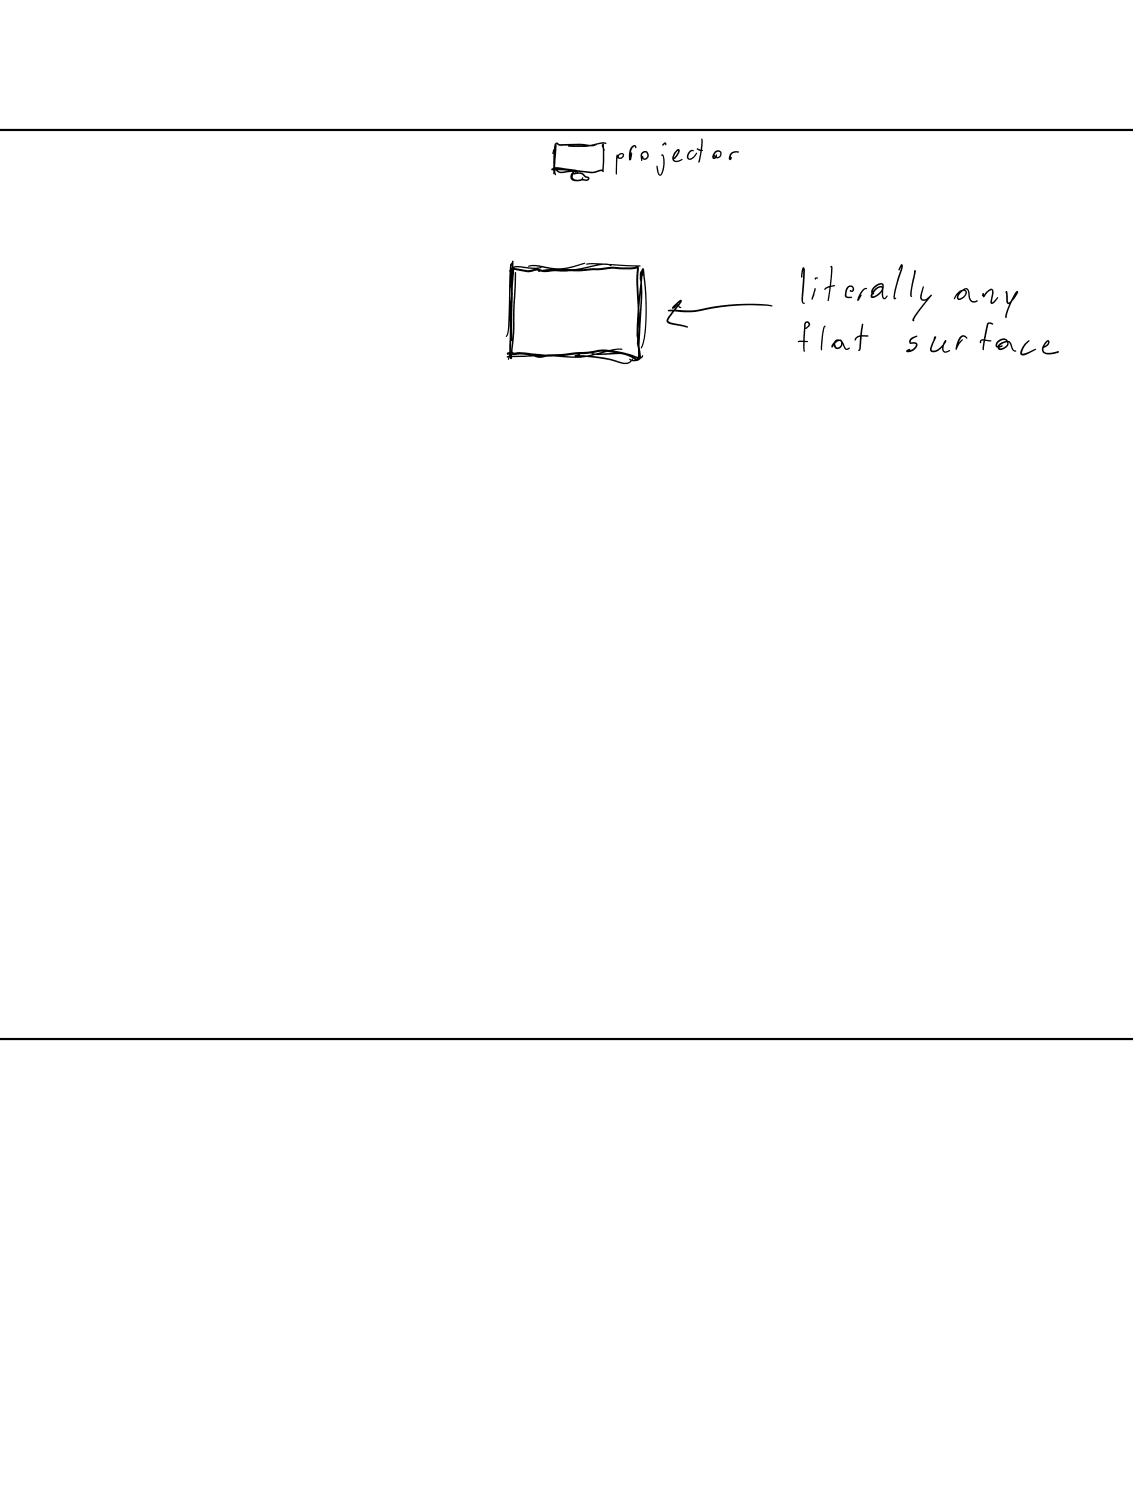
- Organize blocks, rolling boards, or curtains in the MOLA space as the base setup.
- Map the projector to these surfaces.
- Design and program projections to depict the shifting realities of Juliette’s world.
- Create a control board in Isadora for ease of access.
- Source actors.
- Rehearse.
- Present.
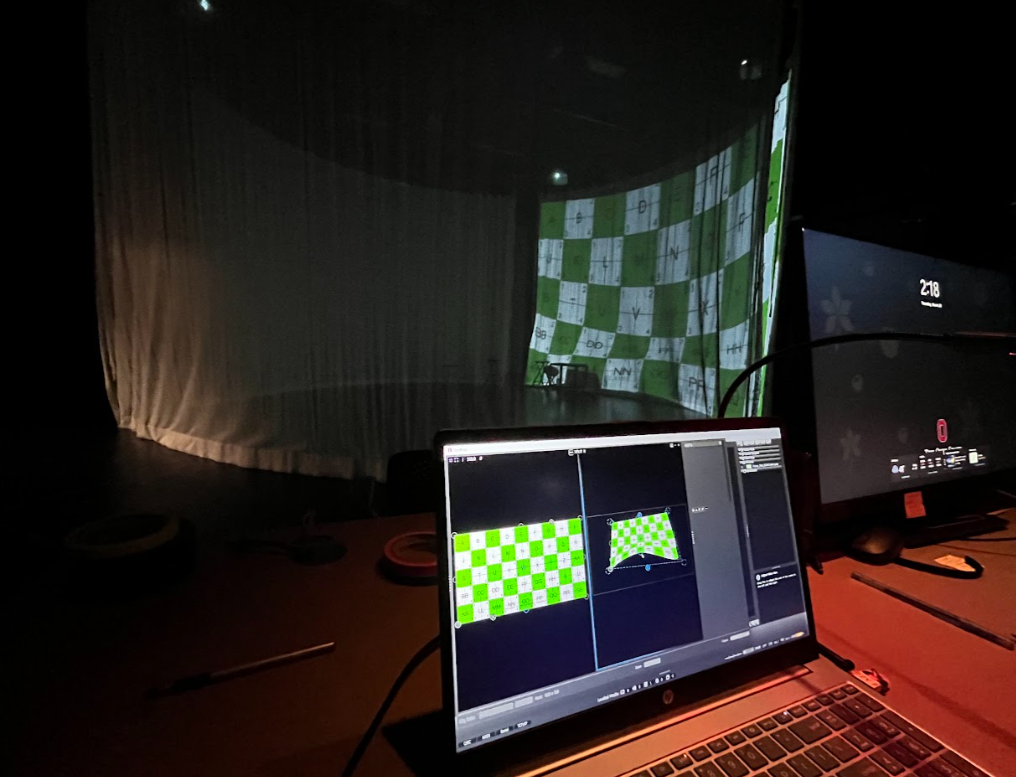
In my original score, I had anticipated projecting onto flat surfaces and possibly a curtain. But after our Motion Lab Demonstration, I observed a track for curtains that ran circular which I was immediately drawn to. So the first two days, with the gracious help of my peer Michael, I worked to understand routing NDI sources to 3 projectors in the motion capture lab. Through trial and error, we overcame a major barrier on day 2. When sending an NDI signal over a closed internet connection, many computers such as mine, will not send the signal if a firewall is enabled. After disabling the firewall, I was off to the races.
In IsaDora, I utilized EJ McCarthy’s focus grid to understand how to canvas the curtains properly. This was a meticulous effort that took nearly a whole class. I find that I can often get so focused on the specifics of the work, that I forget to take a step back and look at the big picture. So towards the end of class, I threw up some stock footage on all 3 curtains and to my surprise, I found that nearly everything is more forgiving than the focus grid.
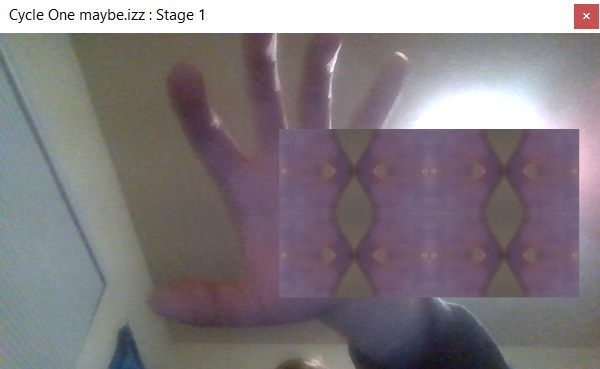
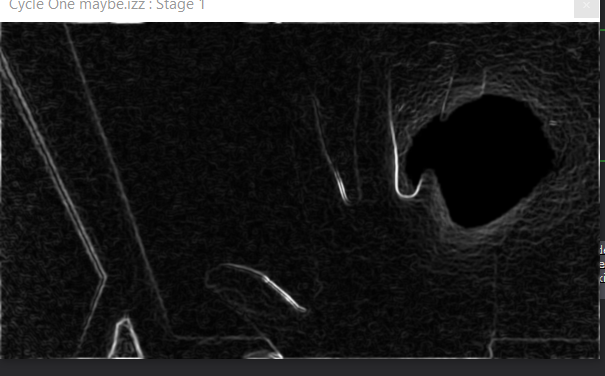
With my surfaces properly mapped for projection, it was time to turn to the script. This piece has always been one that makes me nervous because I want to handle this difficult subject matter with as much care as possible. So to avoid alienating my peers/the audience, I selected a brief snippet that occurs earlier in the play that revolves around a repeated daily occurrence, grabbing coffee. I felt that both the environment and the interaction would be familiar enough to put audiences at ease while also providing a great opportunity to show the evolution of Juliette’s mind. When writing this scene, I found that this scene occurred at these stages of the heroine’s Journey/Alzheimer’s development:
STAGE 3 – Noticeable Memory Difficulties (3A.The Awakening)
STAGE 4 – More Than Memory Loss (3B.Preparing for The Journey)
With one day left in class to work on this project, it was time to generate. Although I did not have this software initially in my score, I decided that Adobe Premiere Pro would be the best canvas to create this scene. I sourced stock footage and audio from both Adobe and Pixabay (an EXCELLENT source if you haven’t checked it out).
I had to source footage that could suggest a coffee shop without needing to be in full focus, I didn’t want the projections to be a focal point for the audience. I eventually settled on a nice loopable clip and to make the transition gradual, I then started the scene with a circular gaussian blur at the center and over the course of the 2 and half minute scene allowed it to encompass the entire video. I then created a sound design based on stock noises. With the audience being on the inside of the curtains, I felt it was important to not only surround them visually, but sonically. I utilized surrounding reverbs and panning to allow sounds to come from specific points in the room.
I moved this scene into my ISADORA file where it replaced the focus grid and easily projected on all 3 surfaces.
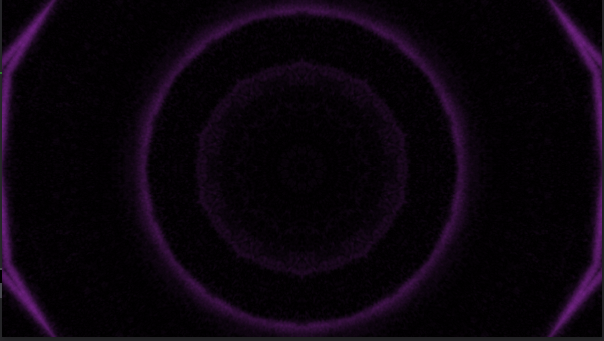
On the cue line “my mind” I set up a second scene in Isadora which would be the Doctor’s office. I used a similar approach to the coffeeshop, but reversed the blur effect. I did this to intentionally throw off the audience, to tell them that we were somewhere different, somewhere with much more sterile light, but slowly allowed that to be revealed over time.
With my projections designed, it was time to implement actors. I did source a few actors who agreed to take part in a staged reading of the scene. Given the nature of a class project, all my actor’s eventually backed out which led me to scramble for new actors. When I presented the piece in class, I was only able to give my actor’s their given circumstances and the instruction to follow their impulses. This created a sense of a scene, but led to some confusion in character dynamics and audience attention. For my personal taste, it created some clunky staging, but I was so thankful to have 2 actors who were gracious enough to jump in and with a brief rehearsal, we could have ironed this out.
In the feedback, which was extremely valuable, I learned that there was room to go further with the visual design. While the current projections and sound designs were immersive according to my peers, the same visual on all 3 surfaces created an uncanny blend that actually kind of takes the audience out of it. That being said, I did receive feedback that my approach was tasteful and the blur effect, while discrete, was noticed. Perhaps my biggest takeaway from the feedback was that there is a real opportunity to continually define and redefine the audience relationship. The coffee shop very much sent the message “I want you to be a part of this”, but the doctor’s office provides an opportunity to flip that on its head and push the audience out. When I continue to work with this project in cycle 3, I will explore how lighting can be a tool for achieving this effect. My question I will investigate is, “When can I afford to truly leave the audience in the dark”.
Overall, I am happy with the shape this project took. While it did not look at all how I originally intended, I was pleased to expand my muscles with NDI AND projection mapping at the same time while providing a unique theatrical experience for the audience. I laid the groundwork for a compelling piece and with an updated score and a bit more time, I can lean into the aspects of this project that were lost to time.
Cycle 1: It Takes Two Magic Mirror
Posted: April 1, 2025 Filed under: Uncategorized | Tags: cycle 1, Interactove Media, Isadora, magic mirror Leave a comment »My project is a magic mirror of sorts that allows for interaction via an XBox One Kinect depth sensor. The project is called “It Takes Two”, because it takes two people to activate. In its single-user state, the background and user’s shadow are desaturated with a desaturation actor linked to the “Bodies” output of the OpenNI Tracker BETA actor. When the sensor only detects 1 body (via an Inside Range actor), it puts the saturation value at 0. When a second body is detected, it sets the saturation value at 100. I have utilized envelope generators to ensure a smooth fade in and fade out of saturation.

The above patch was added onto the shadow mechanism I created. I did some research on how to achieve this, and experimented with a few different actors before concluding that I needed an Alpha Mask. The LumaKey actor was one I played with briefly but it did not do what I needed. I found a tutorial by Mark Coniglio, which is how I ended up in alpha-land, and it worked beautifully. I still had to tinker with the specific settings within the OpenNI Tracker (and there is still more to be fine-tuned), but I had a functional shadow.

My goal with Cycle 1 was to establish the base for the rest of my project so I could continue building off it. I sectioned off my time to take full advantage of lab time to get the majority of my work done. I stuck to this schedule well and ended Cycle 1 in a good position, ready to take on Cycle 2. I gave myself a lot of time for troubleshooting and fine-tuning, which allowed me to work at a steady, low-stress pace.
I did not anticipate having so much difficulty finding colorscape videos that would provide texture and contrast without being overwhelming or distracting. I spent about 45 minutes of my time looking for videos and found a few. I also ended up reusing some video from Pressure Project 2 that worked nicely as a placeholder and resulted in some creative insight from a peer during presentations. I will have to continue searching for videos, and I am also considering creating colored backdrops and experimenting with background noise. I spent about 20 minutes of my time searching for a sound effect to play during the saturation of the media. I wanted a sound to draw the users’ attention to the changes that are happening.
Overall, the reactions from my peers were joyful. They were very curious to discover how my project worked (there was admittedly not much to discover at this point as I only have the base mechanisms done). They seemed excited to see the next iteration and had some helpful ideas for me. One idea was to lean into the ocean video I borrowed from PP2, which they recognized, causing them to expect a certain interaction to occur. I could have different background themes that have corresponding effects, such as a ripple effect on the ocean background. This would be a fun idea to play with for Cycle 2 or 3.
The other suggestions matched closely to my plans for the next cycles. I did not present on a projector because my project is so small at the moment, but they suggested a bigger display would better the experience (I agree). My goal is to devise a setup that would fit my project. In doing so, I need to keep in mind the robustness of my sensor. I needed a very plain background, as it liked to read parts of a busy background as a body, and occasionally refused to see a body. Currently, I think the white cyc in the MOLA would be my best bet because it is plain and flat.
The other major suggestion was to add more things to interact with. This is also part of my plan and I have a few ideas that I want to implement. These ‘easter eggs’, we’ll call them, will also be attached to a sound (likely the same magical shimmer). Part of the feedback I received is that the sound was a nice addition to the experience. Adding a sonic element helped extend the experience beyond my computer screen and immerse the user into the experience.
This is a screen recording I took, and it does a great job demonstrating some of the above issues. I included the outputs of the OpenNI Tracker actor specifically to show the body counter (the lowest number output). I am the only person in the sensor, but it is reading something behind me as a body, so I adjusted the sensor to get rid of that so I could demonstrate the desaturation. Because it saw the object behind me as a body, Isadora responded as such and saturated the image. The video also shows how the video resaturates breifly before desaturating when I step out and step back in, which is a result of the envelope generator. (The sound was not recording properly, please see above for sound sample.)
My score was my best friend during this project. I had it open any time I was working on this project. I ended up adding to it regularly throughout the process. It became a place where I collected my research via saved links and tracked my progress with screenshots of my Isadora stage. It helped me know where I was at with my progress so I knew what to work on next time I picked it up and how to pace myself across this cycle by itself and all three cycles together. I even used to to store ideas I had for this or a future cycle. I will continue to build on this document in future cycles, as it was incredibly helpful it keeping my work organized.
Pressure Project 1 – Interactive Exploration
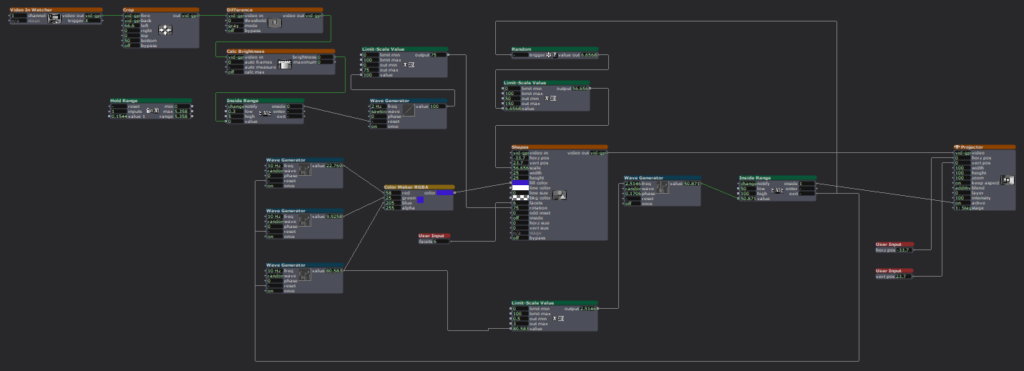
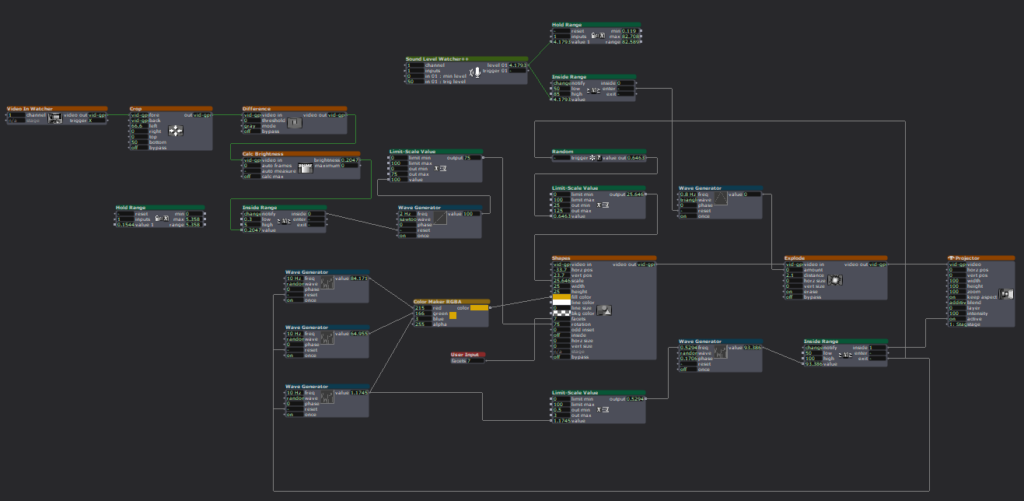
Posted: February 4, 2025 Filed under: Uncategorized | Tags: Interactive Media, Isadora, Pressure Project Leave a comment »For this project, I wanted to prioritize joy through exploration. I wanted to create an experience that allowed people to try different movements and actions to see if they could “unlock” my project, so to say. To do this, I built motion and sound sensors into my project that would trigger the shapes to do certain actions.
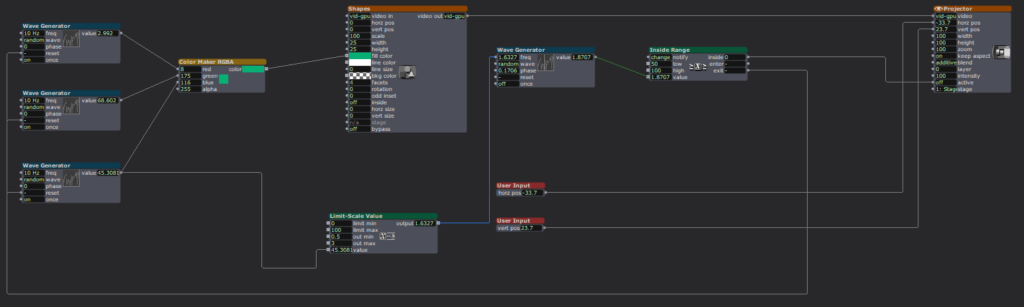
Starting this project was difficult because I didn’t know what direction I wanted to take it, but I knew I wanted it to have some level of interactivity. I started off small by adding a User Input actor to adjust the number of facets on each shape, then a Random actor (with a Limit-Scale Value actor) to simply change the size of the shapes each time they appeared on screen. Now it was on.
I started building my motion sensor, which involved a pretty heavy learning curve because I could not open the file from class that would have told me which actors to put where. I did a lot of trial-and-error and some research to jog my memory and eventually got the pieces I needed, and we were off to the races!
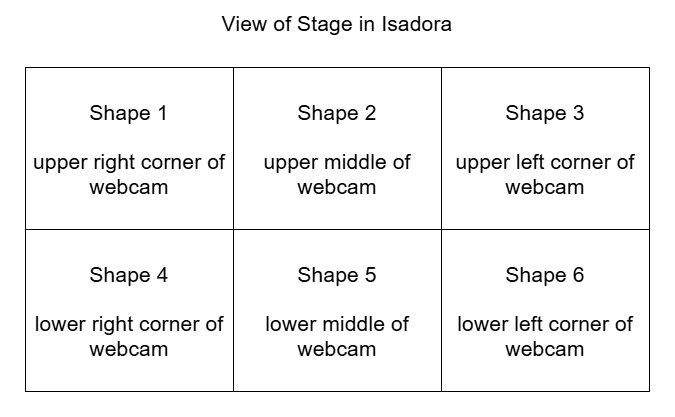
A mockup diagram of which section of the motion sensor is attached to each shape. The webcam is mirrored so it is actually backwards, which made it difficult to keep of which portion of the sensor attached to which shape.
Figuring out the motion sensor from scratch was just the tip of the iceberg; I still needed to figure out how to implement it. I decided to divide the picture into six sections, so each section triggered the corresponding shape to rotate. Figuring out how to make the rotation last the right amount of time was tricky, because the shapes were only on-screen for a short, inconsistent amount of time and I wanted the shapes to have time to stop rotating before fading. I plugged different numbers into different outputs of a Wave Generator and Limit-Scale Value actor to get this right.
Then it was time to repeat this process five more times. Because each shape needed a different section for the motion detector, I had to crop each one individually (making my project file large and woefully inefficient). I learned the hard way how each box interacts and that not everything can be copied to each box as I had previously thought, causing me to have to go back a few times to fix/customize each shape. (I certainly understand the importance of planning out projects now!)
I had some time left after the motion sensor was done and functional, so I revisited an idea from earlier. I had originally wanted the motion sensor to trigger the shapes to explode, but realized that would likely be overwhelming, and my brain was melting trying to get the Explode actor plugged in right to make it work. Thus, I decided on an audio sensor instead. Finding the sweet spot to set the value at to trigger the explosion was difficult, as clapping and talking loudly were very close in value, so it is not a terribly robust sensor, but it worked well enough, and I was able to figure out where the Explode actor went.
I spent a lot of time punching in random values and plugging actors into different inputs to figure out what they did and how they worked in relation to each other. Exploration was not just my desired end result; it was a part of the creative process. For some functions, I could look up how to make them work, such as which actors to use and where to plug them in. But other times, I just had to find the magic values to achieve my desired result.
This meant utilizing virtual stages as a way to previsualize what I was trying to do, separate from my project to make sure it worked right. I also put together smaller pieces to the side (projected to a virtual stage), so I could get that component working before plugging it into the rest of the project. Working in smaller chunks like this helped me keep my brain clear and my project unjumbled.
I worked in small chunks and took quick breaks after completing a piece of the puzzle, establishing a modified Pomodoro Technique workflow. I would work for 10-20 minutes, then take a few minutes to check notifications on my phone or refill my water bottle, because I knew trying to get it done in one sitting would be exhausting and block my creative flow. Not holding myself to a strict regimen to complete the project allowed me the freedom to have fun with it and prioritize discovery over completion, as there was no specific end goal. I think this creative freedom and flexibility gave me the chance to learn about design and creating media in a way I could not have with a set end result to achieve because it gave me options to do different things.
If something wasn’t working for me, I had the option to choose a new direction (rotating the shape with the motion sensor instead of exploding them). After spending a few hours with Isadora, I gained confidence in my knowledge base and skill set that allowed me to return to abandoned reconsidered ideas and try them again in a new way (triggering explosions with a sound sensor).
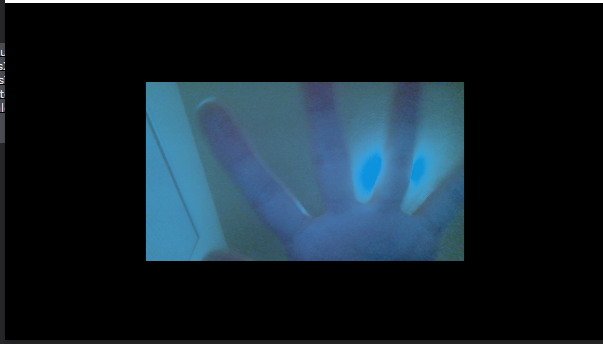
I wasn’t completely without an end goal. I wanted to create a fun interactive media system that allowed for the discovery of joy through exploration. I wanted my audience to feel the same way playing with my project as I did making it. It was incredibly fulfilling watching a group of adults giggle and gasp as they figured out how to trigger the shapes in different ways, and I was fascinated watching the ways in which they went about it. They had to move their bodies in different ways to trigger the motion sensors and make different sounds to figure out which one triggered the explosions.
Link to YouTube video: https://youtu.be/EjI6DlFUof0
Cycle One Mirror Room
Posted: April 10, 2024 Filed under: Uncategorized | Tags: cycle 1, Isadora Leave a comment »The concept for the whole project is to just have fun messing with different video effects that Isadora can create in real time. One of the ways of messing with your image in real time is with a mirror that is warped in some way. The first cycle is simple by just deciding on what kind of effects that should be applied to the person in the camera. I wanted each one to be unique so the effect is something not available in usual house of mirrors.
The feedback for the effects that had something that took a bit of time for the user to figure out what was going on was positive. They enjoyed messing around in the camera until they could have a decent idea on how they affect the outcome. The one they thought was lack luster was the one with lines trailing their image. They were able to figure out almost immediately how they affect the image. So, for the next cycle the plan is to update the one effect screen to make it a bit harder to decipher what is going on. Next on the list is to try and get a configuration set up with projectors and projection mapping so the person can be in view of the camera and see what is happening on the screen or projection without blocking the projection or showing up on screen at a weird angle.
Pressure Project 3: Puzzle Box
Posted: April 2, 2024 Filed under: Uncategorized | Tags: Isadora, Pressure Project, Pressure Project 3 Leave a comment »Well uh the thing is is that the project didn’t work. The idea was for a box to have a puzzle entirely solvable without any outside information. Anyone with any background can have a fair chance at solving the puzzle. So, because I am not a puzzle making extraordinaire, I had to take inspiration from elsewhere. It just so happens that a puzzle with just those requirements was gifted to me as a gift from my Grandpa. It is called a Caesar’s Codex. The puzzle works by presenting the user with a four rows of symbols that can slide up and down then right next to it is a single column of symbols. Then on the back is a grid full of very similar symbols to the ones with the four rows. Finally, their are symbols on the four sides that are similar to the ones on the column next to the four rows.
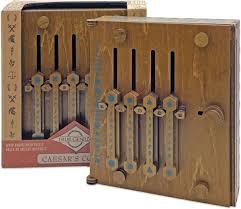
Now the challenge is to get this fully mechanical system to interact with the user interface created in Isadora. The solution was to use a Makey Makey kit. So the wat the user moves the pieces to solve the puzzle needed to change, but the hints to solve the puzzle needed to stay the same. The mechanical puzzle requires flipping the box over constantly to find the right symbol on the grid and then flip it over again to move the row to the right position. I opted to just have the grid portion be set up to directly solve the puzzle.
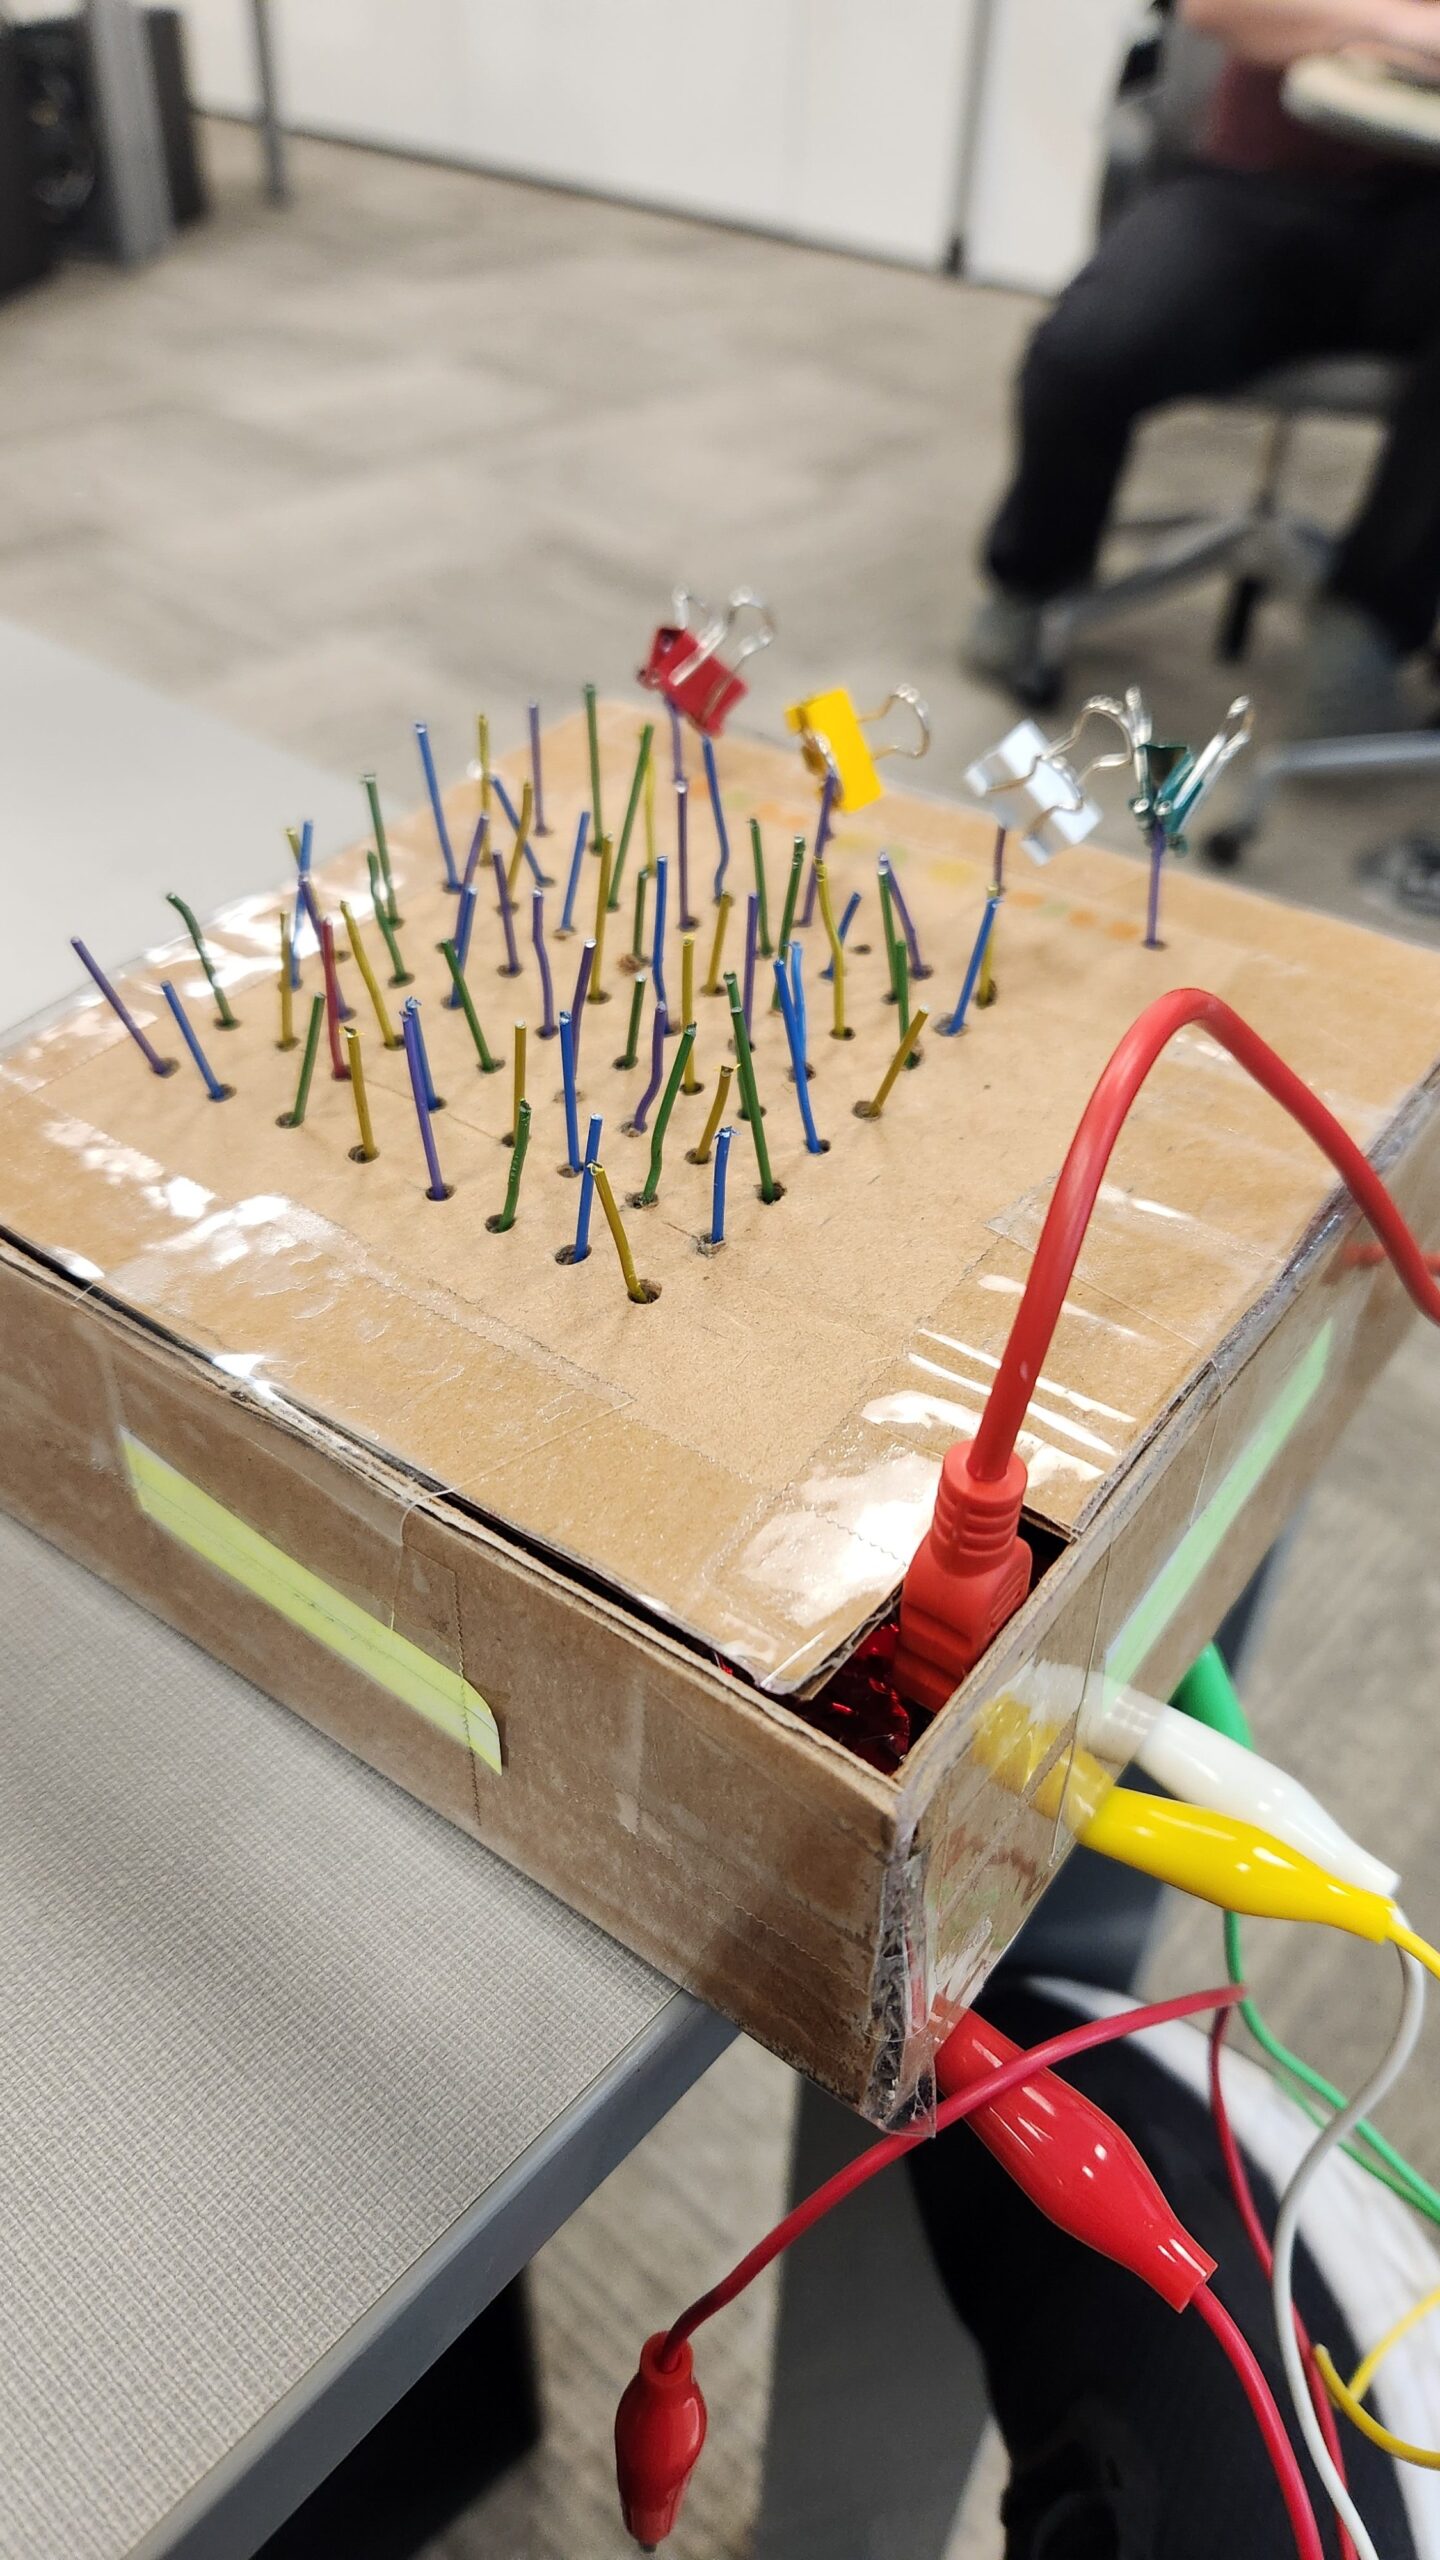
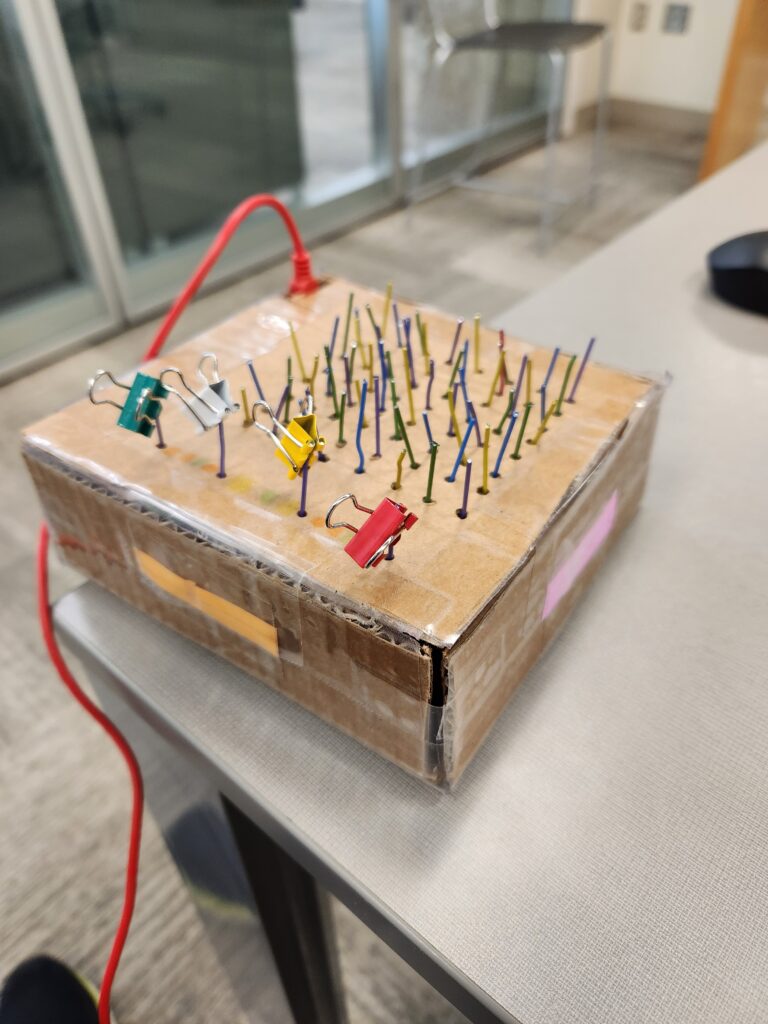
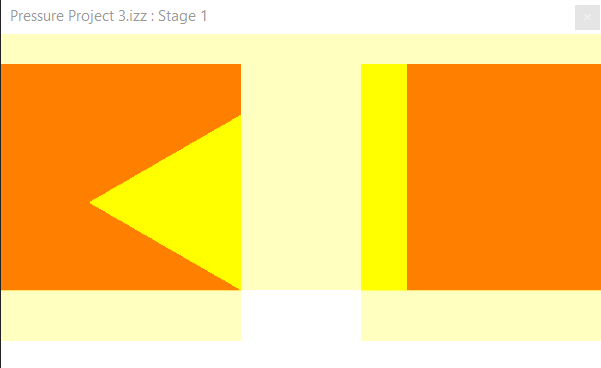
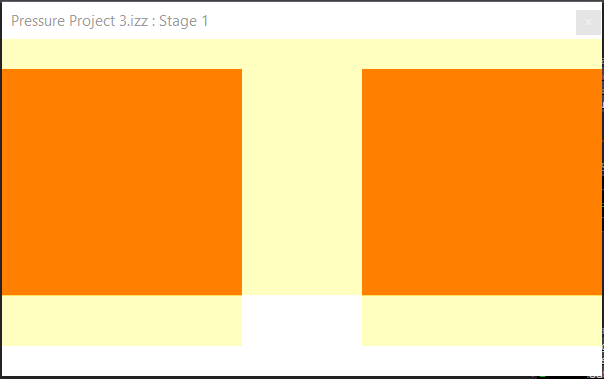
The paperclips are aligned in a grid like pattern for the users to follow. There is one unique paperclip color to indicate the start. The binder clips are used to indicate when an alligator clip needs to be attached to the paperclip. When the alligator clip is attached to the right paper clip, the screen shown on Isadora will change. Unfortunately, I never tested whether or not the paperclips were conductive enough. I assumed they would, but the coating on the paper clips was resistive enough to not allow a current to flow through them. So, lesson learned, always test everything before it is too late to make any changes, or you make your entire design based on it.
Pressure Project 1 – Fireworks
Posted: January 30, 2024 Filed under: Uncategorized | Tags: Interactive Media, Isadora, Pressure Project, Pressure Project One Leave a comment »When given the prompt, “Retain someone’s attention for as long as possible” I begin thinking about all of the experiences that have held my attention for a long time. Some would be a bit hard to replicate such as a conversation or a full length movie. Other experiences would be easier as I think interacting with something could retain attention and be a bit easier to implement. Now what does that something do so people would want to repeat the experience again and again and again? Some sort of grand spectacle that is really shiny and eye catching. A fireworks display!
The Program
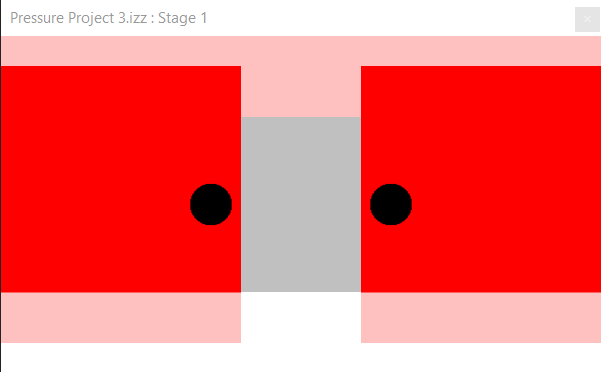
The first scene is setting up the image that the user always see. This is the firework “barrels” and buttons to launch the fire works.
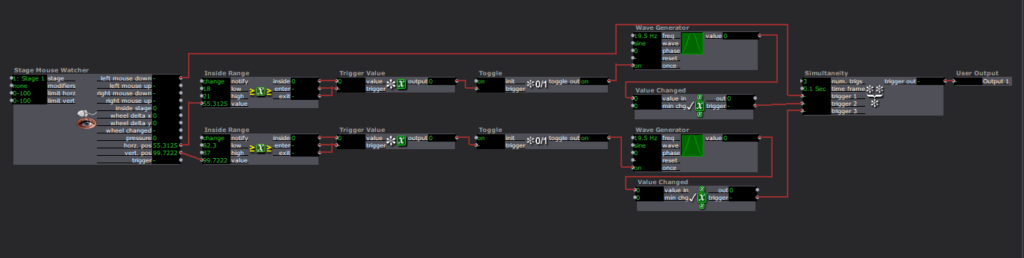
The buttons were made as a custom user input function. I did not know there was a control panel that already has preset buttons programed. If I had known that I could have saved myself 2 hours of experimenting. So how each button works is the Stage Mouse Watcher checks the location of the mouse in the stage and if the mouse clicks. Then two inside range actors are used to check where the mouse is in the x and y axis. If the mouse is in preset range it triggers a Trigger value actor that goes to a Toggle actor. The toggle actor then turns a wave generator on and off. The wave generator then sends its value to a Value Changed actor. If the in the x bounds, the y bounds, and the mouse clicks triggers activate all at once, then the scene is moved to launch a firework.
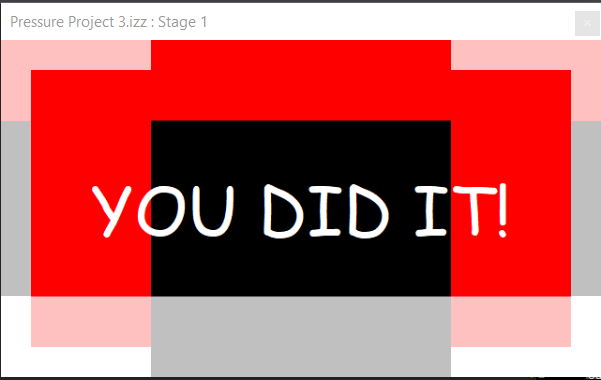
The scenes that the buttons jump to is set up to be a unique firework pattern. The box will launch a firework to a set location and after a timer the sparkle after effect will show. Then after it ends the scene ends.
Upon reflection, one part that could have helped retain attention even longer would have been to randomize the fireworks explosion pattern. This could have been done with the random number generator and the value scalar actors to change the location of where the sparkle explosion effect ends up and with how long they last in the air.