Cycle Three: The Forgotten World of Juliette Warner
Posted: April 30, 2025 Filed under: Uncategorized Leave a comment »For my third cycle, I wanted to revisit my cycle one project based on the feedback I had received, which centered mostly on the audience’s relationship with the projections. One sticking point from that earlier cycle was that all three projectors featured the same projected surface. This choice was originally made as a preventative measure to keep Isadora’s load low. That being said, the first point of focus for my cycle three project was determining whether three separate projected video streams would be sustainable. Once I confirmed that they were, I began sourcing media for the entire script.
After gathering my media, I moved onto an element I’ve wanted to incorporate since cycle one but hadn’t felt fully ready to tackle, depth sensors. I used the Orbec sensor placed in the center of the room, facing down (bird’s-eye view), and defined a threshold that actors could enter or exit, which would then trigger cues. I accessed the depth sensor through a pre-built patch (thank you, Alex and Michael) in TouchDesigner, which I connected to Isadora via an OSC Listener actor. This setup allowed Isadora to receive values from TouchDesigner and use them to trigger events. With this in mind, I focused heavily on developing the first scene to ensure the sensor threshold was robust. I marked the boundary on the floor with spike tape so the performers had a clear spatial reference.
Outside of patch-building, I devoted significant time to rehearsing with three wonderful actors. We rehearsed for about three hours total. Because class projects sometimes fall through due to cancellations. as happened with my first cycle, I wanted to avoid that issue this time around. It was important to me that the actors understood how the technology would support their performances. To that end, I began our first rehearsal by sharing videos that illustrated how the tech would function in real time. After that, we read through the script and discussed it in our actor-y ways, and I explained how I envisioned the design unfolding across the show.
In our second rehearsal, we got on our feet. I defined entrances and exits based on where the curtains would part and placed mats to indicate where the bench would be in the Motion Lab. These choices helped define the shared “in-the-round” experience for both audience and performers.
Over the weekend, I worked extensively on my patch. The full script juxtaposes the Heroine’s Journey with the stages of Alzheimer’s, so I wanted the audience to know which stage they were in as the performance unfolded. Using a combination of enter-scene triggers, trigger delays, envelopes, and text-draw actors, I created a massive patch for each scene that displayed the corresponding stage. This was by far my biggest time investment.
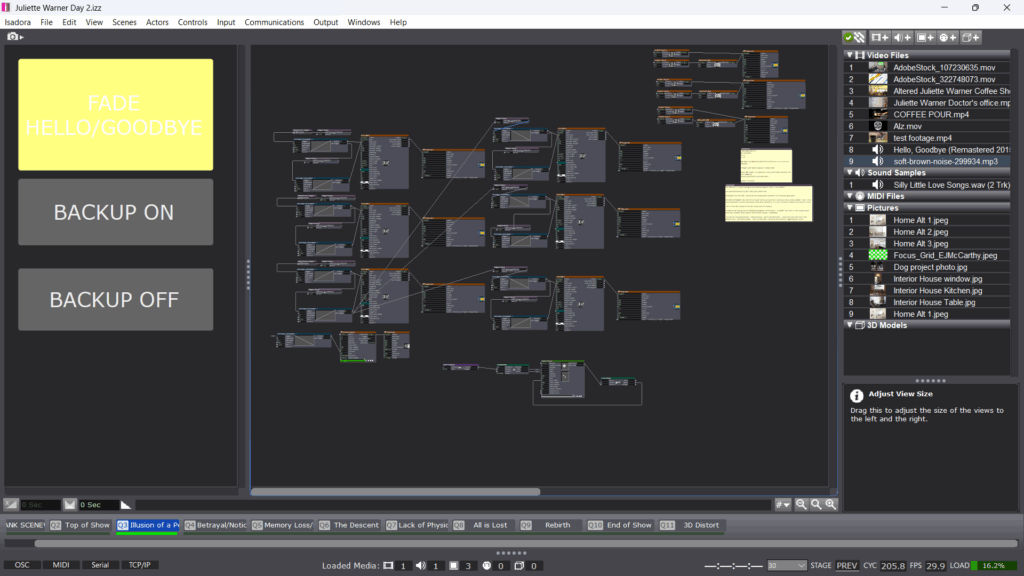
When I was able to get into the lab space with my actors for a mini tech run, I realized that these title cards, which I had spent so much time on, were not serving the immersive experience and to be honest, they were ugly. The entire concept of the piece was to place the audience alongside Juliette on her journey, sharing her perspective via media. Having text over that media disrupted the illusion, so I cut the text patches and Isadora’s performance load improved as a result.
I spent another two hours between tech and performance fine-tuning the timing of scene transitions, something I had neglected earlier. This led to the addition of a few trigger delays for sound to improve flow.
When it came time to present the piece to a modest audience, I was surprisingly calm. I had come to terms with the idea that each person’s experience would be unique, shaped by their own memories and perspectives. I had my own experience watching from outside the curtains, observing it all unfold. There’s a moment in the show where Juliette’s partner Avery gives her a sponge bath, and we used the depth sensor to trigger sponge noises during this scene. I got emotional there for two reasons. First, the performer took his time, and it came across as such a selfless act of care, exactly as intended. Second, I was struck by the realization that this was my final project of grad school, an evolution of a script I wrote my first year at OSU. It made me appreciate just how much I’ve grown as an artist, not just in this class, but over the past three years.
The feedback I received was supportive and affirming. It was noted that the media was consistent and that a media language had been established. While not every detail was noticed, most of the media supported the immersive experience. I didn’t receive the same critiques I had heard during cycle one, which signaled a clear sense of improvement. One comment that stuck with me was that everyone had just experience theatre. I hadn’t considered how important that framing was. It made me reflect on how presenting something as theatre creates a kind of social contract, it’s generally not interactive or responsive until the end. That’s something I’m continuing to think about moving forward.
Once the upload is finished, I will include it below:
Cycle 2: The Rapture
Posted: April 17, 2025 Filed under: Uncategorized Leave a comment »For Cycle Two, I wanted to build off the kernel of my first cycle, Isadora in a theatrical context, and put my money where my mouth is by using it in a real production. My first project was exploratory; this one was functional. I wanted to program a show I could tour anywhere that had a screen. I had just revised The Phil Mitchell Radio Hour, a solo show booked for performances April 11th and 12th at UpFront Performance Space in Columbus, and at the Atlanta Fringe Festival May 27th–June 8th. Both venues had access to a projector, so I decided to build a visual component to the show using Isadora.
This meant I needed to create a projection design and keep it user friendly, since I wouldn’t be running the projections myself. It was important to me that the visual media didn’t just exist as a cool bonus, but felt like a performer alongside me, heightening the story, rather than distracting from it. I’d say the project was a major success. I want to tweak a few small moments before Atlanta, but the tweaks are minor and the list is short.
My Score:
Resources:
- Isadora, Adobe Premiere Pro, Adobe Express
- Projector, HDMI cable, laptop
- UpFront Performance Space
- Projector screen
Steps:
- Create the “scenes” of the show in Isadora
- Remaster sound design and integrate into scenes using enter triggers
- Design projections
- Add projections to scenes and build new scenes as needed
- Run the full show and make sure it all holds together
For context: Here is the official show synopsis followed by an image from the original production:
“The Phil Mitchell Radio Hour follows a self-assured televangelist delivering a live sermon on divine pruning—only to realize mid-broadcast that the rapture is happening, and he didn’t make the cut. As bizarre callers flood the airwaves and chaos erupts, Phil scrambles to save face, his faith, and maybe even his soul—all while on live on air.”
I’m a big image guy, so I sort of skipped step one and jumped straight to step three. I began by designing what would become the “background” projection during moments of neutrality, places in the show where I wanted the projection to exist but not call too much attention to itself. I made a version of this in Adobe Express and pretty quickly realized that the stillness of the image made the show feel static. I exported a few versions and used Premiere to create an MP4 that would keep the energy alive while maintaining that “neutral” feeling. The result is a slow-moving gradient that shifts gently as the show goes on.
My light design for the original production was based around a red recording light and a blue tone meant to feel calming, those became my two dominant projection colors. Everything else built off that color story. I also created a recurring visual gag for the phrase “The Words of Triumph,” which was a highlight for audiences.
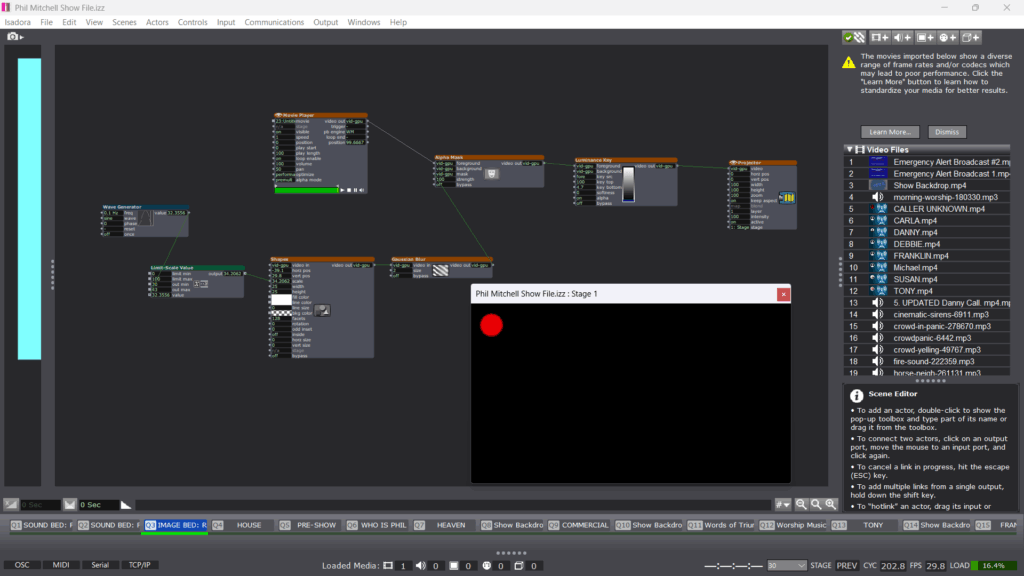
Once the media was built, I moved into Isadora. This was where the real work of shaping began. While importing the MP4s, I also began remastering the sound design. Some of it had to be rebuilt entirely, and some was carried over from previous drafts as placeholders. The show had 58 cues. I won’t list them all here, but one challenge I faced was how to get the little red dot to appear throughout the show. I had initially imagined it as an MP4 that I could chroma key over a blank scene then recall with activate/deactivate scene actors. Alex helped me realize that masking was the best solution, and once I got the hang of that, it opened up a new level of design.
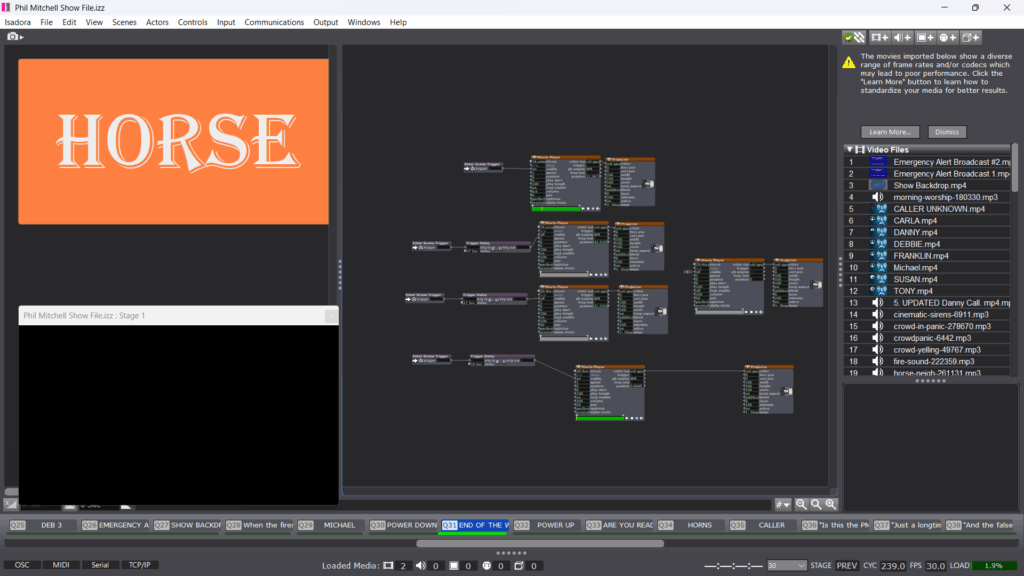
All in all, I spent about two weeks on the project. The visual media and updated sound design took about 8–10 hours. Working in Isadora took another 3. By then, I felt really confident navigating the software. It was more about refining what I already understood. I initialized nearly every scene with specific values so it would be consistent regardless of who was operating. I also built some buttons for the stage manager in key moments. For example, when Phil yells, “Did I just see a horse?! Do horses go to Heaven?!” the stage manager pressed a button which activates a horse neighing sound.
When it came time to present a sample, I struggled with which moment to show. I chose a segment just before the first emergency alert of the Rapture, a phone call exchange. I thought it was the strongest standalone choice. It features three different projections (caller, emergency alert, and blank screen), has layered sound design, and doesn’t require much setup to understand.
Most of the feedback I received was about the performance itself, which surprised me. I was trying to showcase the Isadora work, but because I didn’t have a stage manager, I had to operate the cues myself, this created some awkward blocking. One suggestion I appreciated was to use a presenter’s remote in the future, so I could trigger cues without disrupting the flow of the scene. There were also some great questions about Phil’s awareness of the projections, should he see them? Should he acknowledge them? That question has stuck with me and influenced how I’ve shaped the rest of the show. Now, rather than pointing to the projections, Phil reacts as though they are happening in real time, letting the audience do the noticing.
Overall, I’m extremely proud of this work. Audience members who had seen earlier drafts of the show commented on how much the projections and sound enhanced the piece. This clip represents the performance version of what was shown in class. Enjoy 🙂
Pressure Project 3: Surfing Soundwaves
Posted: April 11, 2025 Filed under: Uncategorized Leave a comment »When starting this project, it was a bit daunting and overwhelming to decide which part of my cultural heritage to explore. Theatre initially came to mind, but that felt too easy, I wanted to choose something that would allow me to share a new side of myself with my peers. With graduation on the horizon, I’ve been thinking a lot about home. I grew up near the water, and there’s this unbreakable need in me to be close to it. That’s where I began: sourcing sounds of the ocean on Pixabay. I went so specific as to only use sounds from the Atlantic Ocean when possible, even finding one clip from Florida.. But I realized that the ocean itself didn’t fully capture my heritage, it was a setting, not a story. I had to go deeper.
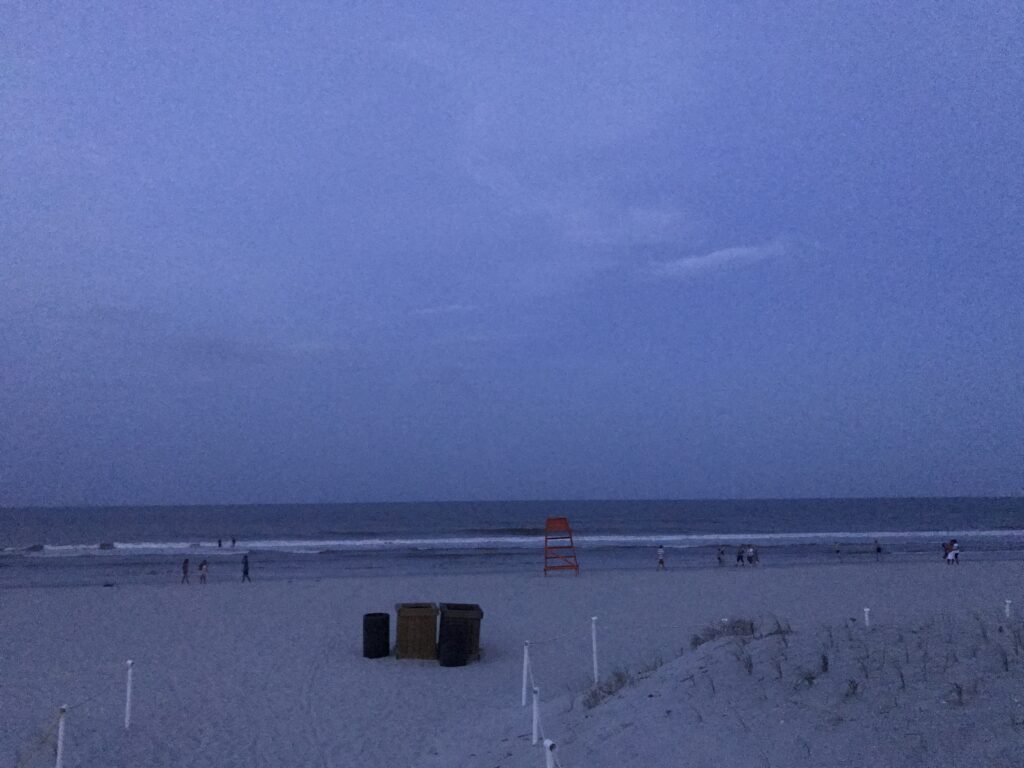
I began thinking about my dad, who was a professional surfer. I’m sure he had aspirations for me to follow a similar path. I felt a lot of pressure to surf as a kid, it was honestly terrifying. But over time, and on my own terms, I grew to love it. Now it’s how my dad and I connect. We sit out on the water together, talk, and when the waves come, we each ride one in, knowing we’ll meet back up. The more I thought about that ritual, the more homesick I felt. Even though the assignment was meant to be sound-based, I found myself needing a visual anchor. I dug through my camera roll and found a photo that captured the calmness and rhythm of beach life, something soft and personal that helped ground my process.
Once I had that anchor, I started refining the design itself. Since this was primarily a sonic piece, I spent about thirty minutes watching first-person surfing videos. It was a surprisingly helpful strategy for identifying key sounds I usually overlook. From that research, I pinpointed four essential moments: walking on sand, stepping into water, submerging, and the subtle fade of the beach as you move away from it. While wave sounds and paddling were expected, those smaller, transitional sounds became crucial to conveying movement and environment.
I then spent another chunk of time combing through Pixabay and ended up selecting sixteen different sounds to track the journey from the car to the ocean. But as I started laying them out, it became clear that I wasn’t telling a story yet, I was just building an immersive environment.
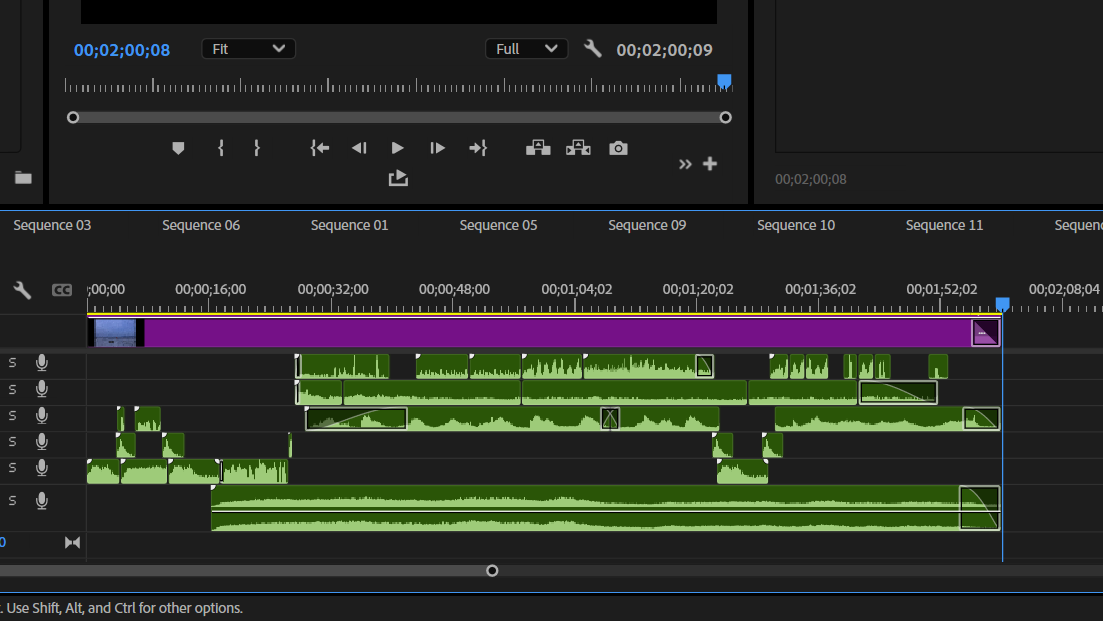
Avoiding that realization for a while, I focused instead on the technical side. I mapped out a soundscape where the waves panned from right to left, putting the listener in the middle of the ocean. I also created a longform panning effect for the beach crowd, which built up as you walk from the parking lot but slowly faded once you were in the water. I was proud of how the spatial relationships evolved, but I knew something was still missing.
Late in the process, I returned to the idea of my dad. I created an opening sequence with a sound of submerging followed by a child gasping for air. I used a kid’s breath to imply inexperience, maybe fear. To mark a shift in time, I recorded a voicemail similar to the kinds of messages my dad and I send each other, with the general sentiment“I’ll see you in the water.” It was meant to signal growth, like the child in the beginning was now the adult. I had hoped to use my actual dad’s voicemail, but when I called him, I found his box wasn’t set up.
I decided to end the piece with the paddling slowing down and the waves settling as I/the character reached dad. I repeated “dad” a couple of times—not in panic, just to get his attention, to make it clear he was present and alive. I used very little dialogue overall, letting the sound do most of the storytelling, but I tried to be economical with the few words I did include.
During the presentation, I felt confident in the immersive quality of the work, but I wasn’t prepared for how the tone might be read. The feedback I received was incredibly insightful. While the environment came through clearly, the emotional tone felt ambiguous. Several people thought the piece might be about someone who had passed away, either the child or the father. I had added a soft, ethereal track underneath the ocean to evoke memory, but that layer created a blurred, melancholic vibe. One person brought up the odd urgency in the paddling sounds, which I completely agreed with. I had tried to make my own paddling sounds in my kitchen sink, but they didn’t sound believable, so I settled on a track from Pixabay.
Looking back, I know I missed the mark slightly with this piece. It’s hard to convey the feeling of home when you’re far from it, and I got caught up in the sonic texture at the expense of a clearer narrative. That said, I still stand by the story. It’s true to me. When I shared it with my wife, she immediately recognized the voicemail moment and said, “I’ve heard those exact messages before, so that makes sense.”
If I had more time, I would revisit the paddling and find a better way to include my dad’s voice, either through an actual message or a recorded conversation. That addition alone might have clarified the tone and ensured that people knew this was a story about connection, not loss.
Cycle One: Immersive Theatre
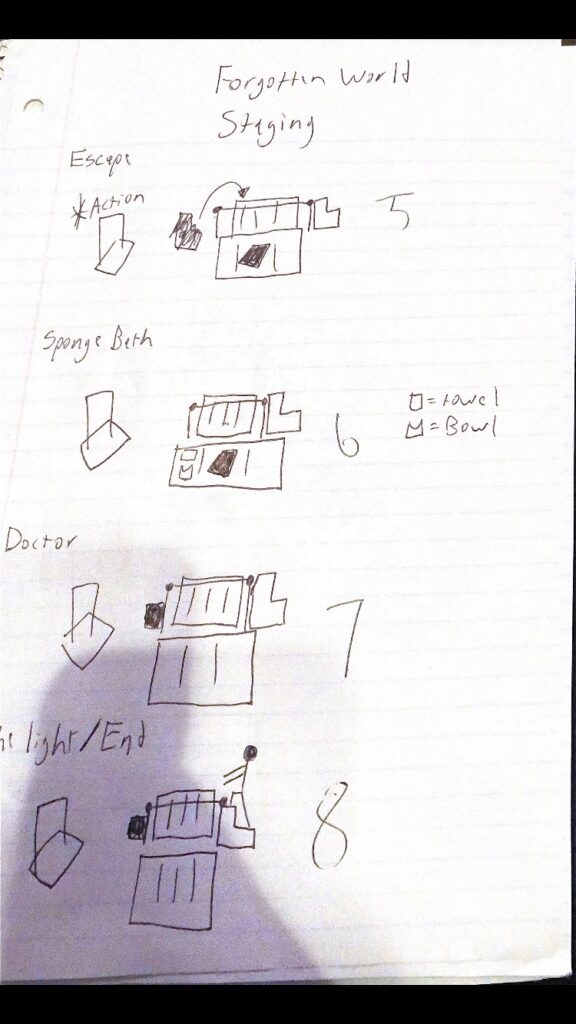
Posted: April 3, 2025 Filed under: Uncategorized | Tags: adobe, cycle 1, immersive theatre, Isadora, premiere pro, theater, theatre Leave a comment »For cycle one, I wanted to take the tools I had been equipped with over the first half of the course and utilize them in a theatrical context.Knowing that I would only be working with a bite sized chunk of work, I decided to revisit a play I had developed in a composition class my first year. It was a 20-ish minute play called The Forgotten World of Juliette Warner. It is a piece that juxtaposes the heroine’s journey with the stages of Alzheimer’s diseases. A theatrical convention of this piece in its initial construction was an ever changing set, meant to reflect the mind of the titular character where nothing is truly settled. Having actor’s move literal mats and blocks constantly was a barrier when establishing the suspension of disbelief. So recently trained in projection mapping, I developed a score around mapping the environments and bringing the audience inside the world.
My original score:
Resources Needed:
- Software: Isadora
- Hardware: Projector, long HDMI cables
- Space & Physical Elements: MOLA access, boxes, rolling boards, or curtains
Steps to Achieve This:
- Organize blocks, rolling boards, or curtains in the MOLA space as the base setup.
- Map the projector to these surfaces.
- Design and program projections to depict the shifting realities of Juliette’s world.
- Create a control board in Isadora for ease of access.
- Source actors.
- Rehearse.
- Present.
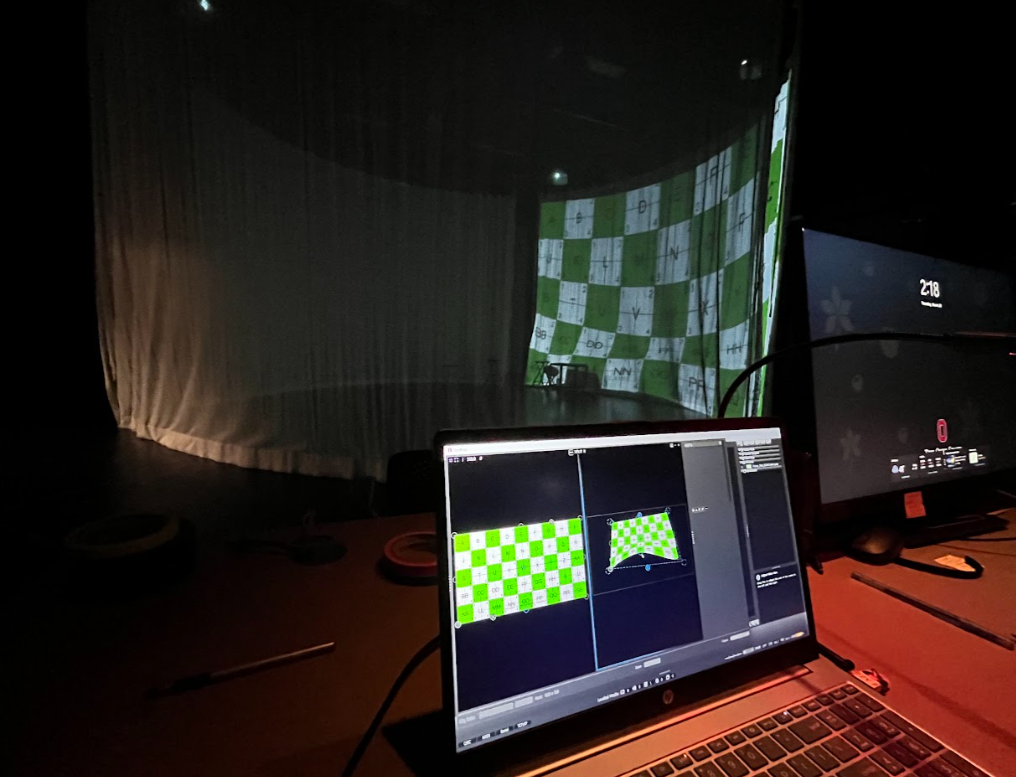
In my original score, I had anticipated projecting onto flat surfaces and possibly a curtain. But after our Motion Lab Demonstration, I observed a track for curtains that ran circular which I was immediately drawn to. So the first two days, with the gracious help of my peer Michael, I worked to understand routing NDI sources to 3 projectors in the motion capture lab. Through trial and error, we overcame a major barrier on day 2. When sending an NDI signal over a closed internet connection, many computers such as mine, will not send the signal if a firewall is enabled. After disabling the firewall, I was off to the races.
In IsaDora, I utilized EJ McCarthy’s focus grid to understand how to canvas the curtains properly. This was a meticulous effort that took nearly a whole class. I find that I can often get so focused on the specifics of the work, that I forget to take a step back and look at the big picture. So towards the end of class, I threw up some stock footage on all 3 curtains and to my surprise, I found that nearly everything is more forgiving than the focus grid.
With my surfaces properly mapped for projection, it was time to turn to the script. This piece has always been one that makes me nervous because I want to handle this difficult subject matter with as much care as possible. So to avoid alienating my peers/the audience, I selected a brief snippet that occurs earlier in the play that revolves around a repeated daily occurrence, grabbing coffee. I felt that both the environment and the interaction would be familiar enough to put audiences at ease while also providing a great opportunity to show the evolution of Juliette’s mind. When writing this scene, I found that this scene occurred at these stages of the heroine’s Journey/Alzheimer’s development:
STAGE 3 – Noticeable Memory Difficulties (3A.The Awakening)
STAGE 4 – More Than Memory Loss (3B.Preparing for The Journey)
With one day left in class to work on this project, it was time to generate. Although I did not have this software initially in my score, I decided that Adobe Premiere Pro would be the best canvas to create this scene. I sourced stock footage and audio from both Adobe and Pixabay (an EXCELLENT source if you haven’t checked it out).
I had to source footage that could suggest a coffee shop without needing to be in full focus, I didn’t want the projections to be a focal point for the audience. I eventually settled on a nice loopable clip and to make the transition gradual, I then started the scene with a circular gaussian blur at the center and over the course of the 2 and half minute scene allowed it to encompass the entire video. I then created a sound design based on stock noises. With the audience being on the inside of the curtains, I felt it was important to not only surround them visually, but sonically. I utilized surrounding reverbs and panning to allow sounds to come from specific points in the room.
I moved this scene into my ISADORA file where it replaced the focus grid and easily projected on all 3 surfaces.
On the cue line “my mind” I set up a second scene in Isadora which would be the Doctor’s office. I used a similar approach to the coffeeshop, but reversed the blur effect. I did this to intentionally throw off the audience, to tell them that we were somewhere different, somewhere with much more sterile light, but slowly allowed that to be revealed over time.
With my projections designed, it was time to implement actors. I did source a few actors who agreed to take part in a staged reading of the scene. Given the nature of a class project, all my actor’s eventually backed out which led me to scramble for new actors. When I presented the piece in class, I was only able to give my actor’s their given circumstances and the instruction to follow their impulses. This created a sense of a scene, but led to some confusion in character dynamics and audience attention. For my personal taste, it created some clunky staging, but I was so thankful to have 2 actors who were gracious enough to jump in and with a brief rehearsal, we could have ironed this out.
In the feedback, which was extremely valuable, I learned that there was room to go further with the visual design. While the current projections and sound designs were immersive according to my peers, the same visual on all 3 surfaces created an uncanny blend that actually kind of takes the audience out of it. That being said, I did receive feedback that my approach was tasteful and the blur effect, while discrete, was noticed. Perhaps my biggest takeaway from the feedback was that there is a real opportunity to continually define and redefine the audience relationship. The coffee shop very much sent the message “I want you to be a part of this”, but the doctor’s office provides an opportunity to flip that on its head and push the audience out. When I continue to work with this project in cycle 3, I will explore how lighting can be a tool for achieving this effect. My question I will investigate is, “When can I afford to truly leave the audience in the dark”.
Overall, I am happy with the shape this project took. While it did not look at all how I originally intended, I was pleased to expand my muscles with NDI AND projection mapping at the same time while providing a unique theatrical experience for the audience. I laid the groundwork for a compelling piece and with an updated score and a bit more time, I can lean into the aspects of this project that were lost to time.
Pressure Project 2: Creating an Escape
Posted: February 25, 2025 Filed under: Uncategorized Leave a comment »For this second pressure project, I had seven hours to design an interactive mystery without using a traditional mouse and keyboard. Based on feedback from my first project—which felt like the start of a game—I decided to fully embrace game mechanics this time. However, I initially struggled with defining the mystery itself. My first thought was to tie it into JumpPoint, a podcast series I wrote about time travel, but I quickly realized that the complexity of that narrative wouldn’t fit within a three-minute experience. Instead, I leaned into ambiguity, letting the interaction itself shape the mystery.
My first hour was spent setting up a live video feed that would give the user questions regarding their current state and environment. To achieve this, I utilized actors such as video noise and motion blur. My initial concept was to have the experience activated via depth sensors, something I had actively avoided in my first project. I set this up, only to realize that to ultize both my high quality web cam as well as the makey makey, all my USB drives were being utilized. So I pivoted to a sound level watcher which would activate the experience.
My second Cue titled “The Scene” serves as my soundbed for the experience. There is an enter scene trigger that gives the appearance of bypassing this in real time, with the 3rd scene utilizing an Activate Scene actor to trigger the music.
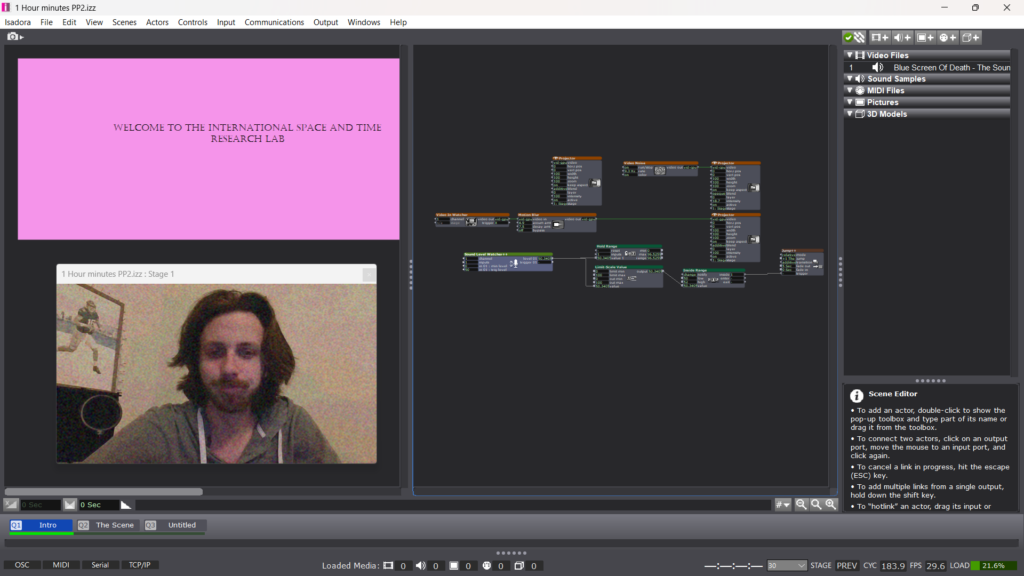
If you view the next screenshot, you will notice that the project says One Hour mark, this is not true. This is also your reminder to save early and save often as twice in this experience, I had the misfortune of having about a half hour of work, each time, disappear.
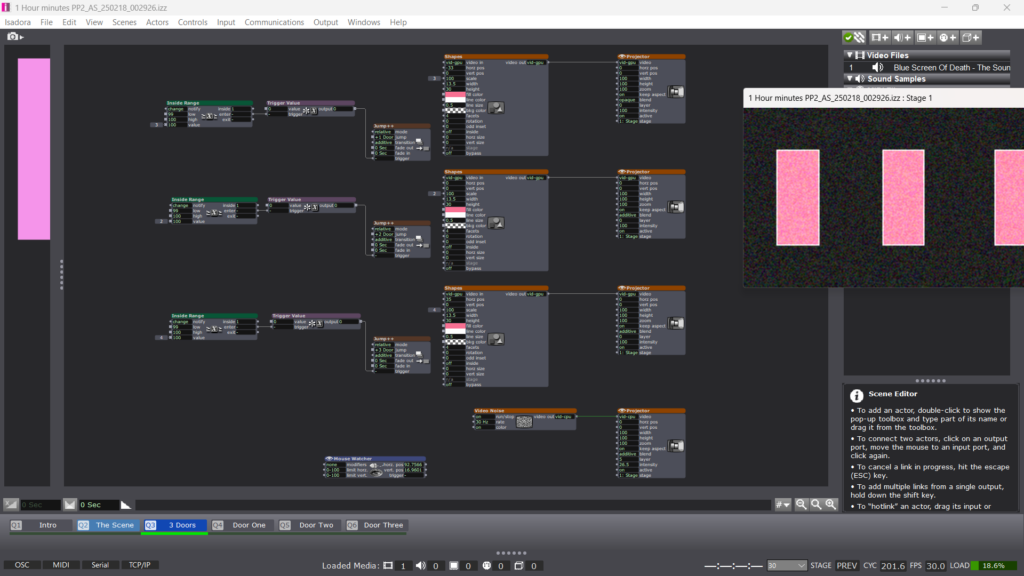
So between hour one and hour two, I set up what would be the meat of the experience. 3 doors with no clear path behind each. This is where I intended to really incorporate the makey makey as the first cue is activated off of sound. In the control panel, I created 3 sliders and attached them to each shape actor in addition to an inside range actor. What I would achieve by this, is creating the appearance that the door is coming closer if you choose to “open” it, while also creating a number which, when hit, would activate a trigger to a jump ++ actor to take the user to either Door 1, 2, or 3’s outcome. A mouse watcher was also added to track the movement from the Makey Makey, which at this point, I had not decided how it would be arranged.
Over the next hour, I would set up the outcomes of doors 1 and 3. Wanting to unlocked the achievement of “expressing delight”, I decided that Door 1 would utilize a enter scene trigger for 3 purposes. 1. To Deactivate the Sound bed. 2. To Activate a video clip to start. The video clip is from Ace Ventura: Pet Detective where Ace, dishelved, comes out of a room and declares “WOO, I would NOT go in there!!”. For the 3rd purpose of the enter scene trigger, I inserted a trigger delay for the duration of the clip to a Jump++ actor to go back to the three doors.
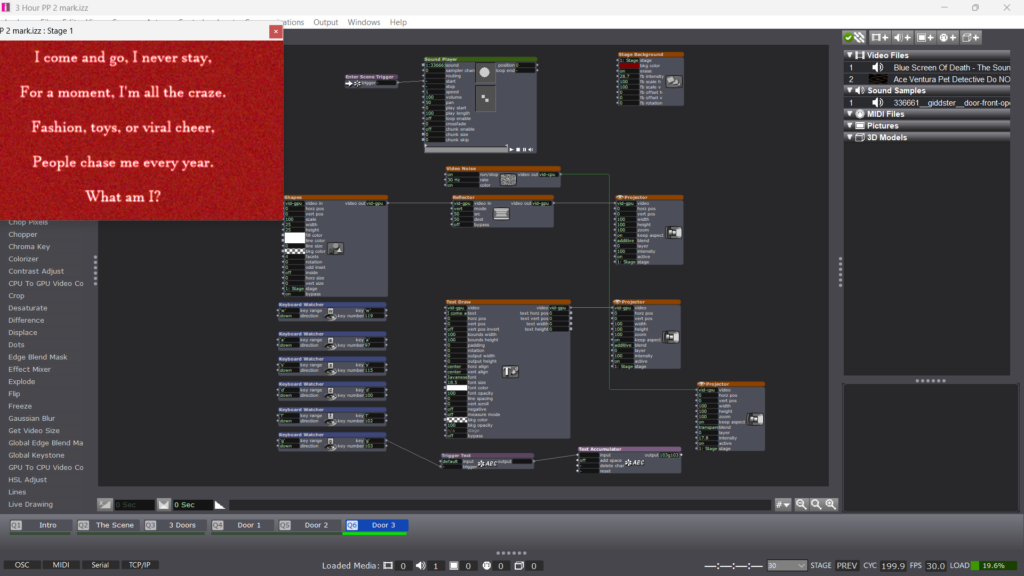
Behind Door 3, I decided to set up a riddle or a next step.To set this up, I utilized a text draw that would rise via an envelope generator. You’ll observe a few other actors, but those were purely for the aesthics. I wanted users to be able to use the Makey Makey in another capacity, so I utilized serval keyboard watchers to hopefully catch every letter being typed. I had made several attempts to figure out how exactly that I needed to inventory each letter being typed before emailing my professor who helped out big time!
While I awaited a response, I spent about half an hour experimenting with the makey makey testing it’s robustness with and without playdough, which I intended to be the conduit for the experience. Please ignore the messy desk, a mad scientist was at work.

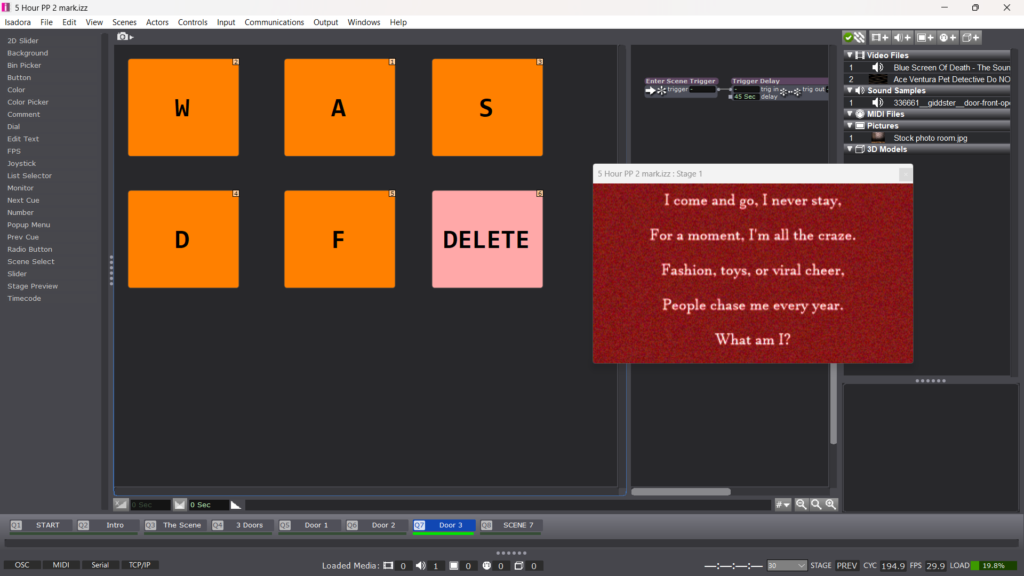
Hour 5 is where my pressure project went from being a stressor to being REALLY fun. (Thanks Alex!) Instead of a keyboard watcher, I created 6 text actors to coordinate with WASDFG. Those text actors would connect to a text accumulator which was attached to 2 additional actors. A text draw, which would put it on screen as I intended and a text comparator, which, when it matched the intended answer, would take send a trigger to take the actor to another scene. Instead of using the WASDFG inputs of the makey makey, I stuck to the directional and click inputs that I played around with earlier and instead created those keys with buttons on the control panel. This would still give the user the experience of typing their answer without having to add 6 additional tangible controls. As hour five drew to a close, I set up the outcome of door two which mirrors features and actors of the other two doors.
With the high use of the text draw actor, I was unintentionally creating a narrative voice for the piece. So in the 6th hour I worked on the bookend scenes to make it more cohesive. I added a scene at the top which included a riddle to tell the user the controls. I also used an explode actor on the text to hopefully instill the notion that the user needed to be quiet in order to play the game (which they would have to do the opposite on the live video, a fun trick). I created a scene on the backend where I felt that a birthday cake was an interesting twist that didn’t get too dark in plot. I liked the idea of another choice, so I simply decided to narrow down from 3 options like the doors, to 2. Still utilizing buttons in the control panel.
It was also in this sixth hour that I realized I didn’t know how this mystery was going to end. I had to spend a bit of time brainstorming, but ultimately felt that this experience was an escape of some kind, but to avoid going a dark direction, I decided that the final scene would lead to an escape room building.
My final hour was spent on 2 things. 1, establishing the scenes that would lead to the escape room end and setting up the experience in my office and asking a peer to play it so I could gauge the level of accessibility. Feeling confident after this experience, I brought my PP to class where I received positive feedback.
Much like an escape room, there was collaboration in both the tangible experience of controlling the escape room as well as decision making. I did observe that the ability to discern which parts of the control were the ground and the click wasn’t clear. In the future, I would like to distinguish these a bit more through an additional label.
Something else that occurred was the live video scene instantly bypassed due to the baseline level of volume in the room. So in the future, I would utilize the actor to update the range in real time as opposed to the hold range actor that I used as a baseline.
With how much jumping was occurring through scenes, I struggled throughout with ensuring the values would be were I wanted them upon entry of each scene. It wasn’t until afterwards that I was made aware of the initialized value feature on every actor. This would be a fundamental component if I were to work on this project moving forward.
Pressure Project 1: Building a Galaxy
Posted: February 4, 2025 Filed under: Uncategorized Leave a comment »Deviating from the original self-generating patch to create something unrecognizable was a process of playing with the shape and wave actors tucked inside of each 50-50 box. Although my patch made several leaps from the original source, this was ultimately an exercise in the unpredictability of not only pattern but challenge. The process of experimenting, problem-solving, and making creative choices based on trial and error allowed me to develop something unique. Each step in the project introduced new discoveries, frustrations, and moments of inspiration that shaped the final product.
I worked on this project in intervals that felt manageable for me. Whenever I could pop the thumb drive in, as long as I wasn’t becoming frustrated, I could keep trucking forward. The moment I’d hit a wall was when I found value in stepping away and coming back with a fresh perspective. Allowing myself space to breathe through the creative process kept me from overworking certain ideas or becoming too attached to one solution. I created drafts at the following intervals: 1 hour, 1.5 hours, 3.25 hours, 4.5 hours, and 5 hours. Each session built upon the last, adding layers of depth and refinement to the patch.
My first hour consisted largely of two things: playing around with different shapes and patterns that were visually appealing to me and organizing the 50-50 boxes onto virtual stages to ensure I was adjusting the correct parameters on the patches. This initial exploration allowed me to get comfortable with the software and begin to establish an aesthetic direction. I decided to take the second 50-50 box and duplicate these hexagon shapes, as evident in the video. I considered having a blinking hexagon of another color travel through the lines of hexagons to give the illusion of movement. Initially, I intended to duplicate this pattern across the whole screen, but as the hour passed, I realized this approach would be too meticulous for what I was looking to accomplish in the given timeframe.
For the first 50-50 box, I experimented with some video actors. I inserted the explode actor between the shape and projector while also adding a wave generator to the vertical position, giving the illusion of a bouncing ball. This small animation gave me my first taste of how dynamic movement could be implemented within the patch. The interplay between controlled movement and randomization became an interesting area to explore.
The next 30 minutes would get interesting as the black void of the stage became strikingly apparent to me. I wanted to texture the space a bit to avoid a completely flat background. I found a background color actor that fixed this problem, but I didn’t like how flat it felt. To enhance the visual complexity, I used the explode actor to create a grain-like texture behind my shape actors. Additionally, I decided to see if I had any audio on my computer to throw in for inspiration. I landed on an ’80s-style synth instrumental. The combination of this music with the textured background inspired me to create an outer-space-style scene. Wanting to reinforce this theme, I focused on making shapes appear to be floating or traveling. I took my bouncing ball from before and added a wave generator to the horizontal parameters, which gave the illusion of flight. However, at this point, I noticed that the projector crop was cutting off the shape along the horizontal base, creating an unexpected limitation that I would need to address later.
In the fourth 50-50 box, which I renamed Box 4, I added a wave generator and a limit scale value actor to the facet’s parameter of the shape. I decided to limit these values between 3 to 6 to keep the shape sharp and prevent it from becoming too rounded. Additionally, I thought it would be fun to implement the same actors to the projector zoom, but this time keeping the values between 100 and 400. This gave the illusion that the shapes were not only increasing in facets but also in size. The unexpected interplay of these parameters created a more organic transformation, making the visuals feel dynamic rather than rigid.
Over the next hour and 45 minutes, I focused on giving my stage actors and parameters that made the piece feel not only like space but something alive. I experimented with my background color and explode actors to create movement when I discovered an actor called Video Noise that resolved this issue beautifully. I also added a subtle stage background actor to adjust the color beneath the noise.
Additionally, as I became more comfortable utilizing Inside Range actors, I decided to base some sort of cue off the music. I connected an Inside Range actor to the position parameter of the movie player, which tracked the number of seconds in the song. Unsure if I could maintain attention for more than 30 seconds, I aimed for something around the 20-second mark. I set my low at 20 and my high at 21, which would then trigger a wave generator. I connected the sawtooth wave generator to two limit scale value actors—one to set the scale position and another to set the vertical position of a shape actor that I envisioned as a planet. I originally attempted to create something that resembled Saturn with a ring around it, but eventually, I realized I was spending too much time refining this one parameter. I ultimately settled on creating dimension via a line size.
Over the next hour and fifteen minutes, I primarily focused on two elements. First, I organized my patch as it was now becoming necessary due to its increasing complexity. Second, I worked on establishing a “night sky” transition. I copied the base 50-50 box and tried to create an explosion that would become the primary layer. Initially, I tried to trigger this effect four seconds after the initial planet would rise, but that didn’t work. I then tried adding an Enter Scene trigger with a trigger delay set for about 24 seconds. This was when I realized the hurdles of real-time rendering, so I created a second scene, which was blank, to flip back and forth between and determine whether my actors were behaving as intended
My final 30 minutes focused on going back to basics and trusting what was working. I scrapped my night sky idea but repurposed the box to return to the galaxy tear concept. I took the night sky and created a shape that resembled the planet. I then used the explode actor and a random wave generator to trigger varying horizontal ranges, creating the illusion of a dying planet.
At this point, the rapid shape actor I had developed in the first hour and a half was feeling stale. To add texture, I introduced the dots actor. However, I wanted to maintain an unpredictable pattern, so I connected the established Inside Range actor to a toggle actor that would turn the dots actor on and off whenever the range from the random wave generator fell between 50 and 100. This was one of my proudest moments, as it allowed me to create something far from the original patch.
At this point, my work was done. I was proud of myself for creating a fun visual that accomplished my goal of creating an outer-space-like scene. This project was a great exercise in evaluation—identifying which actors and elements were useful and which needed to be discarded. Some core ideas were thrown out only to return in new forms, such as the galaxy tear transforming into a dying planet.
During my presentation, I was nervous about whether the piece would hold interest for more than 30 seconds. However, my peers provided valuable feedback. Due to the planet shifting around 20 seconds in, they expected more to happen. This small movement not only shifted expectations but also broke the pattern completely. Additionally, they mentioned that the project felt like the start screen of a video game, meaning my music choice and visuals were in harmony. In the future, I would tackle one box at a time rather than jumping around, which would improve organization and efficiency.
Bumping Emily’s Post
Posted: January 15, 2025 Filed under: Uncategorized Leave a comment »I was drawn to Emily’s work for the distilled, but eye-catching imagery provided in the working stills. From the description of Emily’s process, it ties nicely with our recent work with loop and generator actors. I’d love to challenge myself to create 3 dimensional shapes like the ones in the stills.
Pressure Project One | Devising EMS