Tara Burns – “a canvasUnbound” (Cycle 3)
Posted: December 10, 2020 Filed under: Uncategorized 1 Comment »Goals
*To have panels that disappear when triggered
*To have that reveal an underlying theme/movie
*To use the Oculus Quest as the reveal movie
Challenges
*Everything worked in my office and then when changing to the basement I had to add a few more features in order for it to work. I think the version it ended up at will hopefully be more able to travel with slight modifications. *It is very difficult to create an interactive system without a body in the space to test.
*The Oculus Quest doesn’t work without light, so without directional light I did get that working but you couldn’t see the projection. So in the final video I opted to just use a movie, knowing that it did work is good enough for me at this point and when/if I’m able to use directional light that doesn’t effect the projection we can try it again then. Alternately the positive of this is that I can interact with the system more, if painting in VR, I can’t see when and if I make the panels go away and where I need to dance in order to make that happen.
Moving forward
I’d would put this as big as possible and flip the panels to trigger on the same side as myself (the performer). Take some time to rehearse more inside the system to come up with a score with repetition and duration that allowed for people to see the connections if they are looking for it. Perhaps use the VR headset if that works out, but I am also ok with painting and then recording (the recording is the score that corresponds when the dance) a new white score specific to the space I am performing in to then use in performance. If large enough I think it would be easy to see what I am triggering when they are on the same side as me. In my basement, I chose to trigger the opposite side because my shadow covered the whole image.

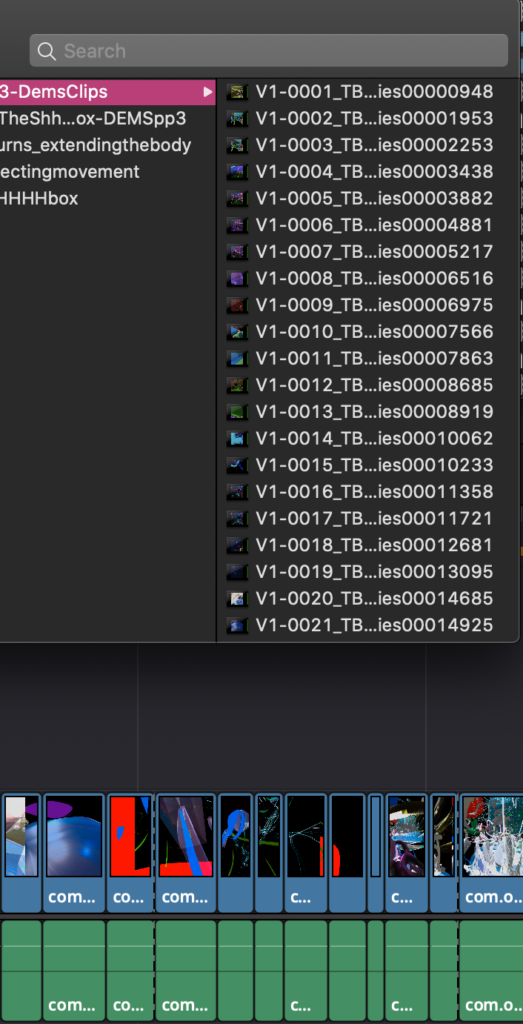
I converted all the movies to the HAP codec and it cut my 450% load in Isadora to 140%. This decision was prompted not because it was crashing anymore but it was freezing when I would click through tabs.

Tara Burns – Cycle Two
Posted: November 27, 2020 Filed under: Uncategorized Leave a comment »Goals
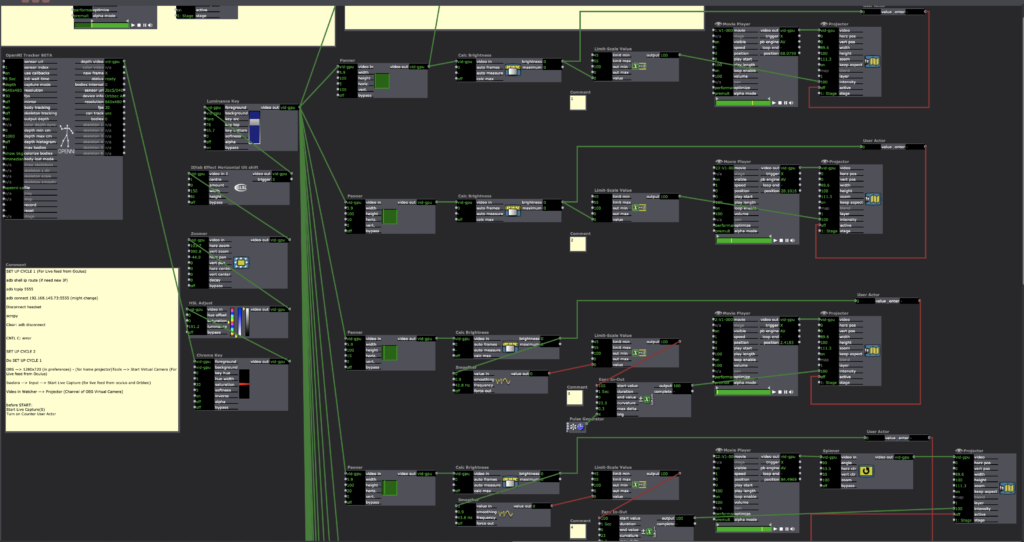
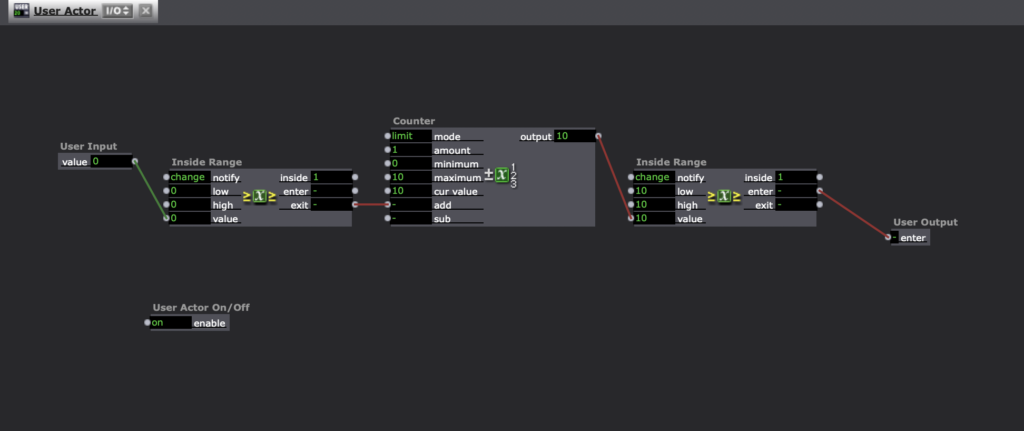
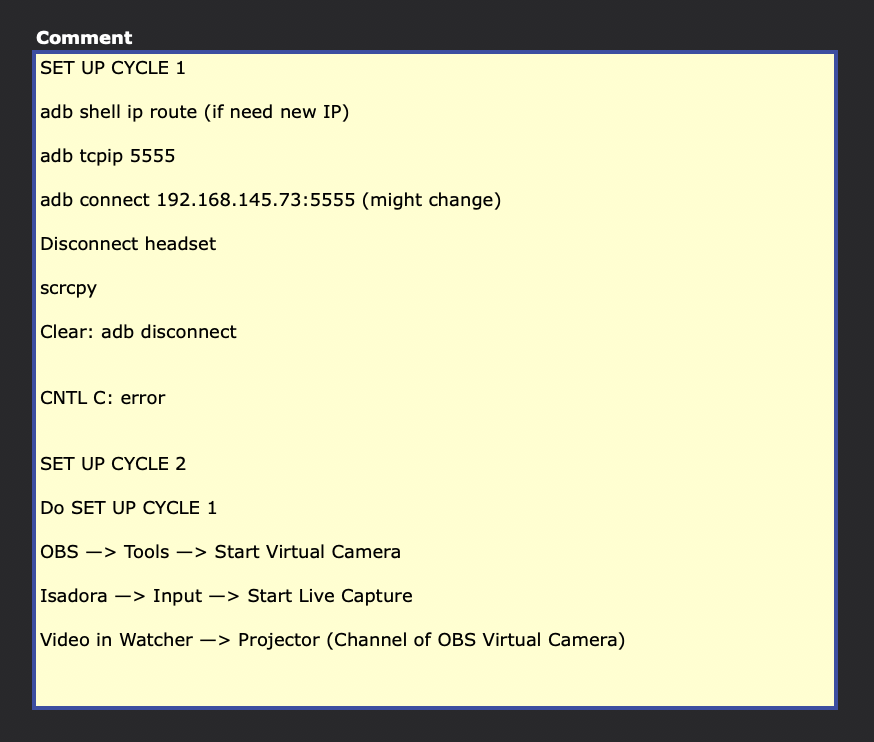
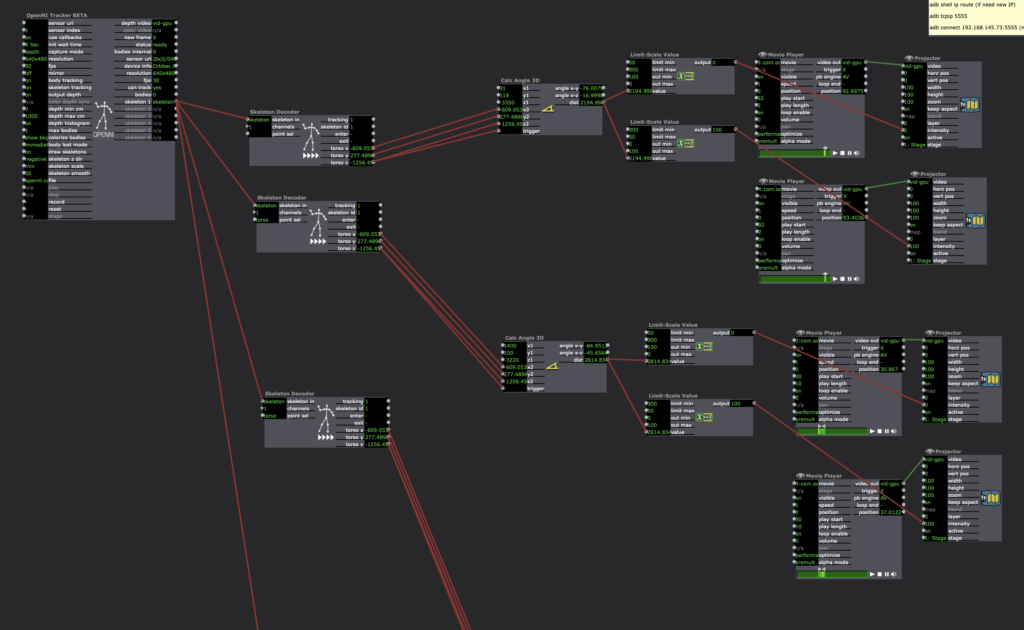
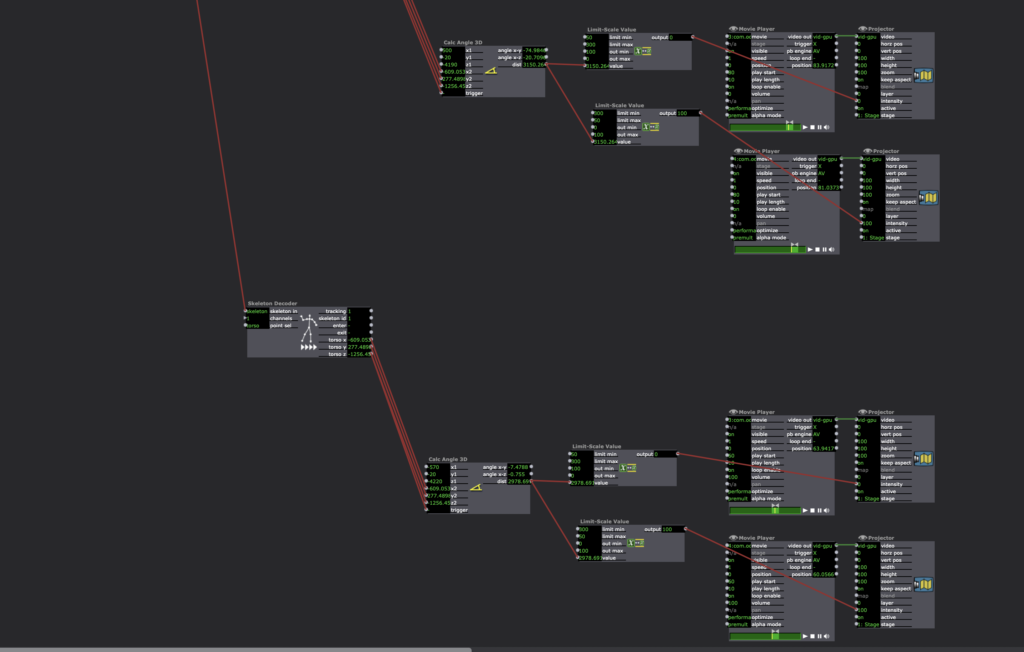
– Using Cycle 1‘s set up and extending it into Isadora for manipulation
– Testing and understanding the connection between Isadora and OBS Virtual Camera
– Testing prerecorded video of paintings and live streamed Tilt Brush paintings in Isadora
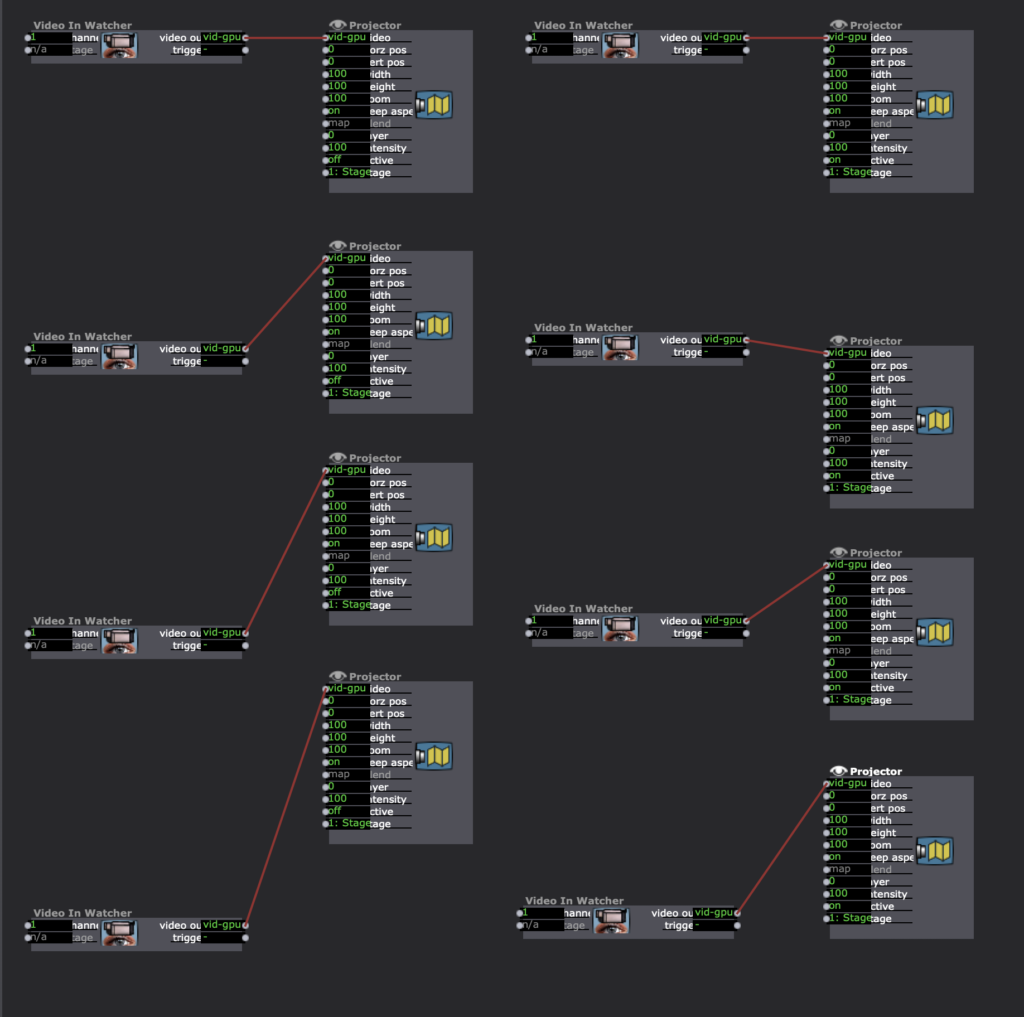
– Moving to a larger space for position sensitive tracking through Isadora Open NDI Tracker
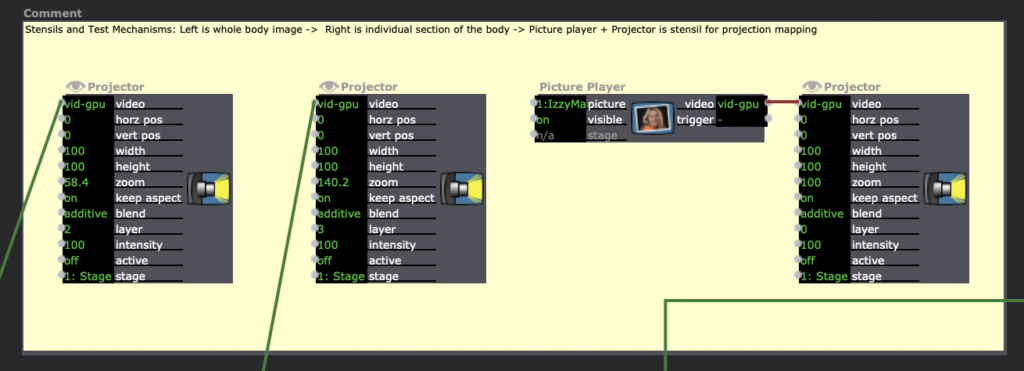
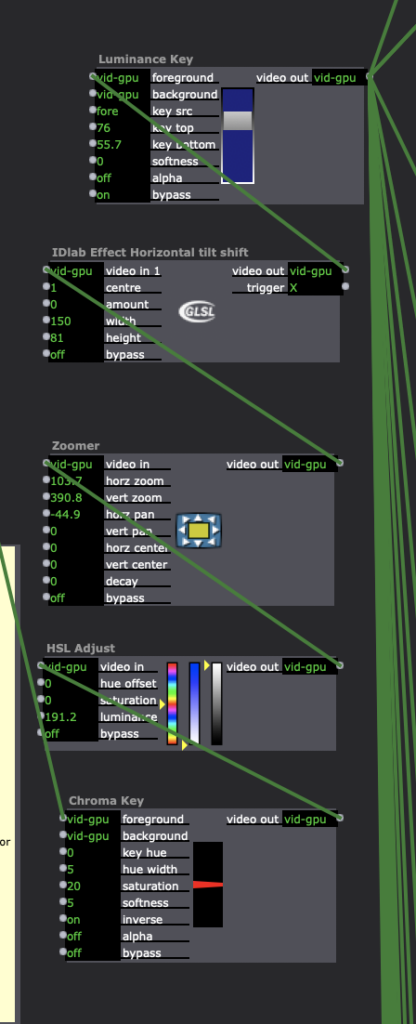
– Projection mapping
Challenges and Solutions
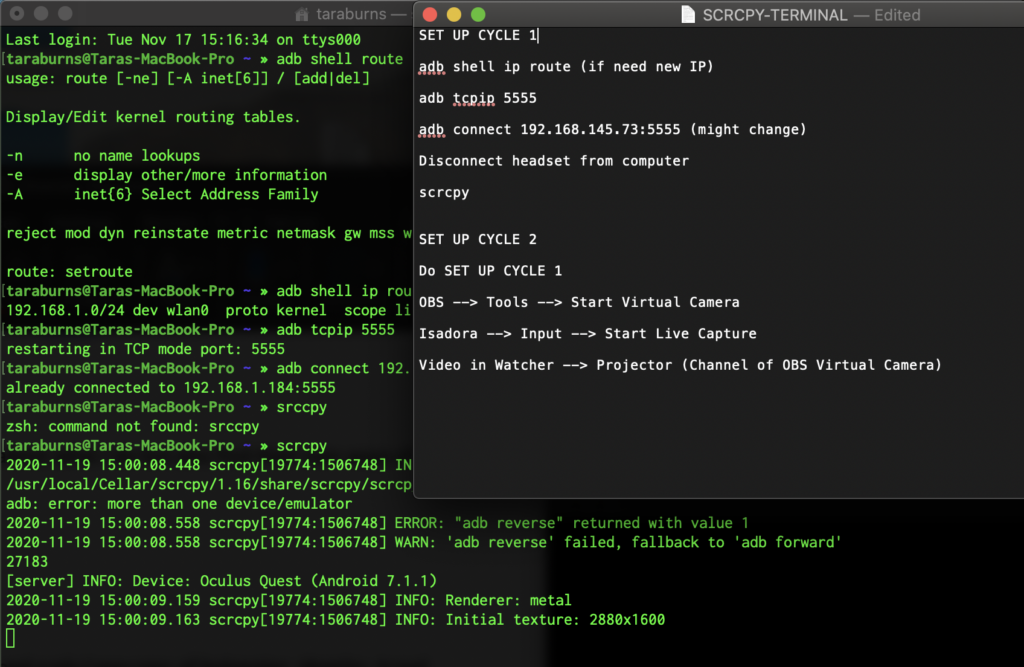
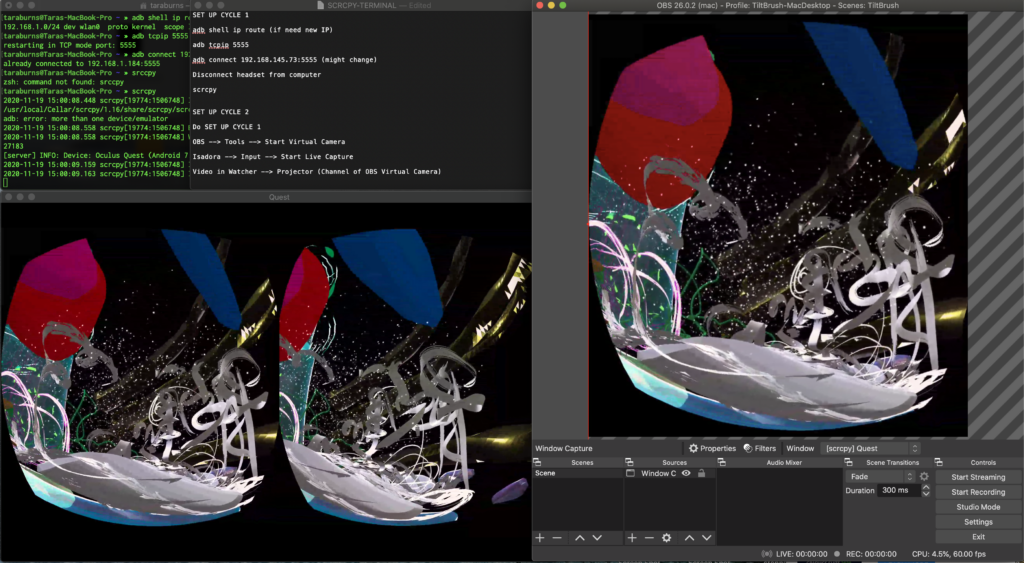
– Catalina Mac OS doesn’t function with Syphon so I had to use OBS Virtual Camera in Isadora
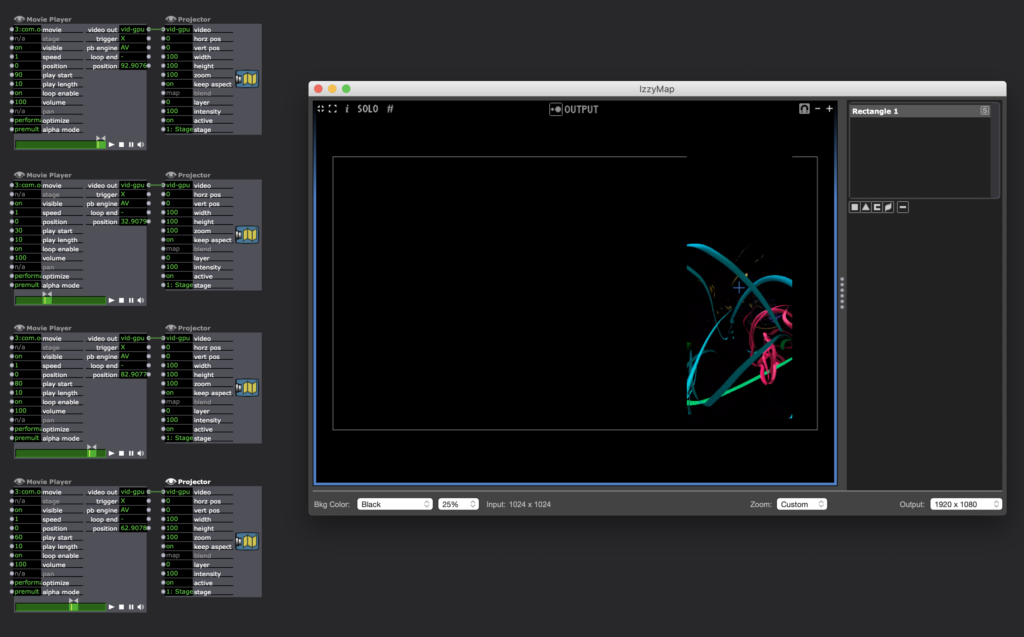
– Not having a live body to test motion tracking and pin pointing specific locations required going back and forth. I wouldn’t be able to do this in a really large space but for my smaller space I put my Isadora patch on the projection and showed half the product and half the patch so I could see what was firing and what the projection looked like at the same time.
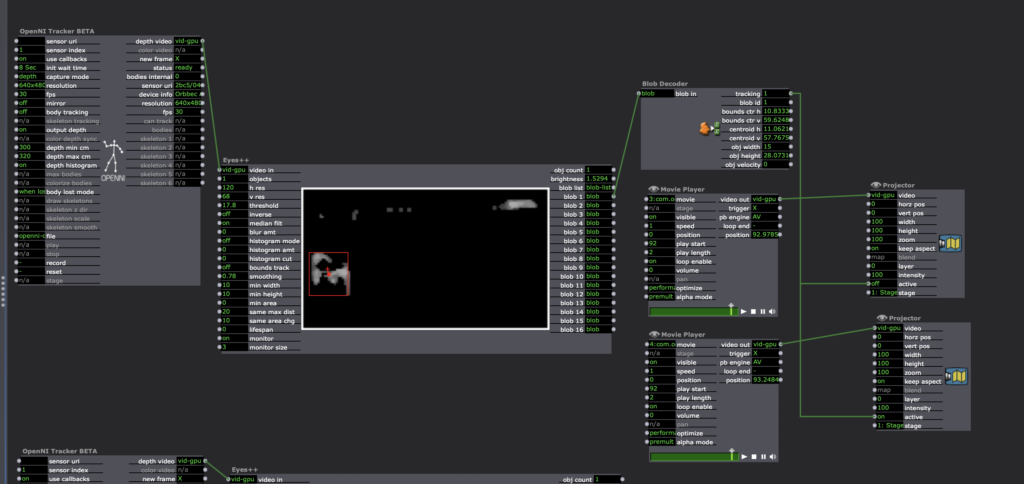
– Understanding the difference between the blob and skeleton trackers and what exactly I was going for took a while. I spent a lot of time on the blob tracker and then finally realized the skeleton tracker was probably what I actually needed in the end.
– I realized the headset will need more light to track if I’m to use it live.
Looking Ahead
The final product of this goal wasn’t finished for my presentation but I finished it this week which really brought about some really important choices I need to make. In my small space, if I’m standing in front of the projection it is very hard to see if I’m affecting it because of my shadow, so either the projection needs to be large enough to see over my head or my costume needs to be able to show the projection.
I am also considering a reveal, where the feed is mixed up (pre-recorded or live or a mix – I haven’t decided yet) and as I traverse from left to right the paintings begin to show up in the right order (possibly right to left/reverse of what I’m doing). Instead of audience participation, I’m thinking of having this performer triggered; my own position tracking and triggering the shift in content perhaps 3-4 times and then it stays in the live feed. Once I get to the other side, it is a full reveal of the live feed coming from my headset. This will be tricky as the headset needs light to work (more than projection provides), which is a reason I switched to using movies in my testing as I didn’t have the proper lights to light me so the headset could track and you could see the projection. I also was considering triggering the height of the mapped projection panel (like Kenny’s animation from class) and revealing what is behind that way. Although I do want to keep the fade in and out.
Tara Burns – Iteration X: Extending the Body – Cycle 1 Fall 2020
Posted: November 19, 2020 Filed under: Uncategorized Leave a comment »I began this class with the plan to make space to build the elements of my thesis and this first cycle was the first iteration of my MFA Thesis.
I envision my thesis as a three part process (or more). This first component was part of an evening walk around the OSU Arboretum with my MFA 2021 Cohort. To see the full event around the lake and other projects click here: https://dance.osu.edu/news/tethering-iteration-1-ohio-state-dance-mfa-project
In response to Covid, the OSU Dance MFA 2021 Cohort held a collaborative outdoor event. I placed my first cycle (Iteration X: Extending the Body) in this space. Five scheduled and timed groups were directed through a cultivated experience while simultaneously acting as docents to view sites of art. You see John Cartwright in the video above, directing a small audience toward my work.
In this outdoor space wifi and power were not available. I used a hotspot on my phone to transmit from both my computer and VR headset. I also used a battery to power my phone and computer for the duration.
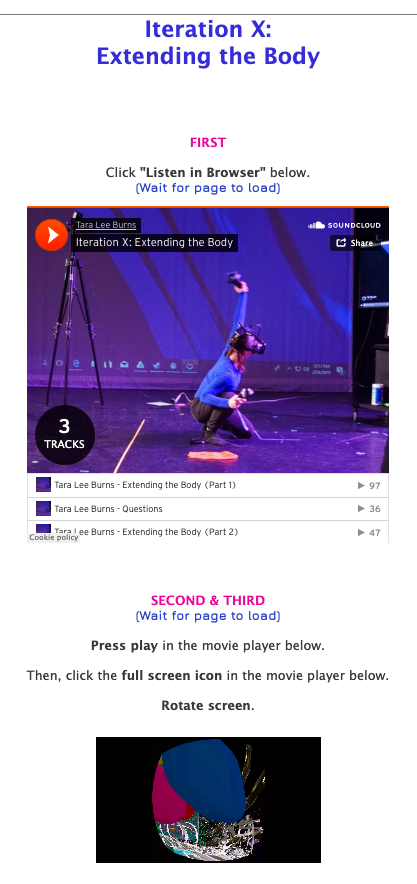
Iteration X: Extendting the Body asked the audience to follow the directions on the screen to listen to the soundscape, view the perspective of the performer, and imagine alternate and simultaneous worlds and bodies as forms of resistance.
Tara Burns – PP3
Posted: October 16, 2020 Filed under: Uncategorized Leave a comment »Goal
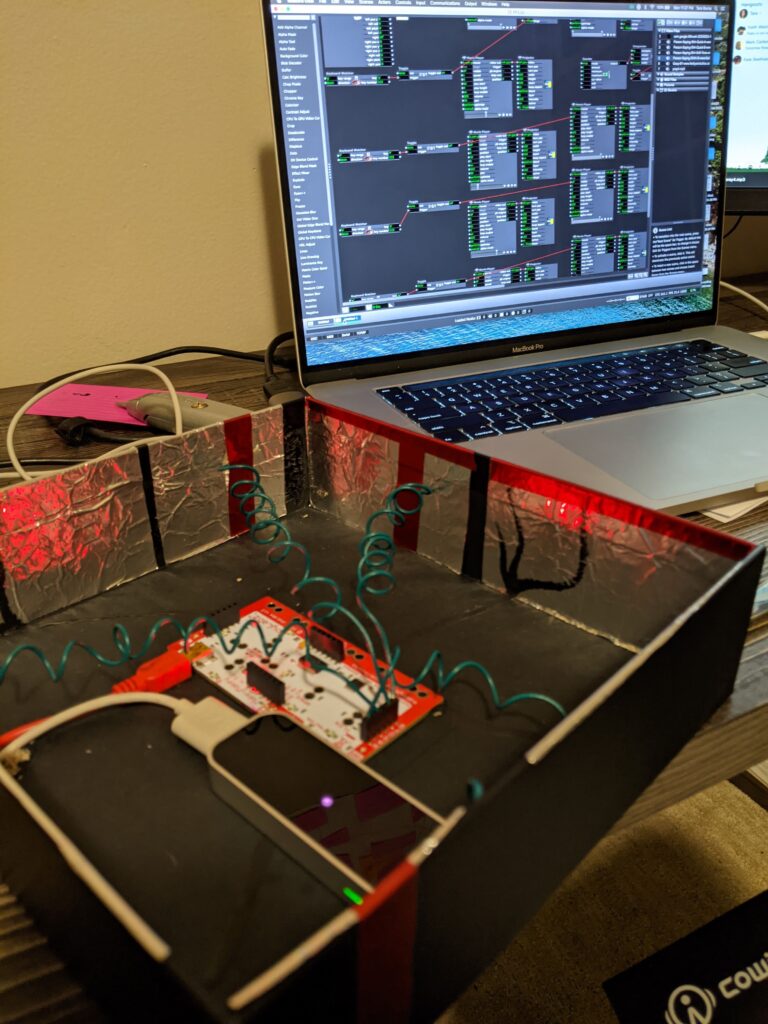
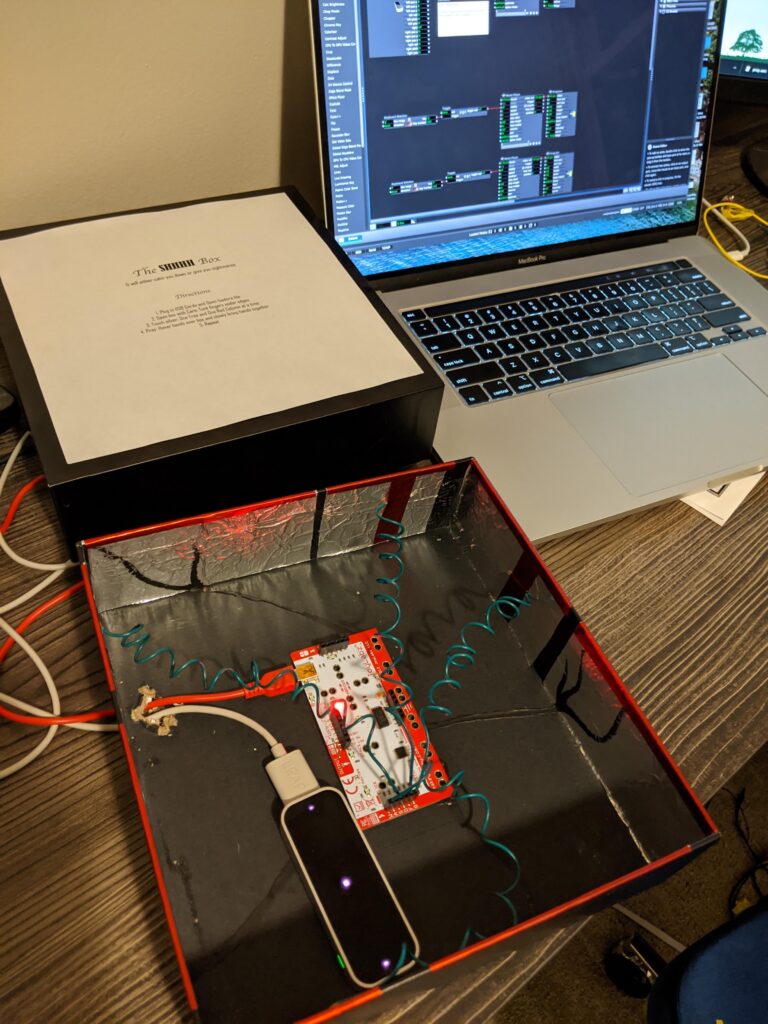
To expand my idea of the installation/performance sound box into a very small version while creating a surprise for my user
I feel I did get an opportunity to research the installation more in my first patch, but I aborted mission to create a cohesive experience switching the sounds to “shhhs,” labeling the box “The SHHHH Box,” and adding the prayer.
Challenges
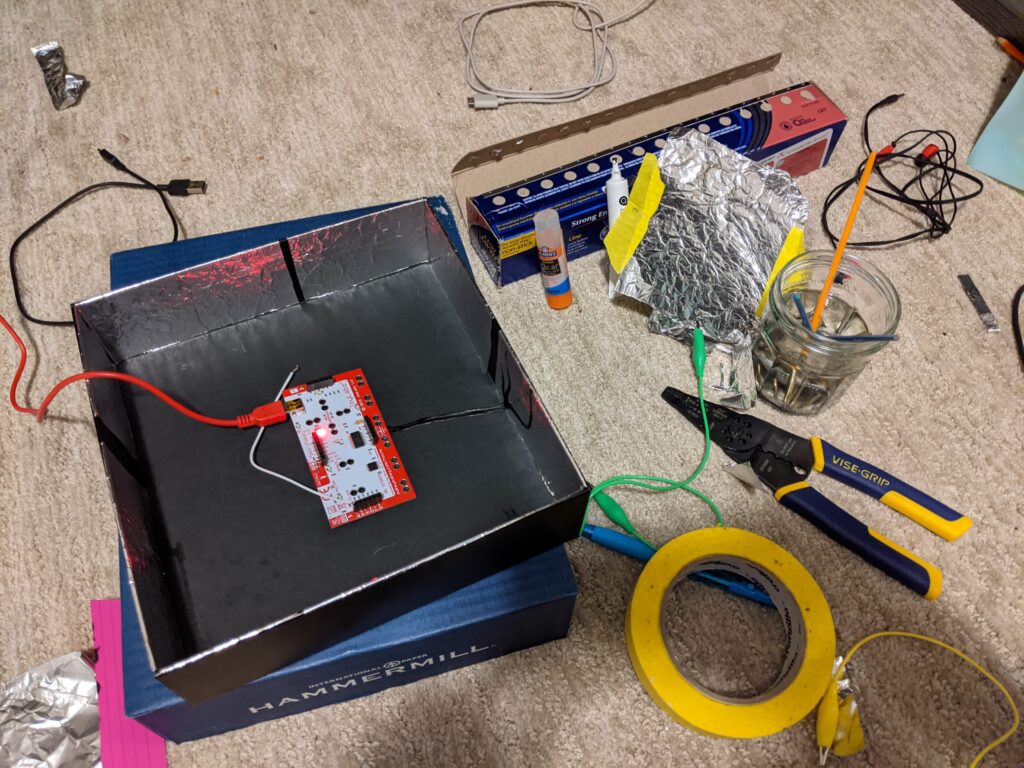
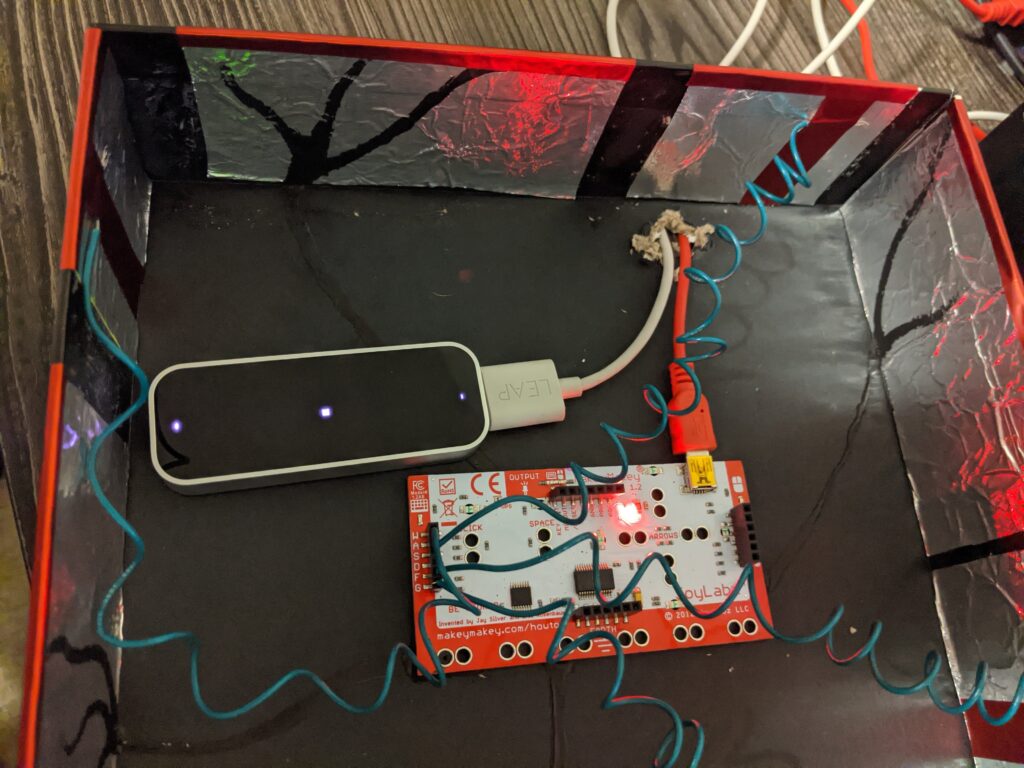
I had a problem with one of my touch points continually completing the circuit. I remedied this by putting a piece of paper under the aluminum. I decided that either glue is conductive (I don’t think so), I accidentally connected the circuit with messy electric finger paint, or the box is recycled and might have bits of metal in that one part.
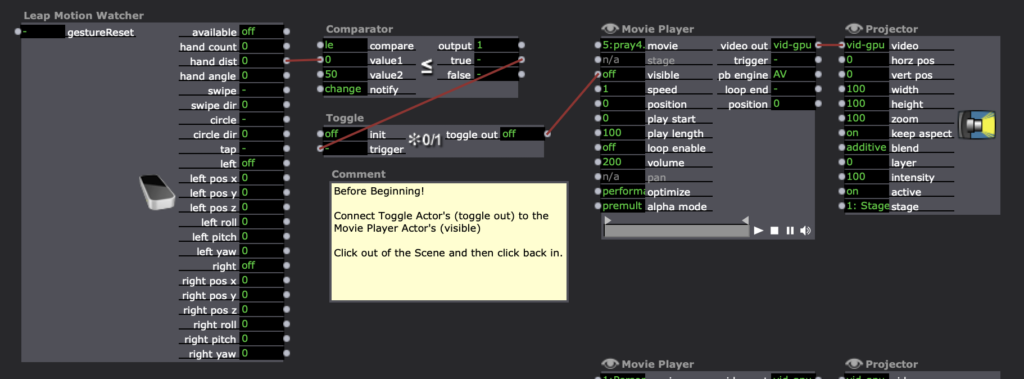
On my computer when I opened the patch, it would blurt out the final prayer. So, I added an instruction to Kara to connect the toggle to the movie player so the sound wouldn’t play and ruin the creepy surprise. Update: Alex showed us a remedy for this: 1) Create a snapshot of exactly how it “should” be (even though it keeps reverting to something other), then Enter Scene Trigger –> Recall Snapshot.
I also wish I had connected all the sounds properly, in haste, I put them in a new folder but forgot to connect the sounds and then Kara had to do that which made it more difficult for her in the beginning. If the paint goes to the aluminum my assumption is that since the aluminum is conductive that it should be trigger enough. But when Kara tested it, she seemed to have trouble triggering it.
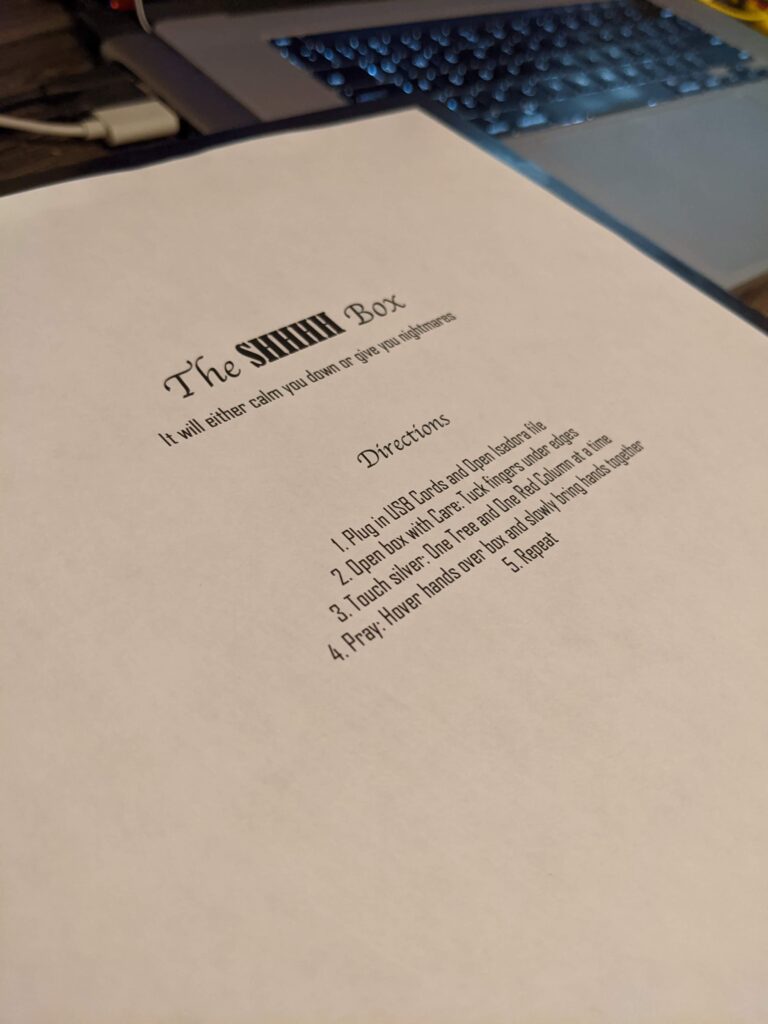
It will calm you down or give you nightmares.

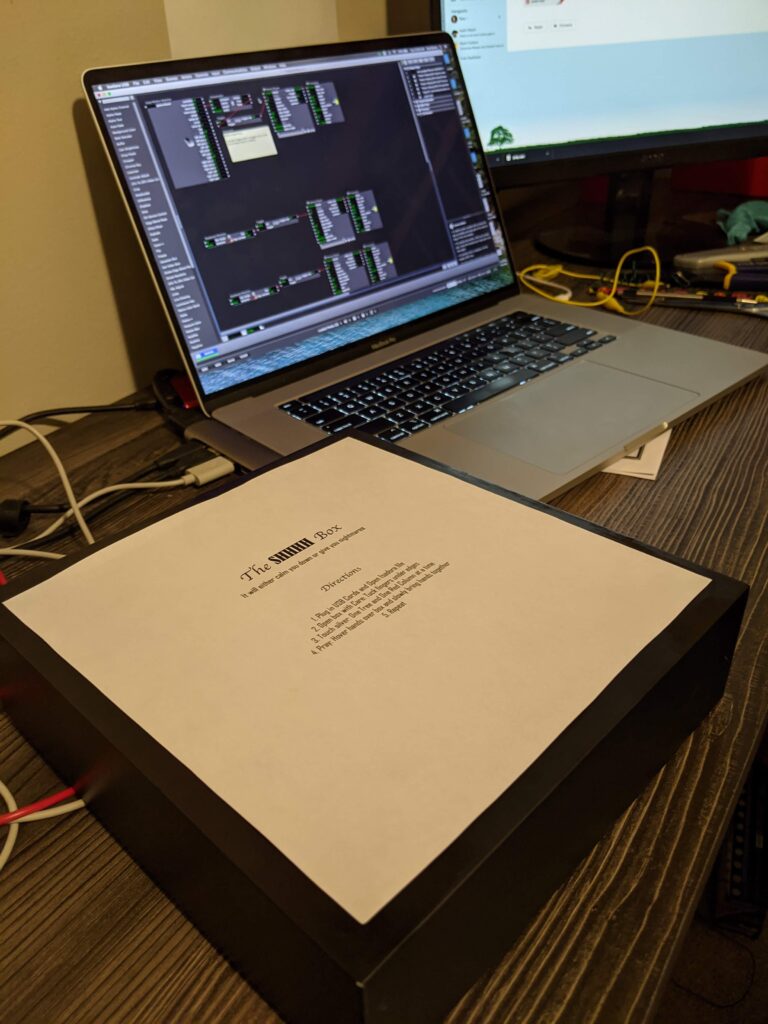
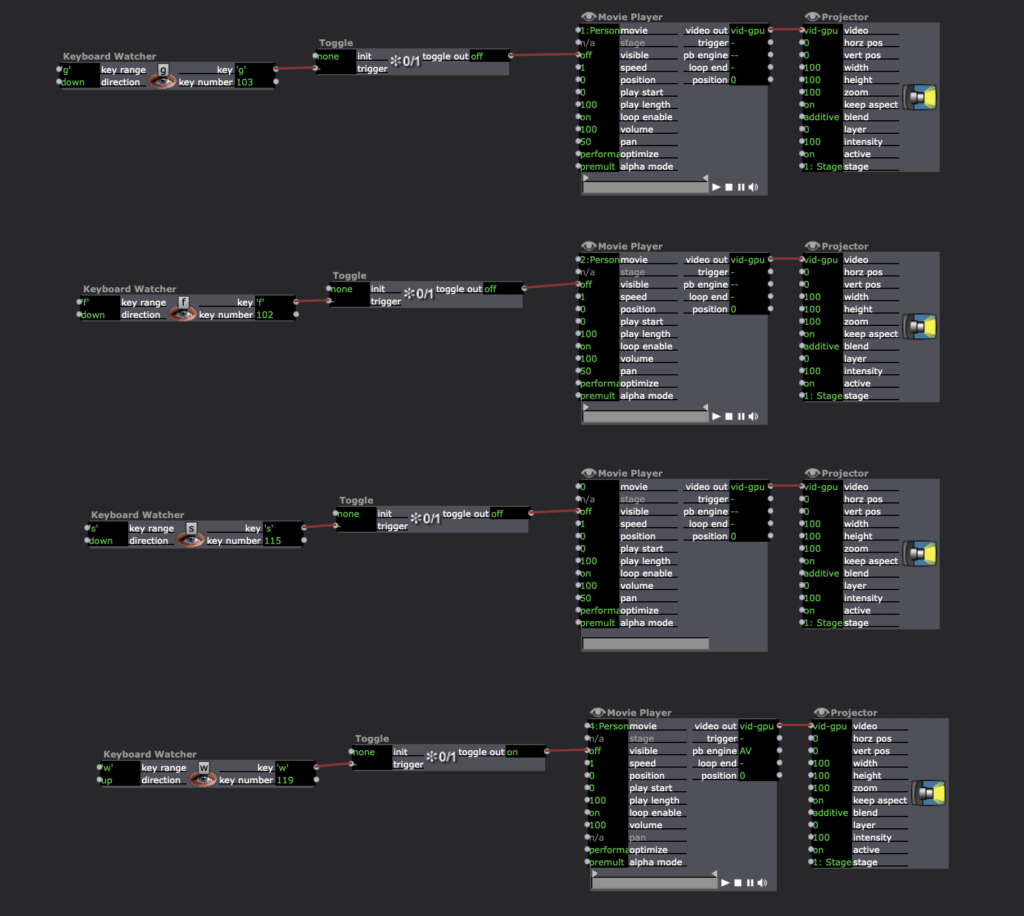
1. Plug in USB Cords and Open Isadora file
Tara Burns – PP2
Posted: October 6, 2020 Filed under: Uncategorized Leave a comment »Goal:
– To create a sound response to movement/dance
– To test the recording of sound from VR/Tilt Brush brushes for repurposing in Isadora
Challenges:
– Having the wire to ground attached to my body made it precarious and possibly dangerous for extended use.
– This would require A LOT of wire.
– The VR/Tilt Brush sounds recorded pretty soft.
Conclusions and future thoughts:
This project kind of turned into dance dance revolution. However, the help from the class/Alex to make a grounding agent for each pad (provided there is enough wire) would make it so I didn’t have to wear the grounding cable. For future application, I can imagine this controlling light and sound perhaps in a small box like a telephone booth (post-covid), that when touched the sounds rolled over one another. As it is, without the numbers, the sounds roll over each other and you can’t quite place what is happening and if in an installation or performance this is what I would prefer. However, the wires and connection to the Makey Makey don’t seem like they would stand up to the abuse I would require (as a dancer), so if everything was contained in a box, then it would probably be ok. In addition, the sounds in Tilt Brush get louder the faster you move, so this could be an interesting thing to try to add to the patch.

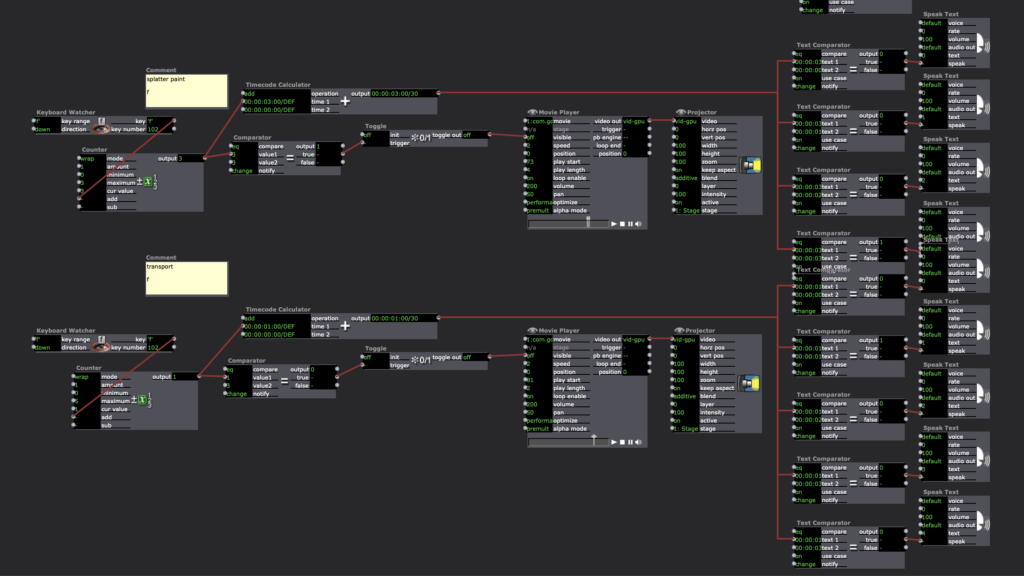
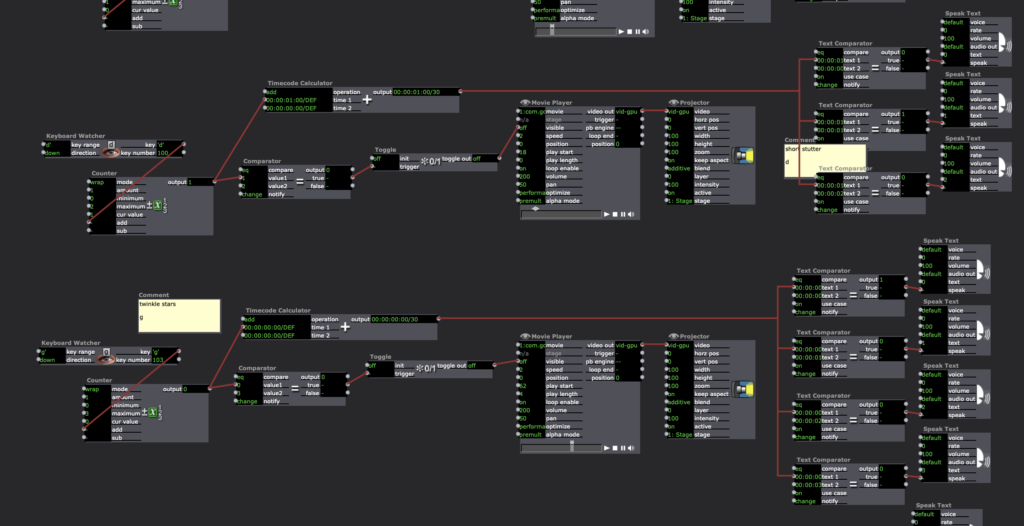
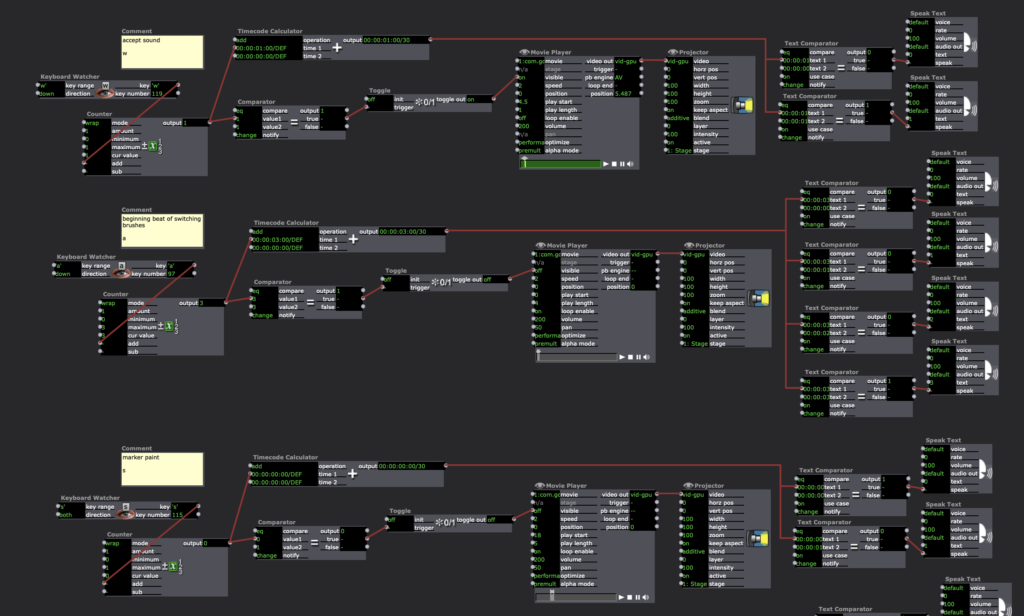
This addition included Timecode Calculator –> Text Comparator –> Speak Text actors.
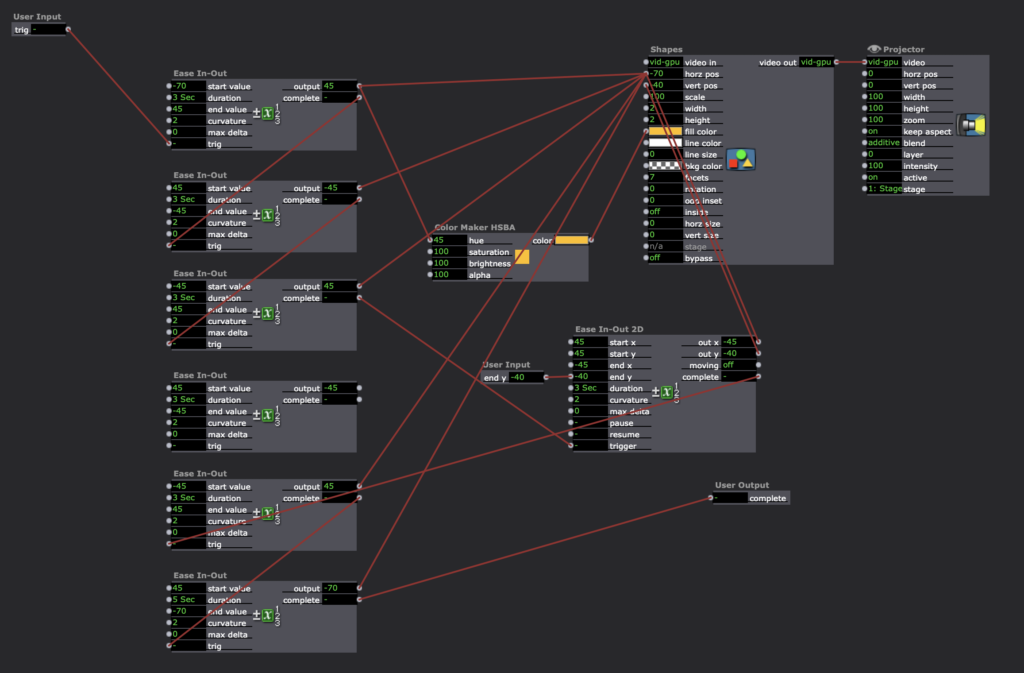
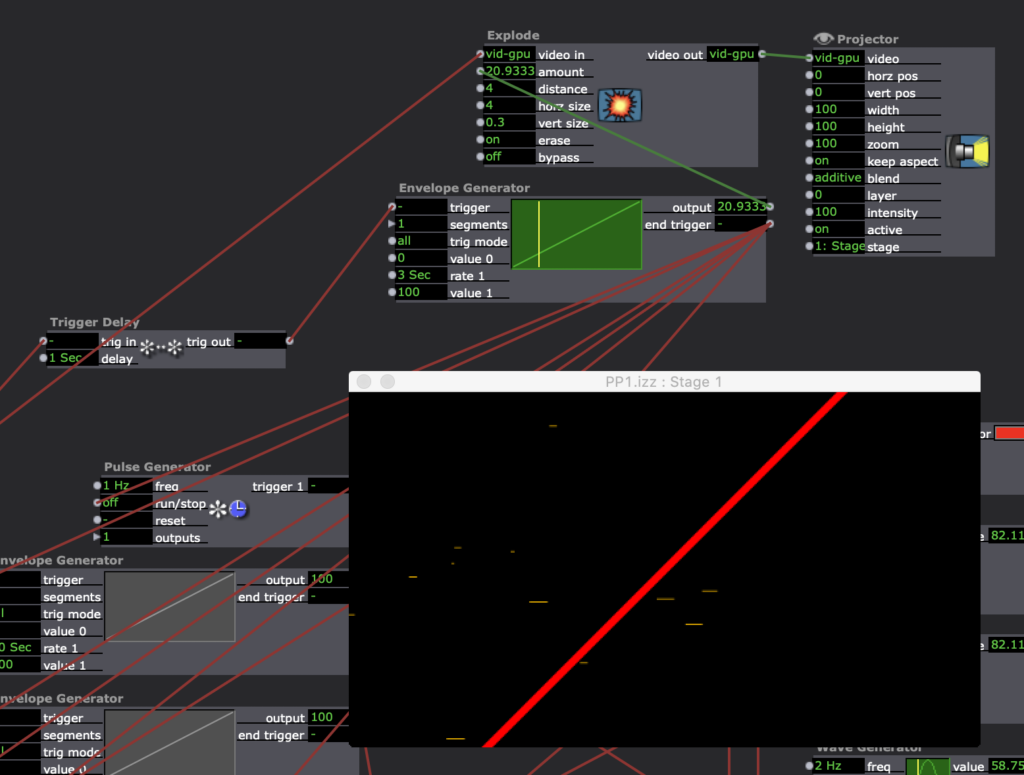
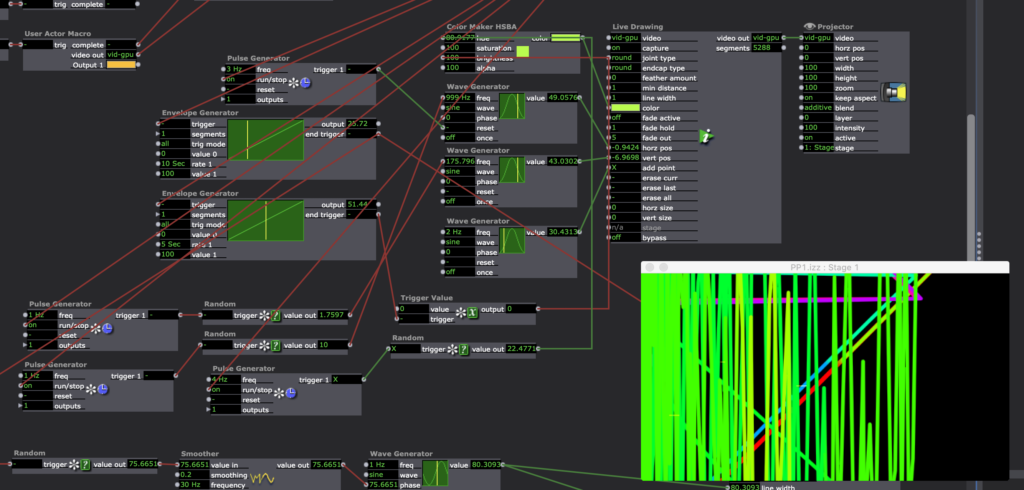
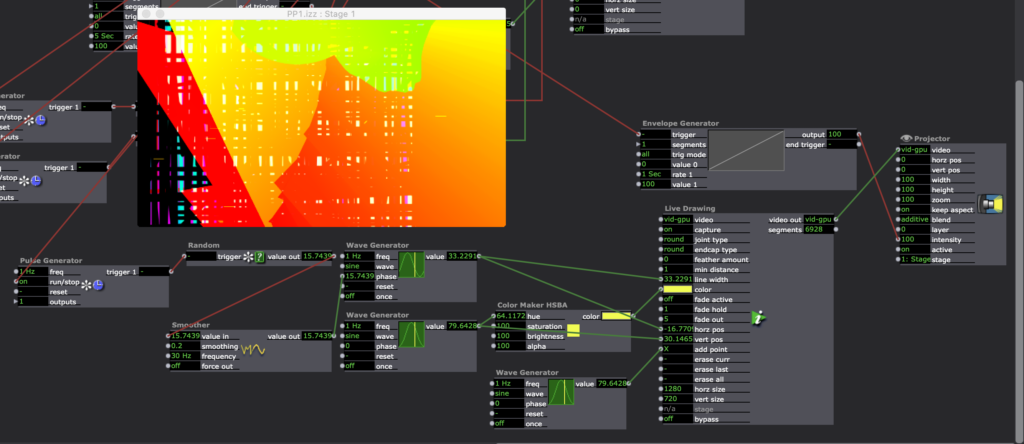
Tara Burns – The Pressure is on (PP1)
Posted: September 11, 2020 Filed under: Uncategorized Leave a comment »Goals:
To use the Live Drawing actor
To deepen my understanding of user actors and macros.
Challenges:
Finessing transitions between patches
Occasional re-setting glitches (it sometimes has a different outcome than the first 10x)
Making things random in the way you want them to be random is difficult.