1st trigger corresponds with audience rigth panel, 2nd trigger corresponds with audience left panel, 3rd trigger corresponds with 2nd from audience left panel, 4th trigger corresponds with 2nd from audience right panel
Goals – Using Cycle 1‘s set up and extending it into Isadora for manipulation – Testing and understanding the connection between Isadora and OBS Virtual Camera – Testing prerecorded video of paintings and live streamed Tilt Brush paintings in Isadora – Moving to a larger space for position sensitive tracking through Isadora Open NDI Tracker – Projection mapping
Challenges and Solutions – Catalina Mac OS doesn’t function with Syphon so I had to use OBS Virtual Camera in Isadora – Not having a live body to test motion tracking and pin pointing specific locations required going back and forth. I wouldn’t be able to do this in a really large space but for my smaller space I put my Isadora patch on the projection and showed half the product and half the patch so I could see what was firing and what the projection looked like at the same time. – Understanding the difference between the blob and skeleton trackers and what exactly I was going for took a while. I spent a lot of time on the blob tracker and then finally realized the skeleton tracker was probably what I actually needed in the end. – I realized the headset will need more light to track if I’m to use it live.
Looking Ahead The final product of this goal wasn’t finished for my presentation but I finished it this week which really brought about some really important choices I need to make. In my small space, if I’m standing in front of the projection it is very hard to see if I’m affecting it because of my shadow, so either the projection needs to be large enough to see over my head or my costume needs to be able to show the projection.
I am also considering a reveal, where the feed is mixed up (pre-recorded or live or a mix – I haven’t decided yet) and as I traverse from left to right the paintings begin to show up in the right order (possibly right to left/reverse of what I’m doing). Instead of audience participation, I’m thinking of having this performer triggered; my own position tracking and triggering the shift in content perhaps 3-4 times and then it stays in the live feed. Once I get to the other side, it is a full reveal of the live feed coming from my headset. This will be tricky as the headset needs light to work (more than projection provides), which is a reason I switched to using movies in my testing as I didn’t have the proper lights to light me so the headset could track and you could see the projection. I also was considering triggering the height of the mapped projection panel (like Kenny’s animation from class) and revealing what is behind that way. Although I do want to keep the fade in and out.
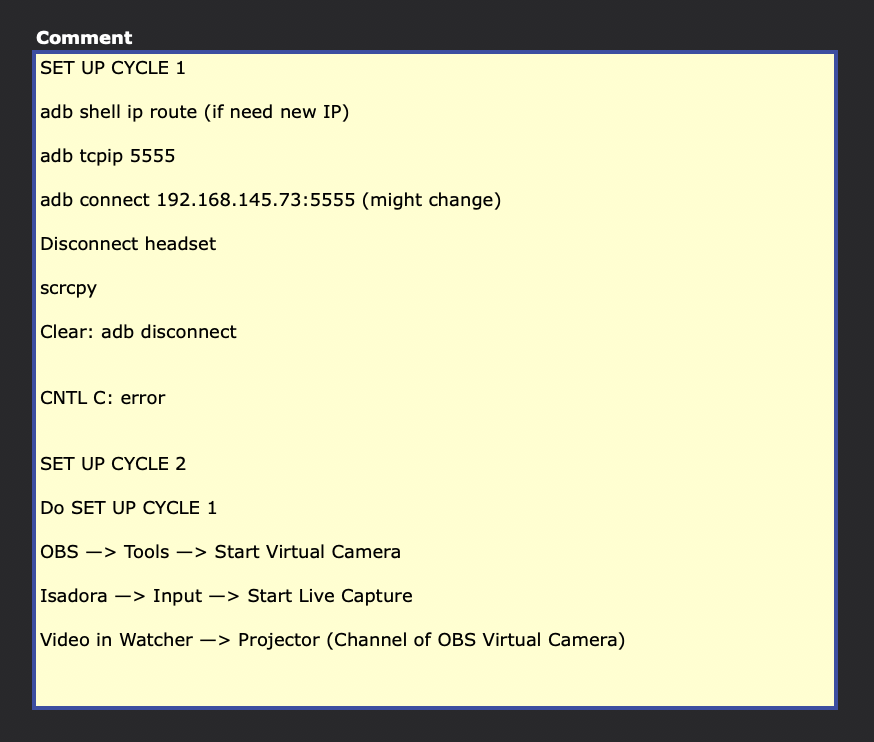
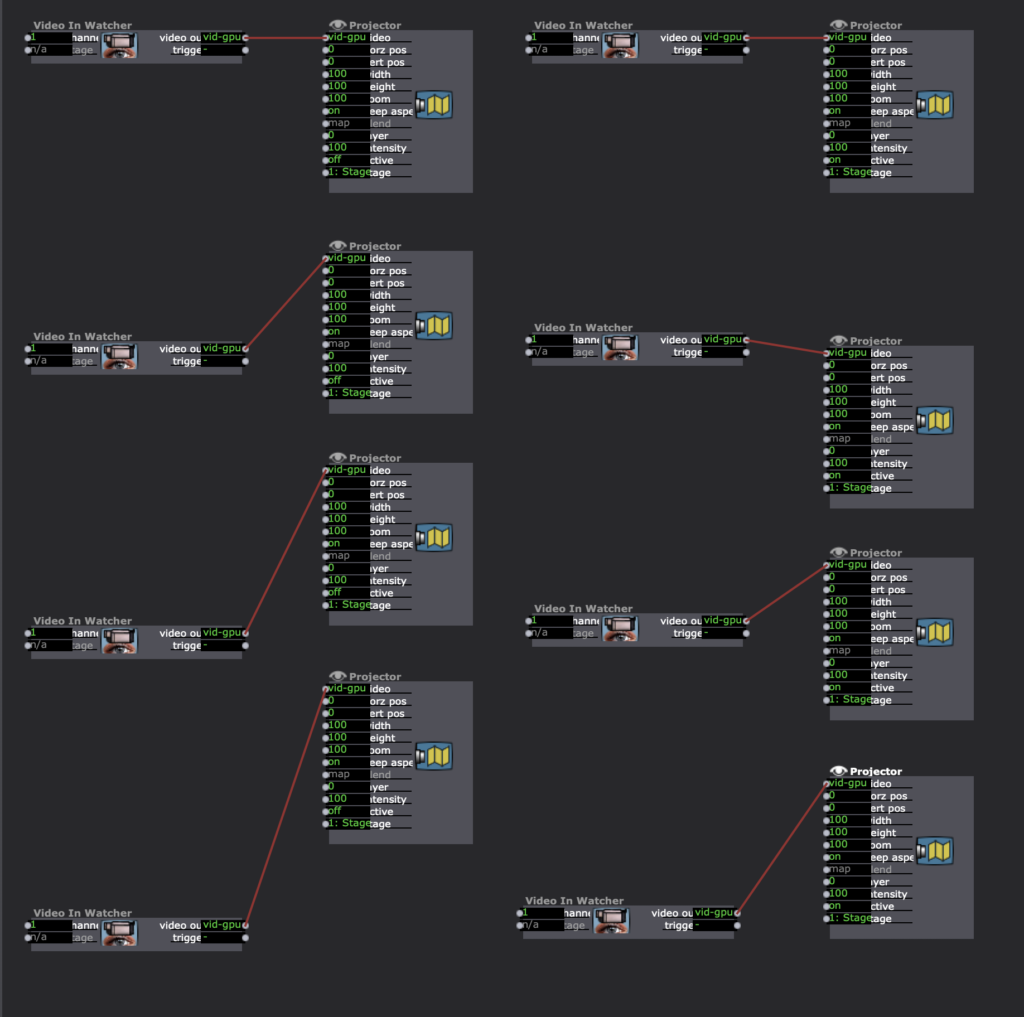
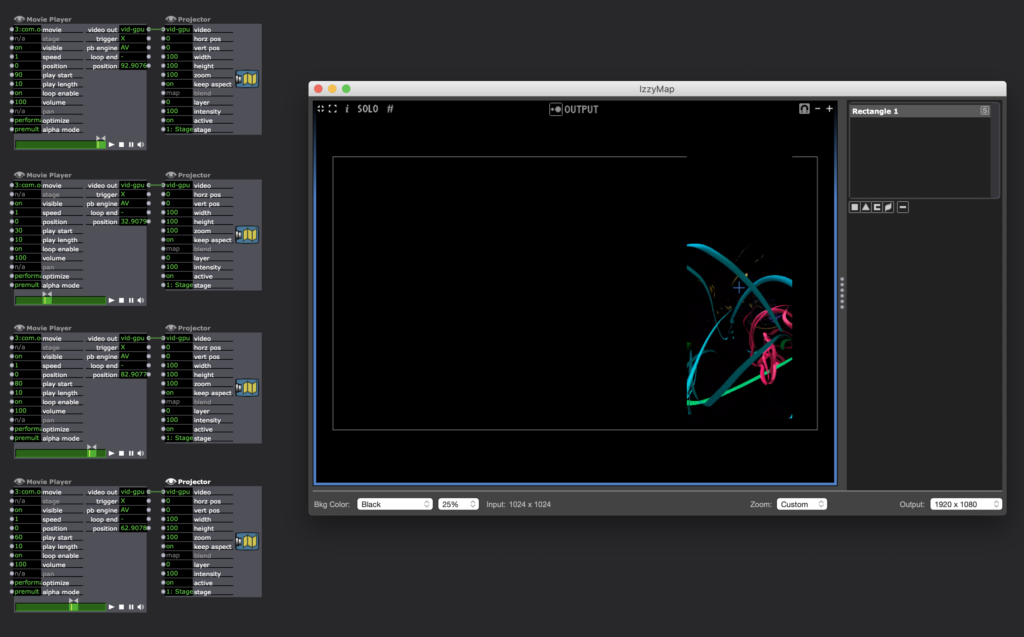
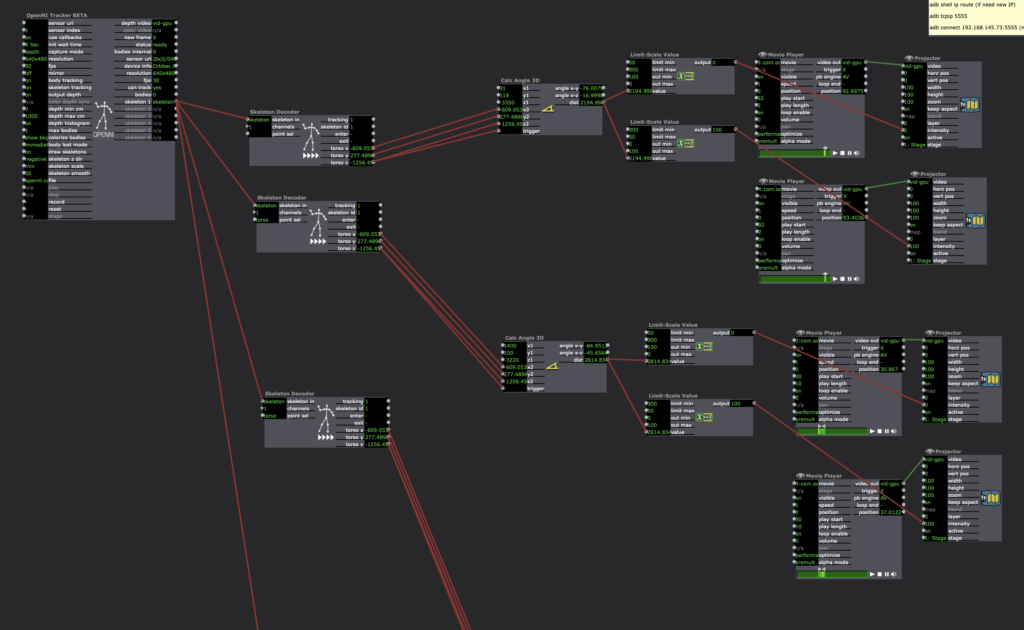
I used the same set up from Cycle 1 to wirelessly connect the headset to the computer and send it to OBS. I created these reminders in my patch to make sure I did all the steps necessary to make things work. Note: The Oculus Quest transmits a 1440×1600 resolution per “eye.” To be able to transmit that resolution to Isadora, make sure the “Start Live Capture” in OBS is turned off, change to the appropriate resolution, then “Start Live Capture” and Isadora should receive this information. The Video in Watcher caught Virtual Camera in Isadora from the live capture in OBS then projection mapped the four panels of projections and their alternate panel to be triggered. Knowing this works is a big step and now I need to decide if it is necessary.Later, I projection mapped movies I downloaded from the Oculus Quest, so I didn’t have to have the headset streaming a live feed of VR footage while testing.I began using “Eyes++” and “Blob Decoder” to to trigger the panels but wasn’t able to differentiate between blobs/areas of space.
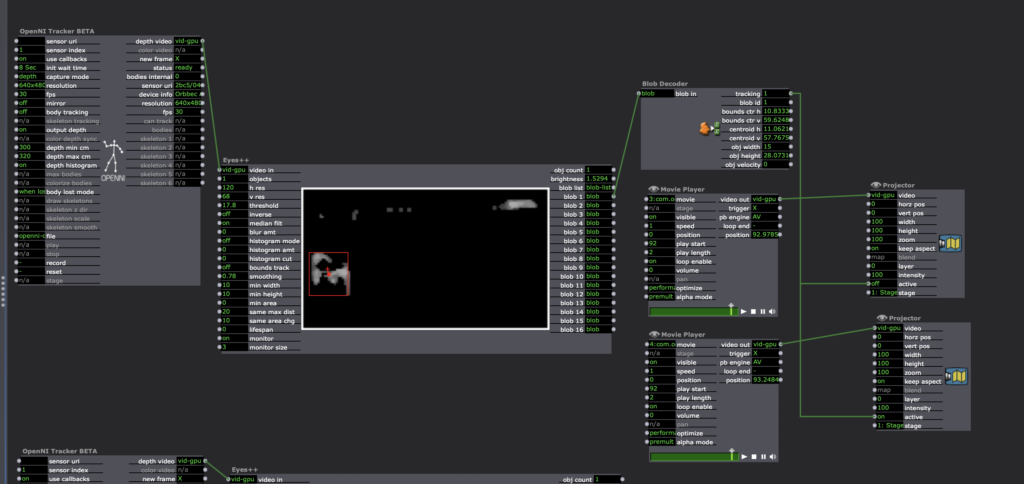
This is what happens (although interesting) using the blob decoder. It was very difficult to achieve a depth that wasn’t being triggered by extraneous elements even using threshold. Perhaps using ChromaKey might have helped, but essentially I think I want the locations to correspond with specific panels blob decoder seemed too care free in that regard.I switched to using the “Skeleton Decoder” and used “Calc Angle 3D” (see Mark Coniglio’s Guru Session #13) to calculate the specific area I wanted to trigger the fade between movies. Mark explains it better but essentially you stand (or ideally have someone else stand) in the space where you want the trigger, watch the numbers in the x2, y2, z2, and catch the median numbers they send off when you are standing in the space. Then put those numbers in the x1, y1, z1. Send the “dist” to the value in a “Limit Scale Value” and determine the range where it can catch the number. In Mark’s tutorial, he achieves ‘0’, however I couldn’t do that so I made a larger range in my limit scale value actor and that seems to work. I hypothosize that it might be the projection interference with the depth camera but I’m not sure. More testing is needed here, perhaps I can reduce my depth range in the OpenNDI Tracker. I did this 4x to trigger each panel. Note: they are all going into the same “Skeleton 1” id on the Open NDI Tracker because I only had one body to test. So choreographically, I have to change the patch if I want more people in the work by connecting each panel to a different skeleton id.
This is how I achieved the numbers by myself. This way, I was able to watch the screen, remember the numbers and then input them into the actor.