Cycle Project 3
Posted: December 10, 2020 Filed under: Uncategorized Leave a comment »In my Cycle 3 project, I wanted to get a bit better filter with a harder edge to edit out the background of the images. Alex and I worked together and added some TT Sharpen effects, Gauzian blur and TT Sorbel Edge Detection. These filters stacked on top of each other allowed me to get my entire body cut out from the background. I think if I had something like a green screen in the background, the effect would be even more precise.


My major goal for the third iteration of the project was adding some things to make the user experience more interesting. I added some sound effects when buttons were pushed on the makey makey, as well as some short animations that would play after the user took a picture with a hat on.
I also added a third environment, which is a party scene. Overall, this project allowed me to synthesize many of the tools we were working with during the class. I used the makey makey as the interface. I also used the Leapmotion hand sensor to allow users to rotate and resize an image.
Much of my work on this project involved compositing, as I used the depth camera to capture the image of the user as well as the filter that would allow for the removal of the background.
If I were to continue on this project further, I would want to take the composited image of the user with the hat and put them into a game like situation, perhaps something like some of the games that came with the game boy camera software. I found that I really enjoyed designing experiences that users would interact with and trying to figure out what would make them clear and easy to use.
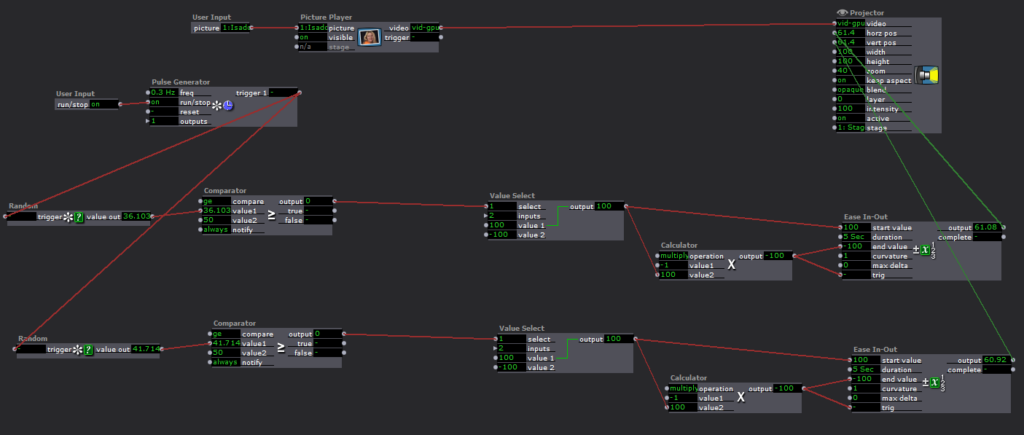
Cycle 3 Isadora patch
https://1drv.ms/u/s!Ai2N4YhYaKTvgbYSo1Tsa-MdTV2ZGQ?e=EmjBNh
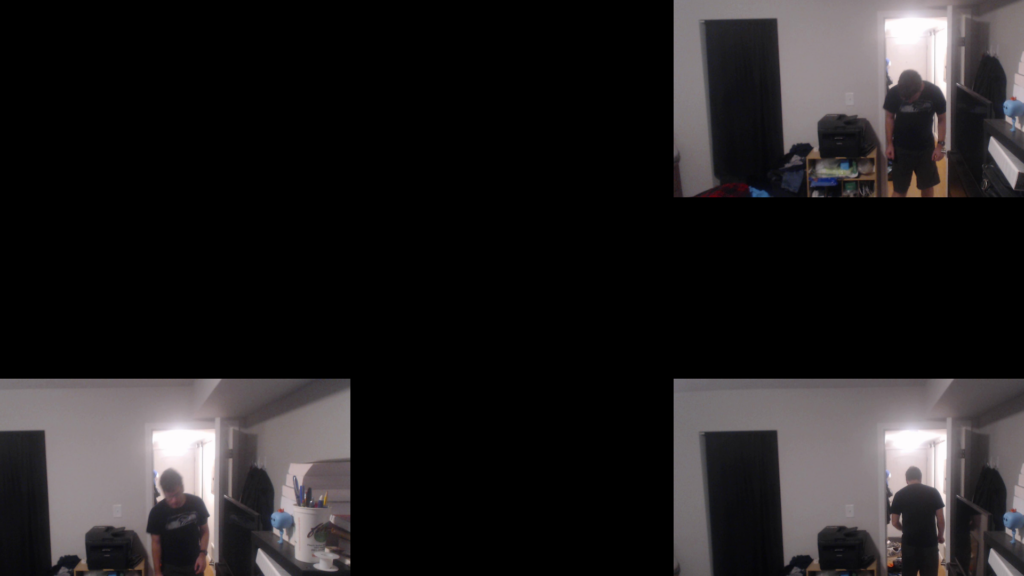
This is a recording of me showing the different parts of my cycle 3 project
https://1drv.ms/u/s!Ai2N4YhYaKTvgbYctMNYMgWOb7P3Sg?e=5hRoqY
Cycle Project 2
Posted: December 10, 2020 Filed under: Uncategorized Leave a comment »As the next step in the photo booth project, I wanted to switch from using my webcam to the Orbecc Astra camera so that I could capture depth data while I was capturing the image. With the depth data, I would use a luminance key to filter out the background portion of my image.
One of the difficult parts of this project was the resolution of the Astra camera. It incorrectly detected some parts of my face, so they became transparent when run through the luminance key. In order to combat this, I added a gauzian blur, but it was not quite the tight filter I was looking for with my project.

https://1drv.ms/u/s!Ai2N4YhYaKTvgbYWfqACckMc8dOFkg?e=wsLF3P
This is a link for my code for cycle 2
https://1drv.ms/u/s!Ai2N4YhYaKTvgbYbCQq_7ZQ6ZIghtg?e=CXGBWk
This is a link to a video file of my cycle 2 presentation.
Cycle Project 1
Posted: December 10, 2020 Filed under: Uncategorized Leave a comment »For this project I wanted to synthesize some of the work I had done on my previous projects in the class. I wanted to create a kind of photobooth. Users would operate the booth by the makey makey and then Isadora would capture a webcam image of the user. From there the user can select different environments to add hats. For this iteration of the project, I offered a choice between a Western theme and a space theme.
After selecting the desired theme, the users could adjust the size of the hat by pressing a button on the makey makey interface. From there, they could use the Leapmotion controller and reposition and rotate the hat as well as resizing it.
One of the most difficult parts of this project for me was figuring out the compositing using virtual stages. Additionally, I spent a lot of time trying to find ways to make the prompts (which appeared over the image) disappear before the image was taken.
This is a link to my code for the project.
https://1drv.ms/u/s!Ai2N4YhYaKTvgbYVl0LiupCRh2PFdg?e=wuKpZm
Here is the link for my class presentation.
https://1drv.ms/u/s!Ai2N4YhYaKTvgbYaMqgJRuOsmjBMog?e=rDAOMd
Pressure Project 3
Posted: October 29, 2020 Filed under: Uncategorized Leave a comment »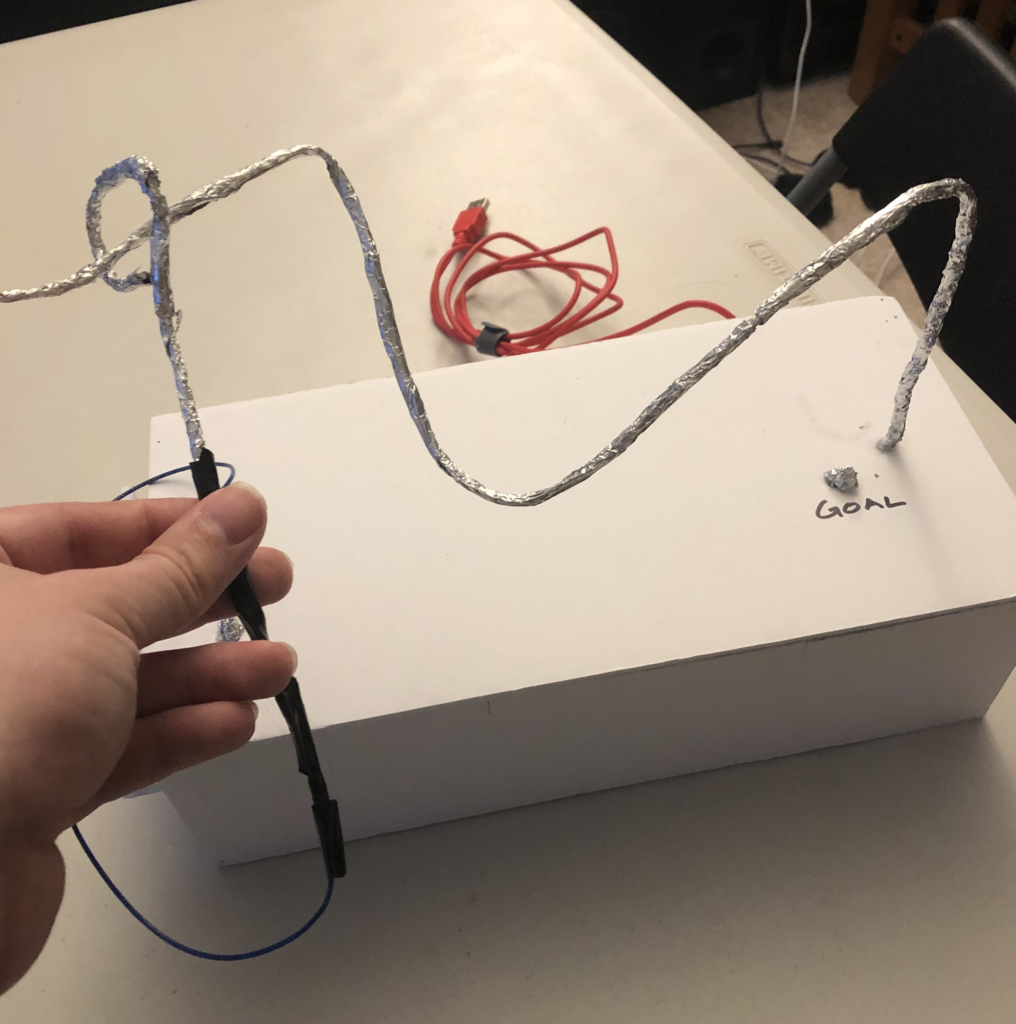
For this pressure project, I wanted to create a game where the player would attempt to move a conductive ring through an obstacle without contacting the obstacle (similar to the board game Operation). The object is to move the wand through the obstacle and touch the piece of foil labeled goal. This would trigger a victory scene. However, if any of the obstacle was touched with the wand, it would trigger a failure screen and the player would need to remove the wand from the obstacle and touch the reset button to go back into the game.
One thing I realized while designing the game was that it would be incredibly easy to cheat, for example moving the wand directly to the goal without going over the obstacle at all after starting the game. I decided to keep this feature in the game without resolving it because it made it very easy to test the game.
When I was building my box I expected I bent a coat metal coat hanger to create the wand and the obstacle. I assumed that the metal coat hanger would be conductive, however, the paint on the obstacle prevented that from happening. I could have sanded down the hanger, but instead, I glued and wrapped foil around the hanger. This created a few places where the wand was not conductive.
Another challenge I ran into was the physical construction of the box. I did not anticipate the need for room for the alligator clips to connect to the makey makey device. I ended up having to make a much taller box so the clips could stand up without strain or being bent at an angle inside of the box.
If I had more time to work on this project, I would have liked to have added another button to bring up a scene that would allow the player to play a “challenge mode.” This mode would force the player to complete the course within a certain amount of time. I also thought it would be interesting to force the player to engage with the Leap Motion controller with their other hand while trying to complete the game.
Download game files:
https://1drv.ms/u/s!Ai2N4YhYaKTvgbM4H-iN0GAvYMls6Q?e=nLweiY
Pressure Project 2
Posted: October 1, 2020 Filed under: Uncategorized Leave a comment »For this project, I wanted to use the makey-makey in order to trigger photos from a webcam to be taken. After a certain number of photos were taken, I wanted them to be displayed on a computer monitor.
I glued a couple of pieces of foil to a piece of cardboard and put a cloth mat over it and ran wires back to the makey makey in order to trigger a space bar press. One of my initial issues was the taking of several photos very quickly when the makey makey was pressed. I used an envelope generator between the keyboard watcher and the capture stage to picture actor in order to make it so one photo at a time was taken.
The next challenge was recalling the file names that had not been created yet. I discovered Isadora did not like referencing files which did not yet exist, so I needed to load in the values after the pictures were taken.
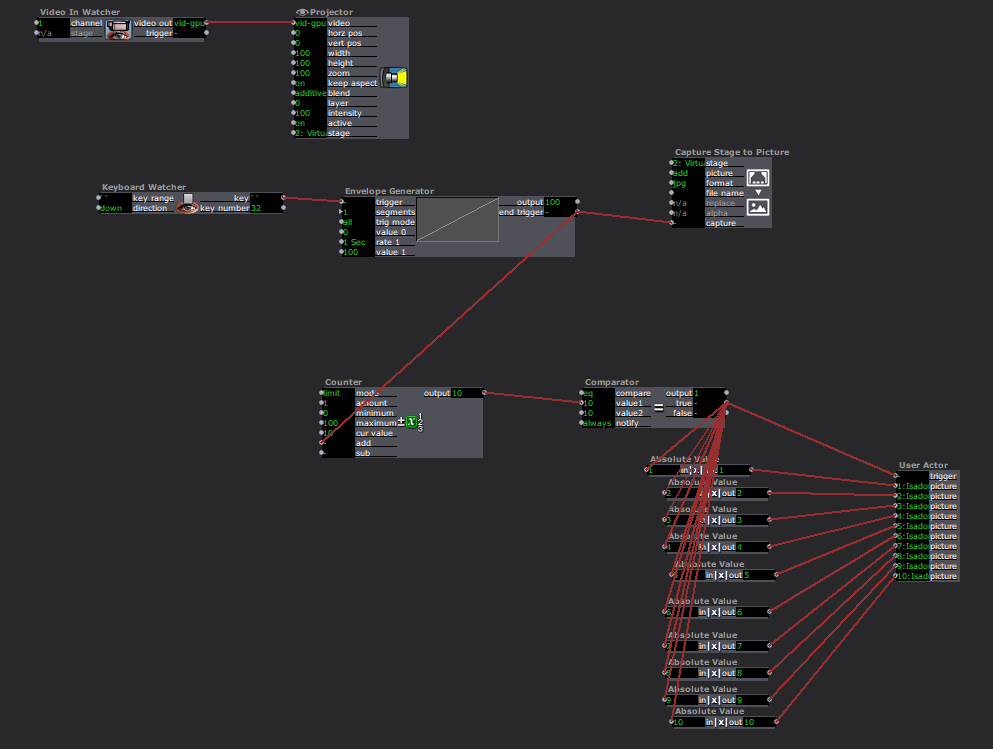
I built a user actor to display each image in a random way and nested it inside of another user actor.
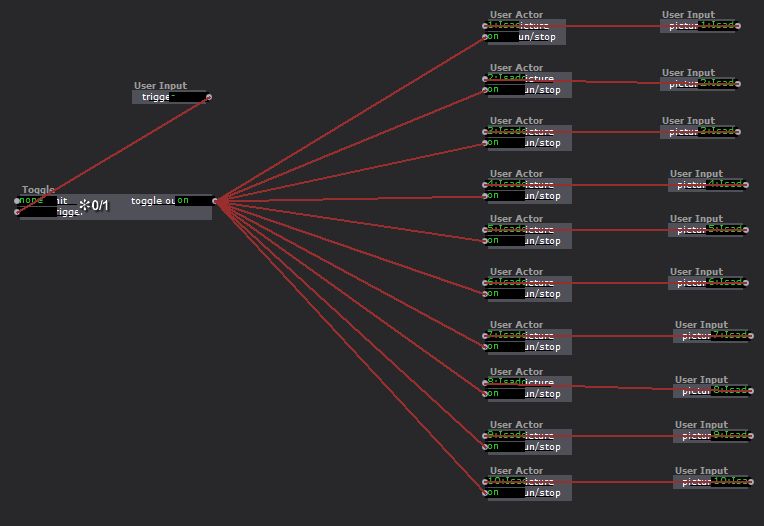
Inside of this actor, I used random value actors in order to randomly generate where the image would appear on the screen. The images would then fly over to the opposite side of the screen.
Ultimately I feel this project gave me a good grasp of manipulating a photo library in Isadora as well as a more sophisticated understanding of some of the logic and math functions.
Pressure Project #1
Posted: September 10, 2020 Filed under: Uncategorized Leave a comment »Working on this project, I wanted to play around with scenes as well as find a way to incorporate some randomly generated elements. I knew that I wanted to get away from a black background, so I found an image with several different colored blocks and zoomed in on it and then set it to move around the screen as a background.
I originally thought my project would consist of rectangular shapes, so I generated one to move in the layer above the background. However, then I started to think about drawing lines in front of the moving block. My first idea was to see if it would be possible to record a mouse movement and then play it back inside of the mouse watcher. After a little playing, I used a random actor to generate lines. This led me to the idea of more and more lines being generated before the project loops back to the beginning.
I began to explore ways of going to different scenes so that the lines would begin to draw on top of each other. As we discussed in class, I could have accomplished this more efficiently by using the jump actor.
One of the best parts about this project to me was seeing different ways people laid out their workspace as well as getting ideas for new actors. Through this project I feel much more confident about basic kinds of actors as well as working with scenes.
Link to Isadora file:
https://1drv.ms/u/s!Ai2N4YhYaKTvgY9sbl-j6aDoPcdJMg?e=9McCvN
Project Bump
Posted: September 8, 2020 Filed under: Uncategorized Leave a comment »I found Aaron Cochran’s cycle project to have an interesting trajectory. https://dems.asc.ohio-state.edu/?p=2281
I like how Aaron went from working with the Kinect sensor and projector to create the interactive game. I thought the idea of this kind of augmented reality game was executed well and the environment seemed very responsive to the movements of the player. Throughout all three of his cycles Aaron seemed to have a logical process that arrived at a good result.