Cycle 3: House of Discovery
Posted: December 15, 2023 Filed under: Uncategorized Leave a comment »
For cycle 3, my main mission was to put all of my elements together. I had the stove/makey-makey element I had created for cycle 1, as well as the projection mappings I had done for cycle 2, and I needed to pull them together in order to make the experience I had set out to originally.
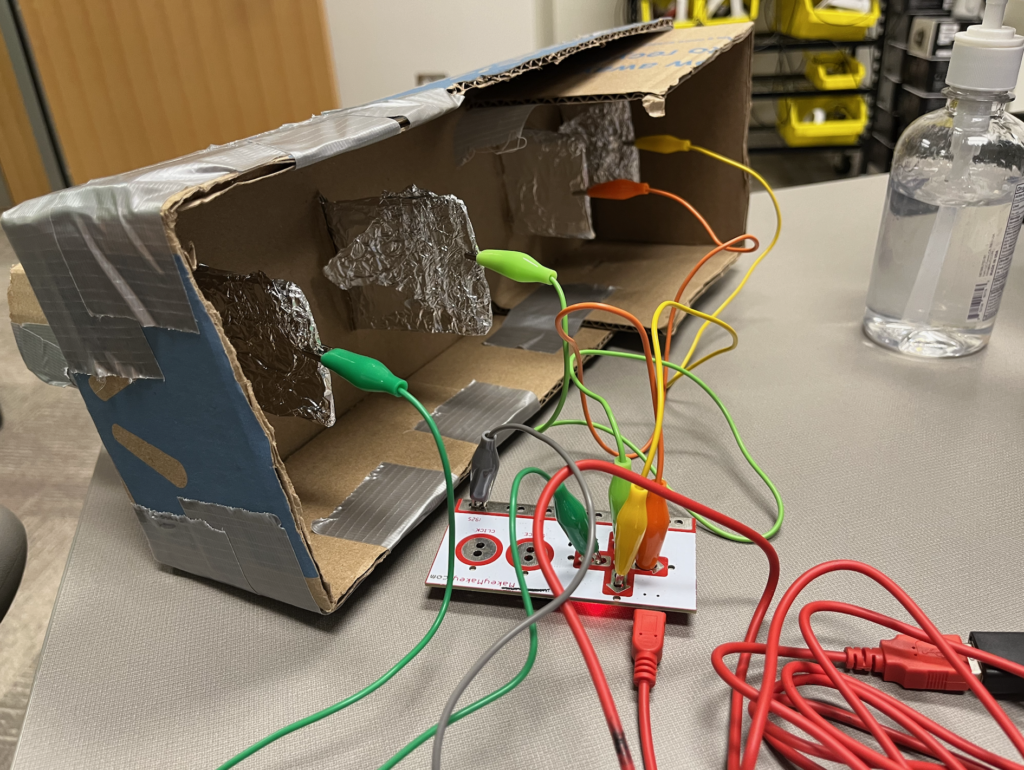
After a lot of thought about how to connect users to ground when using the stove and sink, I realized that I could easily do it by using separate piece of tinfoil on either side of each knob. This whole time, I had each knob wrapped in one singular piece, but by breaking that apart and connecting one side to ground and the other to its correct input, I could easily ground each user without making people take shoes off or touching other tinfoil elements (both options I cam dangerously close to doing!). Of course, this dawned on me the night before we were presenting our cycle 3s, which ended in me reworking a lot of my makey-makey design from cycle 1. However, I found this experience to be very representative of the RSVP cycle and creative process in general. Especially when you’re working “solo” (all work is collaborative to some extent), the sometimes obvious answer can be staring you in the face, and it just takes a while for you to find it.
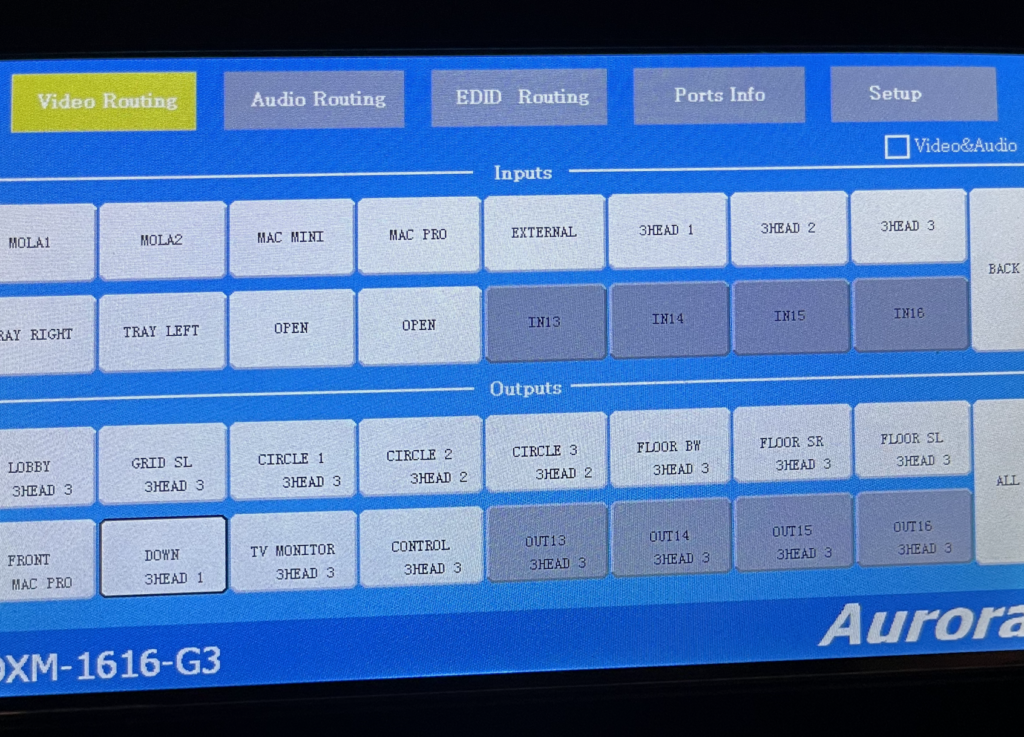
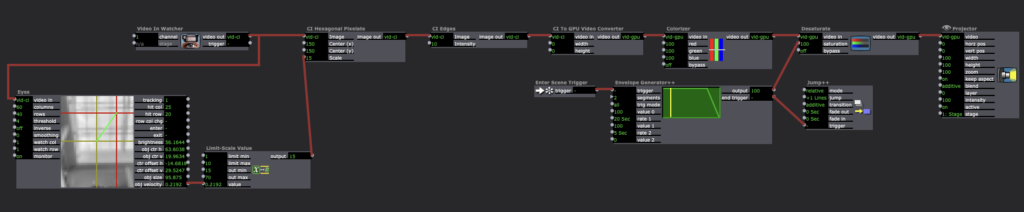
Still, this ground answer was a big breakthrough for me. All that was left was to add some more elements to upgrade my kitchen to an actual house. I decided to add a window to the left of the kitchen scene. In the patch, I set it so that every so often, a man’s faint silhouette would appear in the backyard, giving the experiencer the sense that they were being watched. It was at this point where I also decided to add a living room on another scrim to add dimension to the experience. I was able to set up some chairs in front to set it up as if if could be a place people could gather. I even created a cardboard “vase” with flowers (also made of cardboard and duct tape) to add to the room’s design. Of course, this additional room added complexity with yet another projector (projector count is now 3) and Isadora stage (Isadora stage count also 3). It was a quick picture for me to keep track of my outputs, so the framing isn’t great, but here’s a picture of the matrix switcher with my outputs in it:
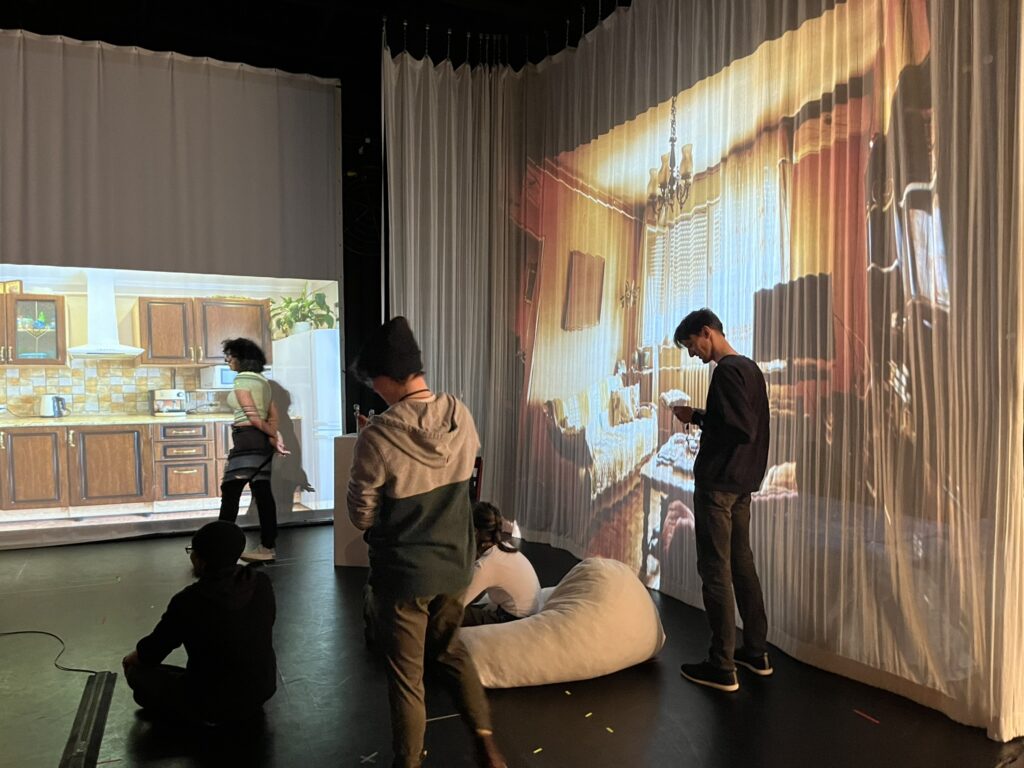
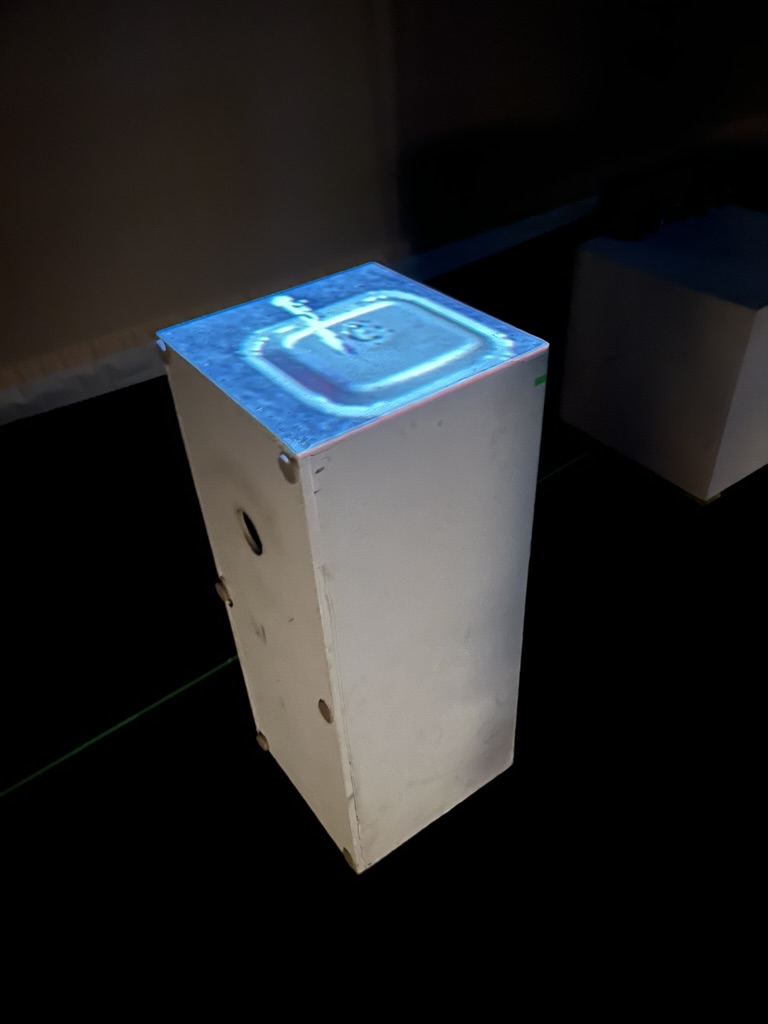
And here’s a picture of the living room during cycle 3’s presentation:
Finally, after the presentation, I find that I would definitely like to make some updates for a theoretical cycle 4. I would focus a lot more on making my patch and experience robust. Some of my elements didn’t quite work during the showcase (thanks to a quick change and fault in logic on my part and OneDrive refusing to sync the morning of), so I’d like to focus on user testing and experience framing. There’s a lot to my idea that I don’t think I translated well into my cycle 3. I think the idea itself was big, so it was hard to tackle it all. If I were to go back to cycle 1, I would definitely downsize, making it easier for myself to have a more robust experience by the time we got to cycle 3. However, I could also 100% see myself saying I would want more time even if we had a cycle 4 and even 5. Since the RSVP cycle never ends, I’ll never quite be “happy” with the output. There’s always something to tweak.
However, I’m still quite proud of what I accomplished in the time given, and most of all what I learned. I never would have known how to do any of this–Isadora programming, projection mapping, experience design–before this class, and it’s given me a lot of ideas for the future and ongoing possibilities. Although I might not get a cycle 4 in the same context as these first 3 cycles, I’m excited to see where my new skills take me in the future.
Thank you all for this class–it’s been amazing, and I’ve truly enjoyed it and am endlessly grateful for this experience!
Cycle 2: Stove Maps
Posted: December 15, 2023 Filed under: Uncategorized Leave a comment »For my cycle 2, I was mostly focused on how I was physically going to present my outputs in motion lab. Since I had already created a main mechanism (my stove), I wanted to start work on the more visual element of the project.
In addition to the stove, I had decided to add a sink element, as this was another interactive piece of a kitchen/house I felt I could incorporate. I used Shadertoy to find a simple water GLSL shader that I connected to my sink user actor. When activated by pressing the tinfoil of the “faucet,” the GLSL shader would fade in, making the sink look full.
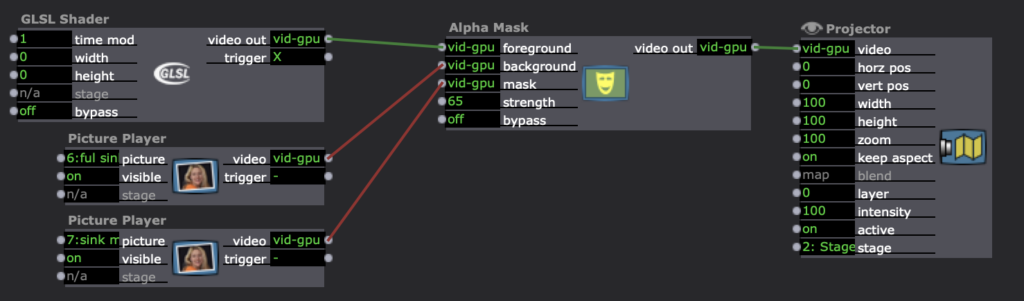
I used an alpha mask to achieve this effect. At this point, all of these “activations,” (like this and the stove burners) were happening by jump++ actors jumping to new scenes. This was a quick and dirty way of activating these elements, but I would soon have to update these to work more seamlessly within the same scene in order to simplify my patch and output.
Once I started working in motion lab, I first had to decide how I would handle the different output streams I had in my Isadora patch. I knew I needed at least two projectors: one that would show the background of the kitchen, and one that would show the stove top and sink.
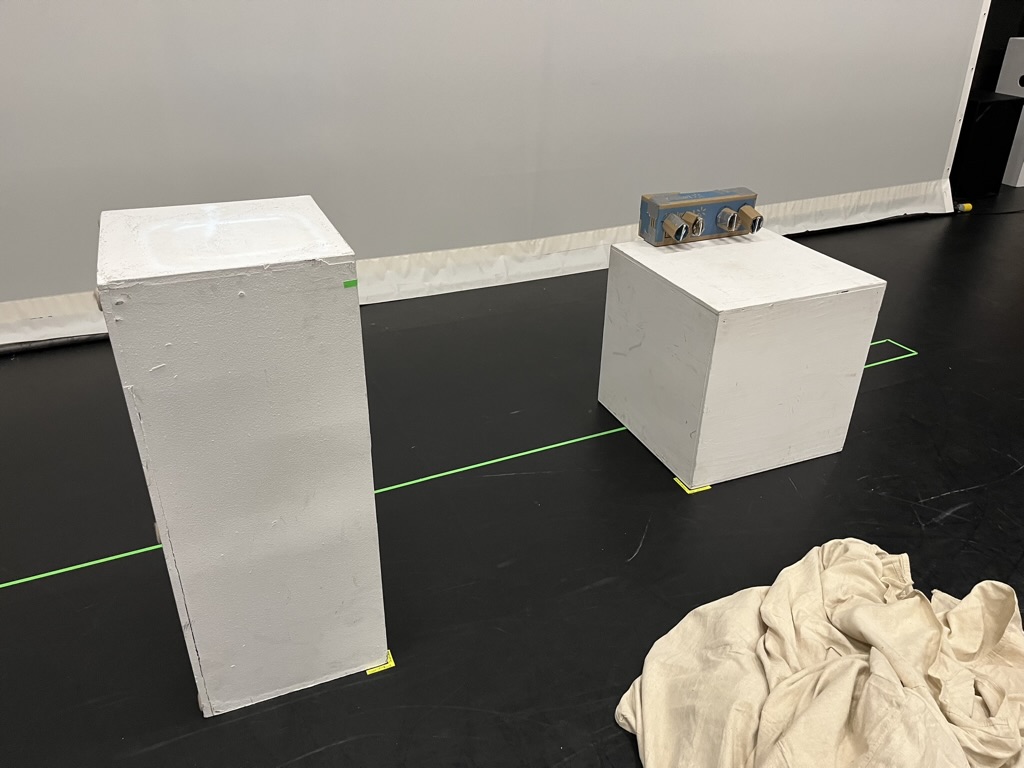
Above are my sink and stove blocks–I had to be aware of how I could position them so that the top-down projector would still hit them. Now that they had been positioned, it was onto output stream management and mapping. I was using the Mac Pro in motion lab, and it took me a long time to sort out how to manage my outputs using the triple head and matrix switcher so that the correct images would project from the correct places. Not only did the matrix switcher have to be set correctly, but I had to fix my Isadora output so that each projection element was on its own stage. I got a lot of help from Alex on this, which was definitely needed.
Finally, I got it set so I could map. Above is my mapped sink. Even though it was mapping a square onto another square, it took a fair amount of time to find where exactly on the floor of motion lab the small sink was, and how I had to move it in order for it to be placed correctly.
From my presentation, I was finally able to present the idea of the space to the class. I got some valuable feedback in terms of switching the direction my stove and sink faced and decided to implement that going into cycle 3.
Cycle 1: Getting Wires Crossed
Posted: November 7, 2023 Filed under: Uncategorized Leave a comment »For my cycle 1, I decided to tackle a basic interactive element I want my cycle 3 to have, a stove. I started my Isadora patch with a top-down view of an electric stove, where I would connect red shapes to slowly fade in and out based on user interaction. I initially tested with a keyboard watcher, but knew I would eventually attach a Makey-Makey to my makeshift stovetop. I used four user actors as the “burners” and used gates to prevent them from being continually turned on and off. Below is a screenshot of one of the burner’s patches.
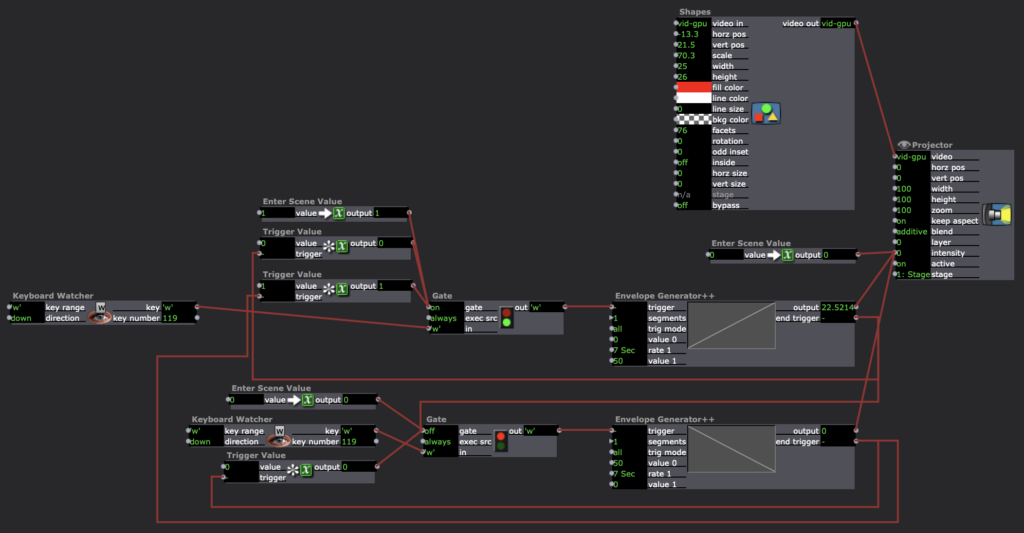
I also knew going into this process that I want my cycle 3 to be a house-like experience with odd elements thrown in to encourage interaction. I’ve always been interested in the idea of a “normal house but move it slightly to the left.” I’m still deciding if I’m connecting some sort of story to it yet or not, but for the moment I knew something had to happen if the user interacted with the stove a certain way. I made it so a pit would “open up” on the stove top if the user turned all the burners on within 2 seconds. I used the simultaneity actor within Isadora to achieve this.
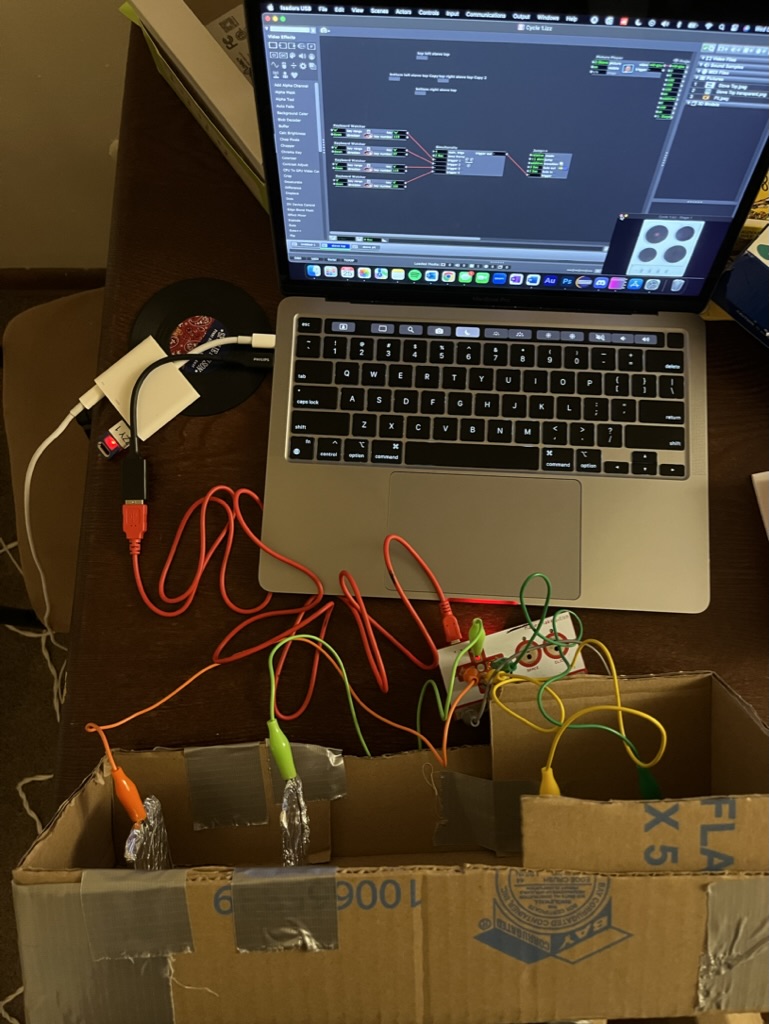
Here’s a few pictures I took when I first connected the Makey-Makey to the patch. The performance in class was a great experience and I deeply appreciated the feedback others provided. I took note especially that the framing of having physical stove dials helped make the experience more interactive and special, so I hope to include more physical interaction in my next two cycles.
PP3: Etch-a-Sketch Iterated
Posted: October 23, 2023 Filed under: Uncategorized Leave a comment »For pressure project 3, I used my pressure project 2 patch as a starting point and both added and updated scenes to make them work more intuitively when users interact with them. From the PP2 performance, there were certain errors within the original patch that would cause scenes to skip through before the user had prompted them to change.

Above is a screenshot of part of my “split screen” scene patch. I added most of this part of the patch for PP3 to ensure that the scene only jumped ahead after the user stayed still for around 2 seconds after the text had appeared to explain that as the way to move forward. I added the gate and enter scene values specifically to keep the triggers from enabling.
Below is a screenshot of Csuri’s work I used as inspiration. I wanted to encourage the user to create and draw live, like in some of Csuri’s pieces. This piece specifically relates to the final scene in my project, the “etch-a-sketch,” in which the user draws and is able to create a canvas similar to this one:
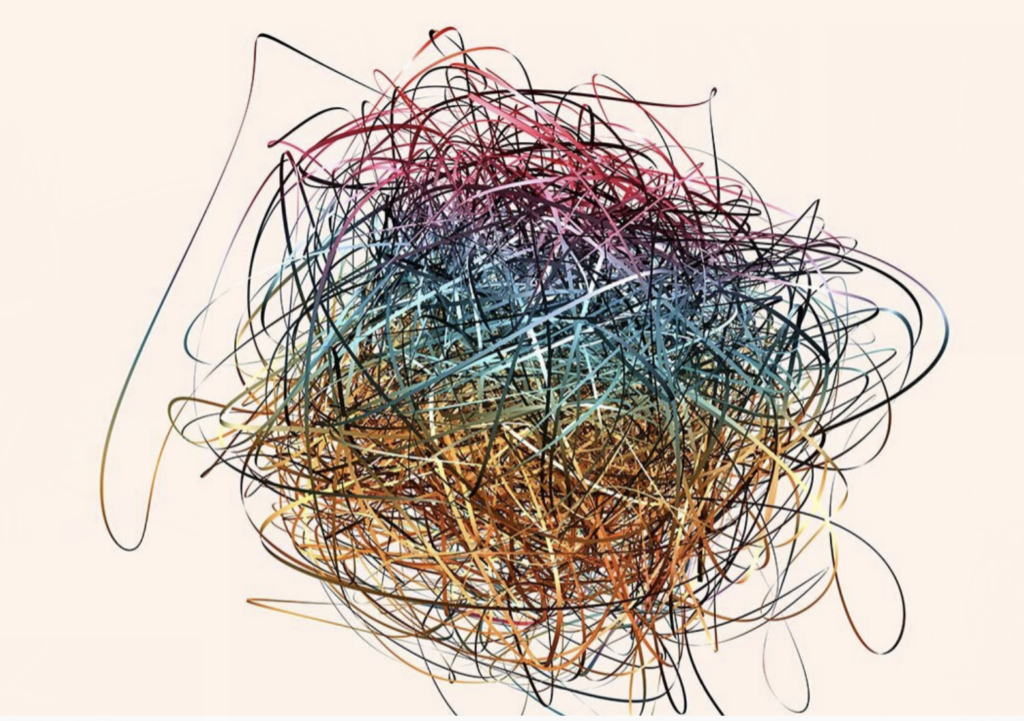
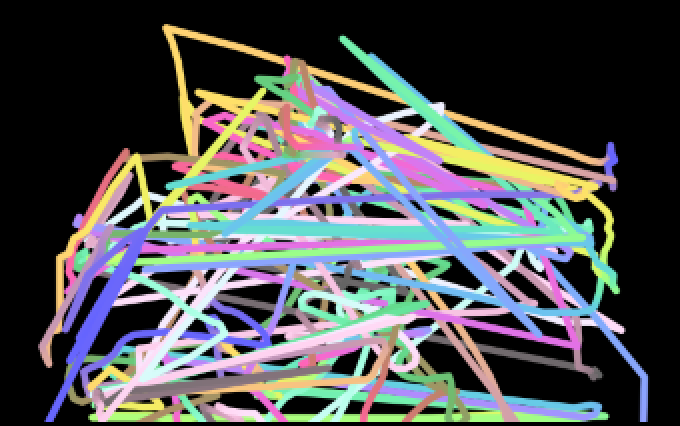
Above is Csuri’s piece, and below is an example of my etch-a-sketch after some movement.
I also added music to this version, as I thought that might encourage movement from the user. I used the activate scene actor to activate the music in its separate scene at the end of the sequence. This also inspired a scene early on in which the user interaction doesn’t trigger movement on the screen, rather it’s the music that controls it. Below is a screenshot of the patch containing this scene.
I enjoyed getting to iterate on a past project, especially because I enjoyed the point I got to when working on PP2. I found the performance interesting as well, as the rest of the class already knew what to expect in a way. I think I learned more from the performance of PP2, but I still enjoyed getting to show the class how I implemented and took into account their feedback and interaction with the patch. Below is a .zip file of my entire PP3 patch:
PP2: Etch-a-Sketch
Posted: October 9, 2023 Filed under: Uncategorized Leave a comment »For Pressure Project 2, I created a sequential interactive experience that ends in a “human etch-a-sketch.”
The Project
For the earlier scenes, I took inspiration from Charles Csuri’s “Swan Lake” piece. I isolated the user’s outline and applied different effects to it. Here are screencaps of my patches for some of these scenes:

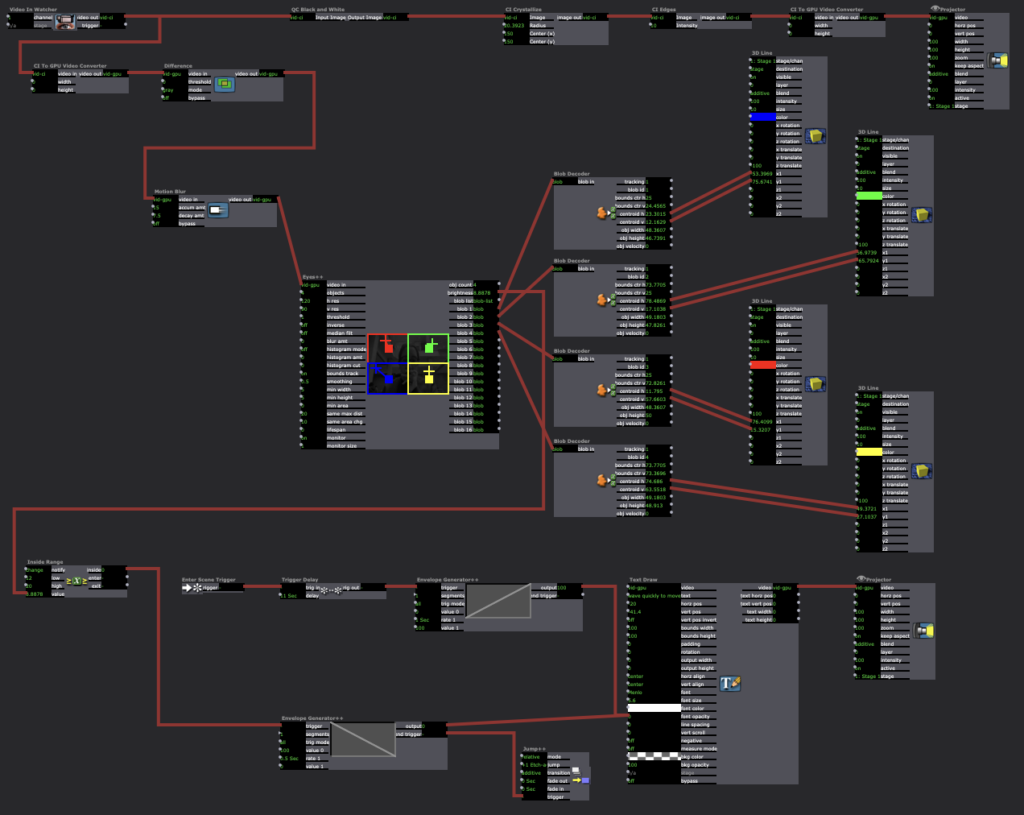
I was also inspired by Csuri’s “Sine Curve Man” and hummingbird drawing, so I wanted to include something that had a feeling of drawing to it. I stumbled upon the Live Drawing actor in Isadora, and figured out how to attach it to a user and have it draw along with their movement. Patch below:
The Eyes++ actor connects the position of the blob’s centroid to the position of the “cursor” in the Live Drawing actor. In order to erase, I connected a Keyboard Watcher to the Explode actor, so the drawing would seemingly erase into small particles whenever the user pressed the ‘c’ key.
As soon as I made this, I got the feeling it was like an etch-a-sketch, a kid’s toy where the user “draws” with two knobs and shakes the board to erase it. This vision gave me a much clearer image of my project as a whole, as I now saw it as a celebration of play and youthfulness. I spent a long time testing the etch-a-sketch scene to make sure the tracking was smooth enough to use intuitively. However, after testing for a long time, I realized I should include instructions as this would be shown both in class and in a gallery-style open house.
Knowing the details of the performance context gave me a new perspective with which to instruct the user. I decided to make them quick and to the point, just instructing them to press certain keyboard buttons to prompt an erase, for instance. I also set a user-controlled loop on the entire project, so it doesn’t require extra setup if a new user wants to start the experience over for themselves.
The Performance
I was very pleased with the outcome of this performance, but still glad we get a chance to iterate on it in preparation for the open house; there were many moments in which I realized new possibilities for “bugs” in the program when watching others test it. When creating the project, I was so used to testing it myself that there were certain user-interaction possibilities I overlooked. For instance, one of the scene changes triggers based on the speed of the user’s movement. After about five seconds, the program prompts them to wave quickly, which should trigger the next scene. However, this scene got skipped in the first run in class because Arvcuken (who did a great job of demonstrating the program) entered the scene while moving.
It was fascinating to see the class’ reactions to the project, especially the interaction aspect. I had a great time watching Arvcuken interact with the program; it gave a lot of new insight as to how someone new to the patch would experience it.
Hearing feedback was especially helpful. I appreciated CG’s comment on the aesthetic of the colors I used. Most times colors were involved, I had the Colorizer actor on three different Wave Generators: one for red, blue, and green respectively. This changed the colors somewhat randomly throughout the scenes. I added this aspect after I discovered the playfulness of the entire piece. The program encouraged discovery through movement, which is essential to childhood. I wanted to bring up those feelings of playfulness and discovery in the user by inserting bright colors to the scenes.
I also appreciated Amy’s comment about the playfulness of the etch-a-sketch scene. Her interpretation of the piece bringing up childhood memories was almost exactly my intention, and I was overjoyed that it actually came through for someone in the experience.
Niko made a good point about the instructions being helpful as a framing device from an accessibility standpoint. This was a new perspective that I hadn’t considered while inputting the instructions, but I greatly valued that as feedback. I originally intended the instructions to provide context and guidance for any user, but knowing that it’s helpful for accessibility is great information to have. Having a range of users in mind while iterating is essential to the RSVP cycle, so it was a welcome reminder of audience awareness.
Overall, I valued the experience of creating and receiving feedback on this project. Seeing people actually interact and “play along” with something I create was new to me, but a very welcome experience. I definitely know how I’m going to iterate on this for PP3, and I look forward to get to work on it more after testing it with users.
Sound Reactivity Lab Activity
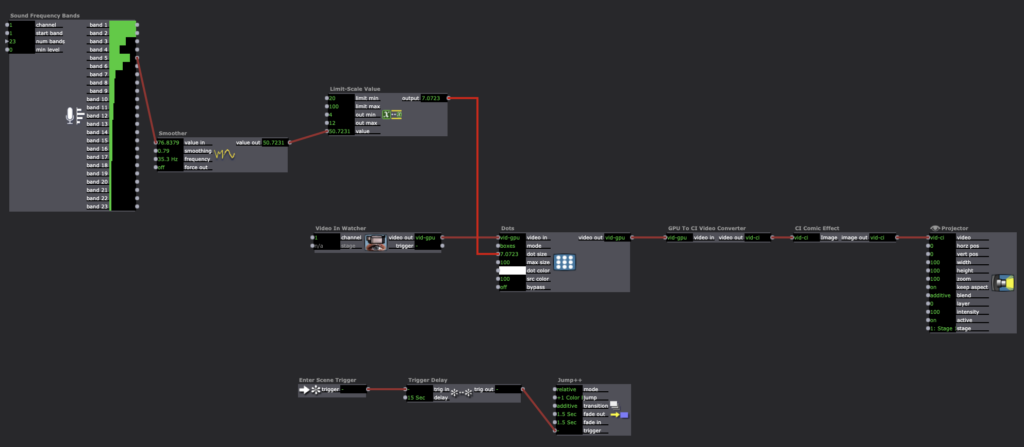
Posted: October 2, 2023 Filed under: Uncategorized Leave a comment »My sound clip was the main theme from the 2010 film The Social Network, as I love the contrast present in the piece. I tried to roughly mimic that with the main scene I worked on in class. I spent some time on other scenes as well, but I ended up liking my first try the best. I tried to make a symmetrical representation of the sound by using the frequency bands actor. I connected different rectangles’ heights to this actor in order to replicate audio “sound bars.”
Above is a clip of the output. I’ve also attached a zip file of the whole project below which includes the two other scenes I played with.
PP1: Good Morning, Boredom
Posted: September 12, 2023 Filed under: Uncategorized Leave a comment »Below is a recording of my “finalized” Pressure Project 1 output:
The Creation
I originally had the idea for a DVD-like screensaver creation about an hour into my work on a completely different idea. I hadn’t fallen in love with it, but had sank a decent amount of time in it. It involved hexagons of various sizes popping up into view, revealing a picture I had taken underneath. While trying to move one of the hexagons across the screen, it shot in a diagonal all the way into the top right corner. I instantly felt a dopamine hit since it reminded me of watching the DVD screensaver as a kid and waiting for it to hit a corner. I immediately switched course and started working on getting a square to bounce around the screen in a way where it wouldn’t immediately hit the corner.
Above is a screenshot of the user actor for the shape acting as the DVD logo itself. By using the triangle wave in the wave generator, I was able to make the square “bounce.” It took me some time to figure out how to keep the square changing color only at the moments where it hit the sides, and I still don’t think that part works every time. I used the HSBA Color Maker actor to help randomize the color each time.
While I knew I could probably hold 30 seconds of the audience’s attention (or at least my own attention) with just the screensaver, I thought it would be interesting to subvert expectations by adding another square. I also wanted to incorporate randomness somehow, so I made the other squares move around and change color randomly.

Above is a picture of scene 6, where all of the boxes appear and start moving around the screen. After playing with the “meat” of it for probably around 4-5 hours, I added the beginning and ending. I ended up picking Singin’ in the Rain for the movie framing device since it’s seen as a classic–everyone knows “Good Morning”–and I liked the idea of having a song being paused in the middle. It also helped add the feeling of nostalgia I was going for since it’s an older movie. Below is a video of my Isadora screen while the action played.
The Performance
After six hours of working on a project, I tend to get stuck in the role of creator and have a hard time seeing things from an outside perspective. I’ll admit that I worked on the whole things in two sittings (which was not a great idea in retrospect). By the time I was “done,” I was so immersed in my work that I had no idea if it even made sense anymore. This wasn’t a great feeling, but in a way, it made the experience of watching the class during the performance much more rewarding. I suddenly was able to see the piece in a new light, especially since people were so vocal with their reactions.
CG’s point about the first square going on the hero’s journey resonated with my original thought; once I’d created the other squares, I realized that I had made a main character and edited the rest of the project to reflect that. What Arvcuken said about it being a “series of interruptions” also stuck out to me. I had a hard time summarizing the piece, but that was an eloquent and accurate way to put it.
Finally, the class’ guttural reaction to the first time the screensaver showed up was awesome to watch as the creator of the piece. While I was hoping for more of a lighthearted response, it was in a way rewarding to see the sudden frustration everyone felt knowing that the box would take a while to hit the corner. Even though it wasn’t a positive feeling, I enjoyed getting to see such a large reaction over what I had made. I also apologize for making something so frustrating–once I saw it I couldn’t pass it up.
Bump: Cycle III – Bar: Mapped by Alec Reynolds
Posted: September 12, 2023 Filed under: Uncategorized Leave a comment »This project is fascinating to me because of its ability to take an ordinary experience like going to a bar and elevate it into more of a unique and interactive experience. Usually, venues are mostly background settings, but in this project, the venue becomes its own character. In Alec’s post he mentioned how the end product wasn’t what he initially envisioned, but I still found the video to be interesting.
Link: https://dems.asc.ohio-state.edu/?p=3384