Cycle 1: Puzzlr Prototype
Posted: October 27, 2022 Filed under: Uncategorized Leave a comment »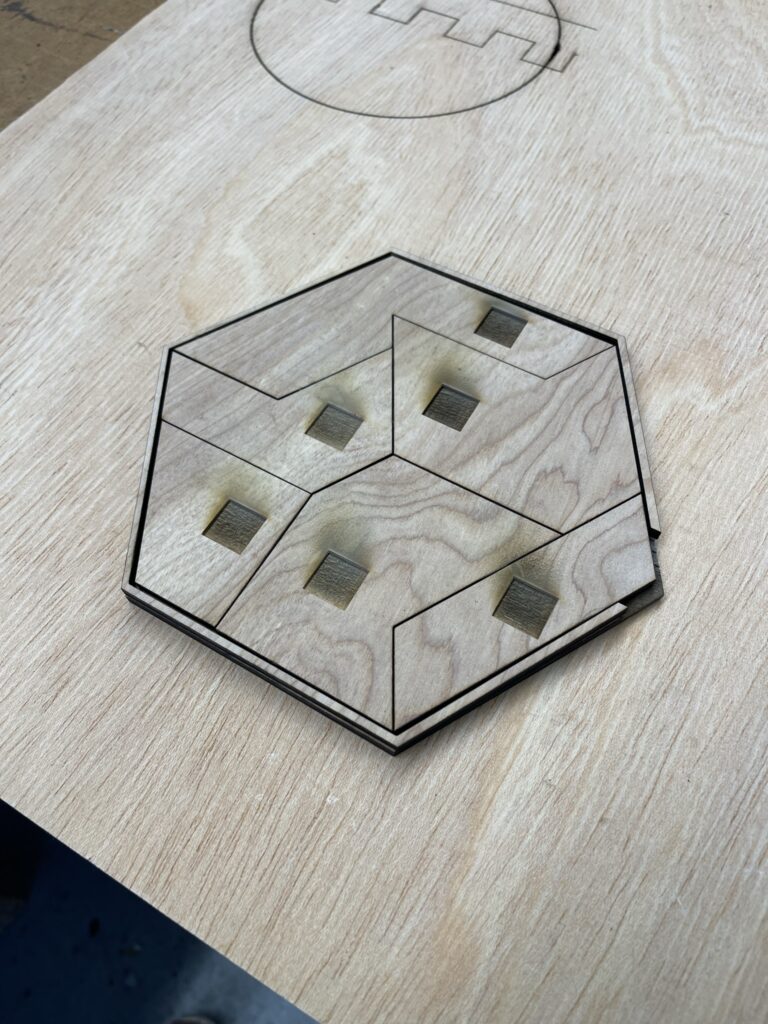
Project Brief
For the final project, I’ve decided to create a fun and challenging puzzle that will stimulate the player in a variety of different ways through 3 distinct play modes. The puzzle consists of six pieces arranged in a hexagonal shape. The goal of each level will be to complete the puzzle each round while navigating the changes in the sensory elements of the puzzle. My research thread focuses on microcontroller inputs and the conceptualization of touch, so I see this project as a way to explore creating micro-interaction systems through physical objects.
The first round of the puzzle will be basic; the player just has to complete the puzzle by getting all the pieces onto the board in the correct configuration. The contacts on the bottom of the pieces and the board itself will give a slight hint as to how to approach the puzzle (more on that later). There will be both a visual and auditory feedback component informing the player about their progress.
The second round will involve covering the players hands so that they can only use the visual/auditory feedback from the system rather than looking at their hands. The pieces will also include unique textures that will then be mirrored on the screen to guide the player on what textures go where on the board.
The third and final round will involve blindfolding the player so they will have to rely on the textural elements of the pieces coupled with the auditory feedback. In this section, the auditory feedback for each piece will be unique so players can keep track of what pieces go where. This final level is intended to be very difficult and will be used mostly as an experiment.
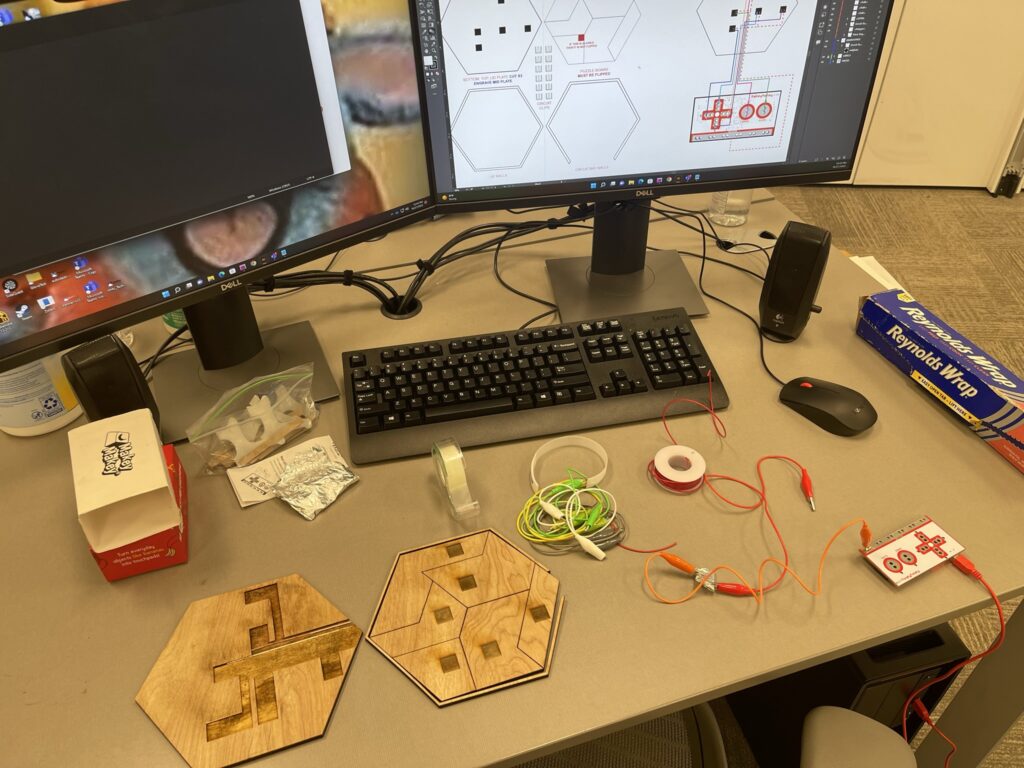
Production & First Prototype
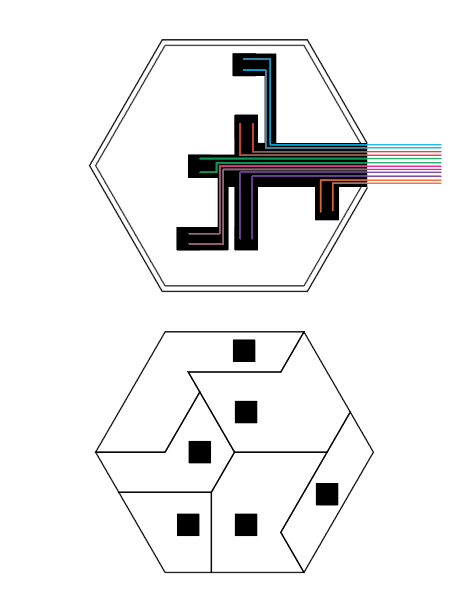
For the first phase of iteration I created a schematic and then used it to laser cut a preliminary model of the puzzle and circuit housing. After laser cutting and setting everything up I realized some parts of the first prototype need to change:
- The engravings on the bottom plate are too narrow and can’t house the wires and cables necessary for the puzzle piece contacts.
- The engravings on the bottom of the puzzle piece are on the wrong side of the pieces because I forgot to flip them before printing
- The circuit layout is confusing, and requires more thought into how the ground/input wires are going to be set up in the final board.
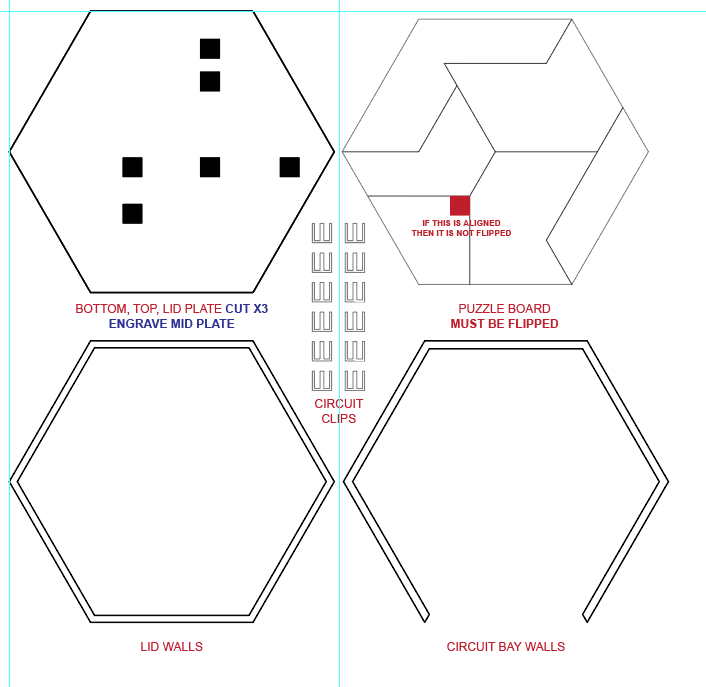
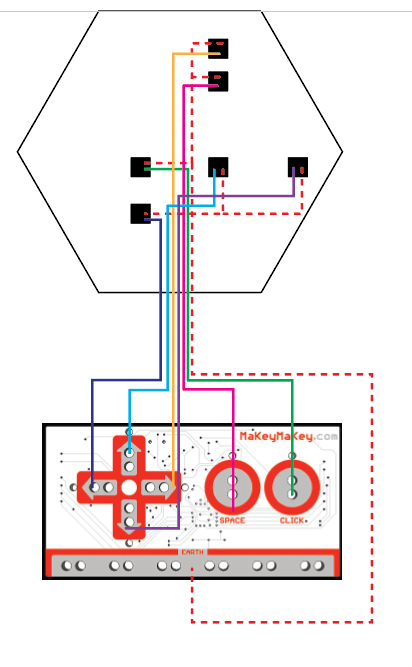
After thinking about those changes I modified the schematic and created a new one featuring a new build layout, a new circuit component, and a new circuit layout. I decided I would create two levels to the puzzle, one for the circuits and one to put the puzzle pieces on. This allows more room for cables and components under the puzzles, and ensures a clean look on the top. The new circuit component is a little adapter (in the middle of the schematic) that will serve as a bridge between the circuit housing and the top of the puzzle. The component will take the ground and input cables and attach them to two pieces of foil that are sticking out at the top, the puzzle piece will then have a piece of foil underneath that, when placed on the contact, will complete the circuit.
Next Steps
The next step in the project is to make the second prototype and get the circuit laid out and working for the next cycle!