Cycle 3: Puzzlr Final
Posted: December 12, 2022 Filed under: Uncategorized Leave a comment »Introduction
The ending of this project was particularly frustrating because I ended up getting COVID the last week of classes. Yes if you’re reading this 20 years in the future, COVID was a terrible virus that crippled most of the planet in 2020, and we are now living with it every day. Because of this, I was not able to present my final prototype to the class, so a part of this documentation post will include a short video demo on how my game works!
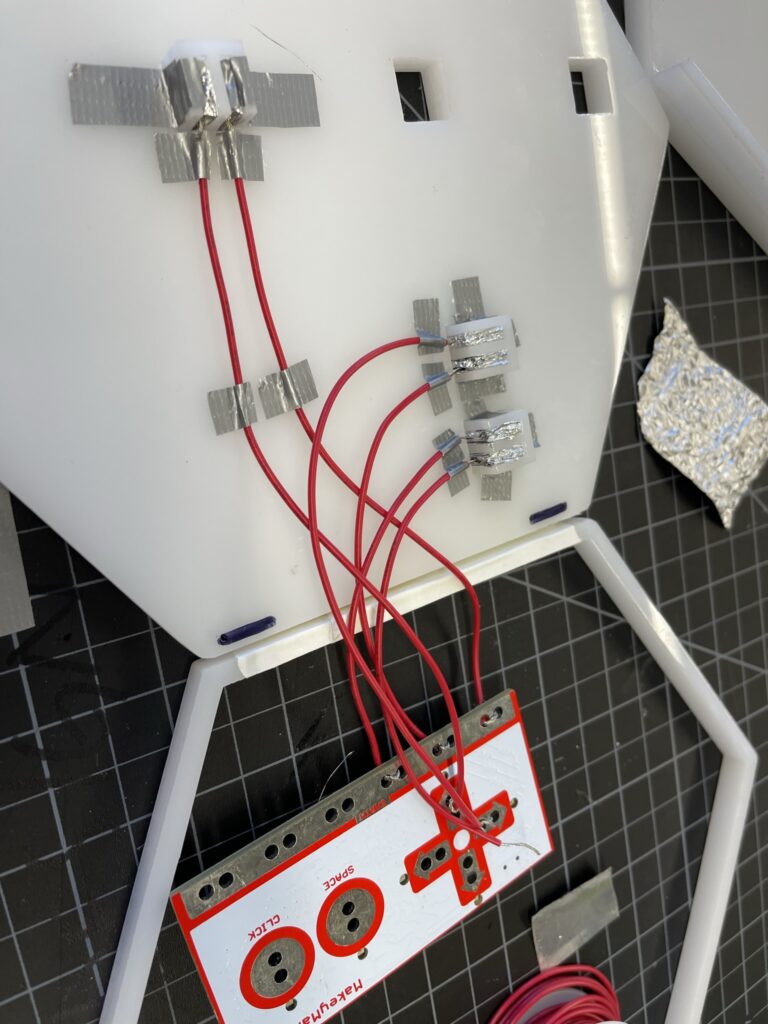
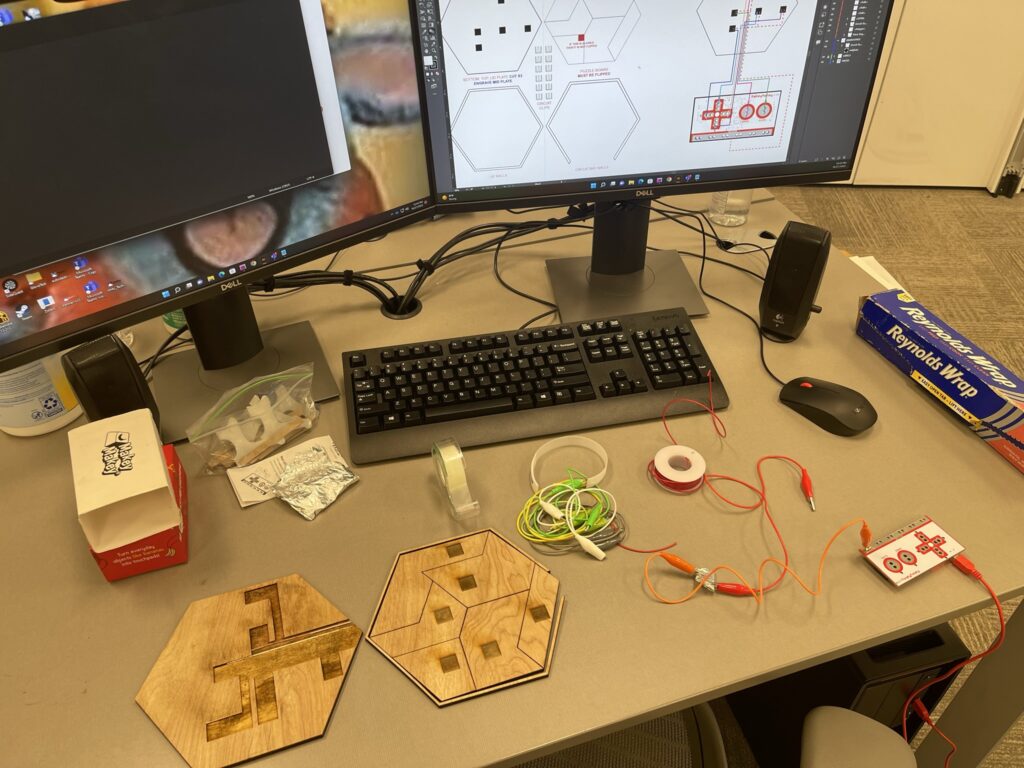
The final project was a great prototype that I am very proud of. After refining some of the cable setups and improving the stability of the Makey-Makey board, I was able to get most of the contacts working. Because of the way I glued and reinforced the wires, some of the contacts cross over, so some will activate more than 1 “keystroke” on the Makey-Makey. Combining this with the digital experience I created on Isadora yielded a pleasing result that was an excellent insight into how different microcontroller boards work.
Reflecting on the Build Process

Building and testing Puzzlr was no easy process. It involved a lot if iteration through different laser-cut prototypes and testing scenarios. I learned how to wire-up and configure the Makey Makey within Isadora, and had to design a circuit system that would work with the Puzzle style.
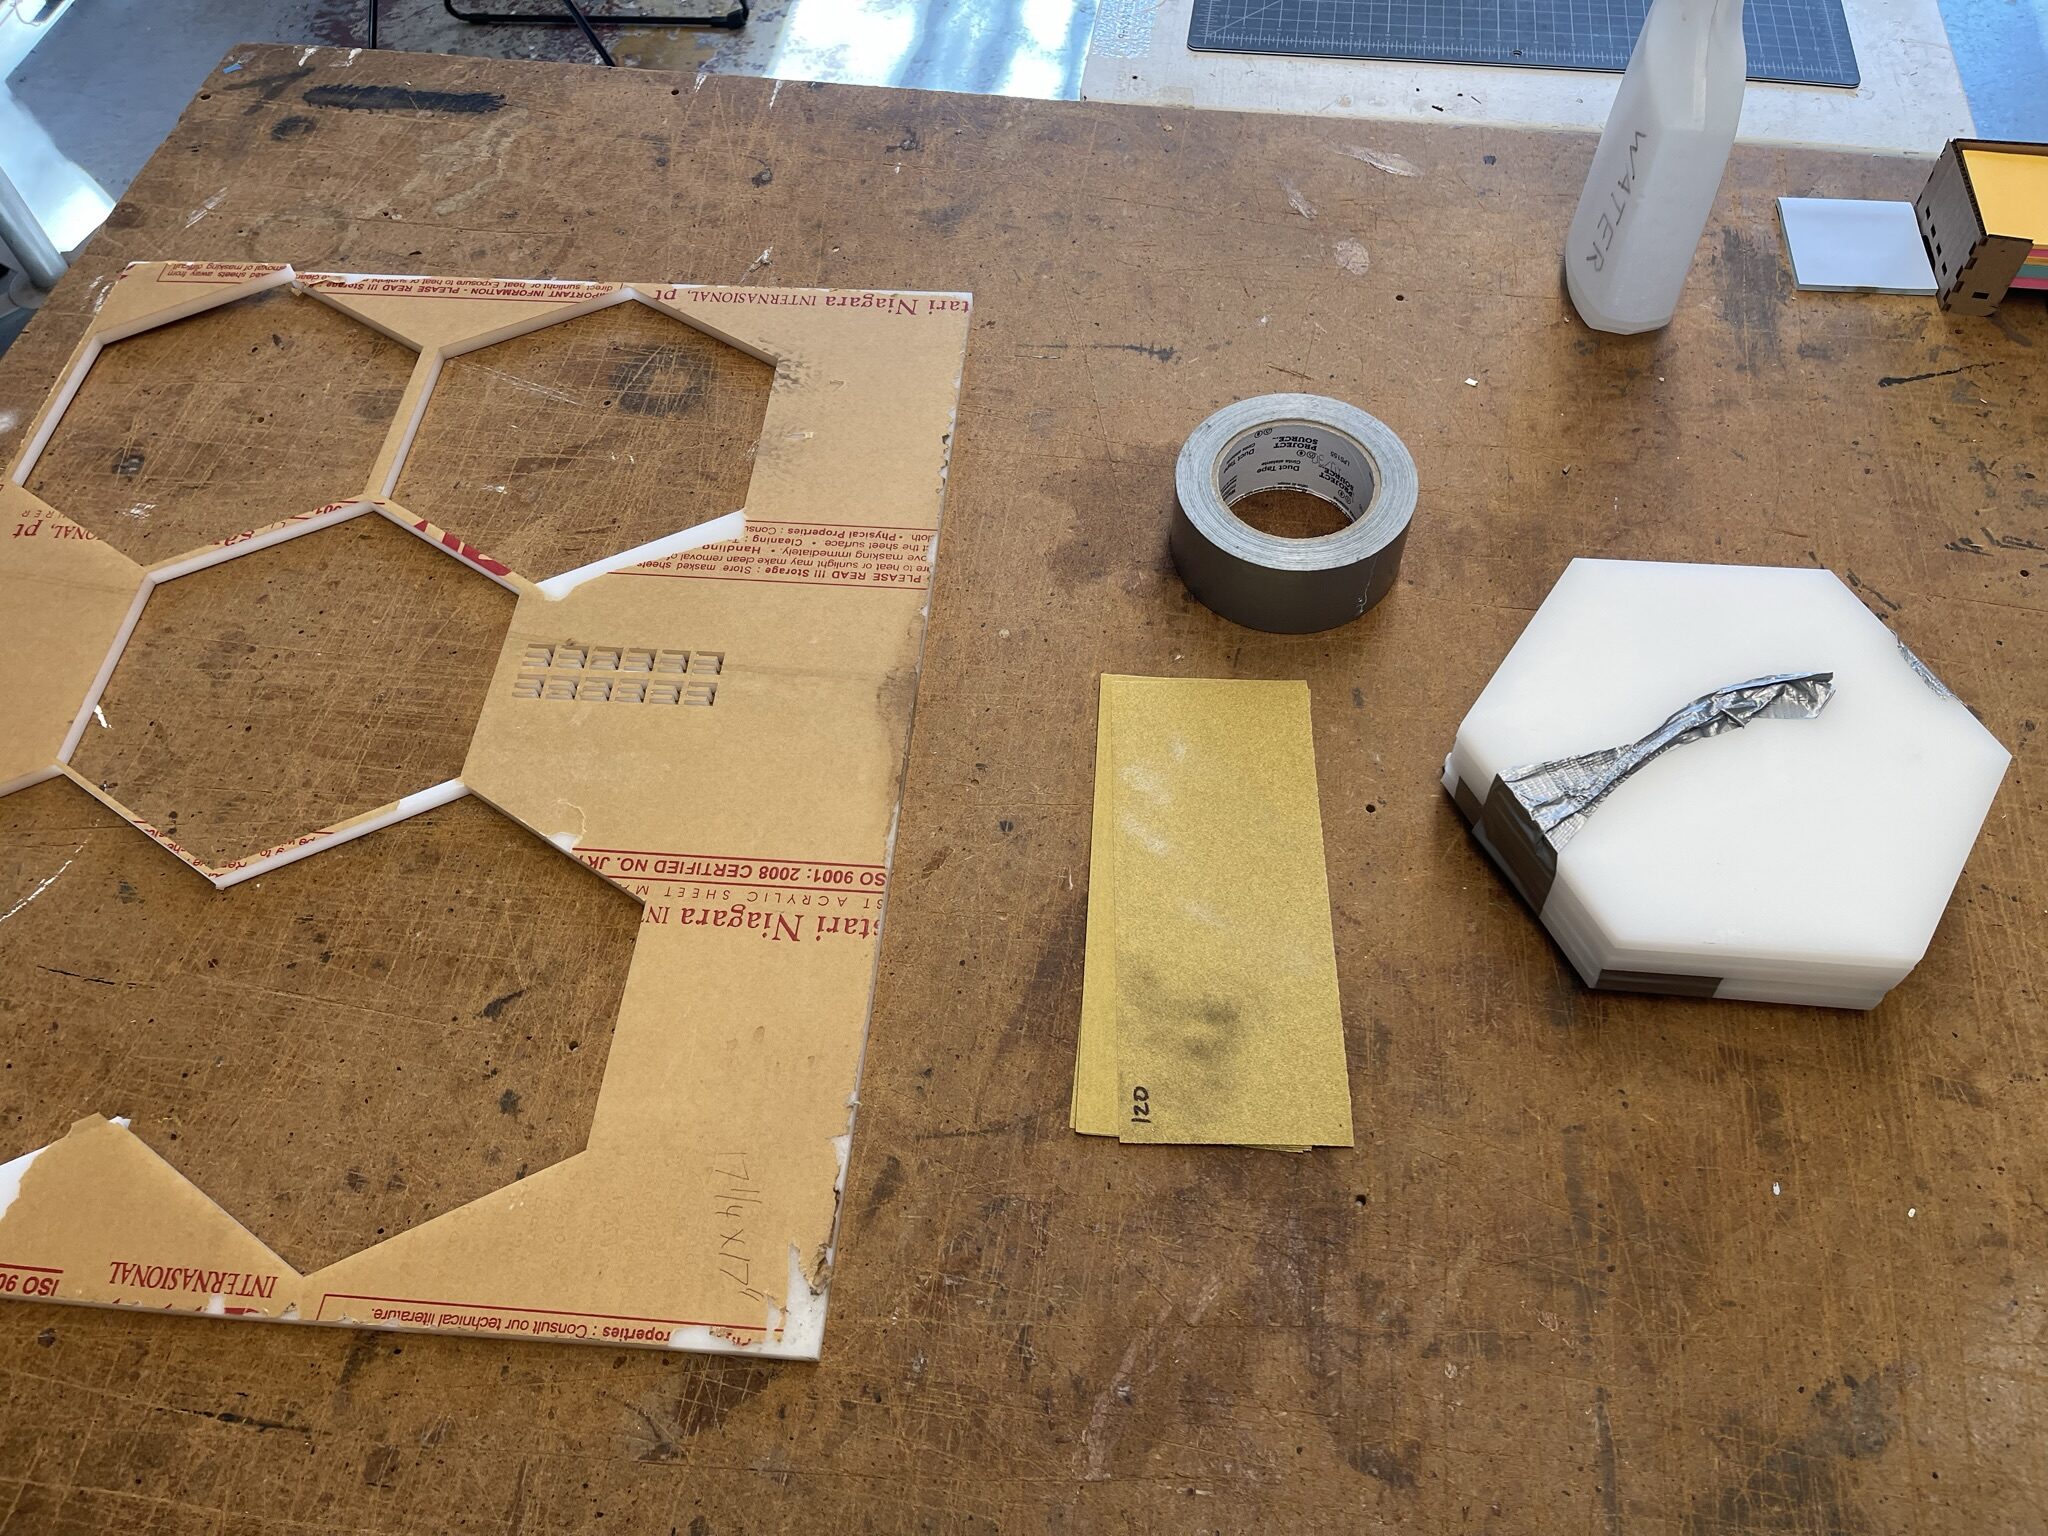
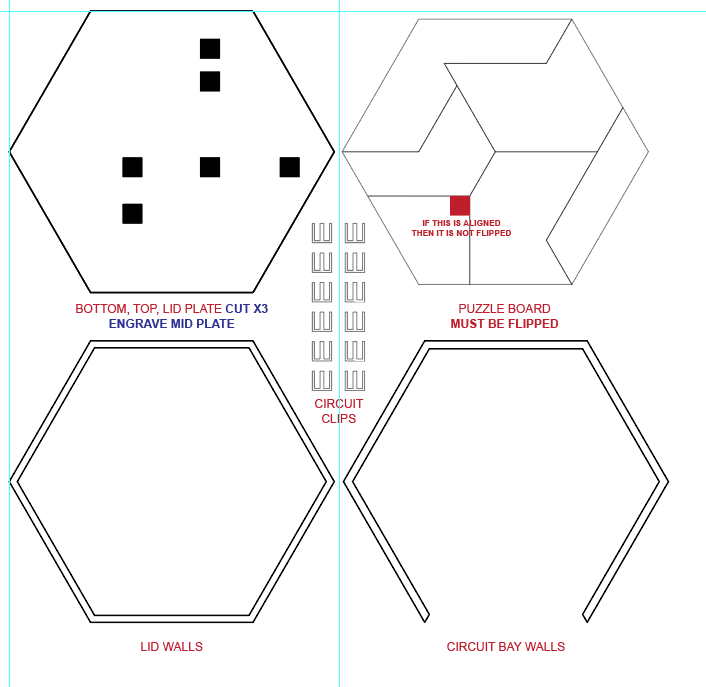
The first wooden prototype allowed me to test the setup and whether the puzzle would be hard for others to solve. It turned out to be a n excellent learning moment because I ended up adjusting the thickness to actually fit the wires, and even learned that I had to flip the puzzle pieces to get the correct engravings.
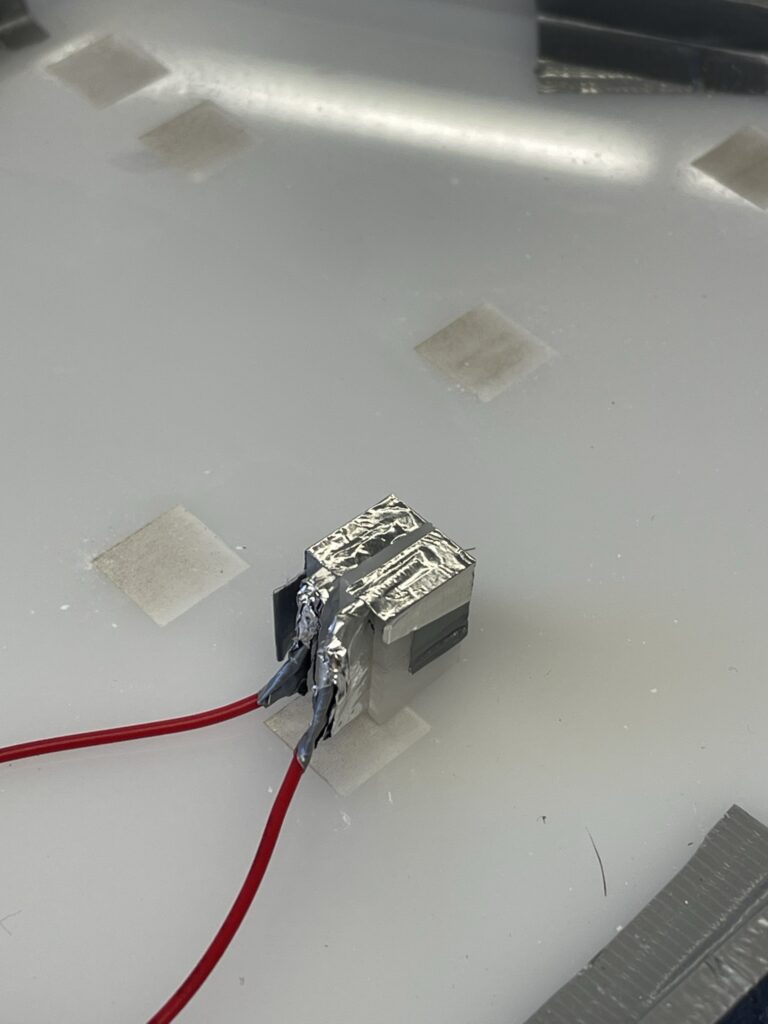
The second and final prototype involved laser-cutting the puzzle out of white acrylic. Then I sanded everything down, cleaned it up, and put it together with duct tape. I would have glued it together but I needed constant easy access to the wire housing to make adjustments and improvements. Another hurdle at this stage was sanding down the circuit clips that hold the wires together. They were initially too tall and ended up poking through the holes; I had to sand them down so they would remain flush with the upper level. By using tin foil, foil tape, glue, and duct tape, I was able to put everything together and get the circuit completed.
How the Game Works
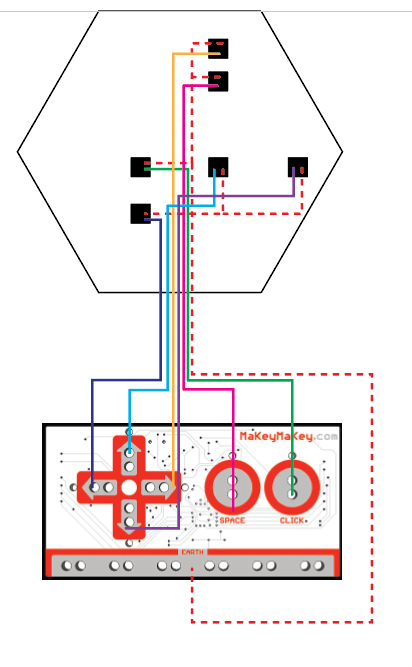
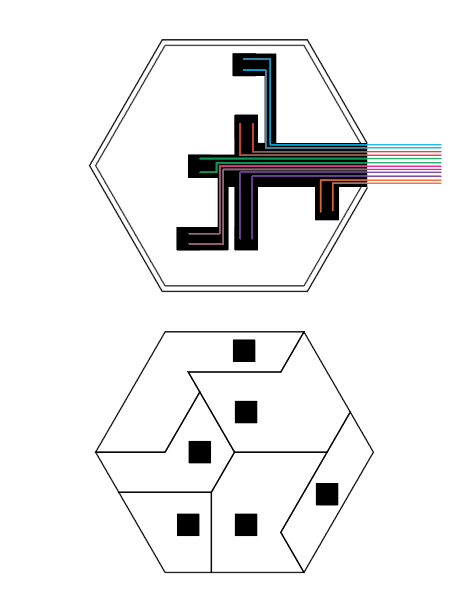
Here is a picture of the actual schematic I created for the puzzle board. The goal of the game is simple: get the pieces onto the board and in the right spots. Each puzzle piece has a piece of metal foil tape underneath it that corresponds to the black squares on the schematic. When the piece makes contact with the board it completes each circuit by closing the loop between the ground and input wires. Each contact corresponds to a certain input on the Makey-Makey, and when activated will relay a keystroke to the computer.
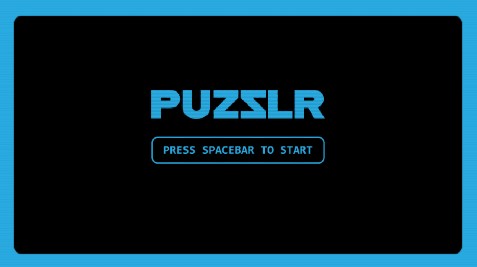
Starter Screen

Instruction Screen
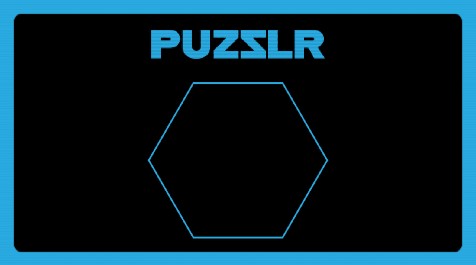
Game screen. As pieces get placed on the board, they begin appearing here. If they are removed from the contact, the piece will disappear a few seconds after it is no longer receiving an input signal.

Win screen
Video Demo
Reflecting on the Project
I really enjoyed this exploratory project because it allowed me to experiment with something I was considering for my thesis. The Makey-Makey system is really unique but has it’s issues with more robust and complex applications. If I were to change anything about this project, I would have spent some time learning how to solder so the connections could be a little stronger. I will be applying the things I learned during this project when creating my own microcontroller input methods for my thesis in the future!
Cycle 2: Puzzlr Progress
Posted: November 25, 2022 Filed under: Uncategorized Leave a comment »Introduction
Not too much has changed in the actual design of my project since the Cycle 1 check-in. I’m still working with a unique and fun way to create physical input methods that match a digital experience. My overall goal is applying the knowledge I gain from this project to my final thesis. So far there have been a few hiccups and issues, but I’m incredibly happy with the progress I’ve made and I look forward to finishing the project soon.
Progress Update
Most of the photos that will be in this Cycle 2 post will be work-in-progress shots of me laser cutting the final pieces, sanding them, and building up the puzzle system and circuits. The last few weeks have mostly been spent refining and building my puzzle board, as well as experimenting with some simple Isadora elements.
The final puzzle board was laser cut from white acrylic, and assembled using duct tape and super glue. The new board design came as a result of a lack of space on the first prototype; this version is much more stable, and includes a bottom space for circuits, a mid plate where the puzzle pieces sit, and then a border to help keep the puzzle pieces in. I also created a simple circuit system where the two wires meet under the contact point, but are separated by a plug-like shaft. Each side extends up into the board and splits into two contact points, the puzzle pieces themselves have metal foil underneath which complete the circuit when placed correctly.
Next Steps
As the project nears it’s end, I’m currently refining the circuit setup and improving the connection quality. I’m planning on including a simple visual component that will provide progress feedback to the player. Since that is an important part of my investigation into hand-eye coordination, I will be prioritizing the Isadora interface to get at least some feedback from that area of focus.
Cycle 1: Puzzlr Prototype
Posted: October 27, 2022 Filed under: Uncategorized Leave a comment »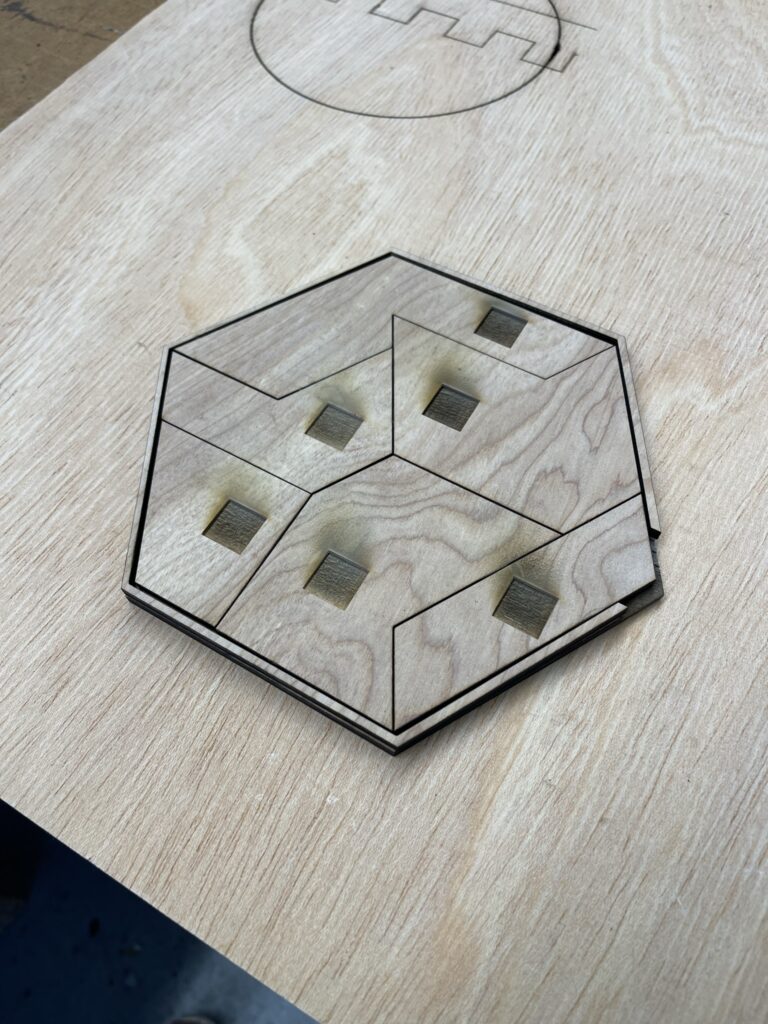
Project Brief
For the final project, I’ve decided to create a fun and challenging puzzle that will stimulate the player in a variety of different ways through 3 distinct play modes. The puzzle consists of six pieces arranged in a hexagonal shape. The goal of each level will be to complete the puzzle each round while navigating the changes in the sensory elements of the puzzle. My research thread focuses on microcontroller inputs and the conceptualization of touch, so I see this project as a way to explore creating micro-interaction systems through physical objects.
The first round of the puzzle will be basic; the player just has to complete the puzzle by getting all the pieces onto the board in the correct configuration. The contacts on the bottom of the pieces and the board itself will give a slight hint as to how to approach the puzzle (more on that later). There will be both a visual and auditory feedback component informing the player about their progress.
The second round will involve covering the players hands so that they can only use the visual/auditory feedback from the system rather than looking at their hands. The pieces will also include unique textures that will then be mirrored on the screen to guide the player on what textures go where on the board.
The third and final round will involve blindfolding the player so they will have to rely on the textural elements of the pieces coupled with the auditory feedback. In this section, the auditory feedback for each piece will be unique so players can keep track of what pieces go where. This final level is intended to be very difficult and will be used mostly as an experiment.
Production & First Prototype
For the first phase of iteration I created a schematic and then used it to laser cut a preliminary model of the puzzle and circuit housing. After laser cutting and setting everything up I realized some parts of the first prototype need to change:
- The engravings on the bottom plate are too narrow and can’t house the wires and cables necessary for the puzzle piece contacts.
- The engravings on the bottom of the puzzle piece are on the wrong side of the pieces because I forgot to flip them before printing
- The circuit layout is confusing, and requires more thought into how the ground/input wires are going to be set up in the final board.
After thinking about those changes I modified the schematic and created a new one featuring a new build layout, a new circuit component, and a new circuit layout. I decided I would create two levels to the puzzle, one for the circuits and one to put the puzzle pieces on. This allows more room for cables and components under the puzzles, and ensures a clean look on the top. The new circuit component is a little adapter (in the middle of the schematic) that will serve as a bridge between the circuit housing and the top of the puzzle. The component will take the ground and input cables and attach them to two pieces of foil that are sticking out at the top, the puzzle piece will then have a piece of foil underneath that, when placed on the contact, will complete the circuit.
Next Steps
The next step in the project is to make the second prototype and get the circuit laid out and working for the next cycle!
Apollo 11 Launch Sound Experience
Posted: October 25, 2022 Filed under: Uncategorized Leave a comment »
Preparing For Launch
The Moon. Arguably one of the greatest achievements in the history of space travel. It’s wild to think that people have been on that little circle of cheese in the sky, and even wilder that we’re going back. Space has always been a huge passion for me. So much so that one of my most cherished childhood possessions was my little season pass to the Burke Baker planetarium at the Houston Museum of Natural Science; whenever there was a new film or experience, my mom and I would go and spend the day gazing at the stars.
My love for science and space travel continued to high school, where I have vivid memories of afternoons with my science teacher Dr.Cote, talking about rockets and the latest NASA news, we even set up a watch party when the Curiosity rover landed back in 2012. All of these events and interactions with the wonders of space have stayed with me for my whole life. So, for the sound experience project, I choose the monumental event of the Apollo 11 Moon Landing.
Mission Log
As soon as I started the project I knew I wanted to use a piece from the Interstellar soundtrack. It is hands down my favorite movie of all time, and I absolutely love the soundtrack created by Hans Zimmer. The core style of the soundtrack gives me chills every time I hear it, and it sparks a truly unique sense of wonder and curiosity.
The problem I now faced was which song should I use. If you’ve seen Interstellar, then you’re probably picturing the film in your head, thinking of some core moments throughout the movie. As I did this myself, I remembered that the track I play most often is Cornfield Chase. This is the scene where Cooper, Murph, and Tom are chasing after a mysterious drone through rows and rows of corn. Take a listen below:
With my song selected I got right to work collecting sound artifacts relevant to the launch. I knew that nasa kept audio recordings of a lot of famous missions, so I started downloading and trimming to get the very best bits.
I also wanted a sort of preface to the mission recordings, something that could spark wonder and simulate that same fuzzy feeling I get when I watch the film and think about Space. After perusing through the events that led up to the launch, I remembered that John F Kennedy’s Rice University speech would be perfect for the job. I trimmed the speech and extracted this memorable line:
A couple more audio bits were collected to form a short chronological story into the Apollo 11 launch. My goal was for listeners to feel like they were progressing through this historic event, just as humanity progressed after JFK’s speech. I cut together countdown audio as well as some other famous lines from the astronauts themselves.
But instead of giving you more tidbits, listen to the full experience for yourself. Make sure you’re sitting down because you may get some intense goosebumps.
Mission Successful
I really loved the outcome of this project. It helped me experiment with audio like I never had before. I also have a strong interest in accessibility so getting to do a project like this helped me flex my universal design muscles. In addition to the audio experience, I also created a visual component because I wanted to include some enhancements to the audio if people chose to view it. Sorry in advance for the weird aspect ratio!
I wouldn’t change anything about my final product. I love this audio experience and I plan on posting it somewhere to share with the other kids that have a season pass to the Planetarium. Experiences like this are what sparked my love for space, and I can only hope to do the same for others.
PP1: The Backrooms Teaser
Posted: September 8, 2022 Filed under: Uncategorized Leave a comment »
Inspiration and Background
Those of us who enjoy horror and creepy stories all know the name Creepypasta. For those of you who may be unfamiliar with the term, Creepypasta is used as a catch-all term for horror stories and legends that are posted to the internet. These stories can often be found on many forms of social media, and some have been adapted into short films or even video games.
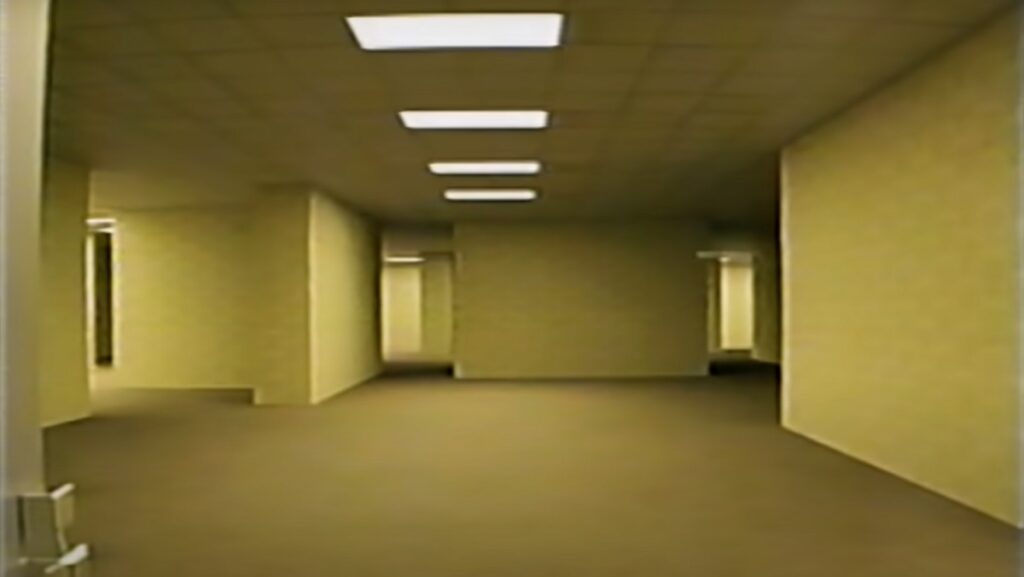
The Backrooms is a popular Creepypasta story that discusses and explains the existence of liminal spaces hidden in our world. These spaces, often referred to as “levels”, are seemingly infinite non-Euclidean environments with twisting hallways and never ending tunnels. The lore itself is expansive, and allows for people to write their own levels into existence (as of writing this there are 2,641 entries on the Backrooms Wiki) . But a sinister and unexplainable evil resides in this dark and haunted place. It’s said that every level of the Backrooms houses a unique entity that is almost always out to get you; this concept and story mechanic has been used to create short films and media related to the original Backrooms Creepypasta. And so the infamous Backrooms: Found Footage movie was born, a short film by Kane Pixels that tells the story of a man that fell into the Backrooms and has to escape and survive the horrors within. This short film has almost 39 million views on YouTube, and is said to have launched the worldwide trend of Backrooms content.
My Experience
Now that I’ve bored you with my inspiration behind the project, I’ll talk a little about my process for the first pressure project and truly my first encounter with Isadora. I started out with the goal of making something with vintage/retro vibes. There’s something about the sound of old computers and VHS players that fascinates me, and I decided to make a little experience that uses that style.
I started by imagining my little corner of Creepypasta lore; I pictured this experience running on a very old computer in a small unsuspecting corner of a museum. A dimly lit, room with a single chair would allow for guests to be immersed in their surroundings. The computer at the center would be playing my start screen (pictured above), waiting for someone to walk by and take a seat. Once the experience starts, they would be shown clips of found footage from the first adventurer into the backrooms (clips taken from the original short film Backrooms: Found Footage by Kane Pixels) The clips would end abruptly when the footage shows our main character pushed into oblivion by a large and haunting entity; the computer cuts to black, and you’re faced with a blue start-up sequence and boot noises:
Sidenote:
I cut the following keyboard input section from the experience I showed in class due to difficulties with the text draw actor (more on that later). Because the goal was to create a self-generating patch, I ended up making it jump to the next scene after the boot-up video played out. If I had required the viewer to click the escape button it would no longer be a self-generating patch.
The input screen hums in front of you as you hear a repetitive analog beeping, waiting for you to press the escape key.
Do you do it?
You hesitate for a moment… and then *click*.
The next thing you know, this horrifying clip is playing in front of you…

Gotcha! Yes, unfortunately since we only had 5 hours and were trying to keep the element of surprise for as long as possible my goal was to build up this creepy lore and finally troll you with Never Gonna Give You Up. The video had the reaction I was going for; audience members were puzzled at the ending, wondering where the heck this video came from.
In addition to their comments on the final part of the experience, my classmates also had comments on how the story was intriguing but hard to piece together. While I was aiming for disorienting and confusing, I was also aiming for fear, and I expected at least a jump or two from one of the scarier parts of the found footage clips. No one jumped, but they did mention it was slightly unsettling!
Note to self: Make the next one scarier
What I Would’ve Done with a Little More Time
If this had been a full-length project, I would’ve spent more time onboarding the viewer into the world of the Backrooms and thinking about the physical manifestation of the project. The ideal scenario for the experience would’ve been some sort of wall-projected environment combined with a creepy old computer. And after you pressed the escape key, I would’ve transported you to the Backrooms, and done my best to scare the hell out of you with a more immersive experience featuring camera tracking and interactive content.
Process and Obstacles
This was the first creation I made with Isadora, and it was certainly a challenge since I’m a 3D artist by trade that’s used to a viewport and polygons. However, since I was familiar with node-based systems, I was able to pick up Isadora fairly quickly and start experimenting with my own ideas.
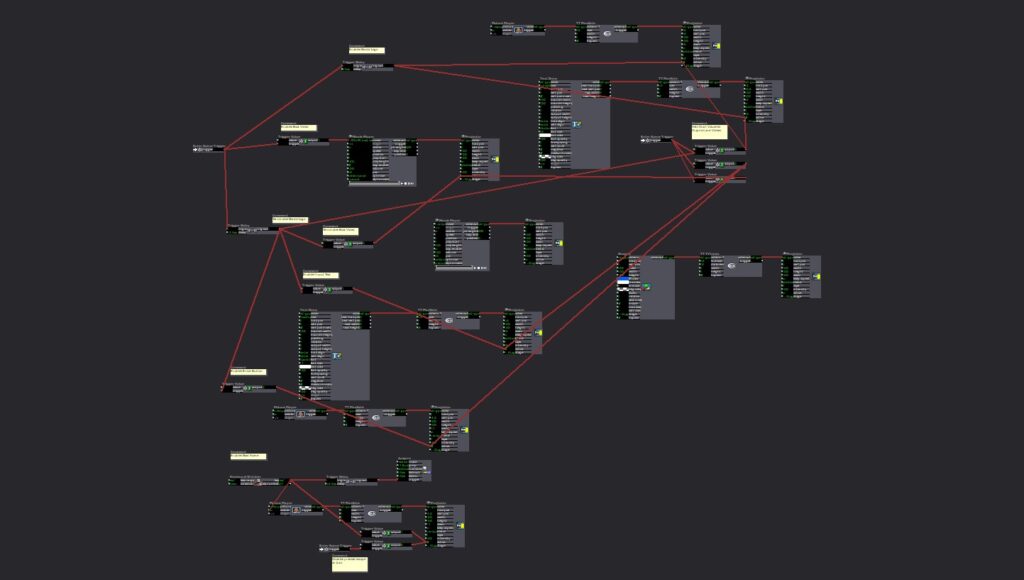
One of my biggest obstacles was triggering videos and transitions. I came up with a system that used trigger delay and trigger value actors to create a faux-sequencer that took care of video layering and playback. Then Alex told me the method I created was great, but that there was a way easier way of doing it!
Another obstacle that I encountered in the minutes before presentation was when one of my text draw actors mysteriously stopped working. The actors were there, and the connections were correct because I had tested the experience at home and it looked great. But for some reason, when I loaded my project on the PC at ACCAD, this one specific text actor was just not showing up. We later found that others had been running into this issue, and that it might be a hidden bug with this specific text actor.
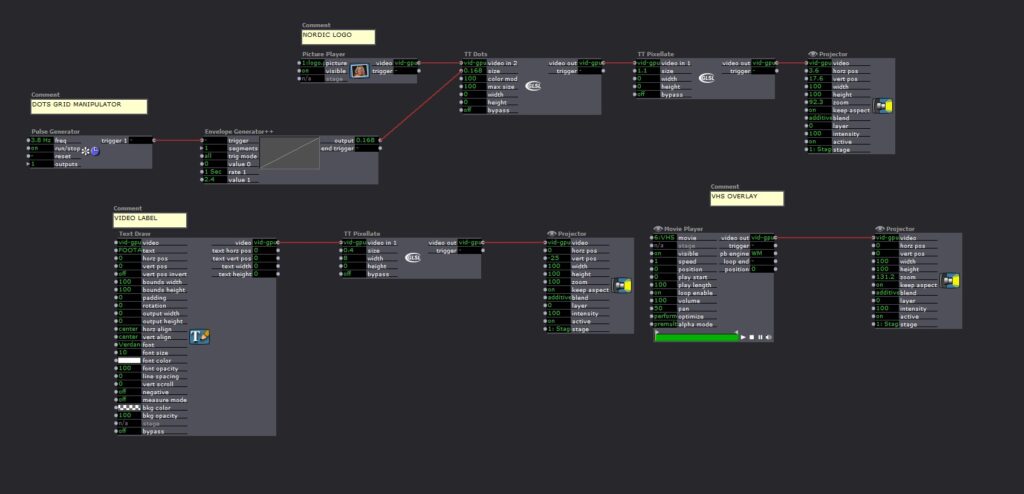
My favorite part of the project was figuring out ways to layer distortion and aging to make the experience look as old and vintage as possible. By using the TT Dots actor in tandem with TT Pixelate I was able to get some really cool effects.
Conclusion
My heart lies in the style of vintage pixelated VHS tapes and the found footage genre. I absolutely loved getting to play with creating a dated interface on a modern computer, and finding out how to mess with our expectation of fresh and high-res images. I look forward to continuing my exploration of Isadora and hopefully getting to make more cool retro-style experiences.
BUMP: Maria’s leap Motion Puzzle
Posted: September 5, 2022 Filed under: Uncategorized Leave a comment »I chose Maria’s Leap Motion puzzle project because it reminds me of the “Impossible Test” that were featured on gaming sites I visited as a Kid. And the idea of using the Leap Motion as a faux button is really cool!