Cycle 3 Final Presentation, Gabe Carpenter, 4/27/2022
Posted: April 28, 2022 Filed under: Uncategorized Leave a comment »In cycle 3 I wanted to bring everything together. In cycle one I provided the proof of concept of using physical controls to interact with a virtual environment, and that I could create these physical tools out of almost anything. In cycle 2, I demonstrated how these tools could be used to control a game environment, however the environment was very limited and lacked sound. For cycle 3, I really wanted to turn up the heat. My game is based on another popular series called I’m on Observation Duty, and shares many of the same concepts. My cycle 3 presentation includes a small story, 3 rooms to play in, and 9 different anomalies to find.
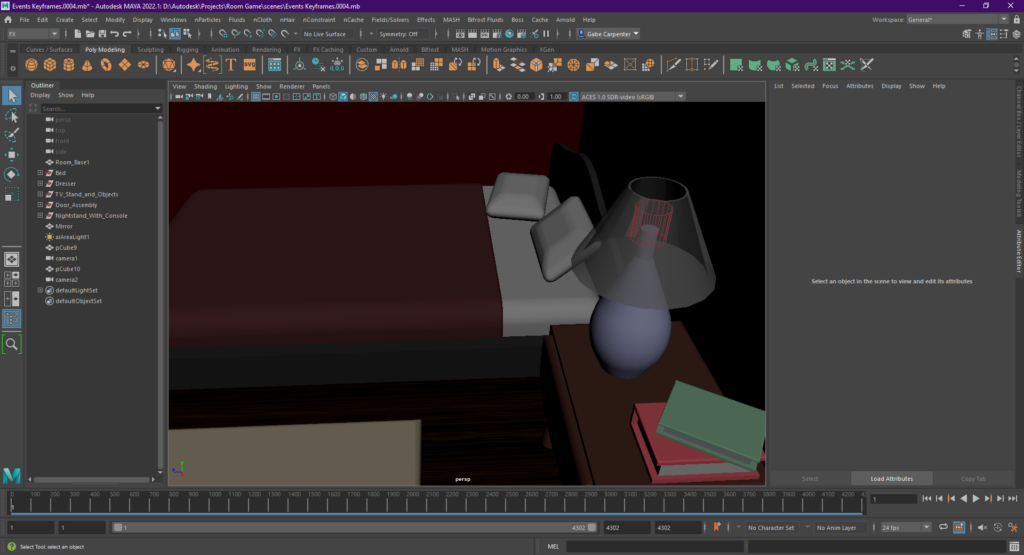
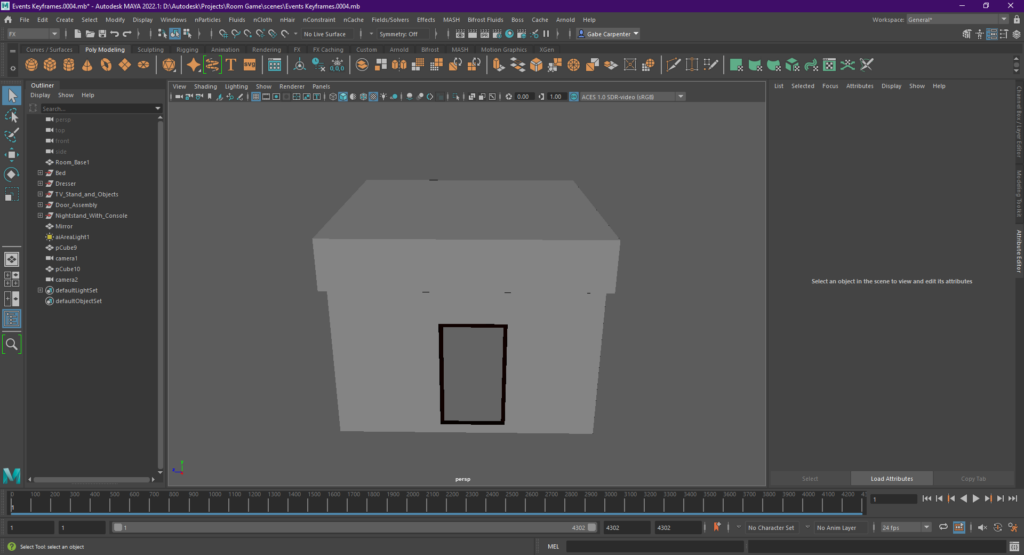
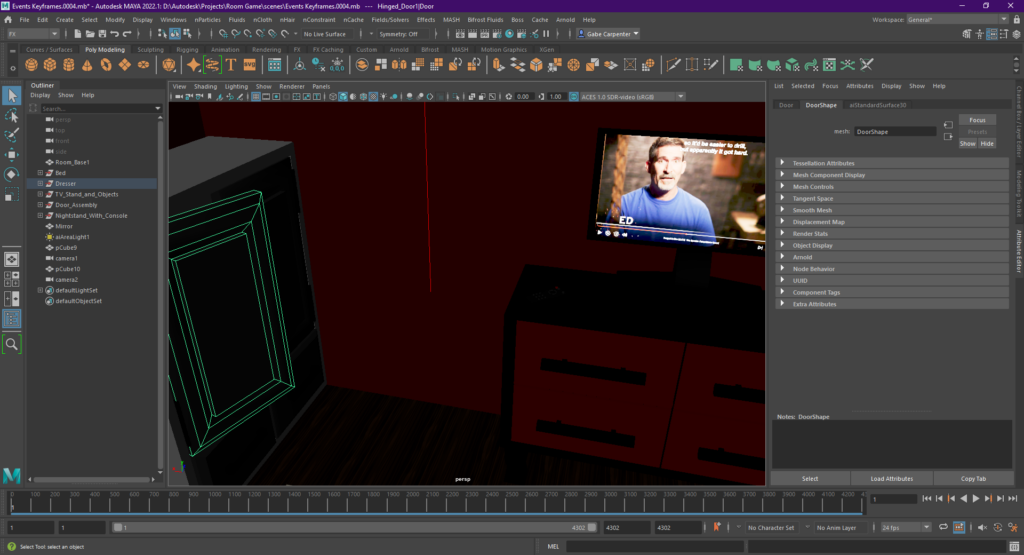
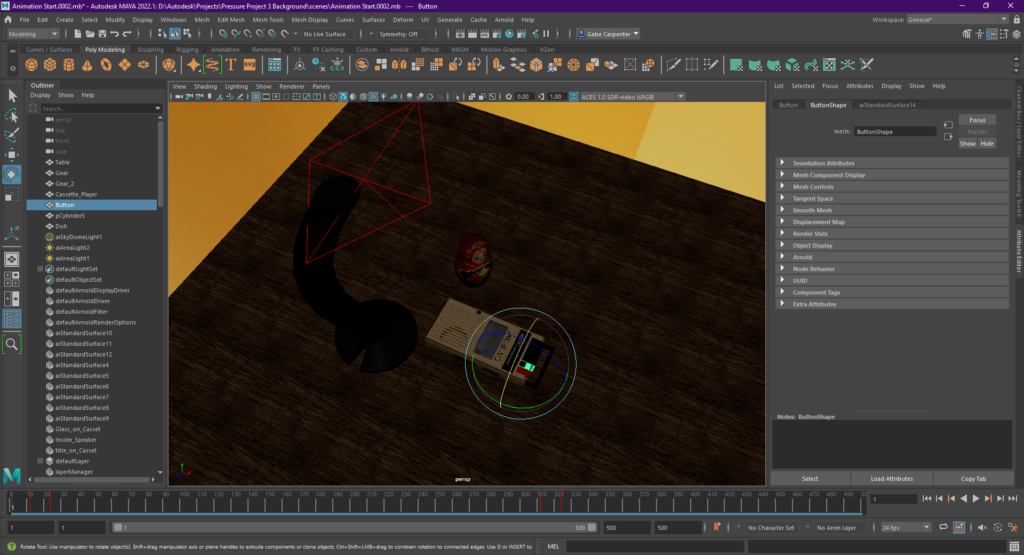
The first step, and arguably the most difficult step, was the animation and modeling itself. I used Maya 2022, as with previous cycles. Each asset in each of the three scenes was modeled from scratch, and no third party assistance was used in the creation of the game world. This meant that a majority of my time was spent modeling and rendering.
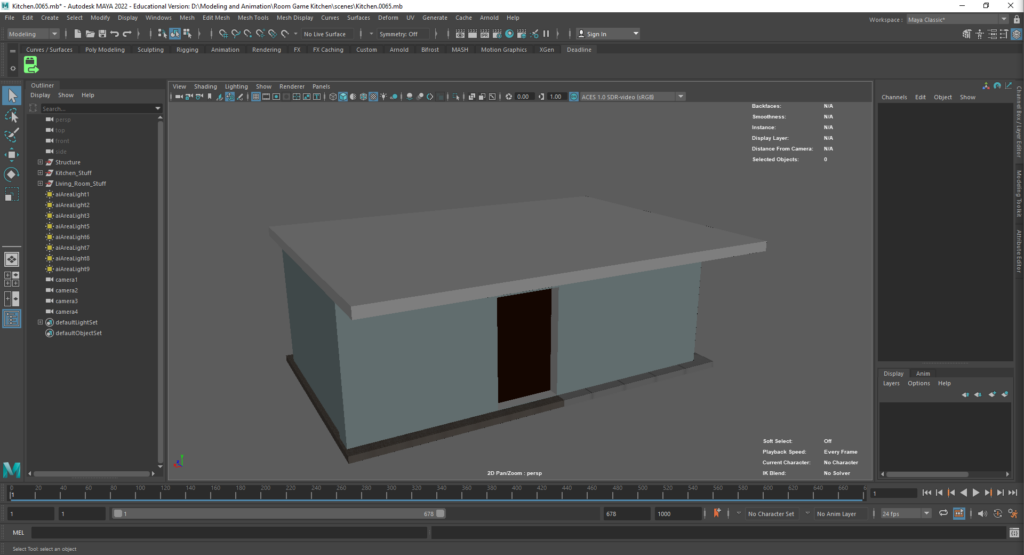

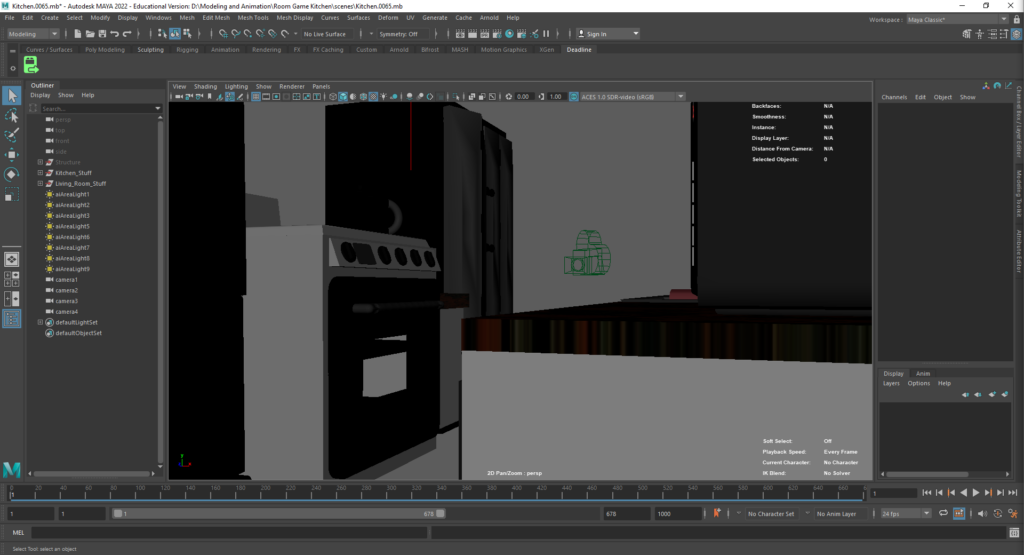
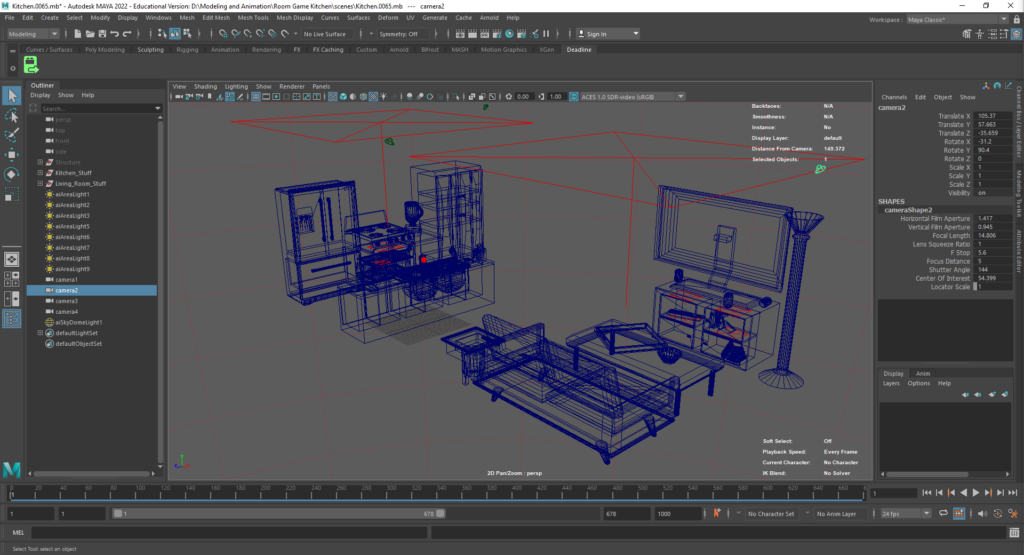

The three images above show a raw view of the newly modeled environments. For a look at the absent third room, check out my cycle 2 post where I go more in depth on that room specifically. The last step of the animation process was to choose the placement of the cameras, one of which you can see in the third image above. These were a bit challenging, as I wanted to give the player enough vision to complete the task of the game without giving too much to focus on at once. Texturing and lighting also took a good deal of my time, as I wanted to make things look realistically lit for a night time setting.
The next step was to get the sound and video assets for the final patch. The process I used involving taking multiple renders of each anomaly from each of the camera locations, and stitching them together as one large MP4. In the end, each camera was comprised of a 4 minute video. The Isadora patch would then allow the user to simply switch between which video they were viewing. I then needed to include sound. The music for the game was obtained through a royalty free music sharing platform, and the voice acting was done by good friend Justin Green. His work is awesome!
Finally, I needed to write the Isadora patch.
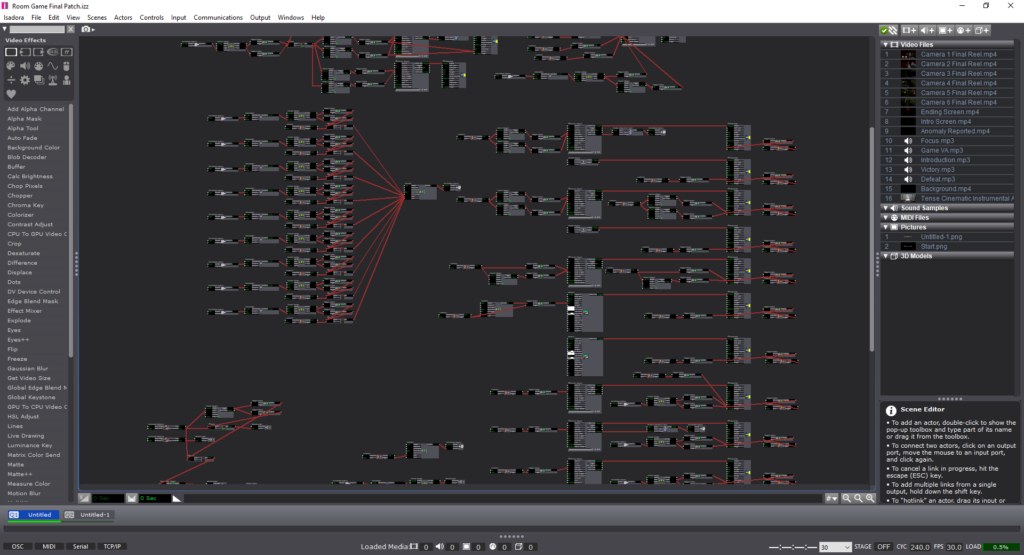
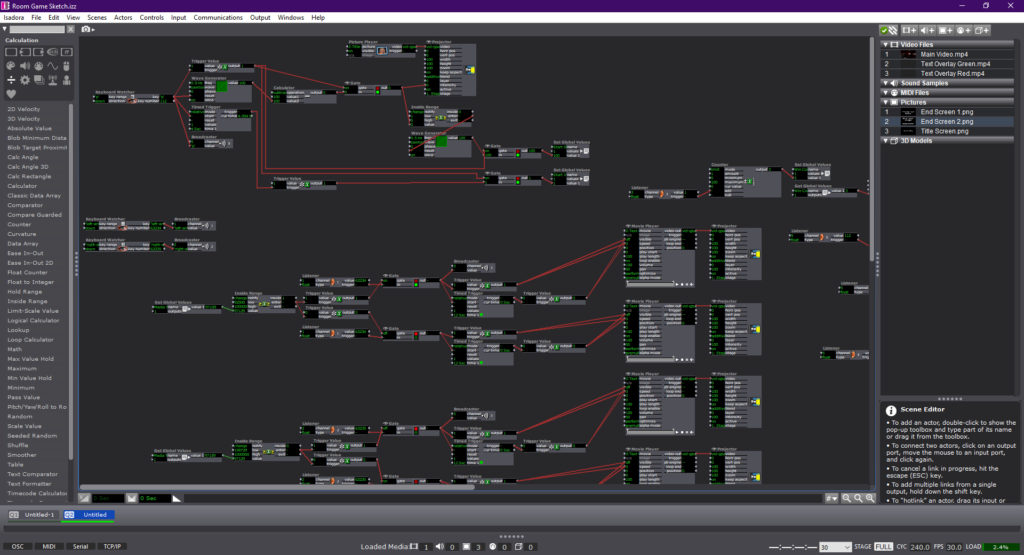
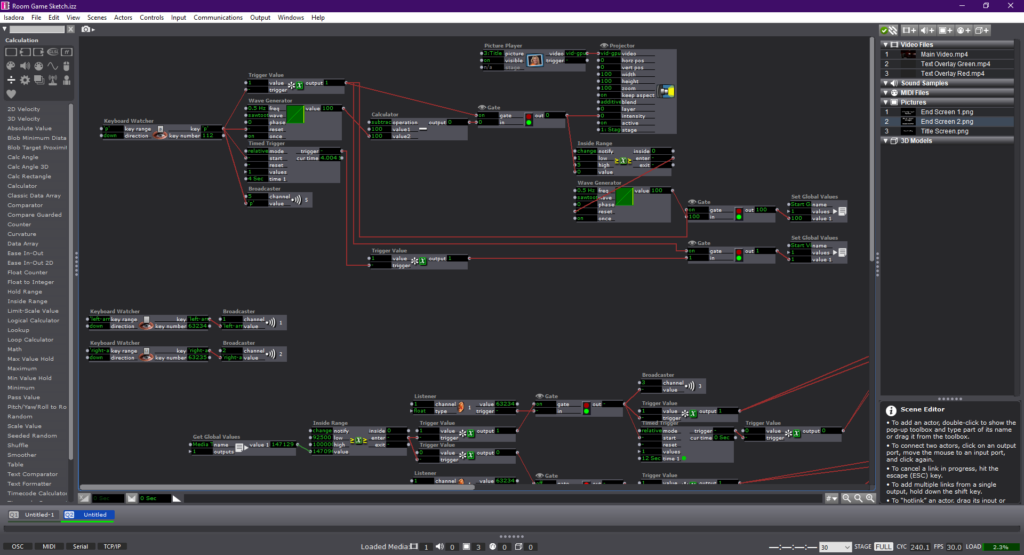
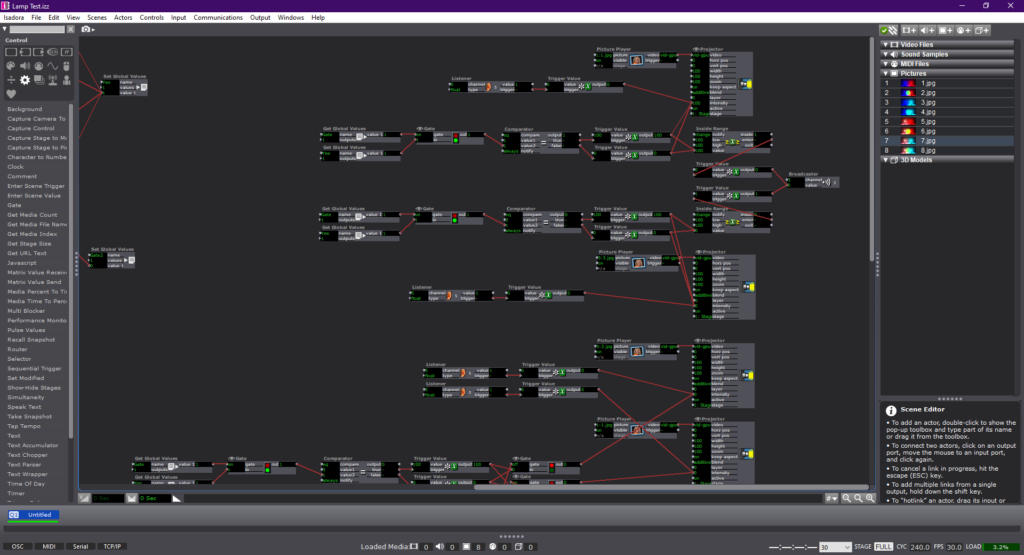
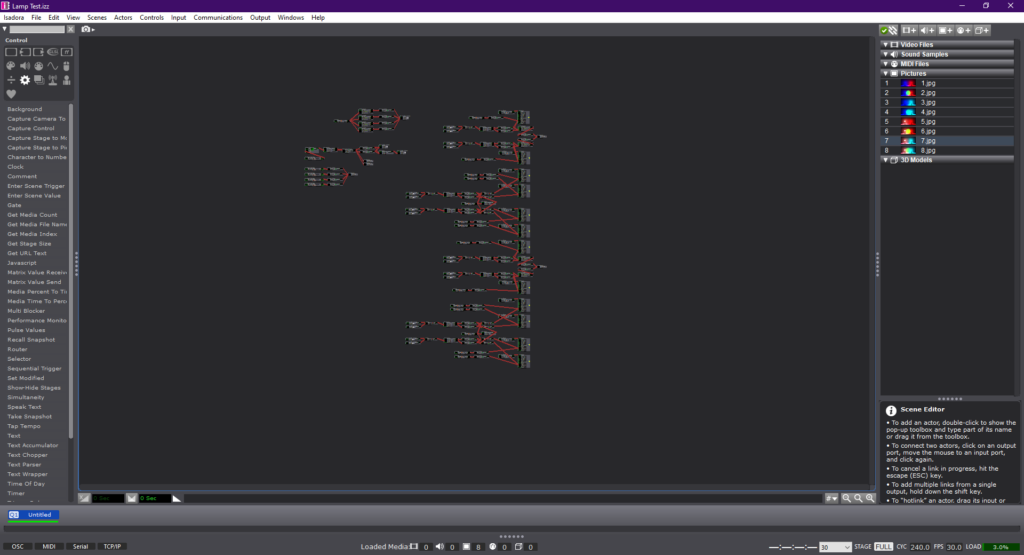
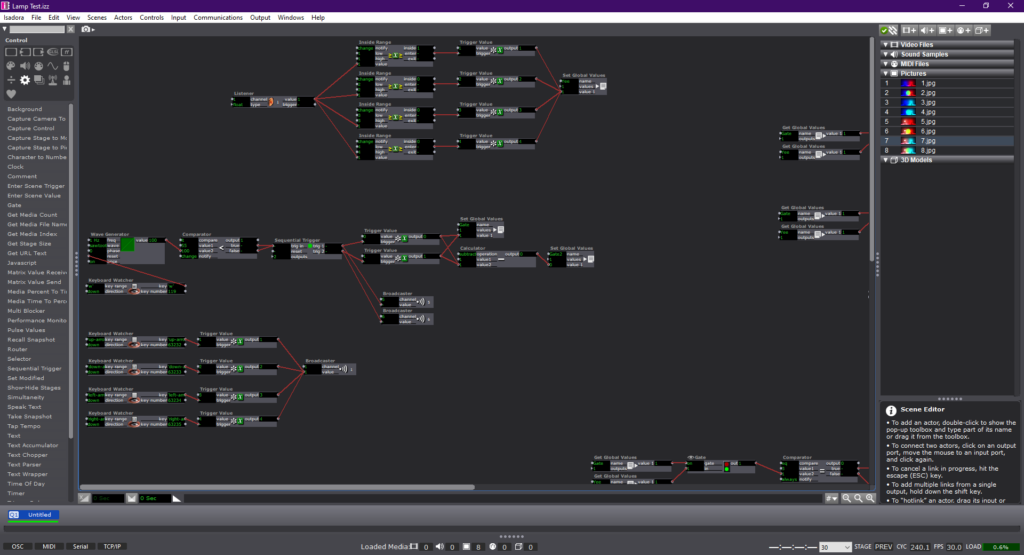
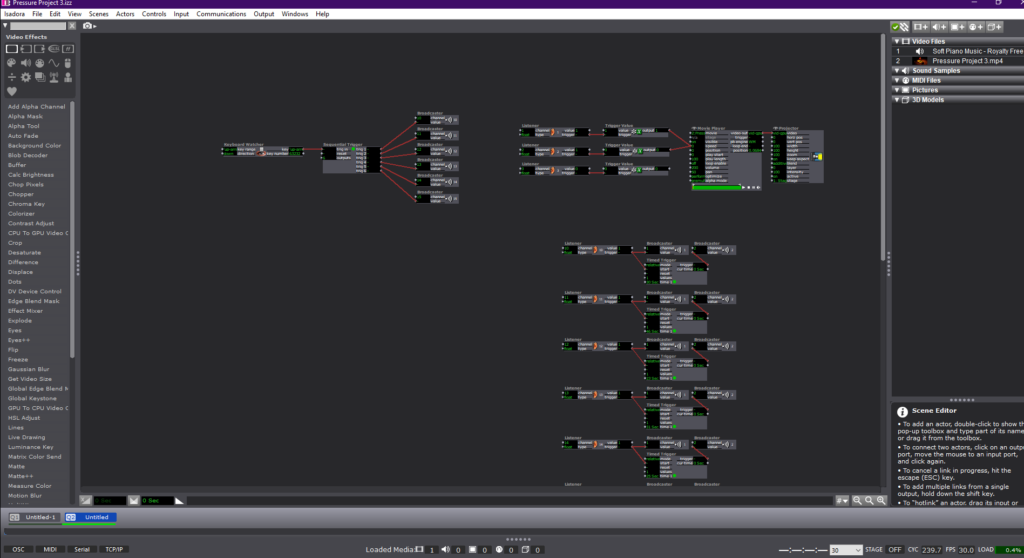
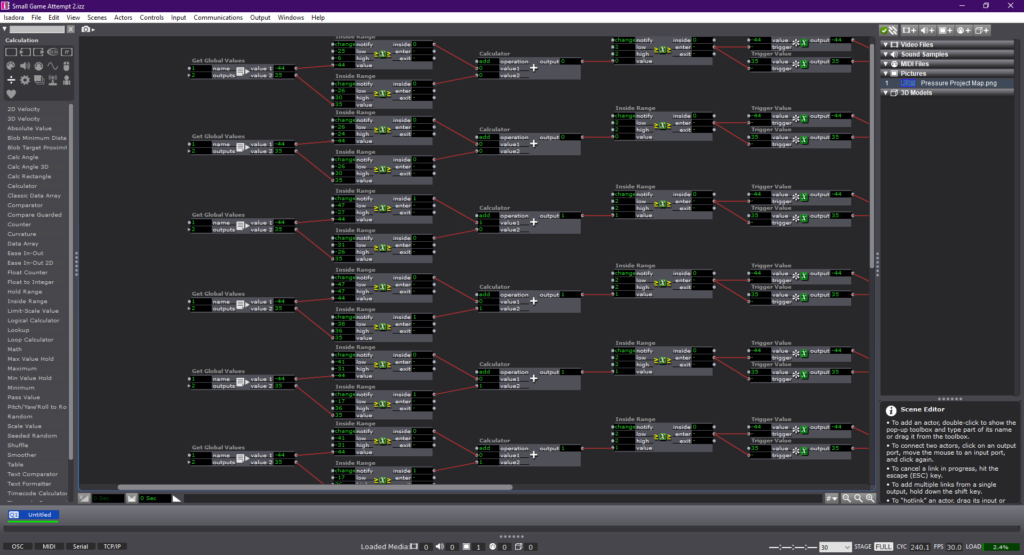
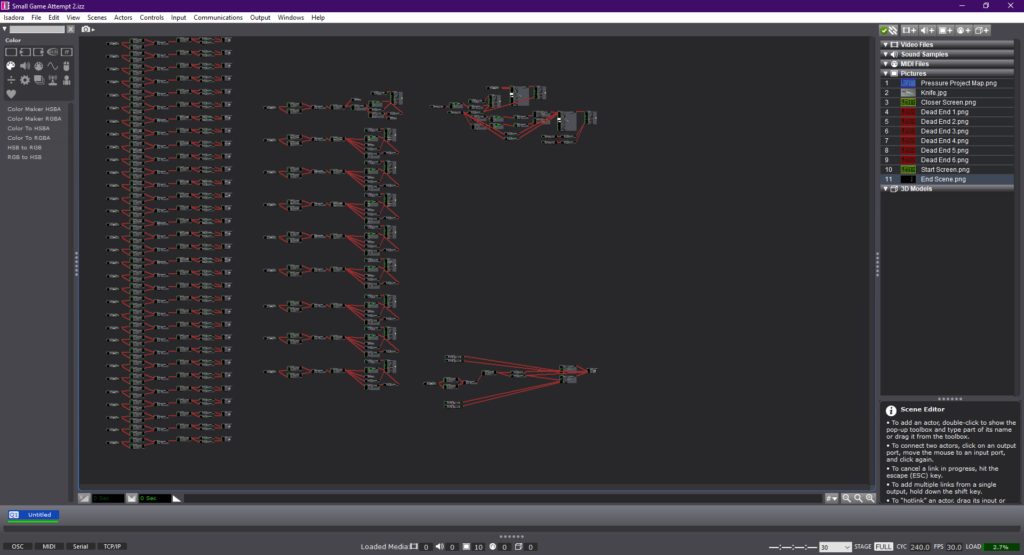
The full patch will be linked here. The patch is split up into 4 sections. The bottom left is the control scheme, comprised of keyboard watchers and global value receivers. The right side is all of the video and sound assets, as well as the timers and triggers that control how they are seen. The upper left is each of the anomalies, and triggers to allow the win condition to understand if the player reported correctly or not. The very top of the patch is the win condition which is made of two parts. The first condition is that the player must correctly identify at least 7 of the 9 anomalies. The second is that the player may not submit more than 11 reports total, to prevent the use of spam reporting. Overall, the actual patch took around 7 hours to write, but this was mainly due to some confusions in all of the broadcasters I ended up using.
In conclusion, I believe that my project was very successful. I did what I set out to do at the beginning of cycle 1, and had an Isadora patch that ran without issue.
Cycle 2, Gabe Carpenter, 4/6/2022
Posted: April 6, 2022 Filed under: Uncategorized Leave a comment »This phase of my project is focused on creating the media aspects of my final project. There are no physical controls involved with this stage, as those were demonstrated in cycle 1. I plan to combine both of these phases in the final project. I began this project by creating my room in Maya. I modeled all of the assets used in the game from scratch and rendered the footage using a render farm and the Deadline system. Below are a few screenshots of the work done in Maya
The next portion of the project involved creating the Isadora patch, which I will link here.
The experience is roughly 4 minutes long, includes a pass/fail ending system, and dynamically responsive choices throughout the game.
Cycle 1 Project Demo, Gabe Carpenter, 3/23/2022
Posted: March 23, 2022 Filed under: Uncategorized Leave a comment »This project is based on a game that allows the player to change the environment in order to gather information and come to a final decision. This demo will allow me to demonstrate the viability of using physical switches to cause changes to a digital environment. The first step to any project involving Isadora is the code, below are images from the completed patch, however, the patch has some issues. The main issue is that the third switch that I originally intended to use as a third option emits a constant signal, which Isadora does not like, so I removed the option for this demo.
The next two videos are examples of me using the switches to change the environment, first just using the keyboard and then incorporating the physical switches with the help of a Makey-Makey.
Below is a link to a copy of the Isadora patch used in the demo.
Pressure Project 3, Gabe Carpenter
Posted: March 2, 2022 Filed under: Uncategorized Leave a comment »My audio pressure project tells the history behind the Russian Nesting Doll or the Matryoshka. I recorded all of the original audio on my Samson C01U microphone and edited all of the audio in audacity. The script that was read during the presentation was created by myself but was based heavily on an article online, linked here. I chose this story because I was born in Vladivostok, Russia, and had a very similar version of the doll displayed in the video on my nightstand. Being adopted from Russia is a huge part of my life and my family’s life. The events currently unfolding between Russia and Ukraine in the year 2022 are very saddening, and I do not condone Russia’s actions in any way by this project.
I created the Isadora network using a sequential trigger, which paused and unpaused a premade rendering of the tape recorder combined with the audio.
The rendering for the project was done in Maya 2022, along with all of the texturing and modeling work.
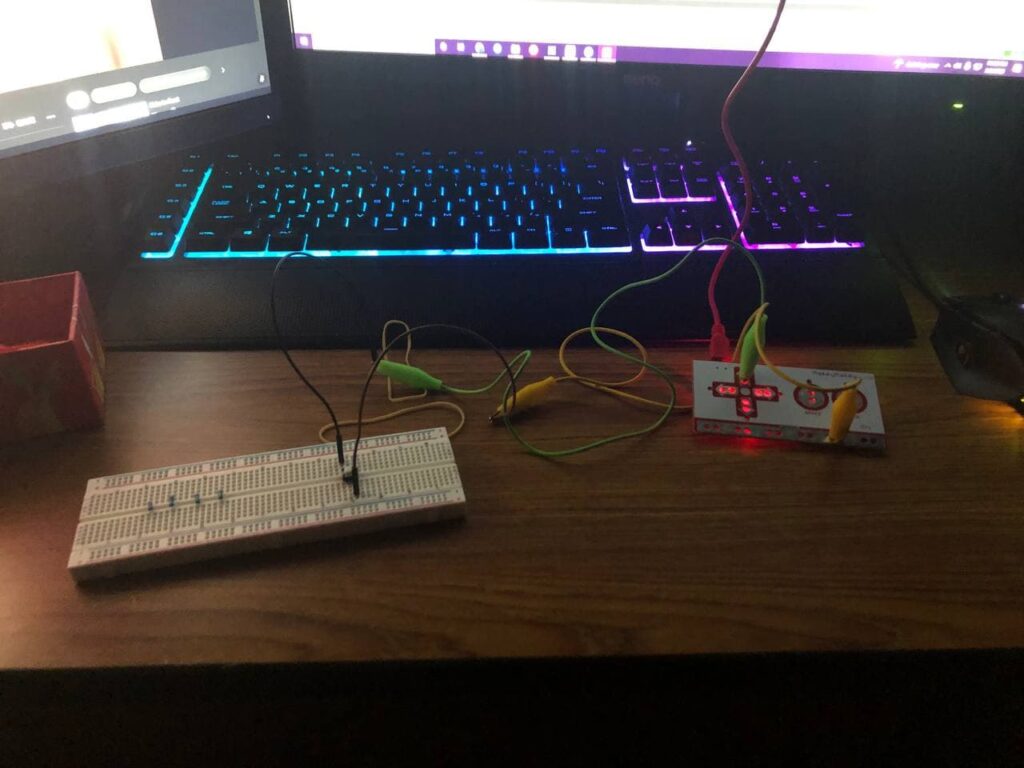
The final interactive portion of the assignment comes from a system based on a breadboard. A button is placed in the center and bridges together two alligator clips connected to ground and the up arrow on a Makey-Makey. When the button is pressed, the circuit is completed and the trigger is sent to Isadora to play the next part of the video.
The following is the full unsliced video containing all of the audio.
Pressure Project 2, Gabe Carpenter
Posted: February 21, 2022 Filed under: Uncategorized Leave a comment »My pressure project focuses on playing a simple maze game with the Makey-Makey. The game is controlled with the D-Pad and includes a reset mechanic, secret messages, and a short ending that reveals a secret exit.
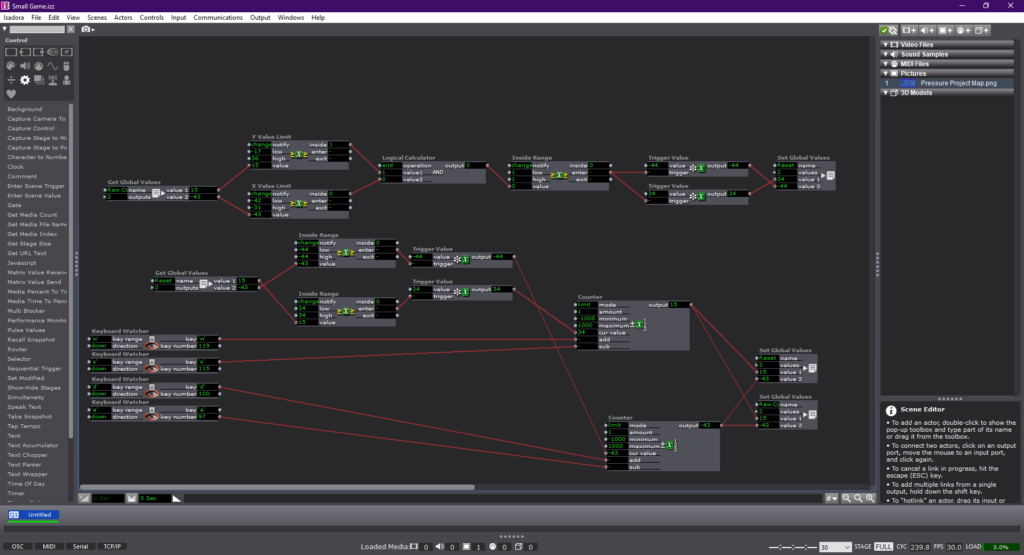
The first trial of my game included a non-functional collision system but aimed to set up the basic wall detection that the program would use. The wall detection started out as an attempt to use 2 inside range actors and comparators to determine if each parameter was met. The 2 inside range actors act as the x and y boundaries of any given wall.
The next phase of development yielded a solid method for determining hitboxes. This method feeds the aforementioned two inside range actors into a calculator, that then adds the outputs together. Upon receiving a “2” output, the calculator triggers a value that resets the player back to their original position. The data of the position is sent to a global values actor, which relays it to the counter that acts as the memory portion of the game.
The final layout may seem messy at first, but the long row along the left side of the image is a series of hit detection pipelines for each individual wall. The row in the middle is an added sequence change that occurs when the player enters a certain area. The screen will change color and a message will be given to the player. This is done using another hitbox detection system, and triggering a waveform generator to fade the new image onto the map and then take it away again. The other smaller pipelines are the controller link and the ending “cutscene” trigger.
This is a video of me playing the game and achieving the ending.
Pressure Project 1, Gabe Carpenter, 2022
Posted: January 26, 2022 Filed under: Uncategorized Leave a comment »- I sat on the bench in my dormitory lobby watching people using the elevators around lunchtime.
- There is a lot of congestion right in front of the elevators, as several groups of people like to travel together and clog the small hallway while waiting their turn
- The hallway is a bit narrow, and there are only three elevators running on either side of the building.
- There are roughly 1400 students in the building, divided by two that is 3 elevators per 700 students.
- The current elevators cause a lot of slowdowns due to their lack of speed and poor efficiency in deciding what floors to go to and in what order.
- The ways in which people enter the elevators can also cause a lot of issues, bringing various packages and other items that take up space.
- The elevators are controlled by a keypad on the outside that gives the user an option for up or down, and a numbered pad on the inside that includes a list of all of the floors that the user can be taken to.
The main problem with congestion in my dorm is the elevators and the lack of movement that appears when there are a lot of people. The elevators can only visit one floor at a time, thus visiting a maximum of 3 floors per group. This is only counting if all occupants of each elevator are going to the same floor. Any variation of destinations would require more stops and slow down the process further. There is also the issue of cramming 6 to 9 people inside of one elevator, especially in current times as the Covid-19 pandemic continues to be a problem.
My proposal is a new system of elevators made for maxim speed and efficiency in moving people from one floor to the next. These elevators would mainly be single occupancy machines intended to take one person at a time. This may seem to be counterproductive at first, but the efficiency comes from the simplicity of the system. When one person enters and presses their floor, the elevator can instantly close and move at the maximum comfortable speed to the desired location and return. With less weight, the elevator can move faster, and the doors can automatically be closed once a single person is inside, instead of waiting for more potential riders. This also allows for less confusion about which floor to go to and will return elevators much quicker than waiting on a single machine to bounce between 3 to 5 floors. The system would have six single elevators on each side, with an additional cargo elevator at the end as well. The cargo elevator would be intended to move large packages or any other objects that could not fit on the personal elevators and would be able to accommodate one person along with the move-in cargo bins that most dorms have in them.
Project Bump
Posted: January 24, 2022 Filed under: Uncategorized Leave a comment »I really enjoyed this project as it made a simple video game style into an interactive experience. I’ve always liked games that were self-aware while you were playing them, and adding the ability to use your hands to control it is a cool bonus! https://dems.asc.ohio-state.edu/?m=202104