PP2: Living Typography
Posted: October 19, 2023 Filed under: Uncategorized Leave a comment »The inspiration for this project was ‘Nervous Tick,’ an animation by Chuck Csuri. I loved the way the shapes felt ‘alive’ in their movements, almost reacting to those watching them. I also wanted to give the computer presence a voice through the use of typography. The interaction between image and viewer was my impetus for creating this work.
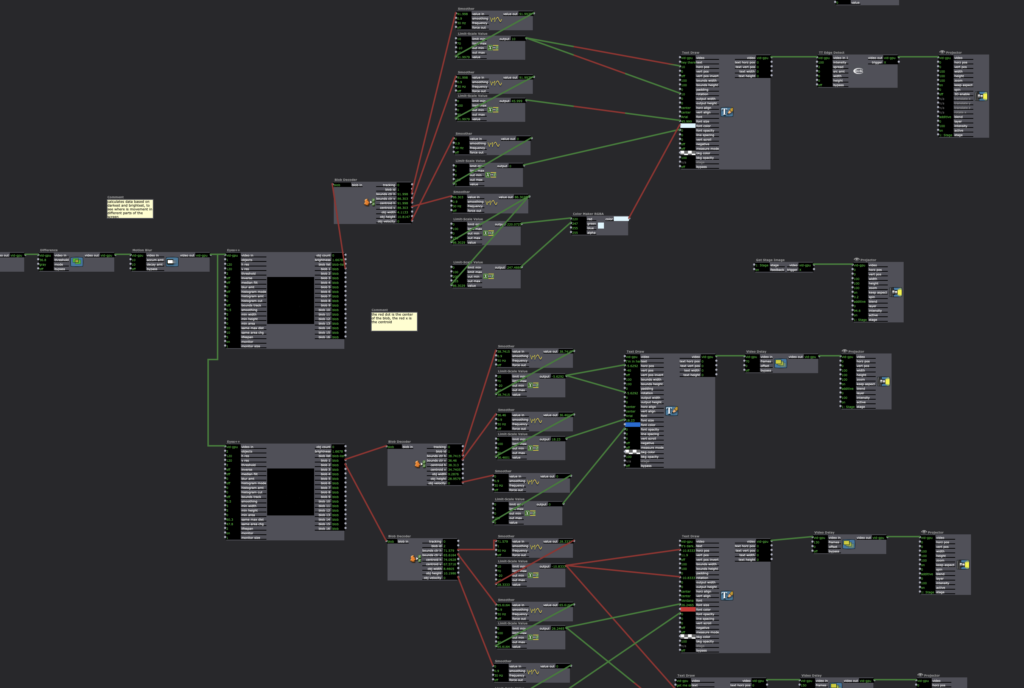
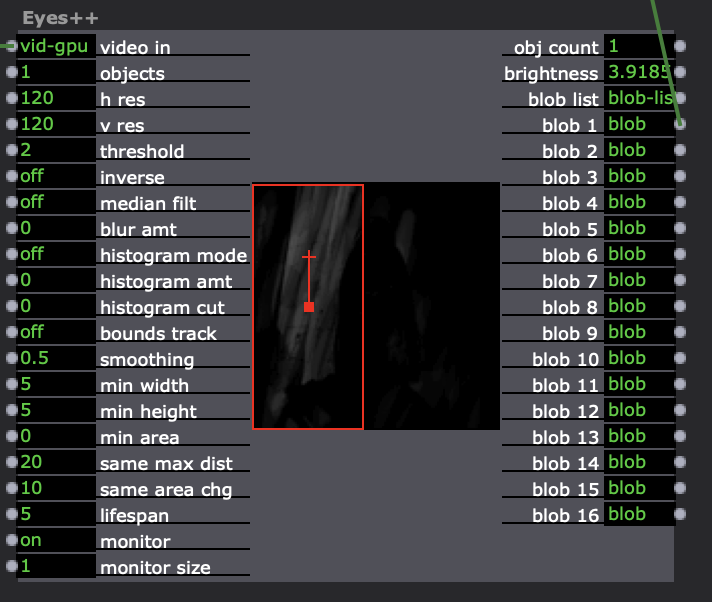
Everything in this first iteration is motion triggered and set off through time delay. Using a webcam, filtered through the ‘Difference’ and then ‘Eyes++’ actor, the motion sensor in it detects movement, which sends triggers for text to appear. One motion sensor actor (above) has a longer delay time and allows for a smoother interaction from human movement to text output. The second motion sensor is set up to be quick and jittery. I did this to give emotion to the creature.
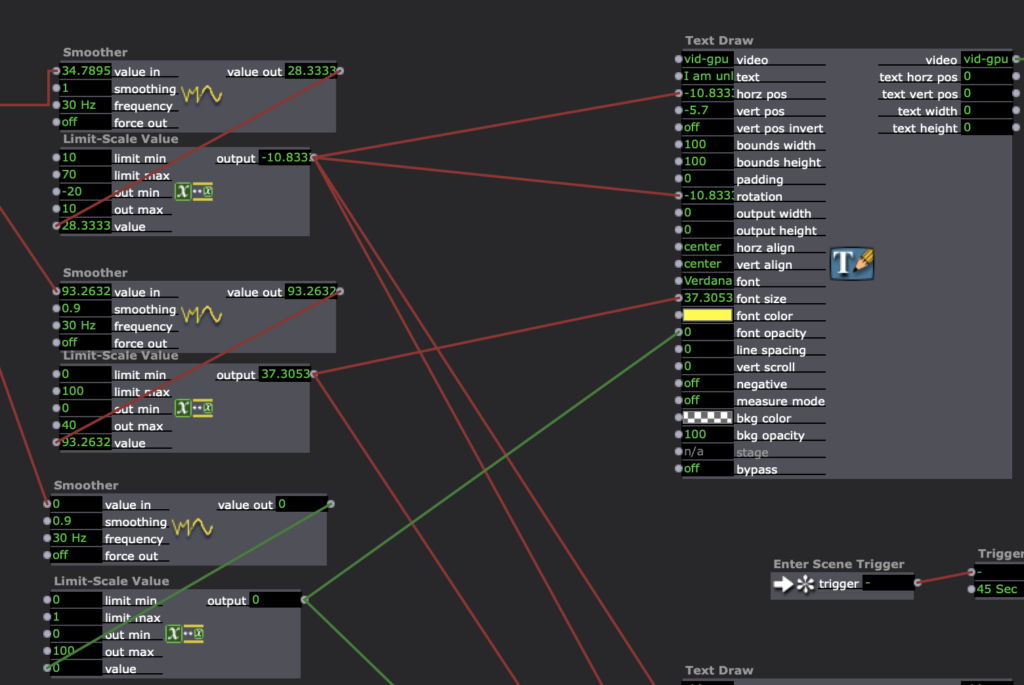
Text in the first scene includes ‘Hey There!’, ‘I’m in here!’, ‘It’s dark..’, ‘Let me out!’
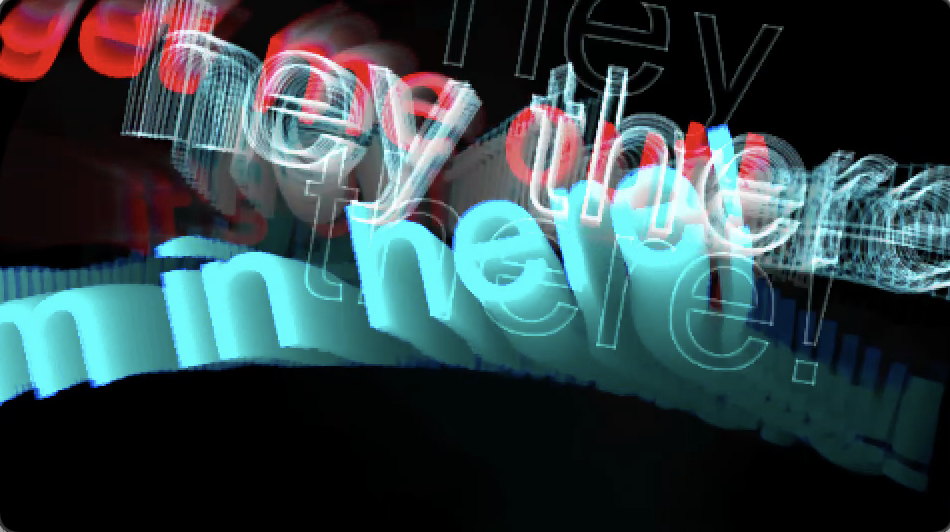
At first, the viewer is not sure whether the character is innocent. From audience reaction, I gathered people thought the creature was the victim. It is revealed in the next scene that it is an unpleasant virus looking thing that has been unleashed and will ‘see you in your dreams.’
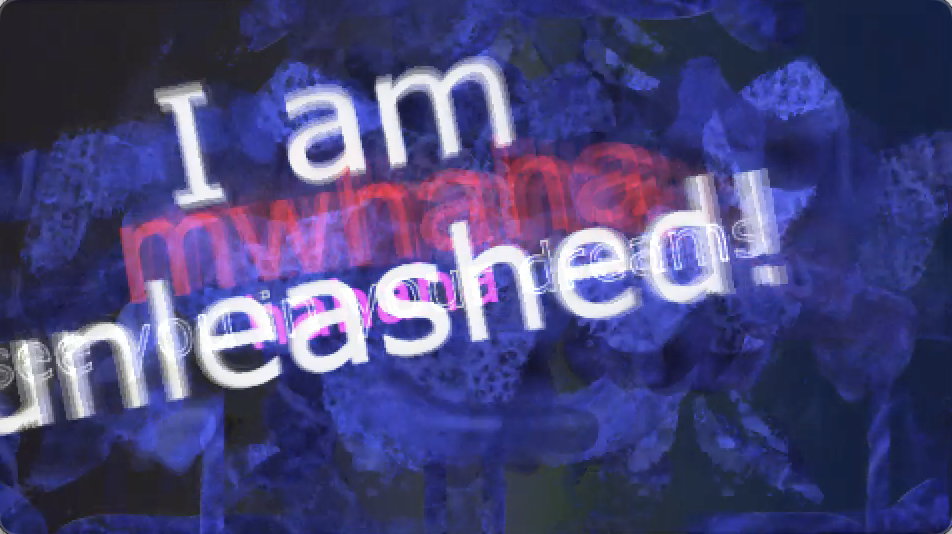
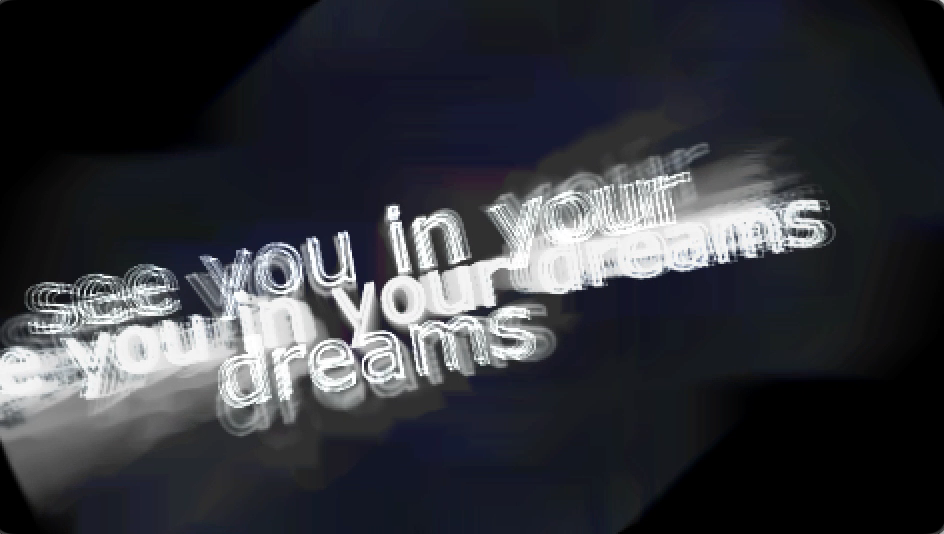
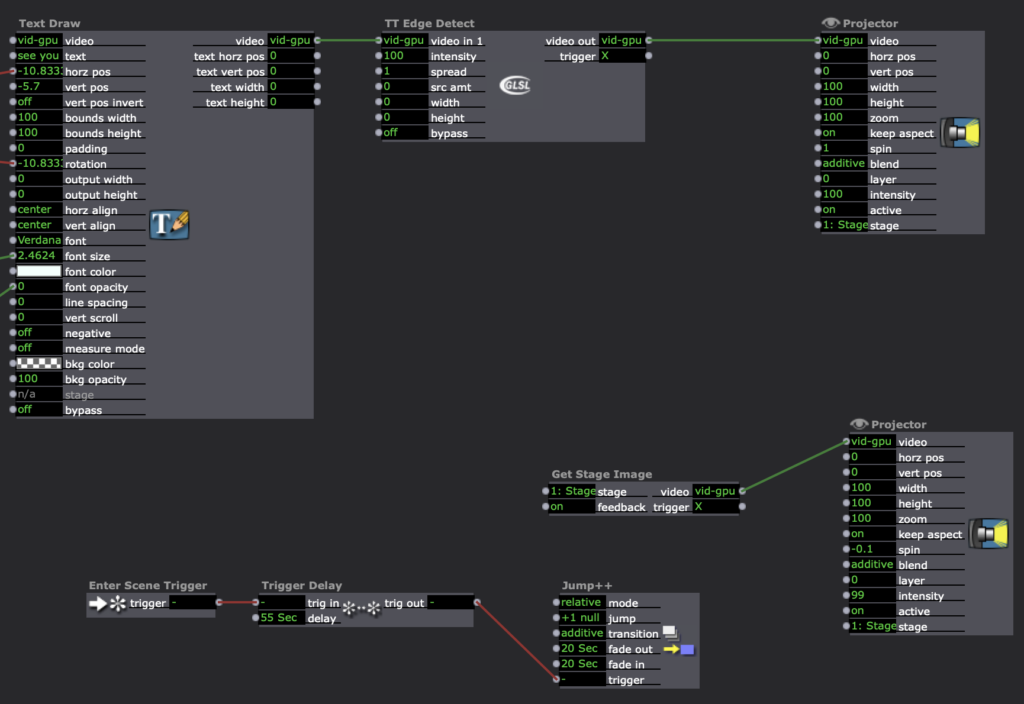
A new element in this project is the use of feedback through the ‘Get Stage Image’ Actor plugged into Projector. It creates a melting effect similar to datamosh that really gave it an organic feel.
Pressure Project 1
Posted: October 17, 2023 Filed under: Uncategorized Leave a comment »In this pressure project, I was very much so tinkering with the software, trying to figure on what to plug where.
In Scene One, I was also experimenting with the various sliders the shape actor, combining them with the envelop, wave and pulse generators to create what I deem an interesting animation. I also did some tuning of frequency, amplitude and phase of curves for various generators so as to create an orbital effect in the moving agents. I was mindful to include user actors, to create independent objects on the stage. These user actors make sense for me from the perspective of object oriented programming.
In Scene two, I imported a video I made and experimented with the kaleidoscope actor.
Overall, I was not totally satisfied with this project and what it achieved, but I am ok to treat it more like a “study” piece.
Here’s my patch for sharing:
https://drive.google.com/file/d/1NSRfCIi78JRKkM_2lV559OdPd70sWCkj/view?usp=sharing
Pressure Project 2
Posted: October 17, 2023 Filed under: Uncategorized Leave a comment »In this project, I was inspired by Charles Csuri’s line work that appears in his work swan lake piece and his humming bird piece.
I experimented with various actors to manipulate the webcam image, such as difference, gaussian blur, shimmer, in order to impact how the eyes ++ actor was responding to the live capture. I wanted more simultaneous capturing of multiple moving objects, and i found the reflector actor to serve my intended purpose well. The numbers generated by the eyes ++ actors were fed into scale, position etc of the moving elements.
As for the moving visual elements, I created simple line drawings using photoshop, and exported them as PNGs with transparent backrgounds. I managed to device a way to call various images into the background using the numbers from the eyes ++ actor. See screenshot below. I will be using this more.

In the work, I also experimented with the 3D Particle generator, but it was not very successful. There were just too many sliders to account for, and after tinkering with it for 2-3 hours, it feels like I only have a sense of what 20% of them do. I also managed to work in the get stage image actor and capture stage to image actor, which I will be experimenting more for cycle 1 of my project.
Here’s my patch to share if you are interested.
https://drive.google.com/file/d/18Tq5N5q7md8nW2IadXUaUh_7EnQI9PIo/view?usp=sharing
Pressure Project 2
Posted: October 16, 2023 Filed under: Uncategorized Leave a comment »Pressure Project 2 had to be completed in 8 hours, had to use the Video In Watcher, had to be interactive, and had to be inspired by Chuck Csuri. I was inspired the colors in this piece and wanted to use them in some way in my work. One of the biggest problems I ran into throughout this Pressure Project was keeping Isadora from crashing. I found that just starting live capture with my webcam would increase the load of Isadora by 30% or more, so I decided to use it in only one part of my project rather than the whole thing in an attempt to keep the load down. I also reduced the webcam resolution quite a bit and this helped to keep Isadora and my computer from crashing.
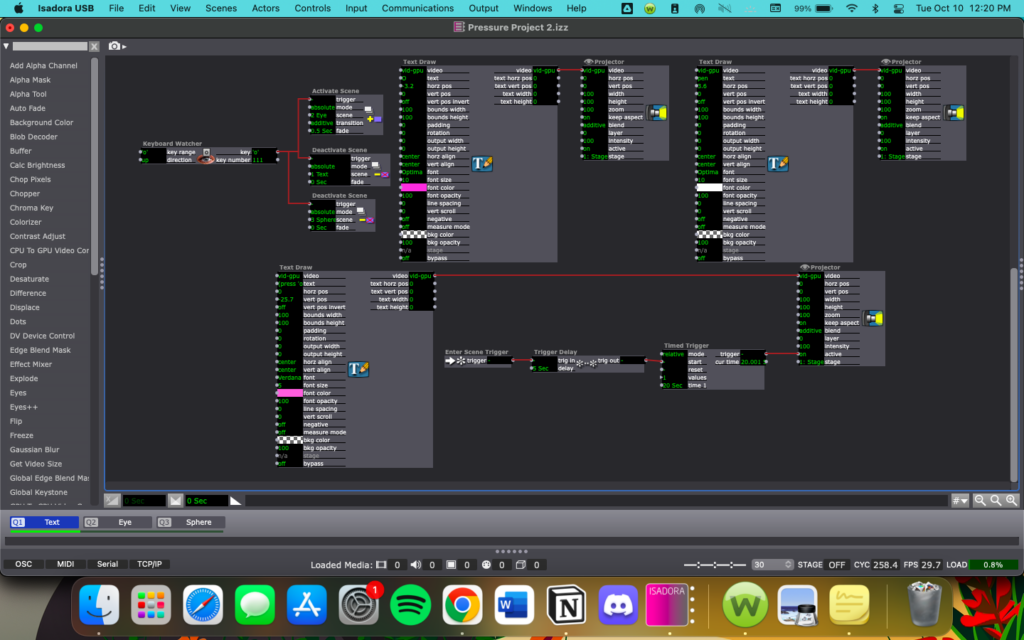
My project begins with a blank screen that says “Open”, with the ‘O’ in pink and the rest of the word in white.
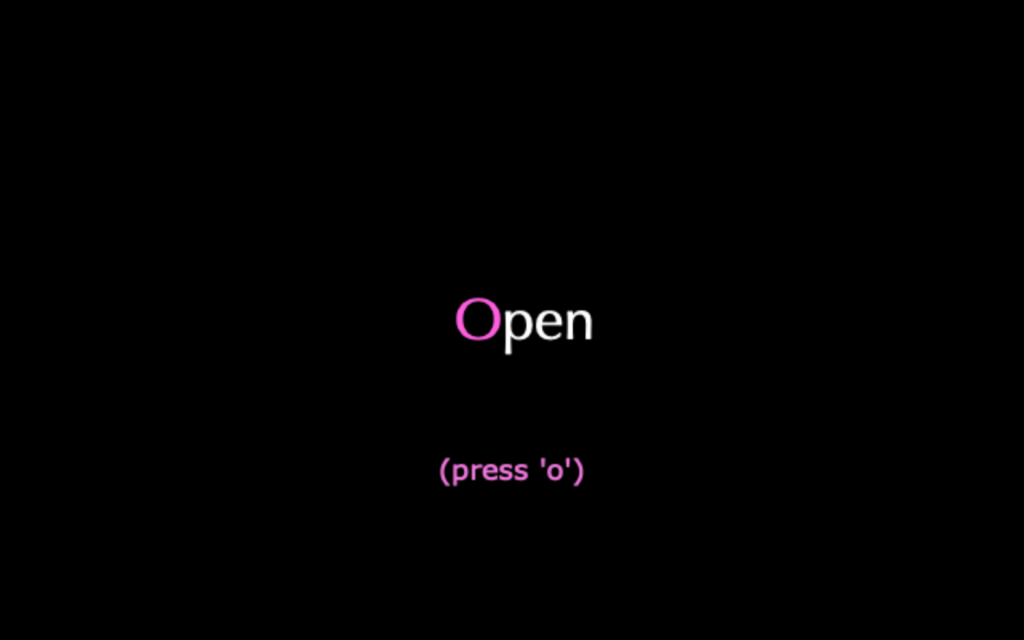
I used three Text Draw actors in this scene; one for the ‘O’, one for ‘pen’ placed beside the ‘O’ to look like one word, and the third for the hint that is displayed after 20 seconds. To create the timer, I used the Enter Scene Trigger, Trigger Delay, and Timed Trigger actors. I also used a keyboard watcher to trigger the next scene when the letter ‘o’ is pressed.
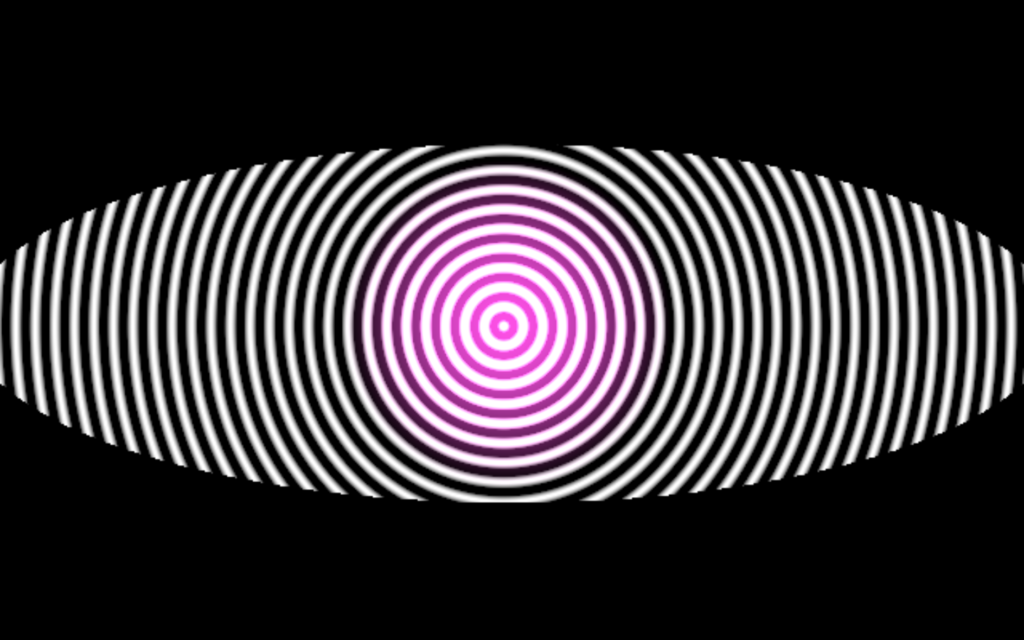
The second scene is an eye shape made of concentric circles and a glowing pink center. I actually started with this scene first, so I started playing with the Video In Watcher here.
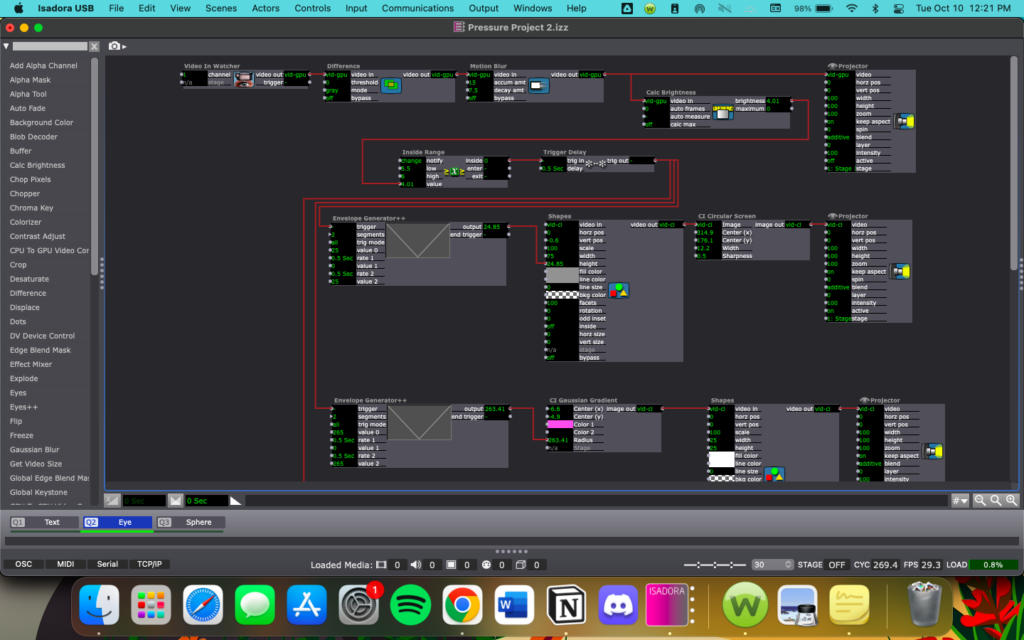
The biggest challenge in this scene was getting a delay between each eye blink so that the next scene doesn’t trigger too quickly. To do this, I used an Inside Range actor within a sequence connected to the Video In Watcher with a higher minimum value and a small range, then a Trigger Delay actor off of the Inside Range Actor.
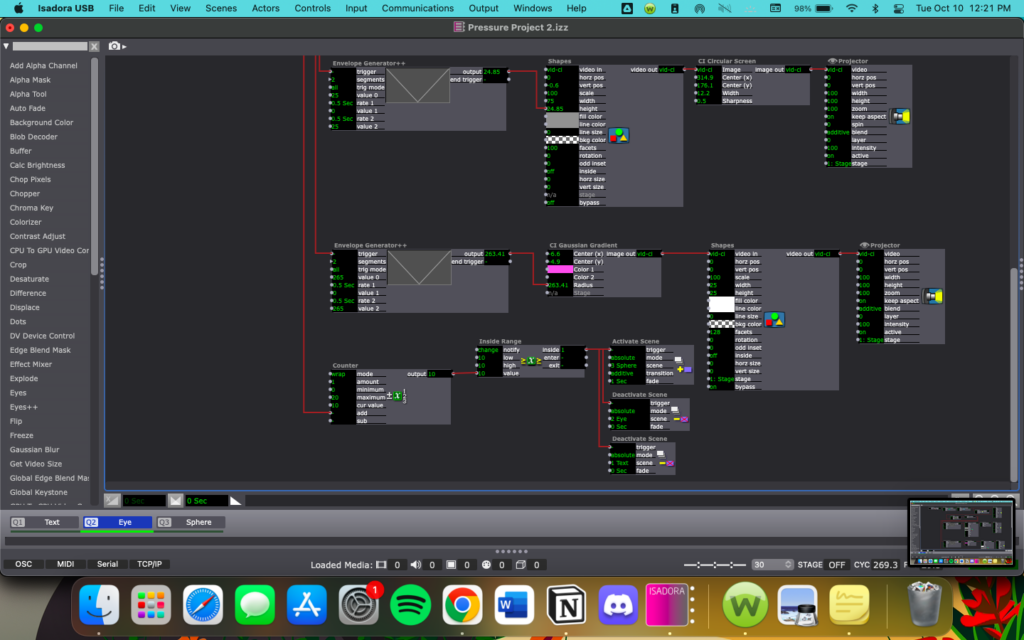
Because I wanted the scene to change after so many eye blinks, I used a Counter and an Inside Range actor to count the number of blinks (movement inputs from the Video In Watcher), then after x blinks (I used 10 but this can be changed for a longer experience), the Inside Range actor will trigger an Activate Scene actor to move to the next scene.
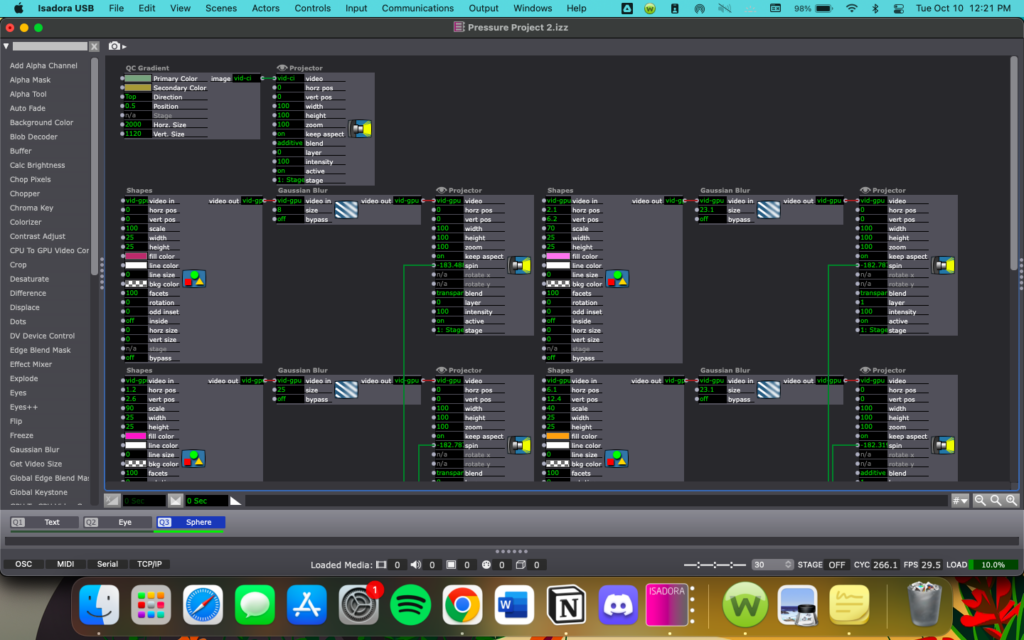
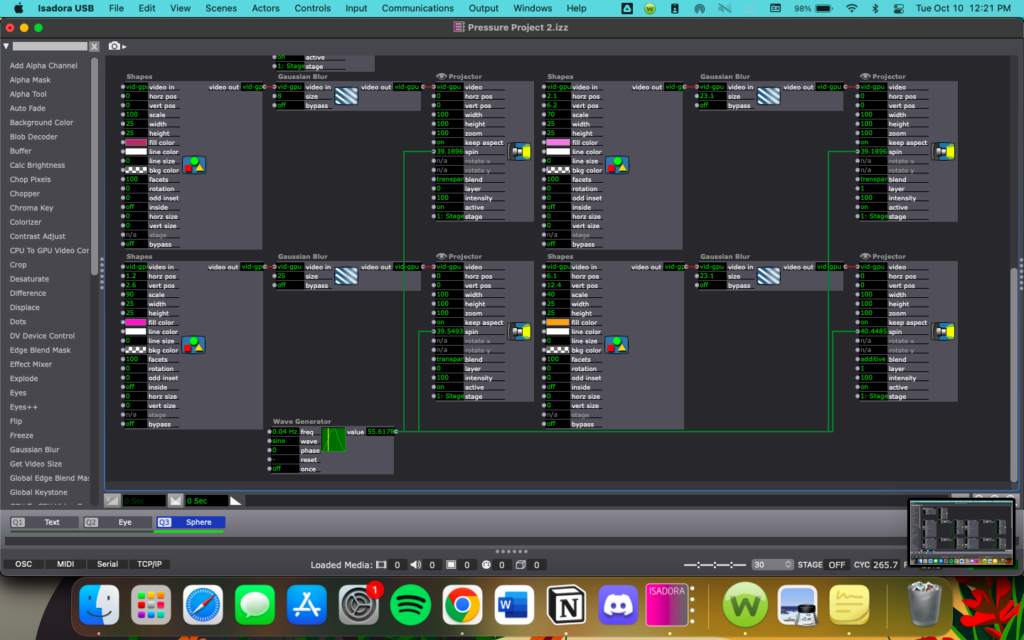
The third scene is a pink sphere on a gold and green/blue background. This one was mostly a result of playing around with layering Shapes actors to see if I could give the illusion of a 3D object. This scene is not interactive, mostly because I couldn’t decide on an input method or how I wanted it to be interacted with.

My biggest obstacles in this scene were just getting each circle in the right place and finding the right actor for the background gradient, and these took a lot of time to do but were relatively easy overall. Because this scene does not have any interactive components, I used a Wave Generator actor to get the circle to spin. As of now, this scene does not end.
PP2: Etch-a-Sketch
Posted: October 9, 2023 Filed under: Uncategorized Leave a comment »For Pressure Project 2, I created a sequential interactive experience that ends in a “human etch-a-sketch.”
The Project
For the earlier scenes, I took inspiration from Charles Csuri’s “Swan Lake” piece. I isolated the user’s outline and applied different effects to it. Here are screencaps of my patches for some of these scenes:
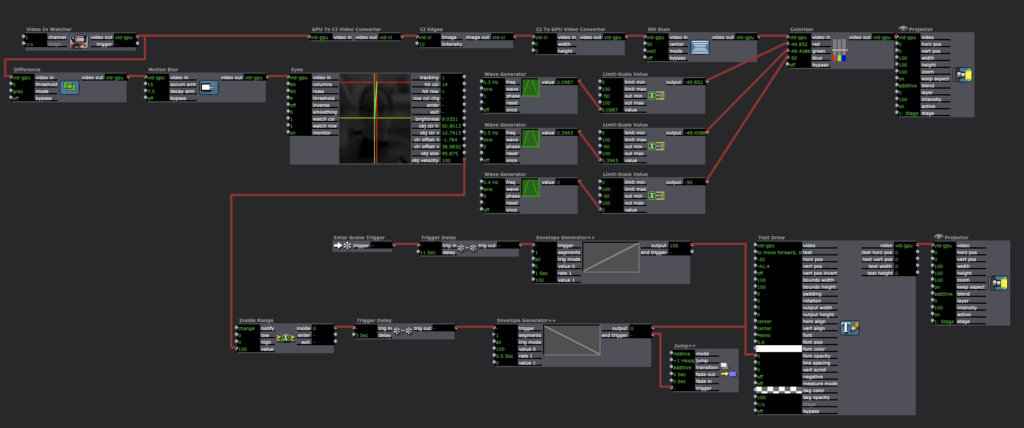
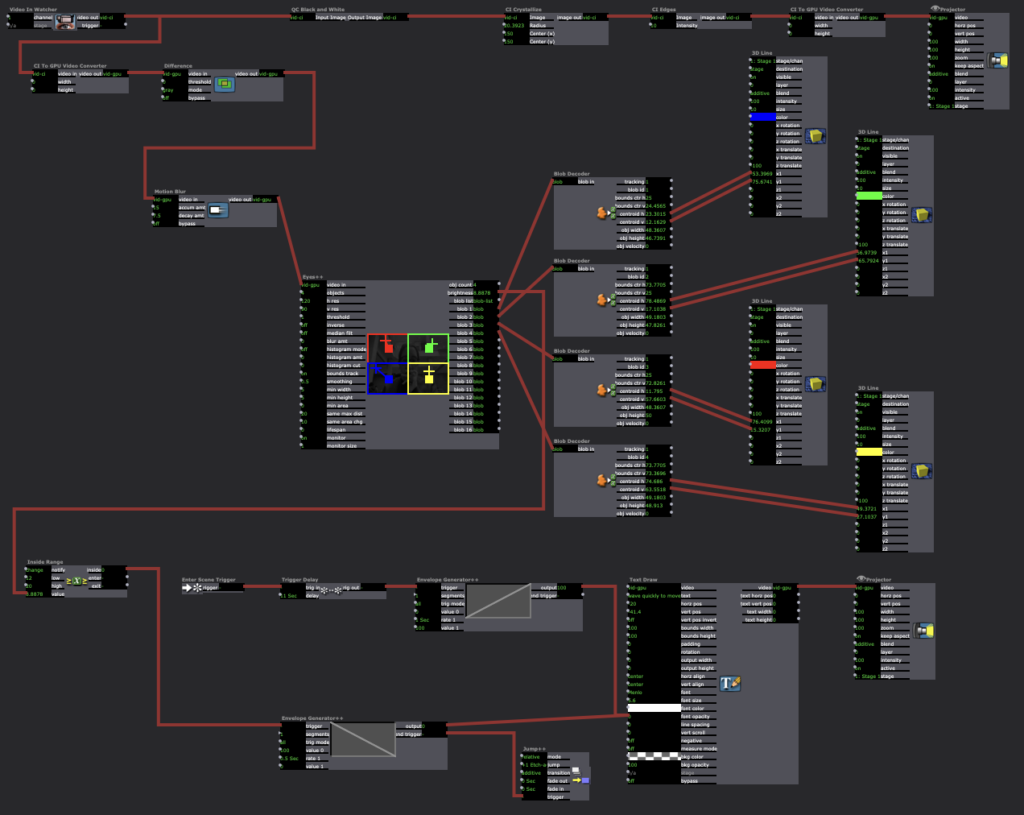
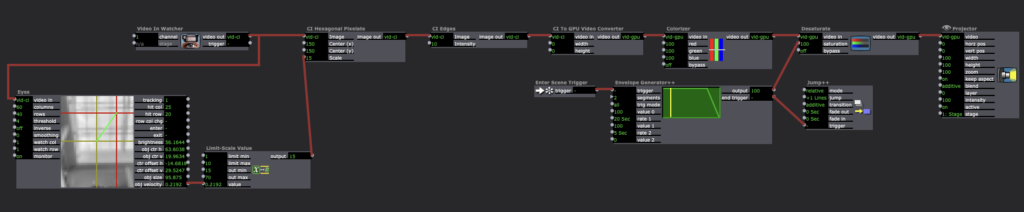
I was also inspired by Csuri’s “Sine Curve Man” and hummingbird drawing, so I wanted to include something that had a feeling of drawing to it. I stumbled upon the Live Drawing actor in Isadora, and figured out how to attach it to a user and have it draw along with their movement. Patch below:
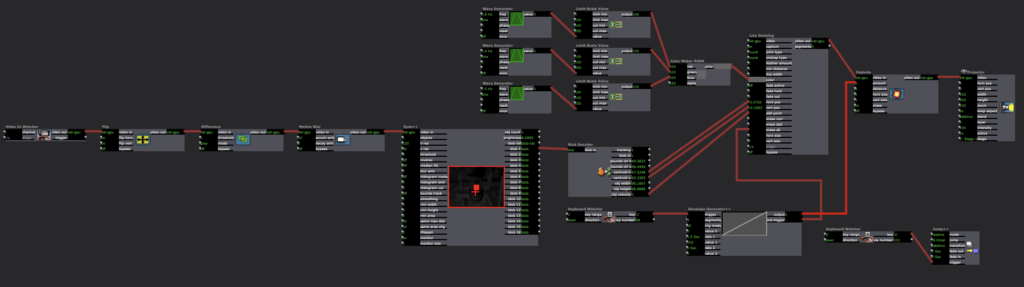
The Eyes++ actor connects the position of the blob’s centroid to the position of the “cursor” in the Live Drawing actor. In order to erase, I connected a Keyboard Watcher to the Explode actor, so the drawing would seemingly erase into small particles whenever the user pressed the ‘c’ key.
As soon as I made this, I got the feeling it was like an etch-a-sketch, a kid’s toy where the user “draws” with two knobs and shakes the board to erase it. This vision gave me a much clearer image of my project as a whole, as I now saw it as a celebration of play and youthfulness. I spent a long time testing the etch-a-sketch scene to make sure the tracking was smooth enough to use intuitively. However, after testing for a long time, I realized I should include instructions as this would be shown both in class and in a gallery-style open house.
Knowing the details of the performance context gave me a new perspective with which to instruct the user. I decided to make them quick and to the point, just instructing them to press certain keyboard buttons to prompt an erase, for instance. I also set a user-controlled loop on the entire project, so it doesn’t require extra setup if a new user wants to start the experience over for themselves.
The Performance
I was very pleased with the outcome of this performance, but still glad we get a chance to iterate on it in preparation for the open house; there were many moments in which I realized new possibilities for “bugs” in the program when watching others test it. When creating the project, I was so used to testing it myself that there were certain user-interaction possibilities I overlooked. For instance, one of the scene changes triggers based on the speed of the user’s movement. After about five seconds, the program prompts them to wave quickly, which should trigger the next scene. However, this scene got skipped in the first run in class because Arvcuken (who did a great job of demonstrating the program) entered the scene while moving.
It was fascinating to see the class’ reactions to the project, especially the interaction aspect. I had a great time watching Arvcuken interact with the program; it gave a lot of new insight as to how someone new to the patch would experience it.
Hearing feedback was especially helpful. I appreciated CG’s comment on the aesthetic of the colors I used. Most times colors were involved, I had the Colorizer actor on three different Wave Generators: one for red, blue, and green respectively. This changed the colors somewhat randomly throughout the scenes. I added this aspect after I discovered the playfulness of the entire piece. The program encouraged discovery through movement, which is essential to childhood. I wanted to bring up those feelings of playfulness and discovery in the user by inserting bright colors to the scenes.
I also appreciated Amy’s comment about the playfulness of the etch-a-sketch scene. Her interpretation of the piece bringing up childhood memories was almost exactly my intention, and I was overjoyed that it actually came through for someone in the experience.
Niko made a good point about the instructions being helpful as a framing device from an accessibility standpoint. This was a new perspective that I hadn’t considered while inputting the instructions, but I greatly valued that as feedback. I originally intended the instructions to provide context and guidance for any user, but knowing that it’s helpful for accessibility is great information to have. Having a range of users in mind while iterating is essential to the RSVP cycle, so it was a welcome reminder of audience awareness.
Overall, I valued the experience of creating and receiving feedback on this project. Seeing people actually interact and “play along” with something I create was new to me, but a very welcome experience. I definitely know how I’m going to iterate on this for PP3, and I look forward to get to work on it more after testing it with users.
Reflection on PP2
Posted: October 8, 2023 Filed under: Uncategorized Leave a comment »The final piece for this project became a spiral color transition interacting with viewers’ motion.
But originally, I started from shapes floating in a monitor along with motion. By using x, y coordinates or speeds of blobs on Eye actor, I tried to make transformations happening on a screen which are generated by a computational process; this idea came from Charles Csuri’s Hummingbird (1967).
This piece could be the final output, but I found Get Stage Image actor can multiply transforming images on screens. I make a spiral structure which creates “echoes” of image transition by spinning the projector.
It totally changed the visual of my original plan, but I was satisfied that this structure created the relationship with the “past” actions which has just done a second before; a more time-transitional motion.
Sound Reactivity Lab Activity
Posted: October 2, 2023 Filed under: Uncategorized Leave a comment »My sound clip was the main theme from the 2010 film The Social Network, as I love the contrast present in the piece. I tried to roughly mimic that with the main scene I worked on in class. I spent some time on other scenes as well, but I ended up liking my first try the best. I tried to make a symmetrical representation of the sound by using the frequency bands actor. I connected different rectangles’ heights to this actor in order to replicate audio “sound bars.”
Above is a clip of the output. I’ve also attached a zip file of the whole project below which includes the two other scenes I played with.
Sound Reactivity LAB
Posted: September 26, 2023 Filed under: Uncategorized Leave a comment »In this sound reactivity patch made with Lexi, I animated three orbiting circles to music. The movement of each circle is generated by Sound Frequency Bands which through using a combination of Smoother, Limit-Scale Value and Color Maker RGBA. The movement idea came from using Spinner and Wave Generator, which is finally filtered through Motion Blur at the end. I really like the way the movement reacts to the beat by jumping in and out of orbit in a symmetrical way.
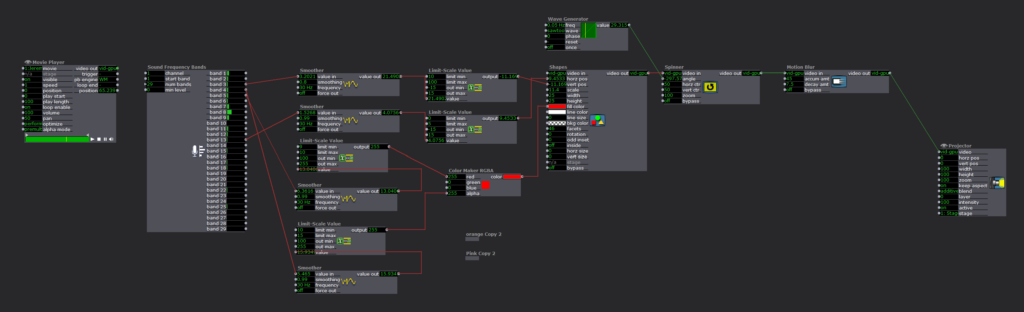
My biggest takeaway putting this together was actually the usefulness of the Limit-Scale Value. I also realized I was not clear on what limit min/max vs. out min/max meant and Lexi helped me to understand.
IZZ feeding sound practice
Posted: September 26, 2023 Filed under: Uncategorized Leave a comment »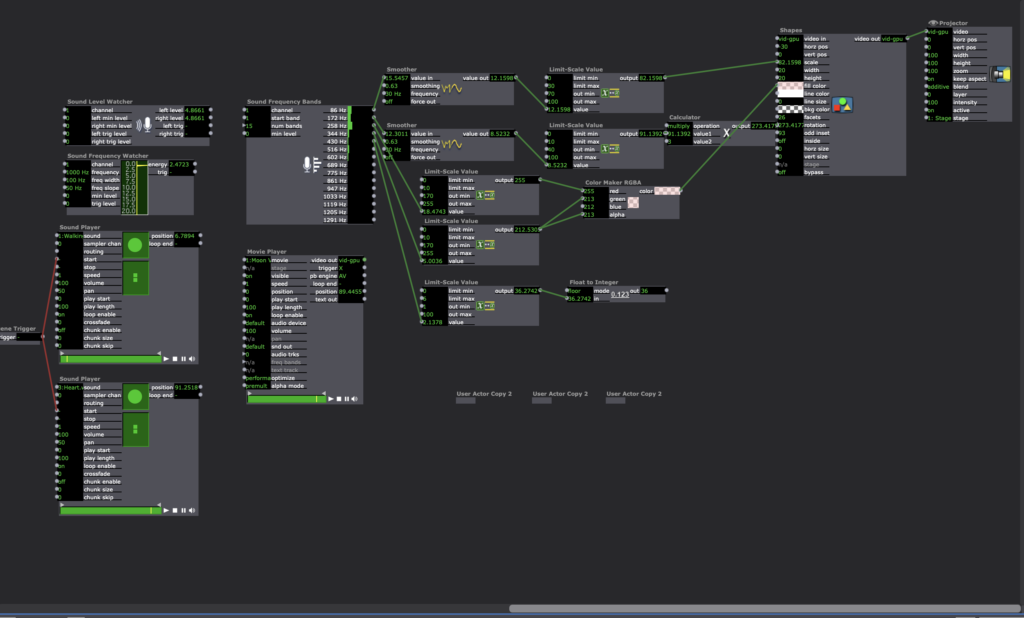
In this practice, I fed into isadora sound files of my own humming, the sound of my heart beat and footsteps. The raw numbers from the sound frequency actors were manipulated through the limit scale, calculator and smoother actors, before being plugged into the shapes actor, changing up the location, scale, rotation and color of the objects. I also used duplicated user actors to create multiples of the same moving object.
Audio Project
Posted: September 26, 2023 Filed under: Uncategorized Leave a comment »My goal for this short project was just simply playing with audio related actors.
I randomly picked up multiple values from Sound Frequency Bands actor, and connected them to many kinds of outputs such as shapes, positions, and colors transitions/transformations.
Even there was no order in those many connections between input and output values, the final video shows synchro with the music (of course, as inputs come from the music).
Especially, the intro part of Blue Train by John Coltrane clearly shows it (as it has the rhythm of the peak and the silence).
I really enjoyed the project, and got the sense of how I can deal with sound actors to use audio data as input or trigger.
Recent Comments