Cycle 3- One-Handed Ninjutsu
Posted: December 12, 2019 Filed under: Uncategorized 2 Comments »This project was inspired by an animated TV show that I used to watch in middle school; Naruto. In Naruto, the protagonists had special abilities that they could activate by making certain hand signals in quick succession. Example:

Almost all of the abilities in the show required the use of two hands. Unfortunately, The leap motion controller that I used for this project did not perform so well when 2 hands were in view and it would have been extremely difficult for it to distinguish between 2-handed signals. However, I feel that the leap motion was still the best tool for hand-tracking due to its impressive 60 frames per second hand tracking that was quite robust (with one hand) on the screen.
Some more inspirations:


I managed to program 6 different hand signals for the project:
Star, Fist, Stag, Trident, crescent, and uno
Star – All five fingers extended
Fist – No fingers extended (like a fist)
Uno – Index finger extended
Trident – Index, Middle, Ring extended
Crescent – Thumb and pinky extended
Stag – Index and pinky extended
The Jutsu that I programmed are as follows:
Fireball Jutsu – star, fist, trident, fist
Ice Storm Jutsu – uno, stag, fist, trident
Lightning Jutsu – stag, crescent, fist, star
Dark Jutsu – trident, fist, stag, uno
Poison Jutsu – uno, trident, crescent, star
The biggest challenges for this project was devising a robust-enough algorithm for the hand signals that would be efficient enough to not interfere with the program’s high frame rate.
And two: Animations and art. Until you start working on a game, I think people don’t realize the amount of work that goes into animating stuff and how laborious of a process it is. So, that was a big-time sink for me and if I had more time I definitely would have improved the animation quality.
Here it is in action: https://dems.asc.ohio-state.edu/wp-content/uploads/2019/12/IMG_8437.mov
Some pics:
You can find the source code here: https://github.com/Harmanjit759/ninjaGame
NOTE: You must have monogame, leap motion sdk, c++ 2011 redistributable installed on your machine to be able to test out the program.
Cycle 3 – Aaron Cochran
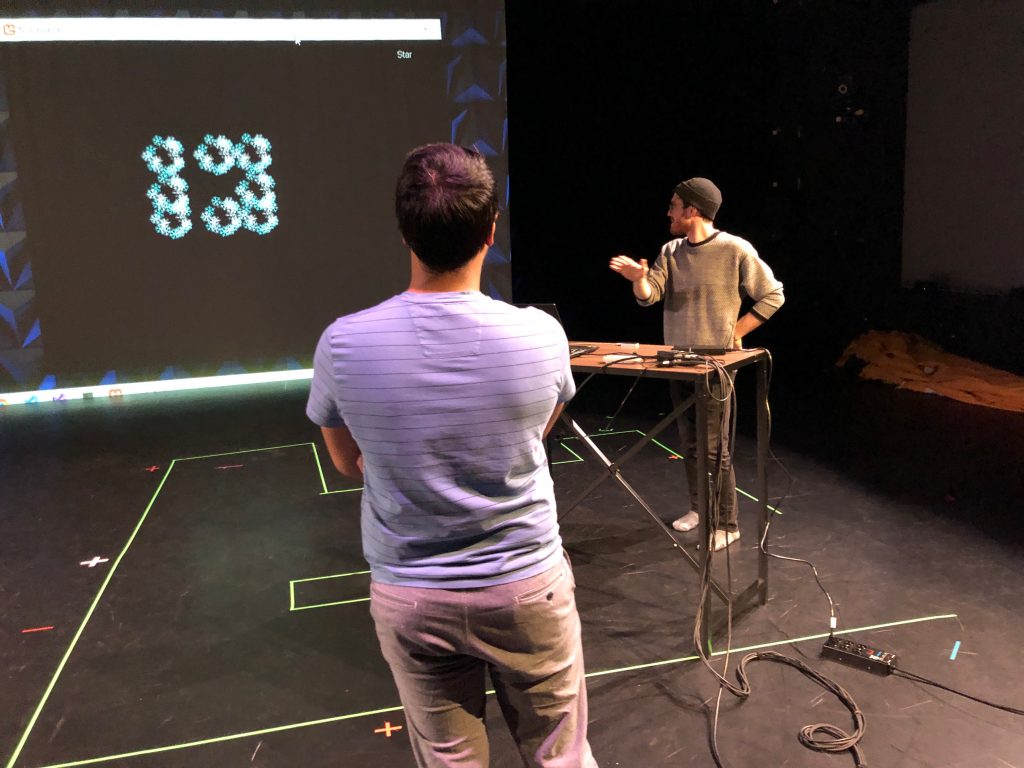
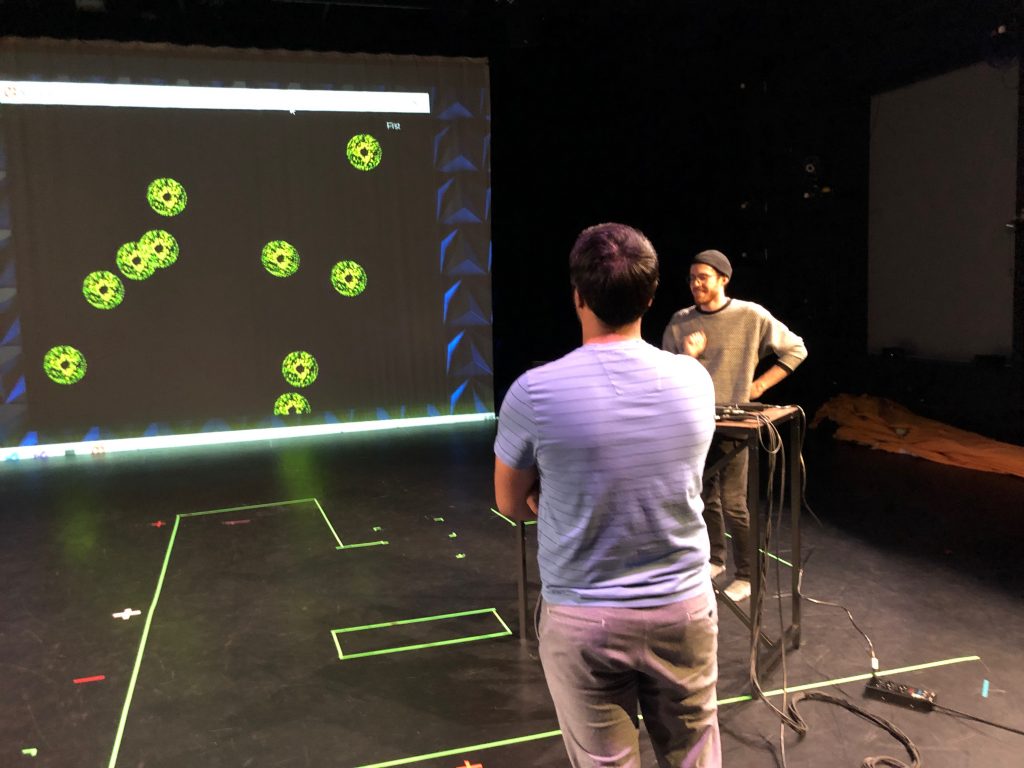
Posted: December 12, 2019 Filed under: Uncategorized Leave a comment »For my final project, I achieved blob detection and the response of projected mapping onto a grid.
As seen in the video below, I set out to create a prototype of a combination between the games checkers and minesweeper. Scott Swearingen often talks about the concepts of public and private information in gameplay. In the game of Poker for example, there is public information about how much you are bidding, while the players each have private information of what is in their hands and on the board. These factors influence decision making on the behalf of the players.
This prototype acts as a proof of concept for a game that uses projection mapping to have information that is “private information” that is held by the game that changes the strategy of players as a result. By combining checkers and minesweeper, a level of randomness was added that would disrupt strategy by random pieces being “blown up” by the game rather than “captured” by the players.
Cycle 2 – Aaron Cochran
Posted: December 12, 2019 Filed under: Uncategorized Leave a comment »By the time we arrived at Cycle 2, I had abandoned the library I was using to attempt projection mapping. I was able to develop Rudimentary Blob tracking—using tutorials from Dan Shiffman—with very limited interactivity.
The final deliverable I was able to bring is visible in the video below. The Kinect was able to detect a blob and determine whether it was in the top or bottom of the screen. No projection was involved in this stage.
Cycle 1 – Aaron Cochran
Posted: December 12, 2019 Filed under: Uncategorized Leave a comment »In Cycle 1, I tried to connect the Kinect 2 and Processing to create a successful trackable Projection Mapping setup. I was able to successfully sync the Kinect and projector according to the library I was using but I didn’t know how to use data.
Pressure Project 3: Thumbnail Generator
Posted: December 12, 2019 Filed under: Uncategorized Leave a comment »Resources
I wanted to complete a project using primarily p5.js and/or Processing to refresh my knowledge on these skills and to work in an environment that felt more comfortable to me than Isadora. Little did I realize how little knowledge I had about connecting Processing to external interfaces.
Score
My goal was to create a system that you could enter one thumbnail drawing in and it would iterate over a series of iterations on that original drawing by manipulating width and height and skewing the bounding quadrilateral (i.e. reducing the width of the bottom while maintaining the width of the top).
Valuaction
In my first cycle, I followed a tutorial to take manipulate a single image into a grid of pictures.
In the second, I focused on modifying proportions between images.
Then I created two prototypes.
Performance
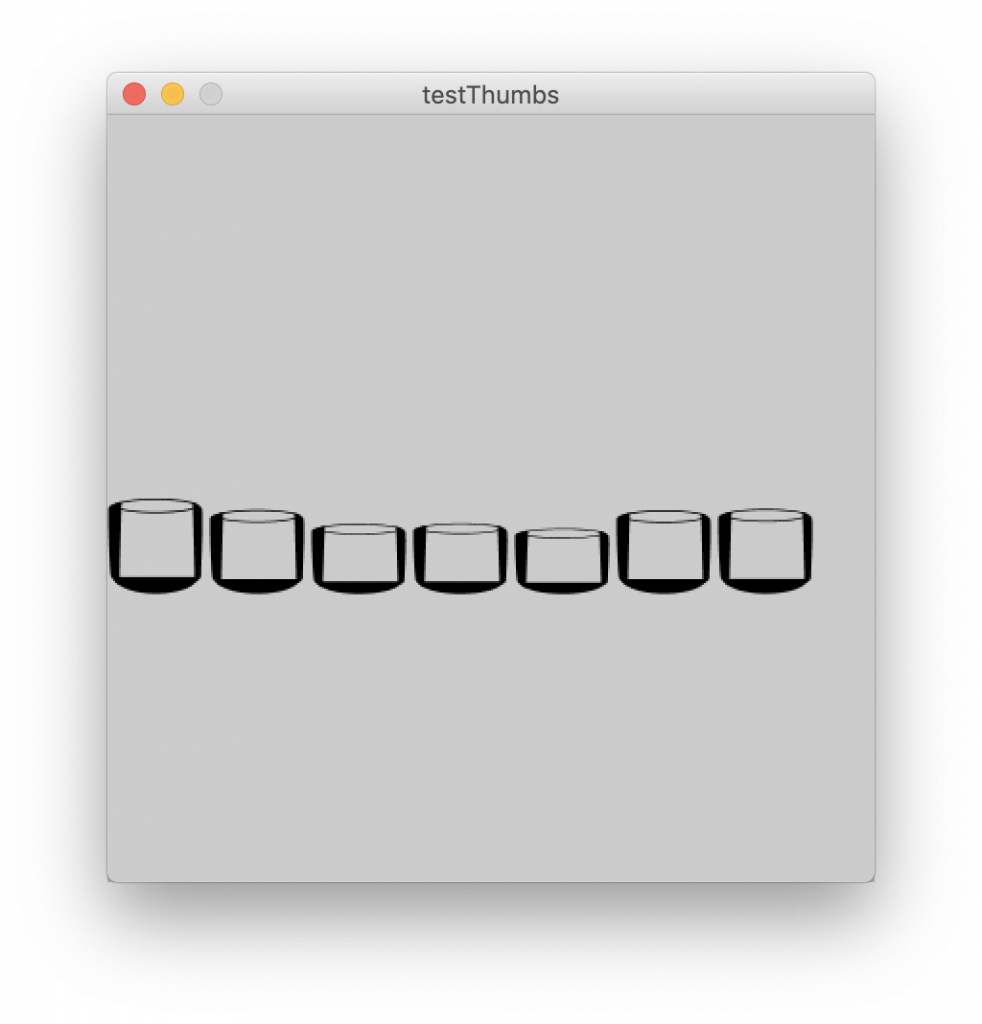
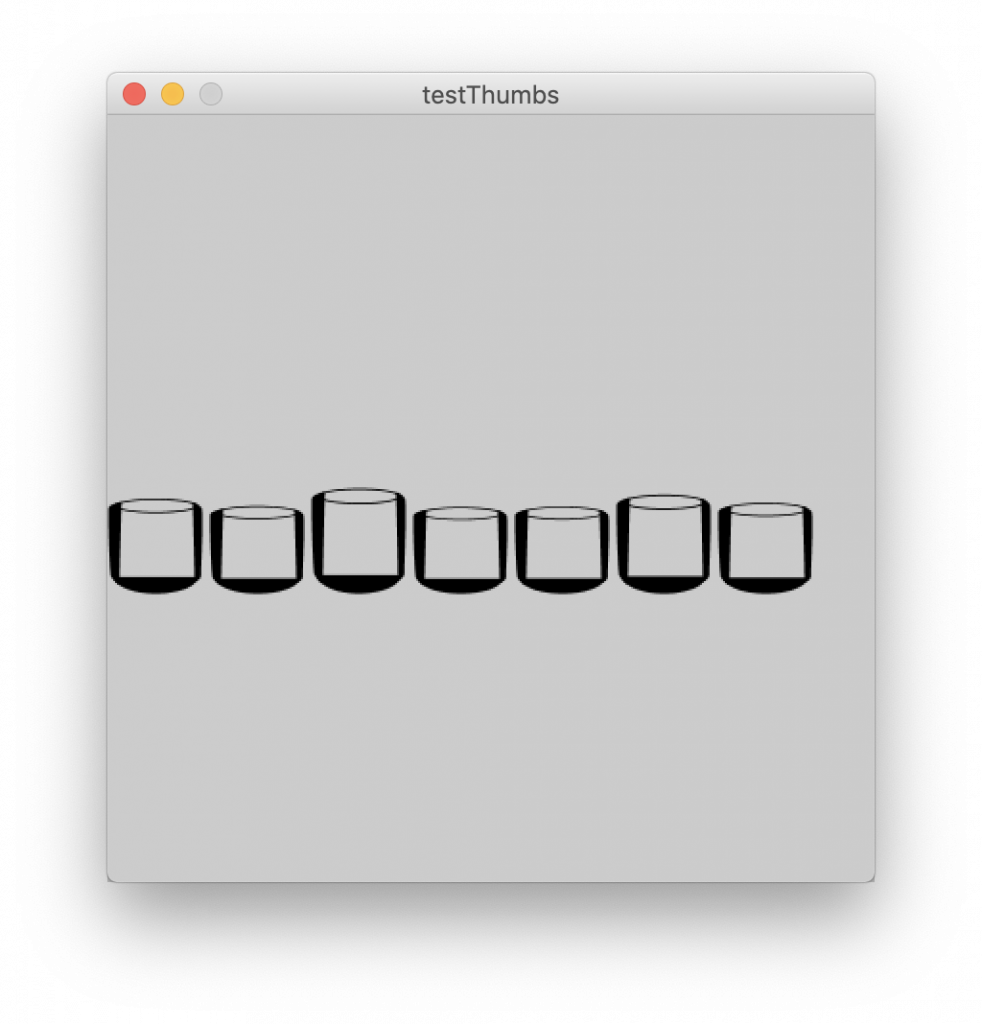
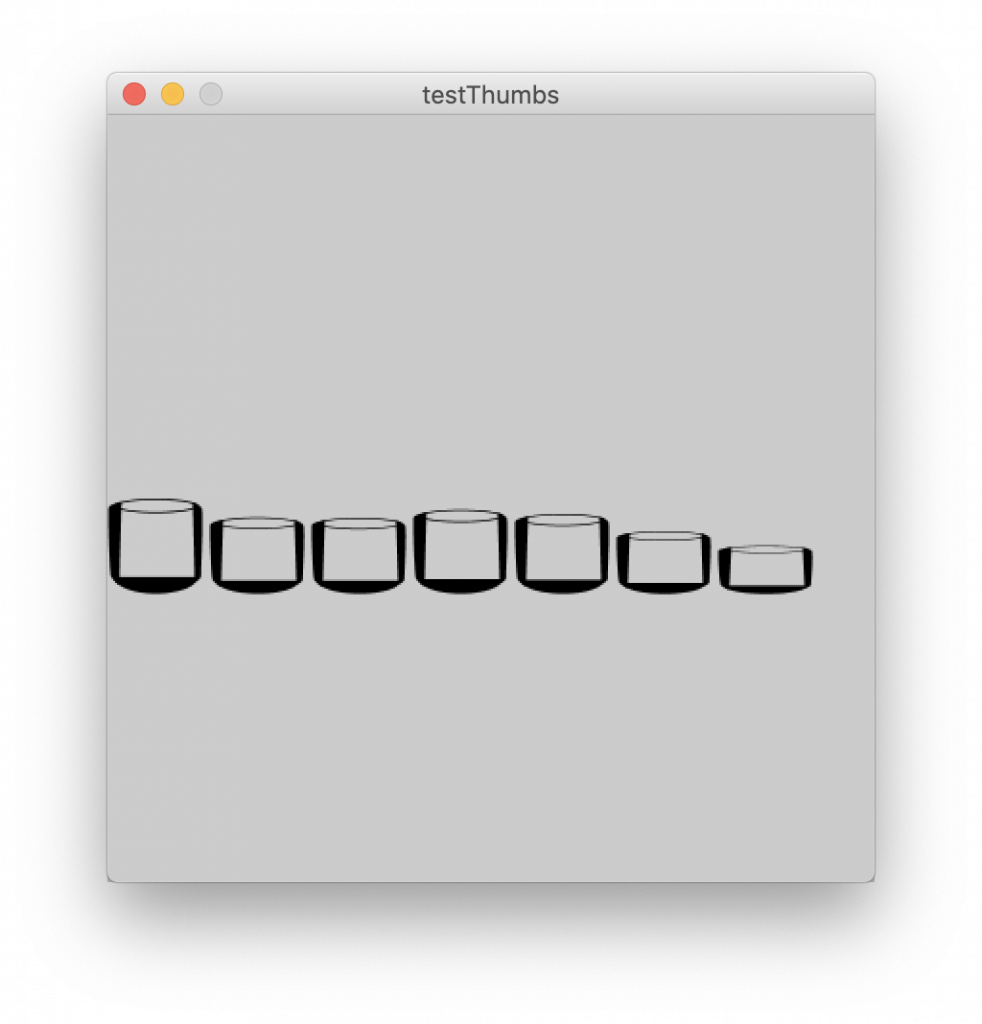
In the end I created 3 Prototypes. testThumbs created a row of cylinders with a variable of their height::width proportion changed.
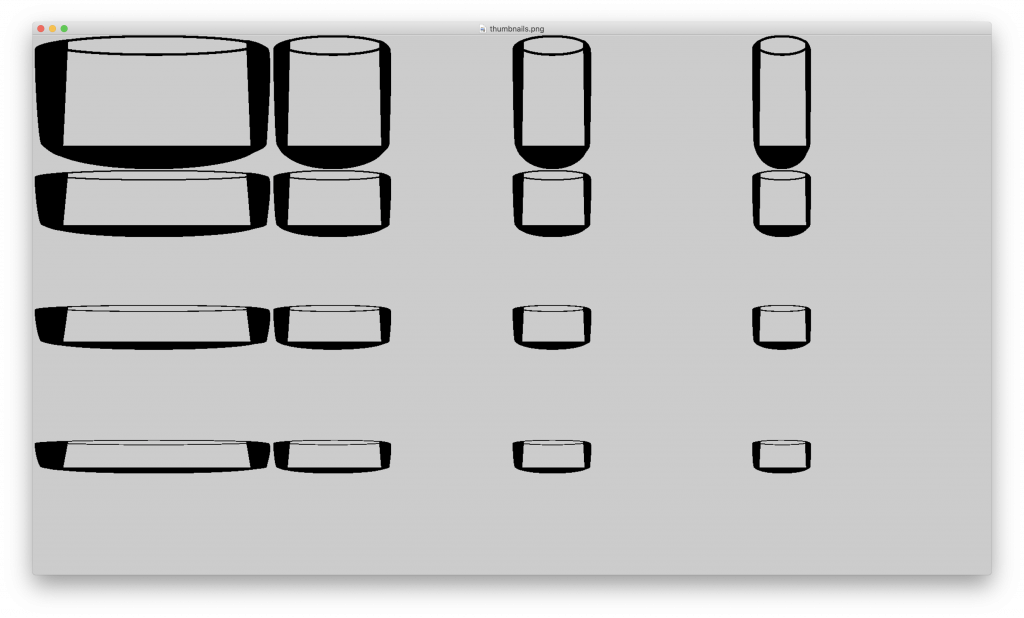
thumbnails.pde created a sequential grid with no randomization.
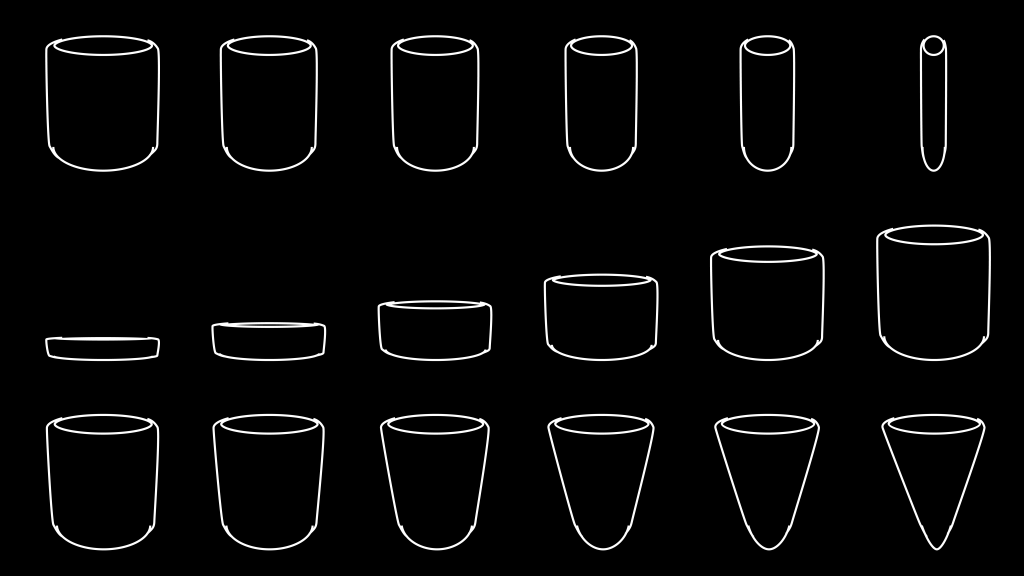
My final prototype was made in Illustrator to exemplify what I hoped for in the end.
Cycle 3! – Thank a Black Woman
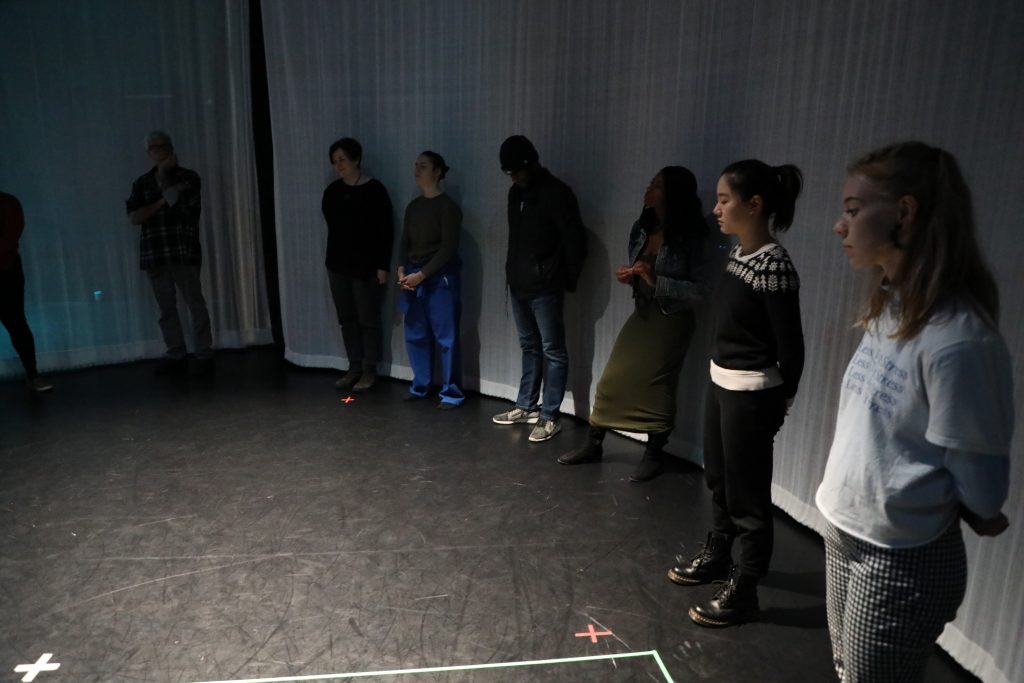
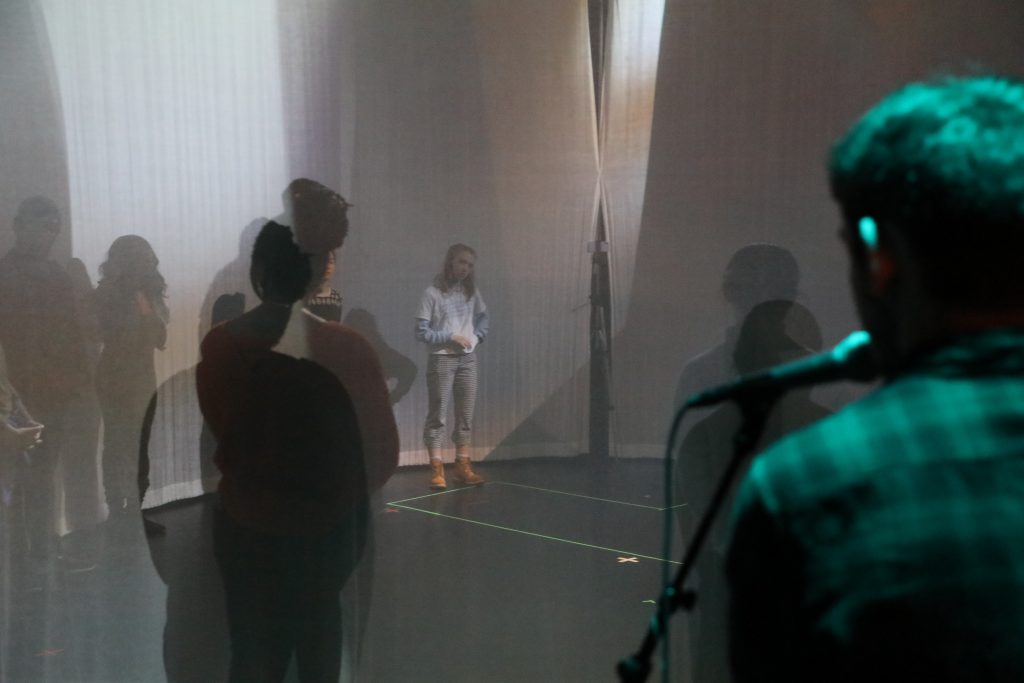
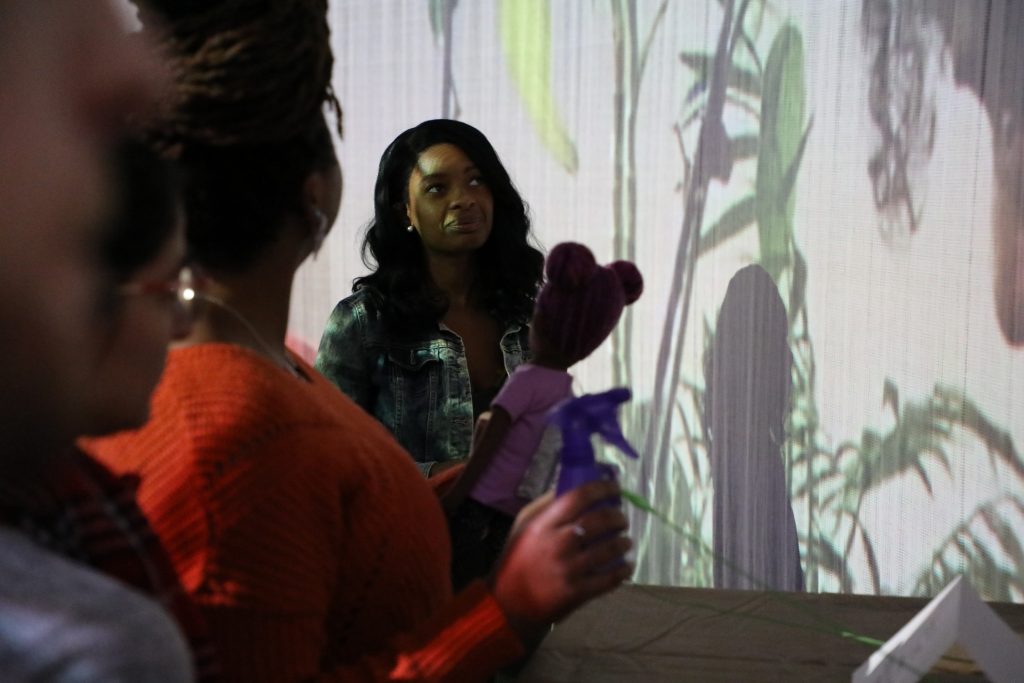
Posted: December 12, 2019 Filed under: Kylee Smith | Tags: Black women, dance, family, hair, installation, intermedia, spirit, thank you Leave a comment »The last round of this project was very fulfilling. I was so happy to be able to share my work with some new faces and for it to continue to be received so well by my classmates. The feedback that I got afterwards was incredibly affirming–it was a valuable and meaningful experience for my participants. Everything didn’t go perfect (I forgot to press record the first time around, whoops lol), but I decided to just go with it, and not be frantic about it. I would love another opportunity to dig the work just a little bit more because I feel that there is still more there to excavate.
This class, and this project in particular, has been inspiring in my personal research practice, and I am looking for ways to deepen these kinds of intermedia installation explorations and how they might inform the way I am crafting my MFA thesis.
I am extremely grateful for this experience. Thank you Oded and Alex for being tremendous supporters of a work that wasn’t about you. That doesn’t happen often.
Go tell a Black woman thank you. We deserve to be celebrated.
I will leave you with some images from my last exhibition.
The participants listen back to the thank you’s 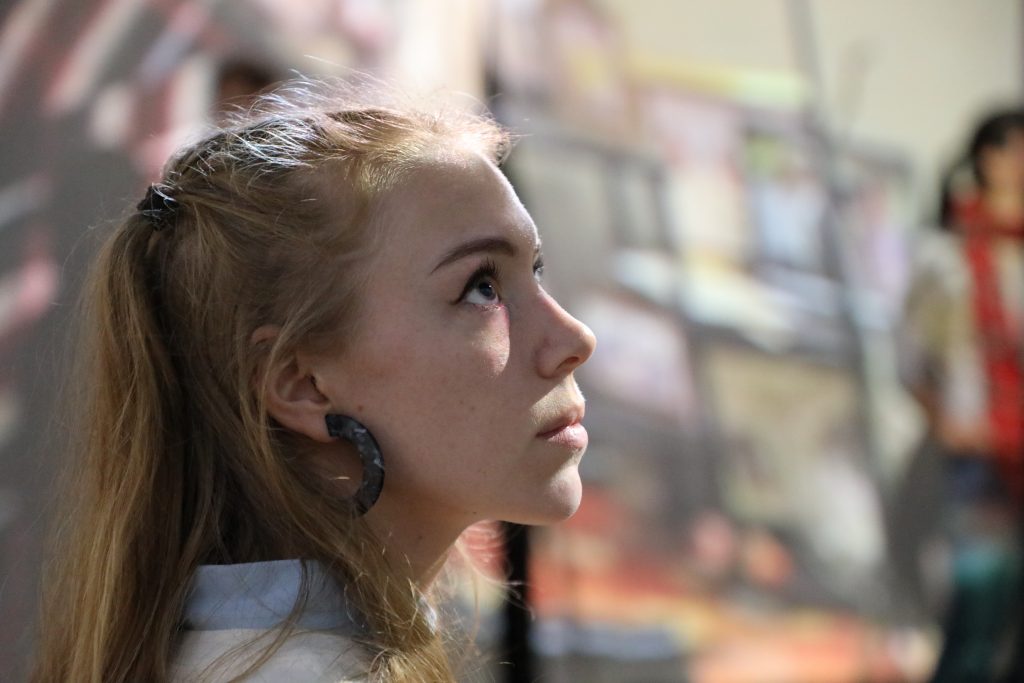

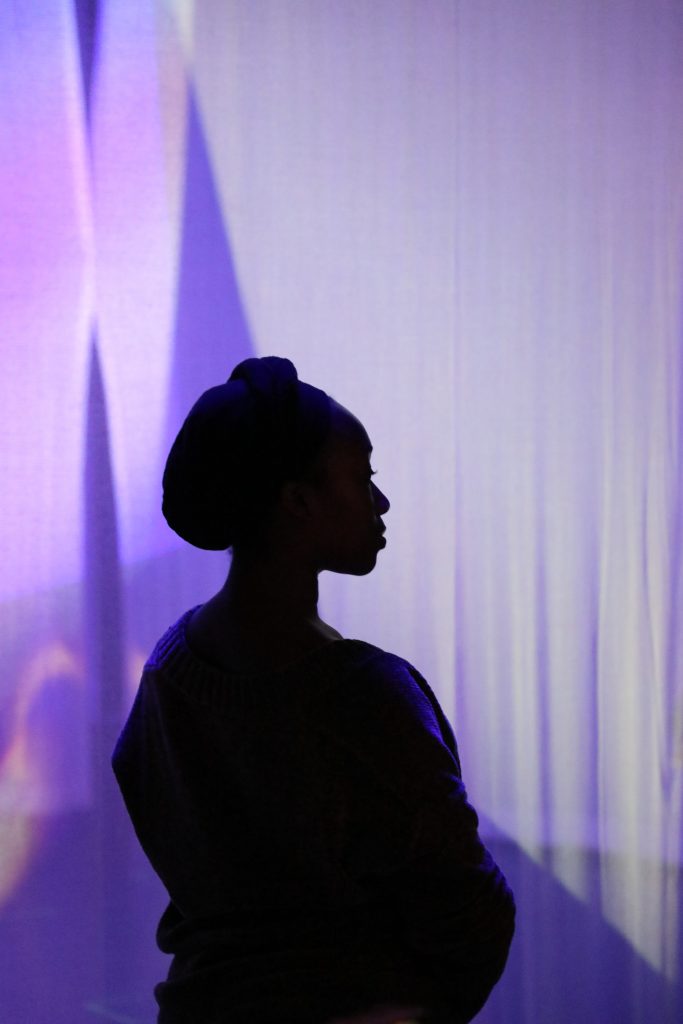
The Black woman behind it all, me — Kylee C. Smith
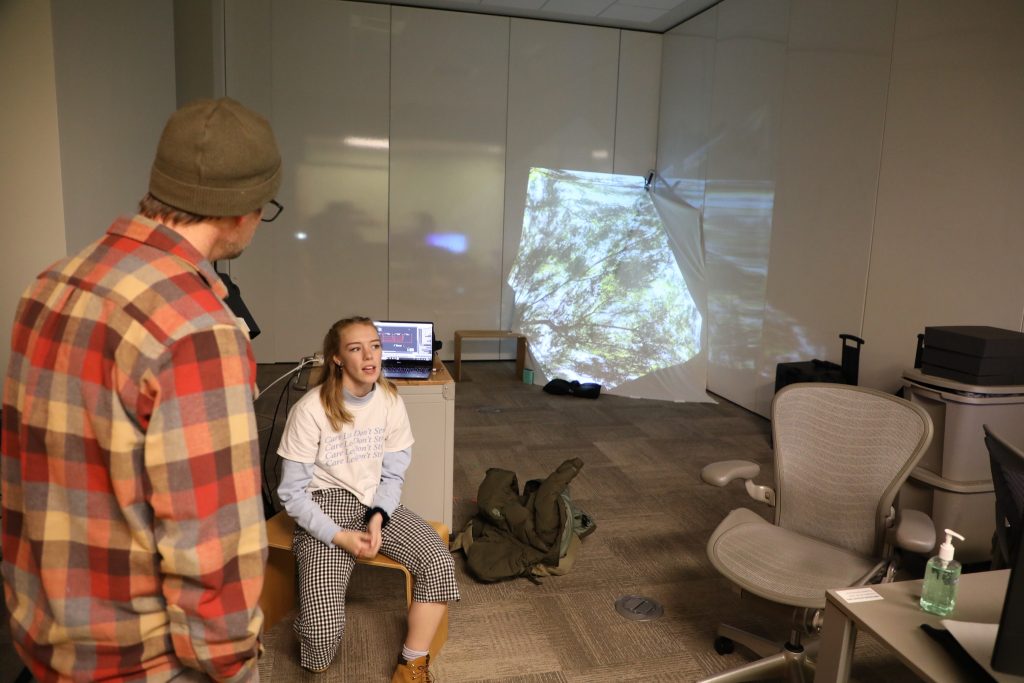
Final Showing-Design your own Relaxation Environment
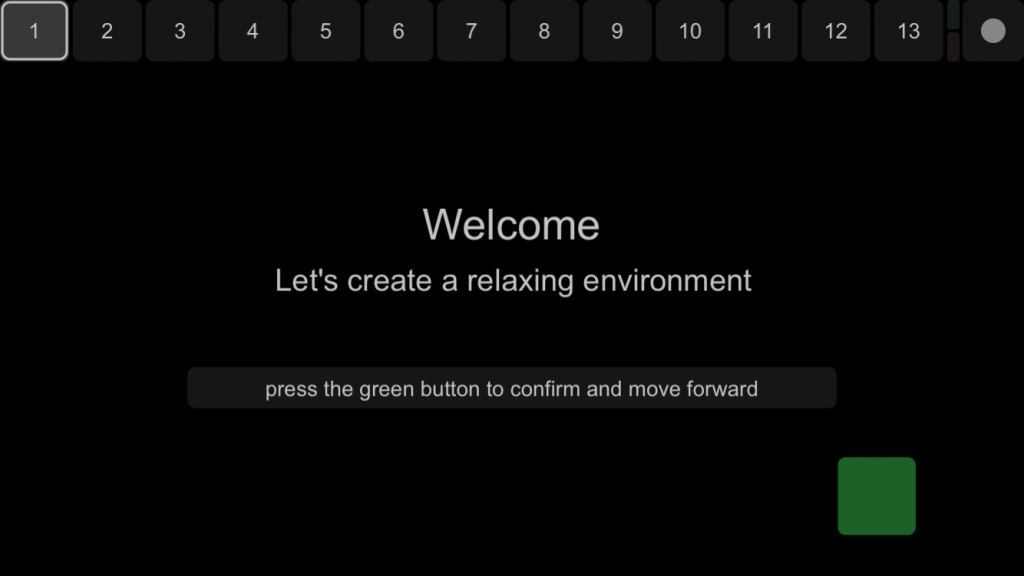
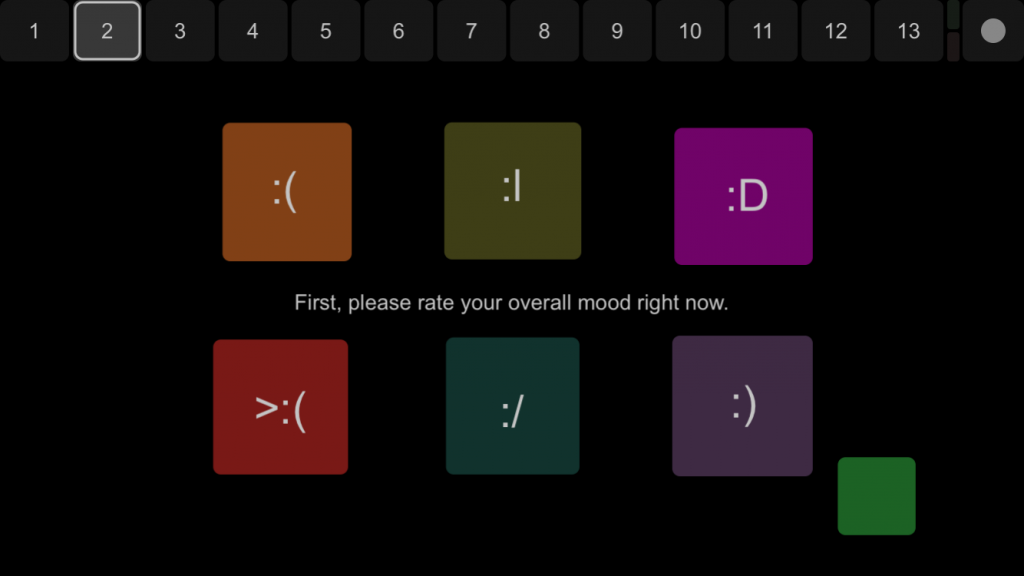
Posted: December 11, 2019 Filed under: Uncategorized Leave a comment »I constructed an individual create your own relaxation environment in which one participant at a time could choose from given music genres, background scenes, and background sounds on a Touch OSC interface I designed before entering into a short guided meditation. My goal was to provide a place of escape for students or faculty on campus from the stresses of college, work, life, etc by guiding them through a calming meditation. I wanted the experience to feel safe, cozy, but most of all personal, which reasons why I wanted the participant to make choices about the vibe of their relaxation environment.
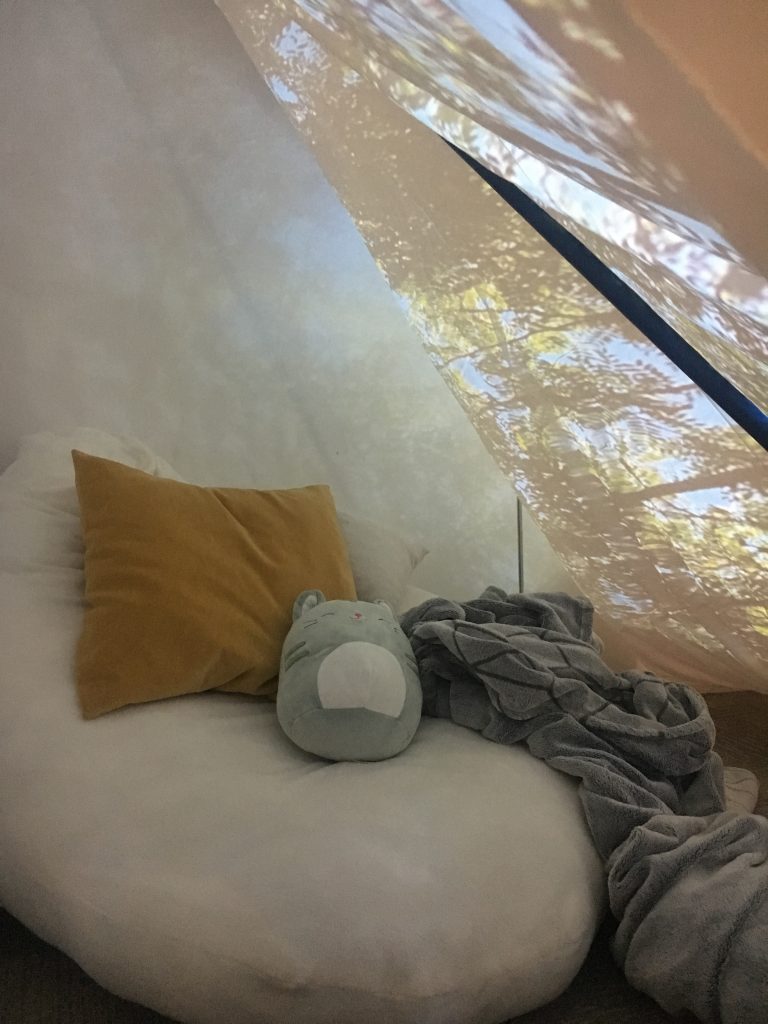
Super comfy!

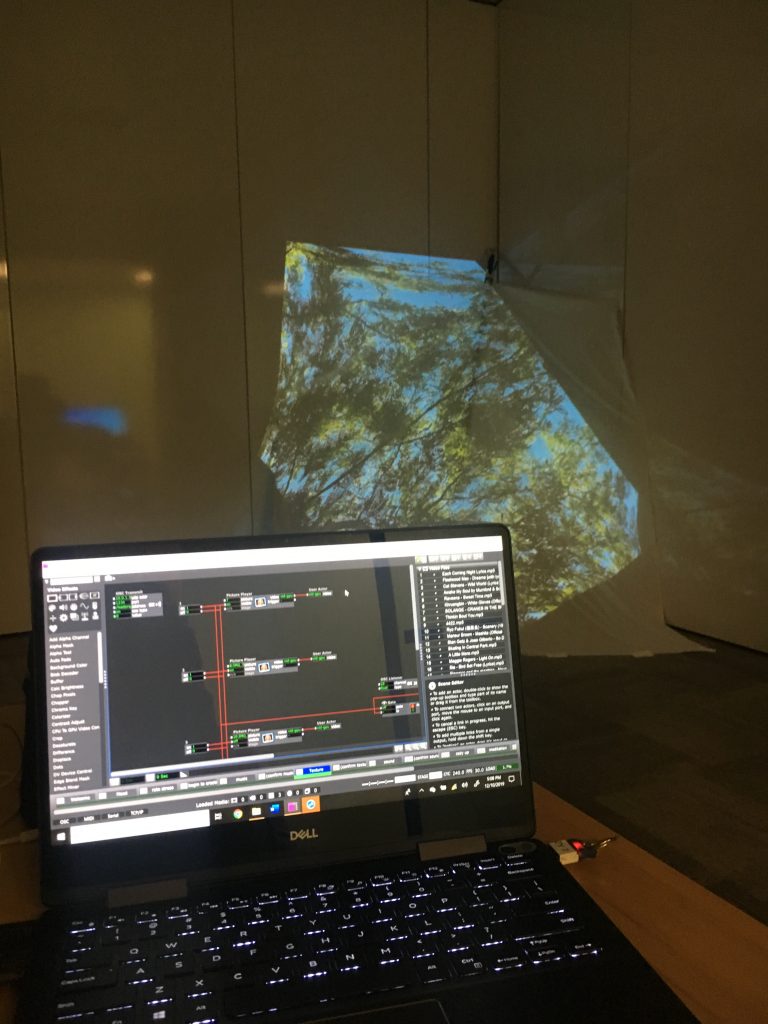
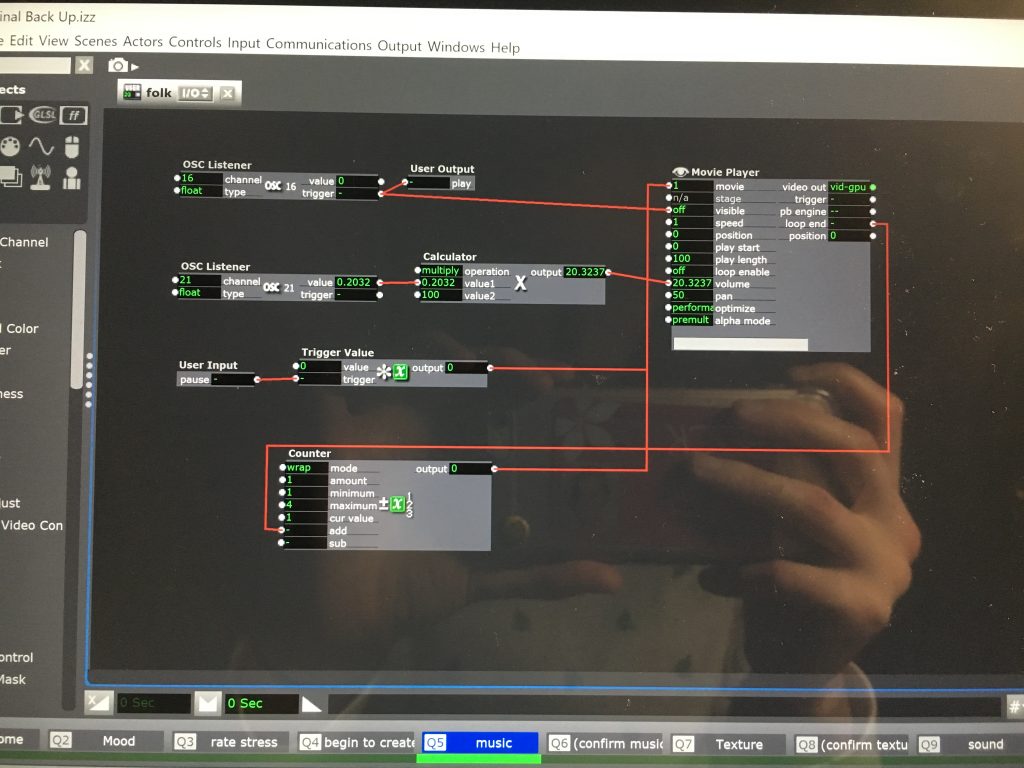
Inside the tent, participants would interact using an iPod touch, following a program I created using Touch OSC. This simplified their choice making by only giving them a few buttons and having them decide on their favorite of the few.

However, while my interface looks simple, my Isadora program is much more complex.
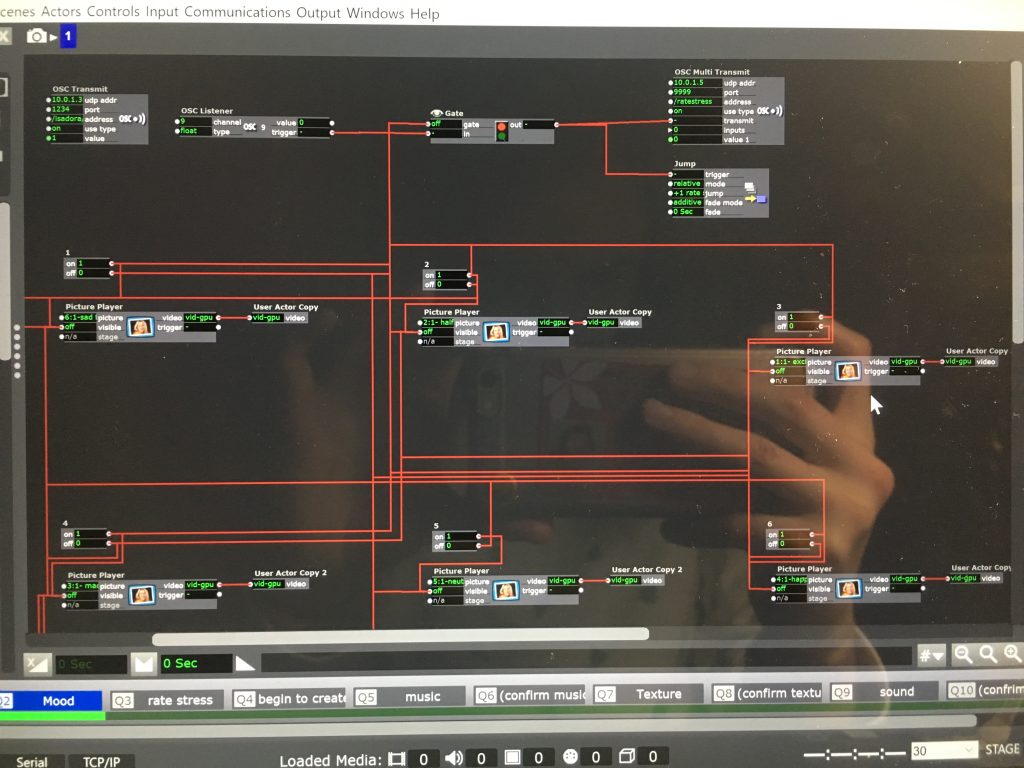
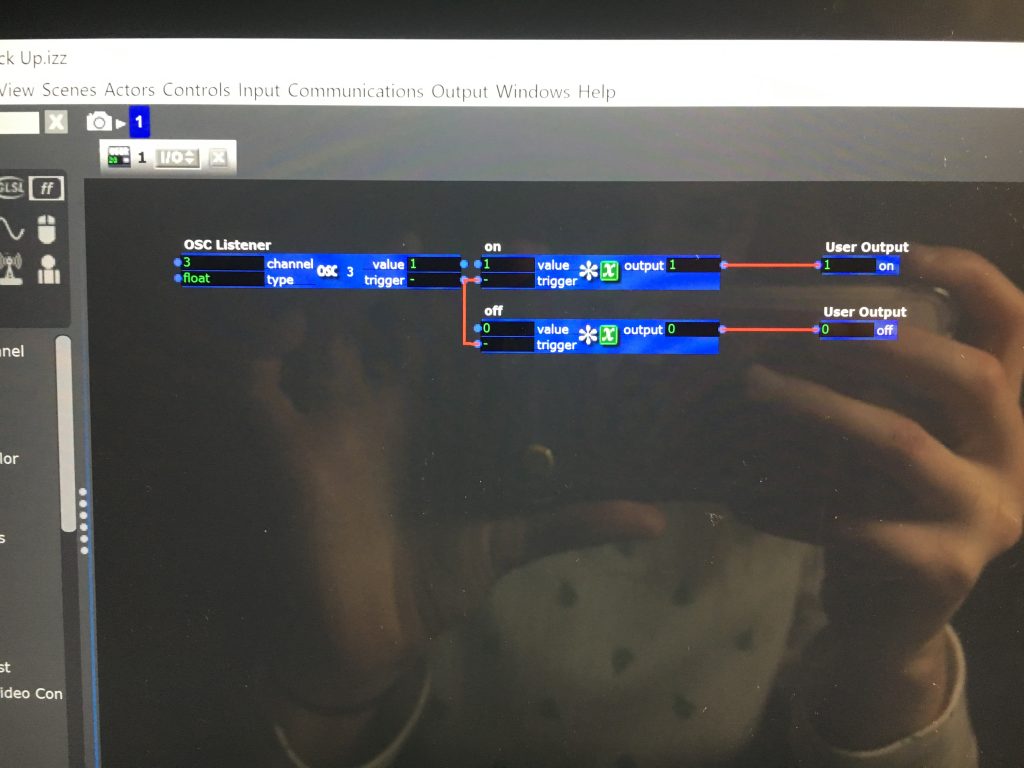
The trickiest aspect about working with Touch OSC and Isadora is actually allowing Isadora to send messages back to Touch OSC. I didn’t want the participant to do any work other than make choices about their relaxation environment. That means, in order for their interface to progress automatically to the next page, I needed Isadora to send it a message to move on. Alex and I worked on this extensively, but eventually resolved this by using the actor ‘OSC Multi Transmit’ and ensuring the incoming port number on OSC matches the port on that actor. In this case I used 9999 seen on the left image in the top right corner. (Also refer to my Cycle 2 post for more on problem solving this task!)
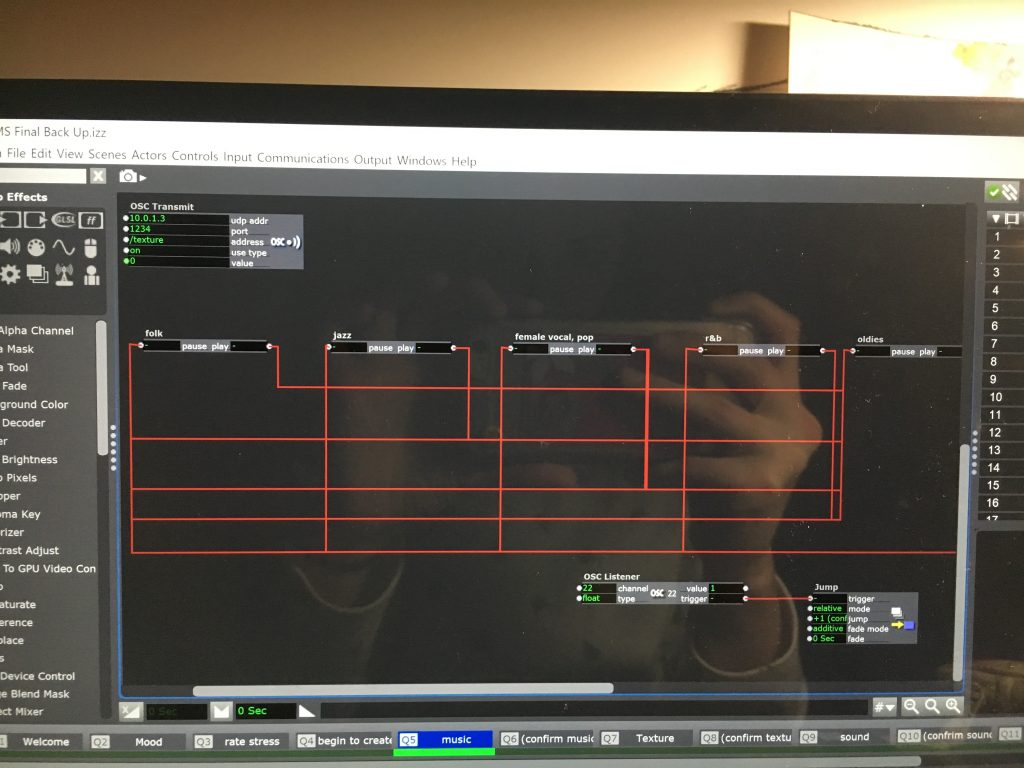
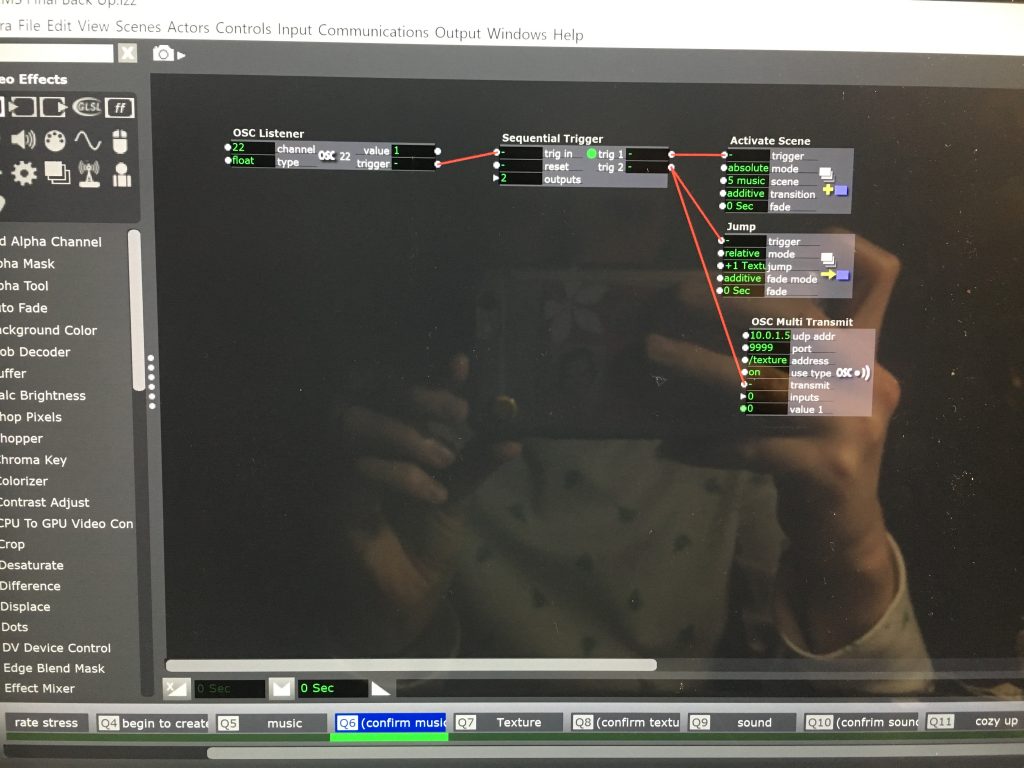
To fix this I inserted a ‘confirm’ scene following each choice scene which included the “Activate Scene” actor. When triggering the Activate Scene actor, the designated scene (in this case music scene) would reactivate and allow multiple scenes to play at once. This way I could have music and background sounds play while having a projection up and run the meditation track all at the same time.
Overall, most of my participants gave positive feedback and encouraged me to further this idea by creating a more established relaxation environment somewhere on campus. I felt my final showing for DEMS was a very successful prototype. I think that my program could become more robust by running it on a machine with a better processor. My personal laptop crashed multiple times while running the program and disrupted some participants mid-mediation.
I think I would be interested in establishing this idea some place on campus because it truly promotes positive well being. Especially being in such a stressful environment, taking care of one’s mental and emotional state in crucial. This program would teach people that it’s okay to need a break sometimes, so why not break in a place you can personalize?!
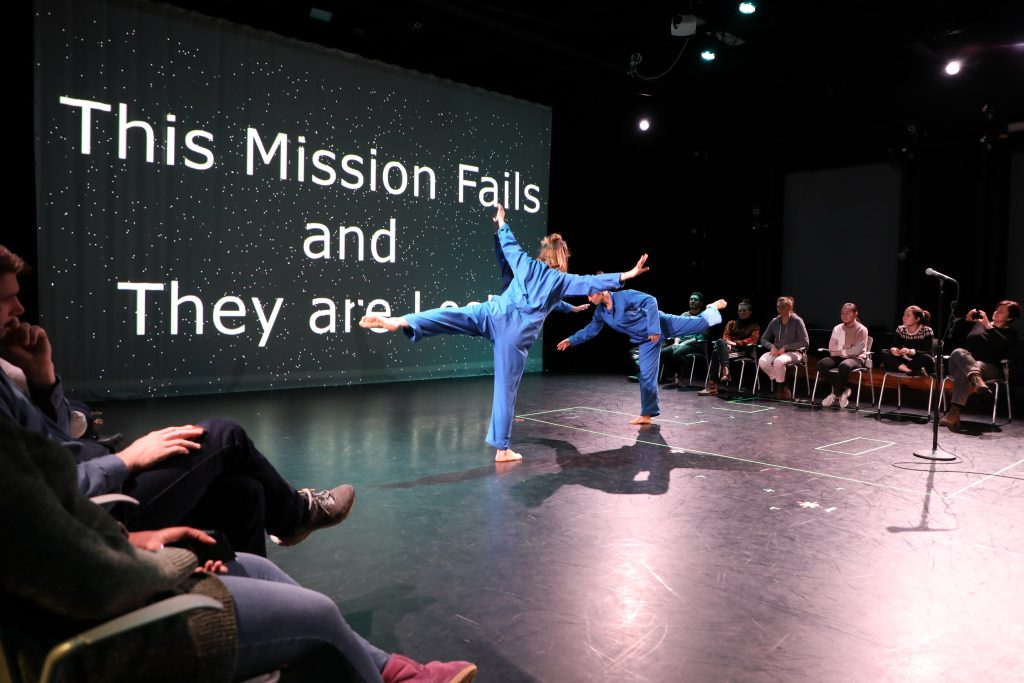
Final Mission: three travelers
Posted: December 11, 2019 Filed under: Emily Craver, Final Project | Tags: choose your own adventure, dance, Isadora Leave a comment »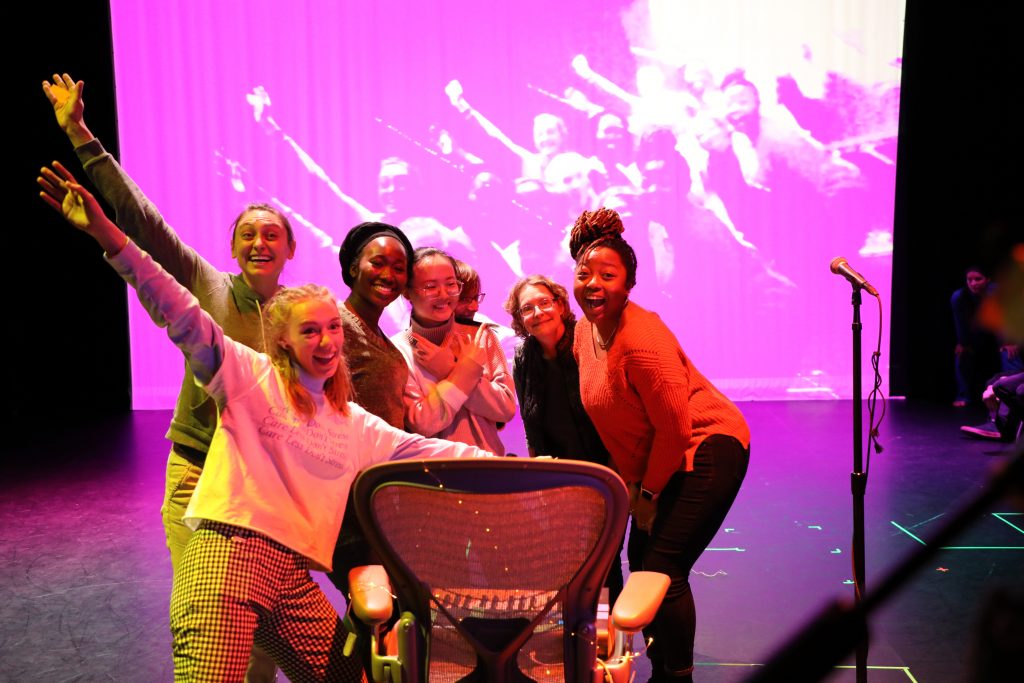
photo by Alex Oliszewski
During my Cycle 3 of Choose Your Own Adventure: Live Performance Edition, I explored how to allow for more timelines. I realized that the moments of failure for the audience provides excitement and raises the stakes of the performance. How to make a system that encourages and provides feedback for the volunteers while also challenging them?
I feel most creative and myself when creating pieces that play with stakes. I love dance and theatre that encourages heightened reactions to ridiculous situations. The roles of the three travelers started to sink in to me the more we rehearsed. They needed to be both helpless adventurers somewhere distant in time and space while also being all-knowing, somewhat questionably trustworthy narrator-like greek chorus assistants. Tara, Yildiz and I added cheering on the volunteers to blur those lines of where and who we are.
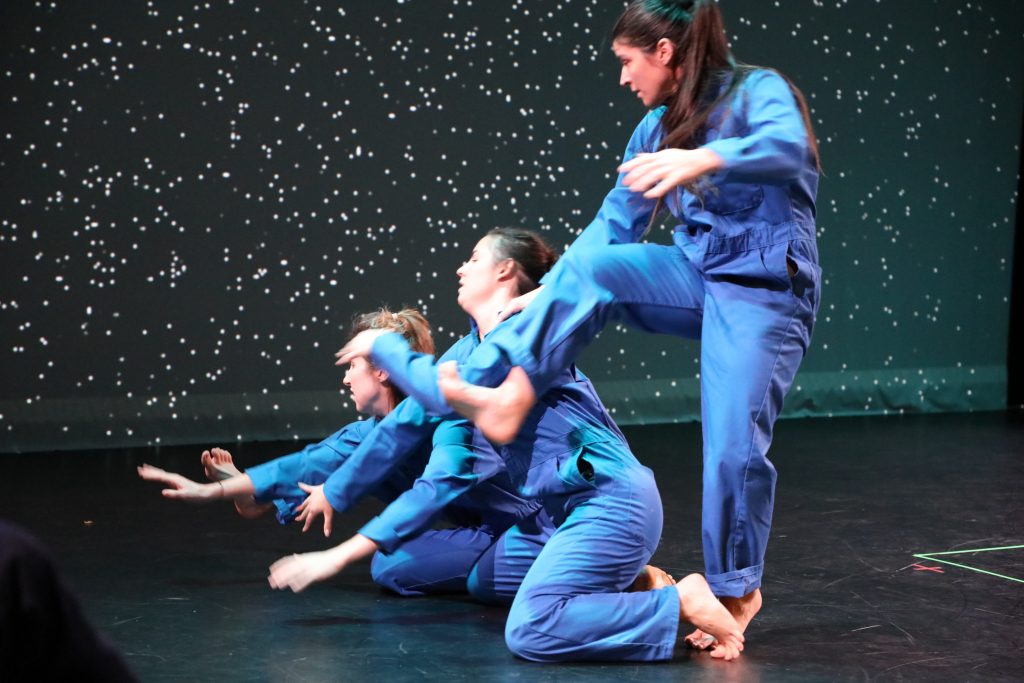
photo by Alex Oliszewski
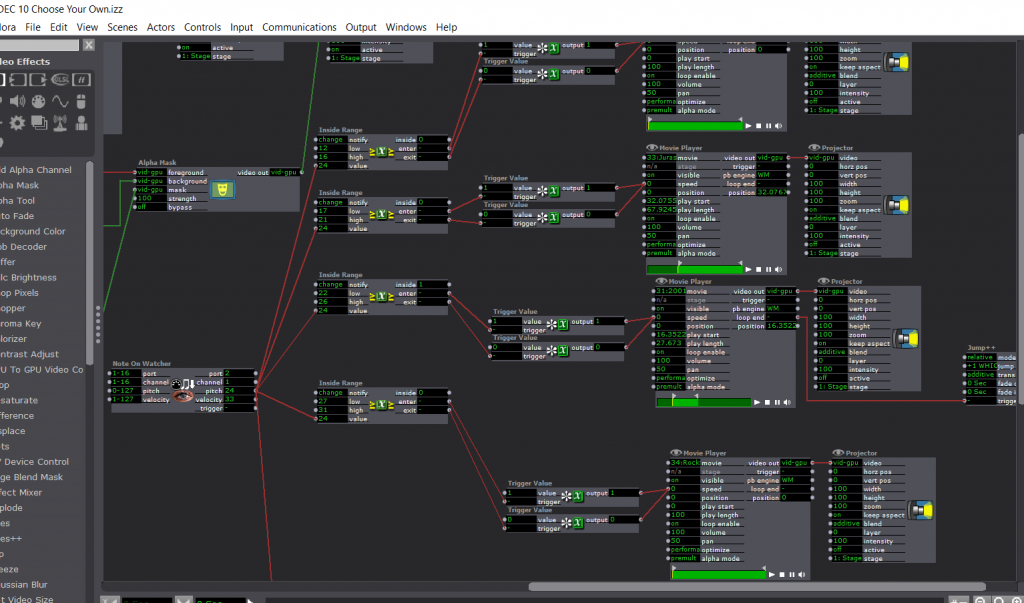
The new system for Choose Your Own Adventure included: MIDI keyboard as a controller, Live Webcam for a live feed of adventurers and photo capture of successes, FocusRite Audio hook-up for sound input and sound level watcher, GLSL shaders of all colors and shapes, and Send MIDI show control in order to trigger light cues.
The new system provided more direct signs of sound level watching and cues to the volunteers. The voice overs were louder and aided by flashing text reiterating what the audience should be doing. The three travelers became side coaches for the volunteers as well as self-aware performers trying to gain trust. I found myself fully comfortable with the way the volunteers were being taken care of and started to question and wonder about the audience who was observing all of this. How can an audience be let in while others are physically engaging with the material? I thought about perhaps close camera work of the decisions being made at the keyboard? Earlier suggestions (shout out to Alex Christmas who gave this suggestion) included an applause-o-meter to allow for the non-volunteers to have a say from their seats. A “Who Wants to be a Millionaire” style audience interaction comes to mind with options for volunteers to choose how to interact and have the audience come to their aid. What does giving audience a voice look like? How can it be both respectful, careful and challenging?
Dancing Club 3.0
Posted: December 11, 2019 Filed under: Uncategorized Leave a comment »

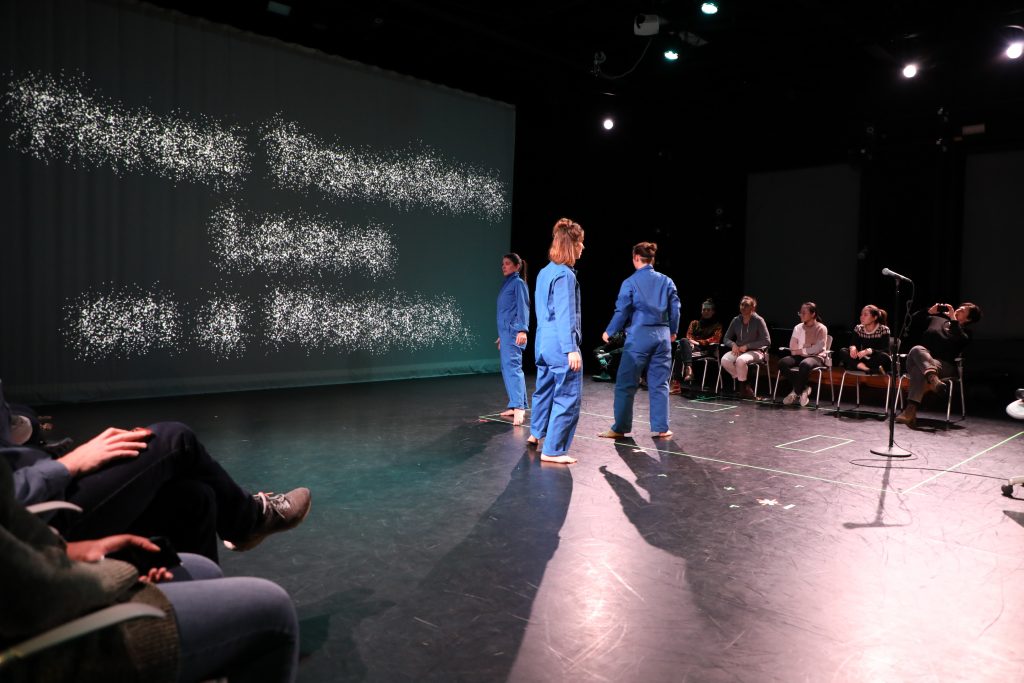
In this project, I explored the digital body and the actual body moving together.
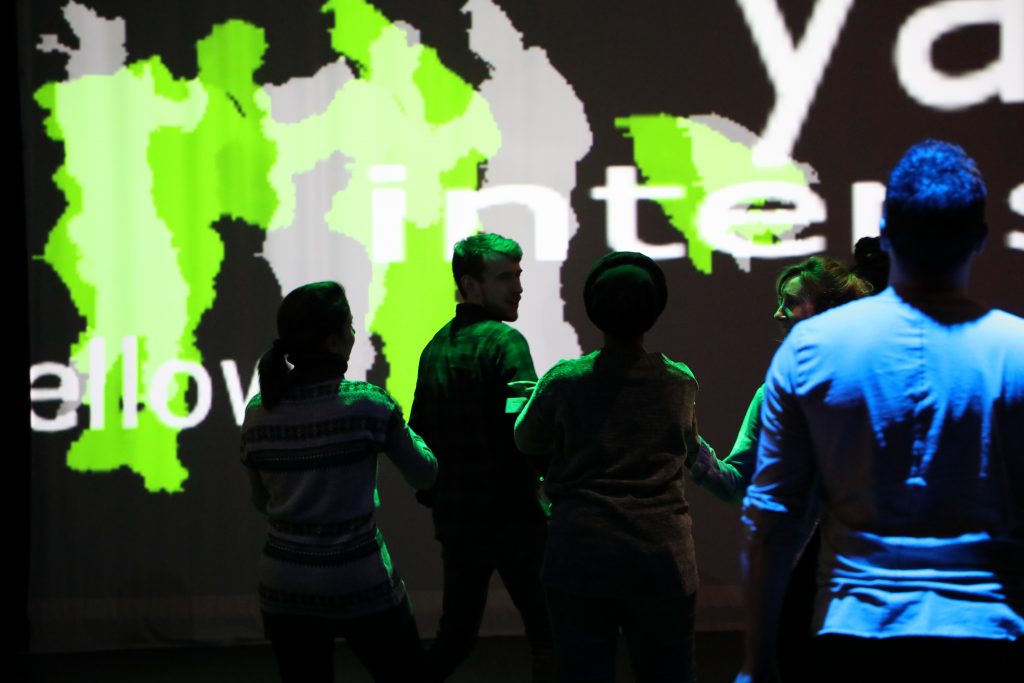
Scene 1: People came into space and saw the introduction. (Audio & Video)
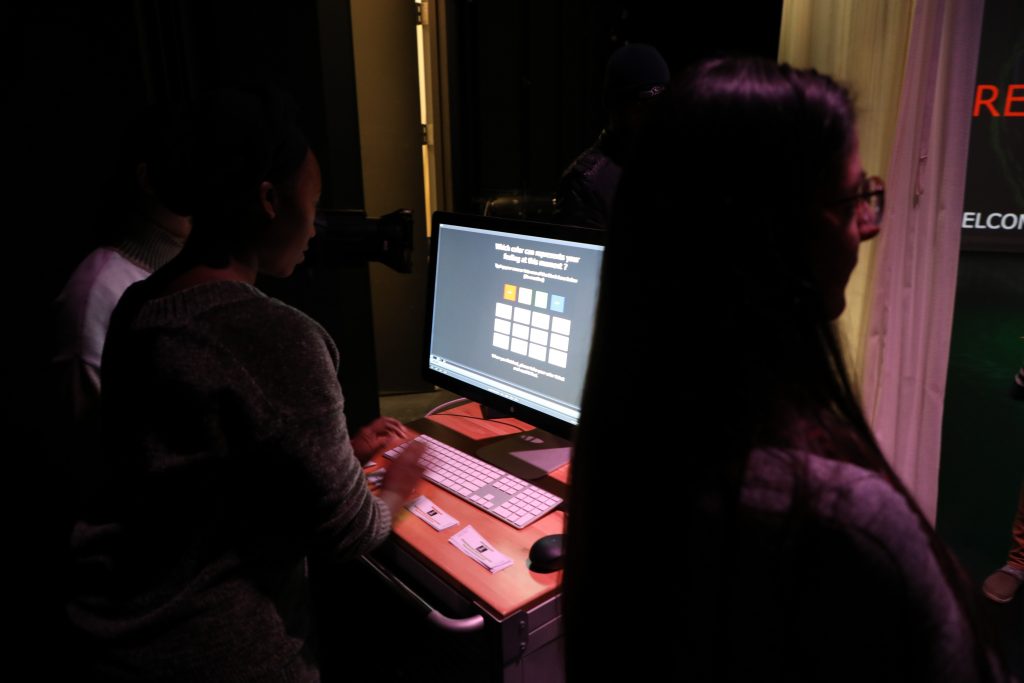
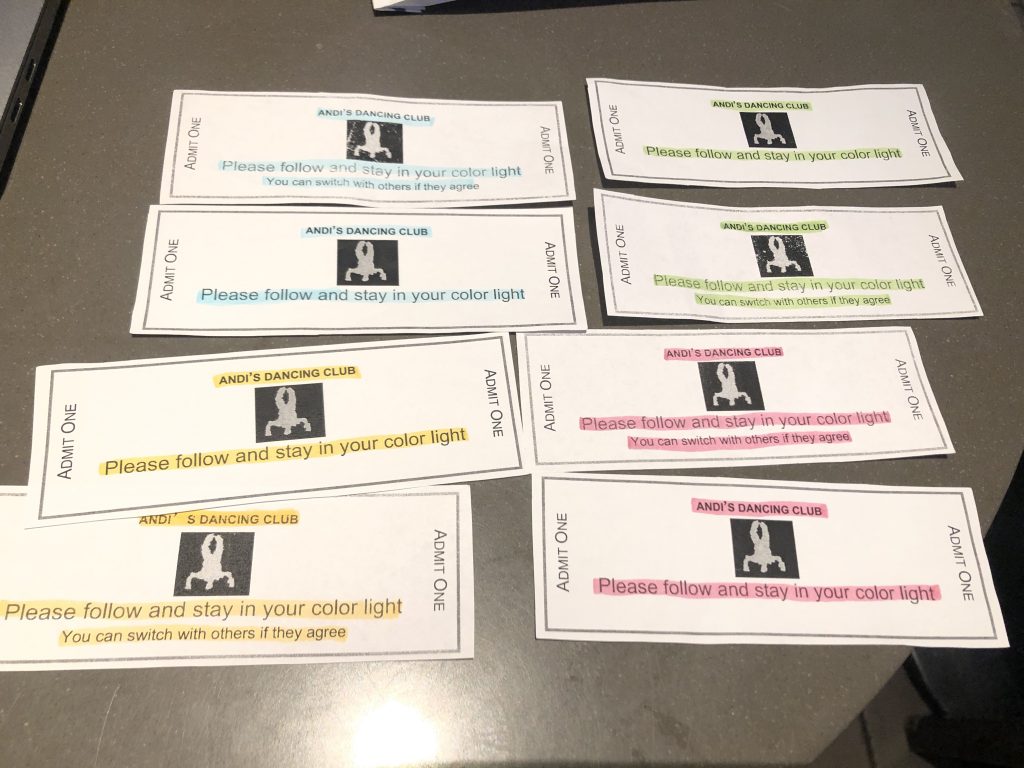
Scene 2: I used two sperate interfaces, which are the Box office and the DJ table. People went to the box office, answer the question, and got their ticket first, and then be permitted to go to the stage. I changed the question into which color can represent your feeling at this moment? People typed their answers, and the answers went to the screens immediately. While people were typing their answers, the screen jumped to scene 2, which was a dancer dance in the middle of a 3D music ball with the music “Alitina by the water.” I wanted people in this part could be more patient since they had to wait for all the people and then went into the next scene. So I choose a piece of soft piano music to erase the anxiety mood. It looks like people were patient. They either watching the dance or talking with the same color person.
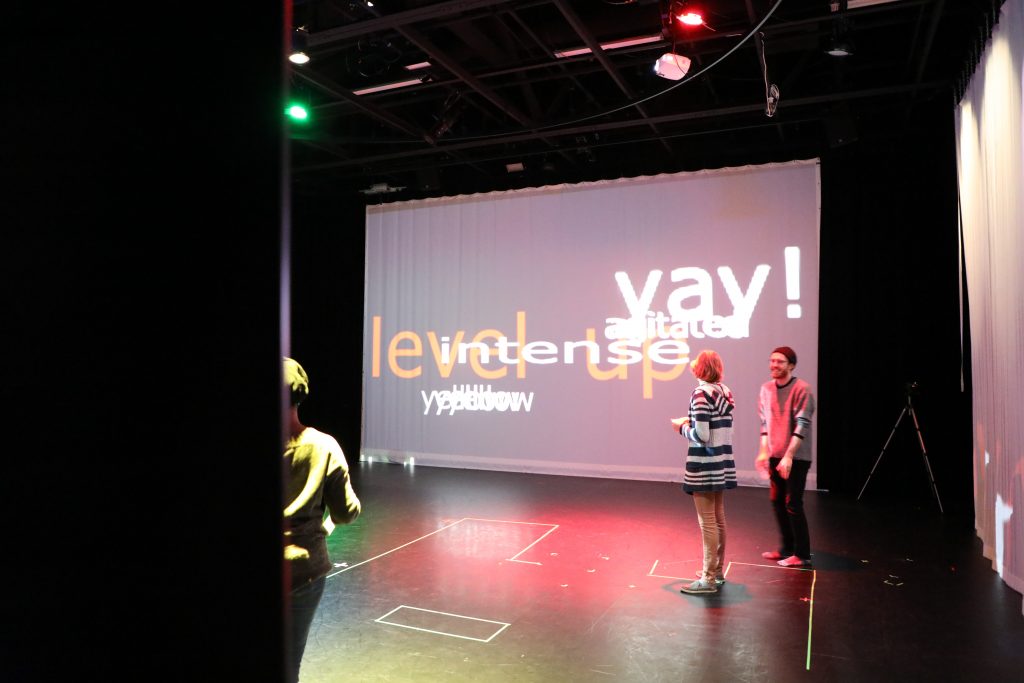
Scene 3: I used a dark red instruction of “Level up” to let people aware that there was some change happening. But some people still not noticed that because the side screens were not clearly showing the warning. I had to tell them “Level up”.
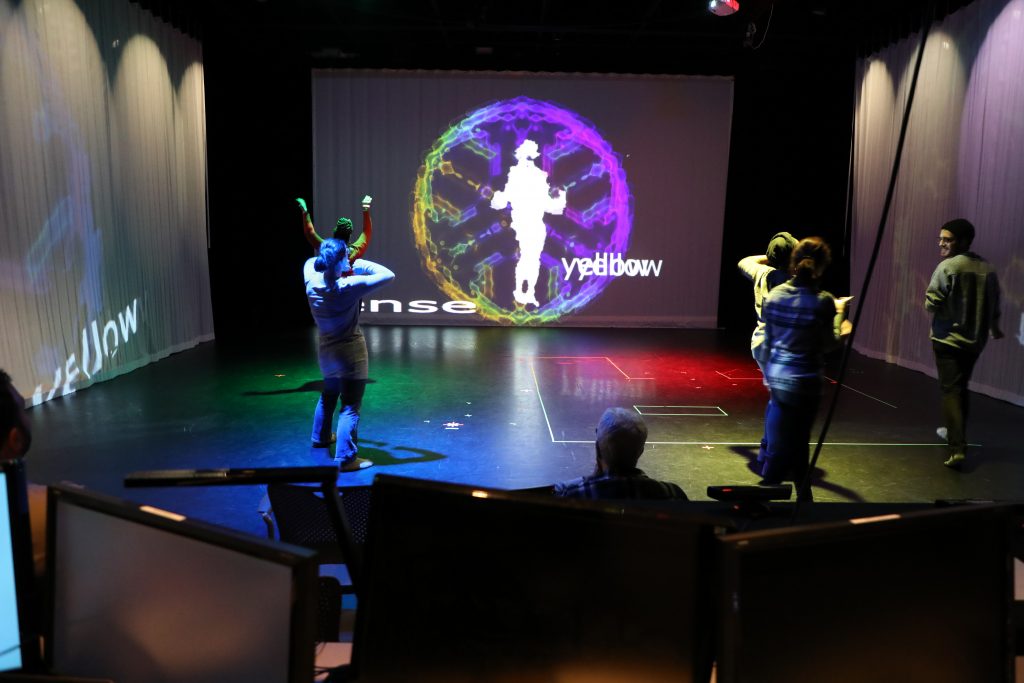
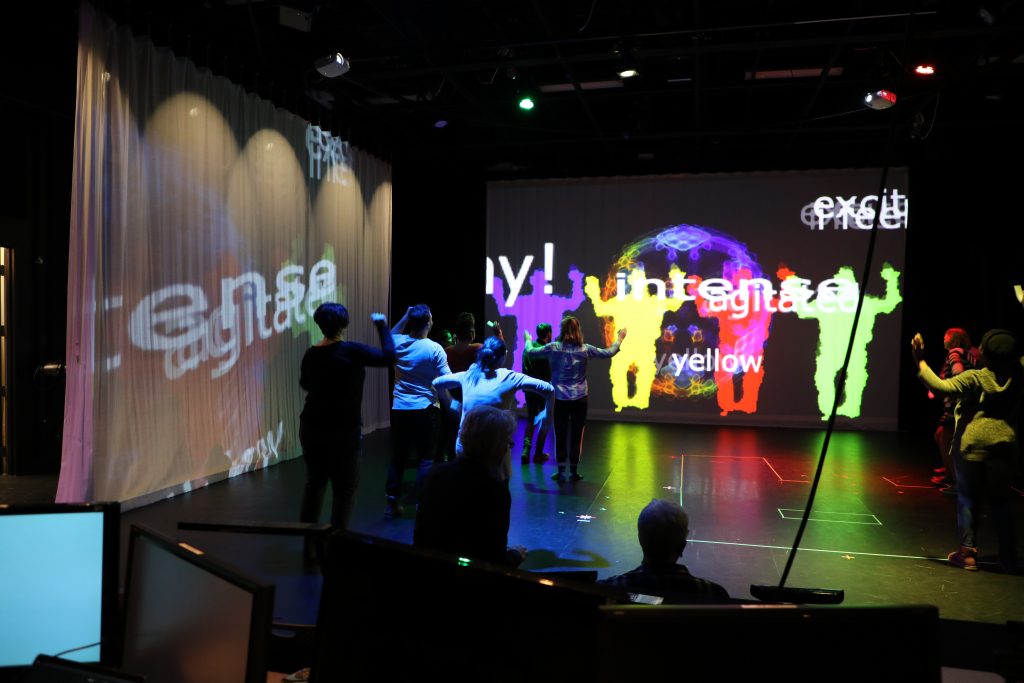
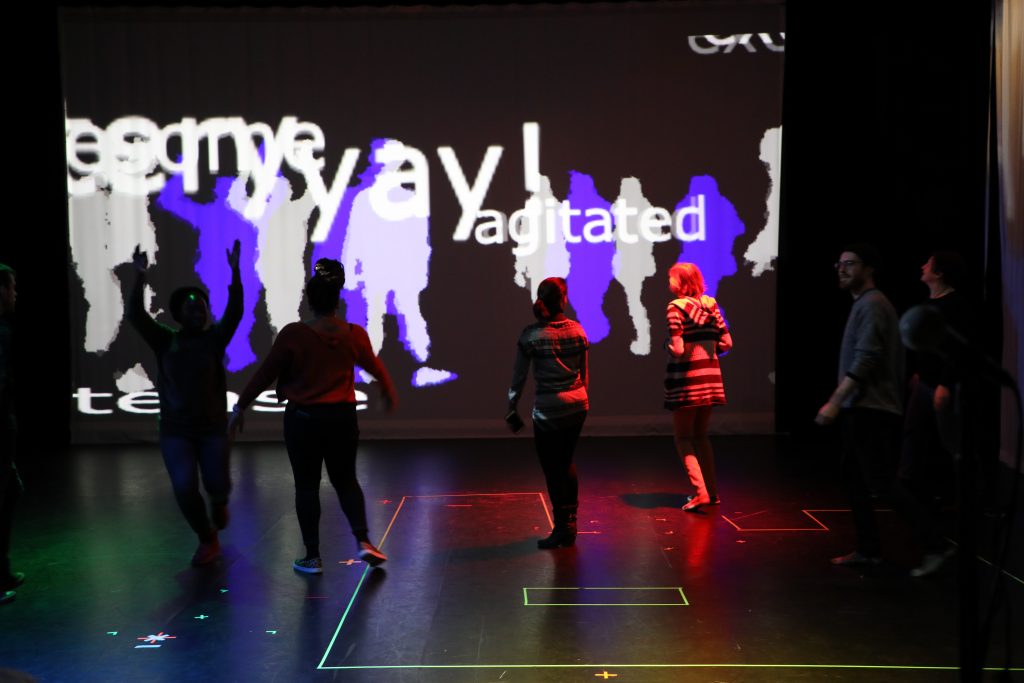
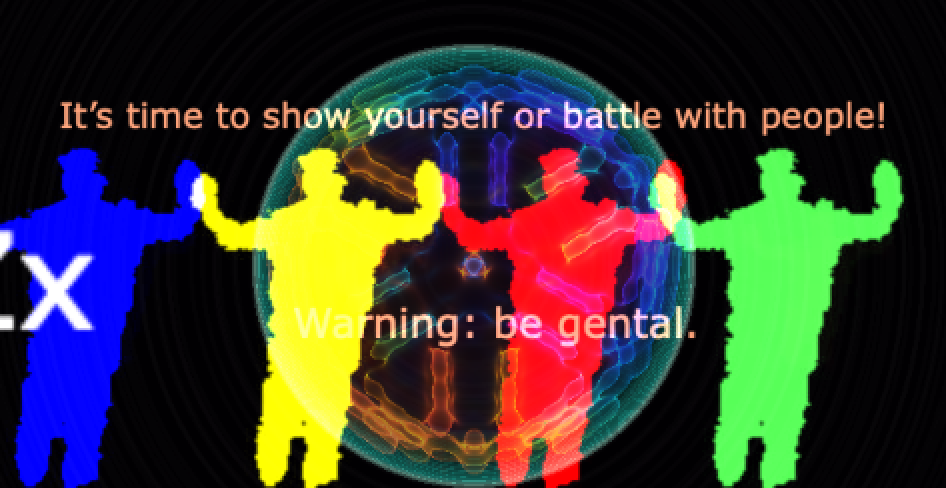
Scene 4: this was the same thing in Dancing club1.0 and 2.0. Four different colors of dancers dance very fast. People dance with the dancers.
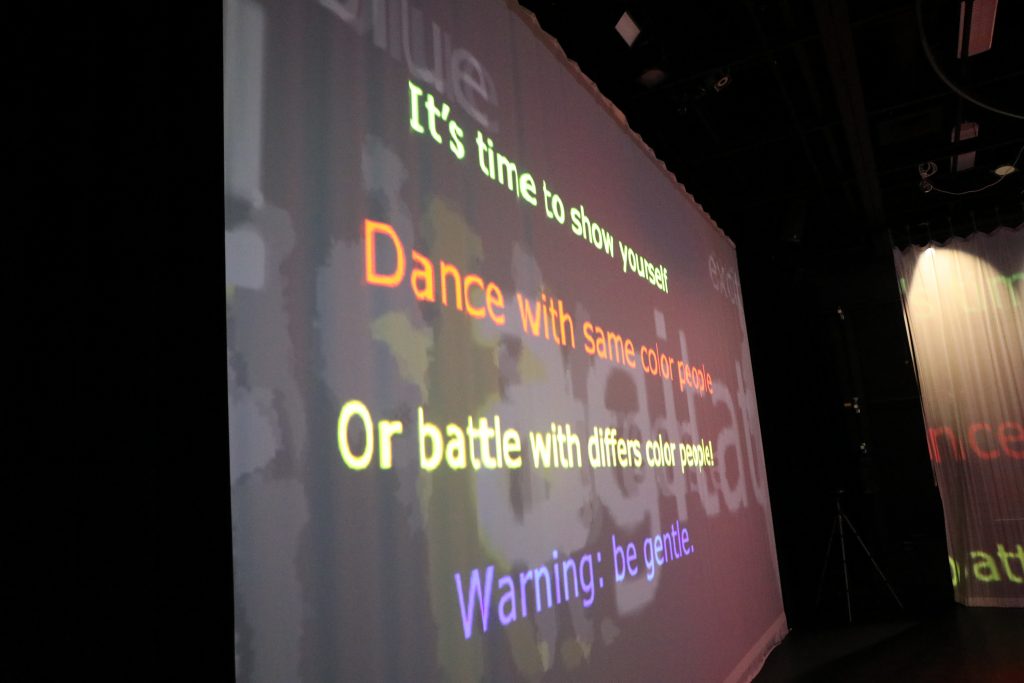
Scene 5: I changed the instruction into an individual scene that people could know quickly. It was successful, people noticed and read those instructions. And they prepared to dance or battle with others!
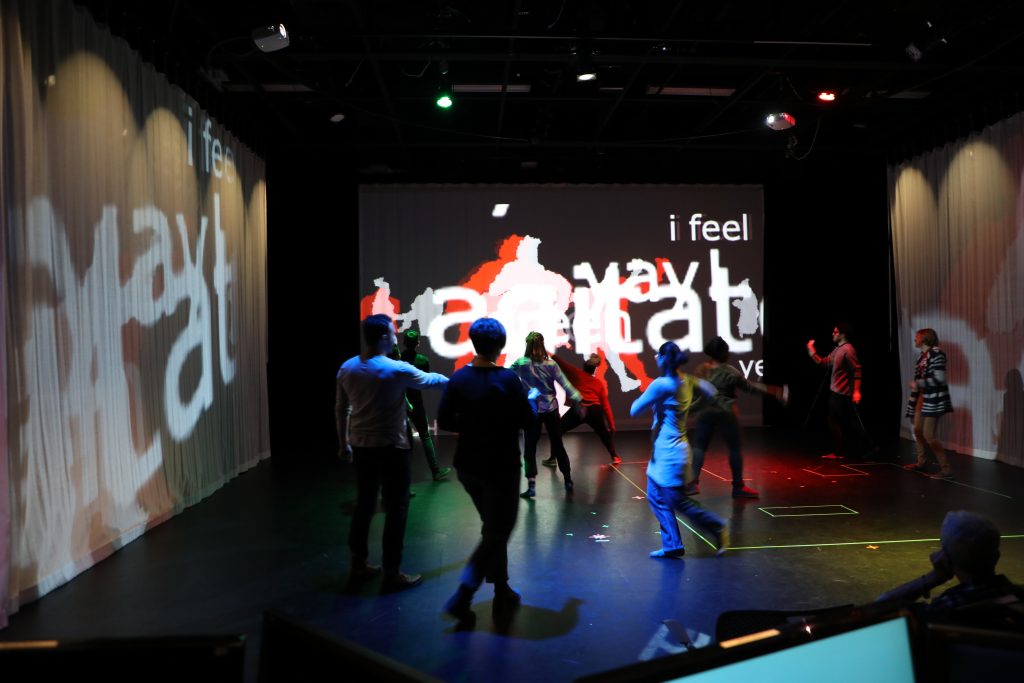
Scene 6: people danced to each other with music. I still did the lighting change at this part, but some people may forget about follow their light.
Thought: Audiences are uncontrollable! There always something happened, unexpectable! So I have to think more and prepare more form different angles and perspectives.
Dancing Club 2.0
Posted: December 11, 2019 Filed under: Uncategorized Leave a comment »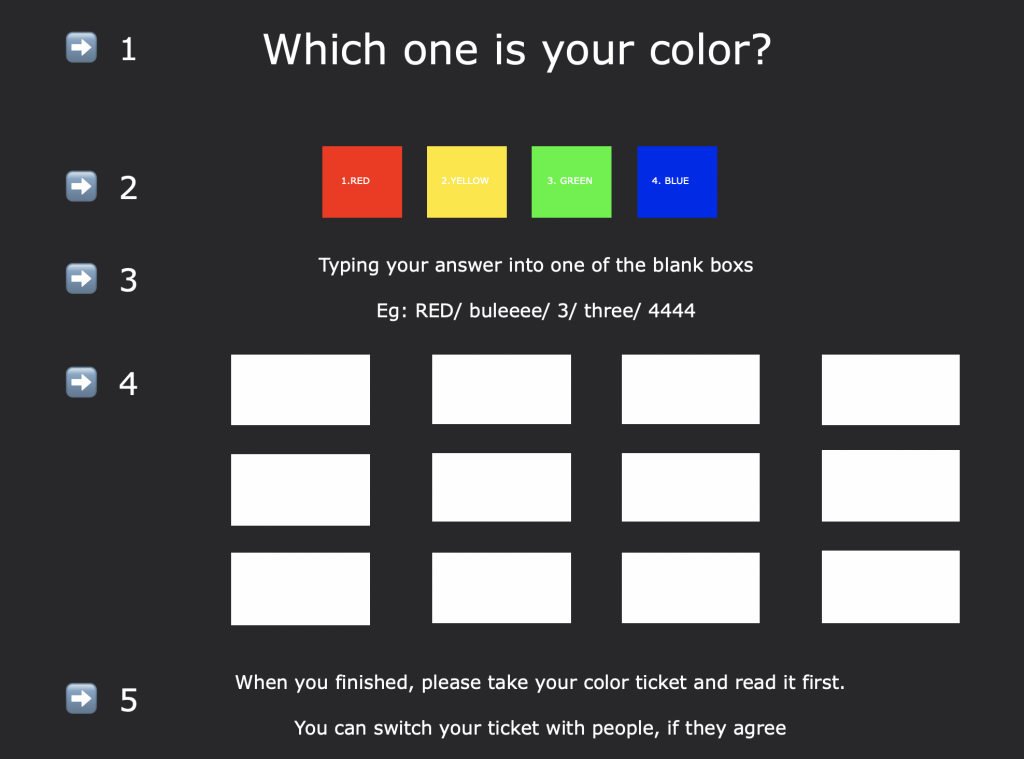
After cycle 1 performance, I added something on my cycle 2. It was basically the same structure as cycle 1. I tried to make each scene going smoothly into the next and made audiences better understand why the scene changed. I used some instructions on scene 2 (I recorded some dance through kinetic sensor and project to the screen) through which people could know the next part is to dance/battel with others. (picture 2) And the scene 3 was the kinetic sensor live recording the dance people did on stage. I also added some light cue on scene 3 (picture 3), so people had to move while recognizing the lighting change and follow their light! In this performance, we had some guest audiences, they gave me some valuable suggestions. They talked about the change between scene2 and scene 3 felt a little fast. Because I pressed the wrong button, the instruction didn’t go as I designed. After this performance, I thought I should make the whole thing more detail and specific, and to guide people step by step with more time so that they can understand better.