Olsen Cycle 3 – Final – Audio Game
Posted: December 11, 2019 Filed under: Uncategorized Leave a comment »Cycle 3:
I decided to move forward with the Audio game as previously mentioned. Through the last few weeks, I had random participants test the game and let me know if any part had any particular confusion to it.
Some of the comments that were mentioned included:
- How would this be different if it were a touch screen instead of a mouse?
- How should I know when I need to listen?
- Is there a way to make the experience move forward at a quicker pace?
- Is there modes of play? Easy, Medium, Hard? What would those be?
—I had considered using the Kinect as a means to play. That being said, I took the time to become part of the Beta testing group for Isadora. Using the Kinect data, it was difficult to calibrate all of the settings for every time the experience would be set up. It was also somewhat buggy, and didn’t necessarily follow the body as planned.
—I hooked up the OpenNi and Skeleton decoder to get the x/y data from the hand of the user, but because of the lag or loss of input, it made the experience unpleasant. I also attempted to use the depth from the Orbecc sensor in the MoLab. This would use the top-down orientation of the depth to create a ‘blob’ to be tracked. Unfortunately, as well, the feedback was buggy and difficult to be managed.
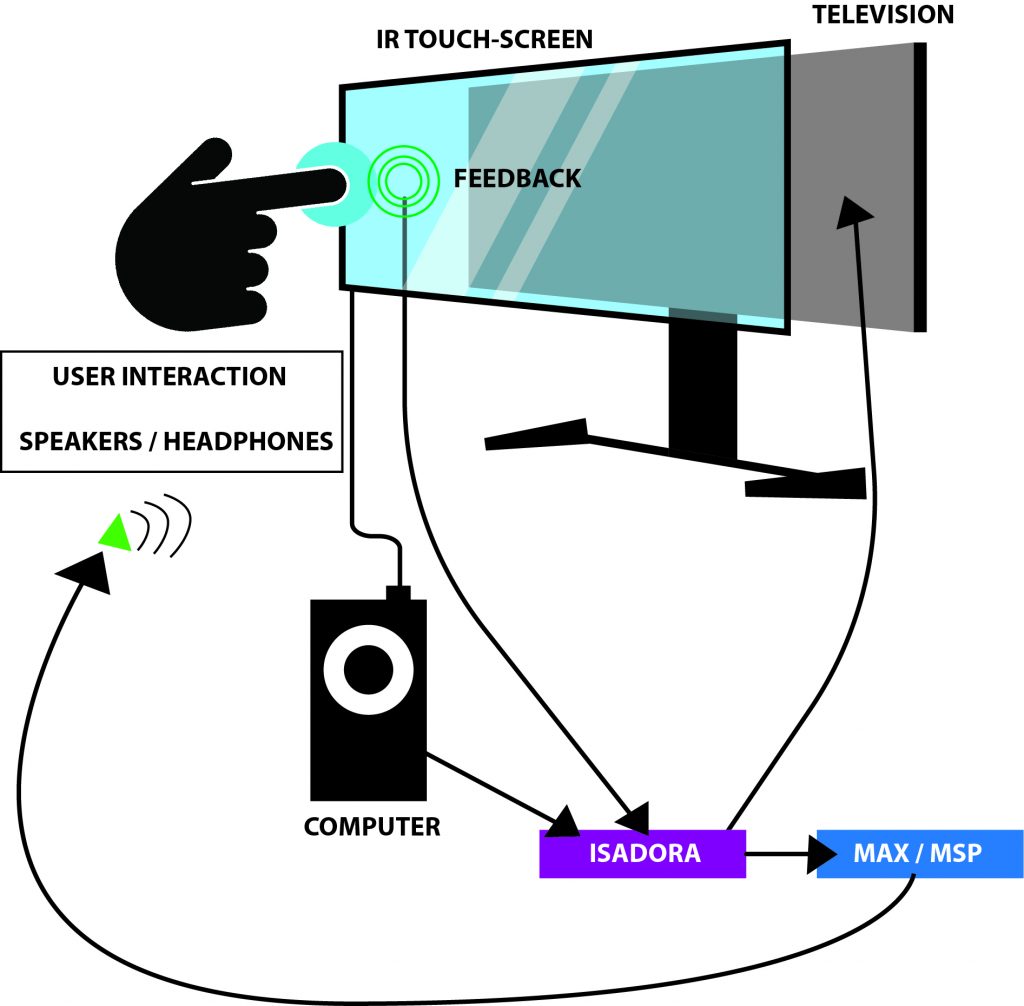
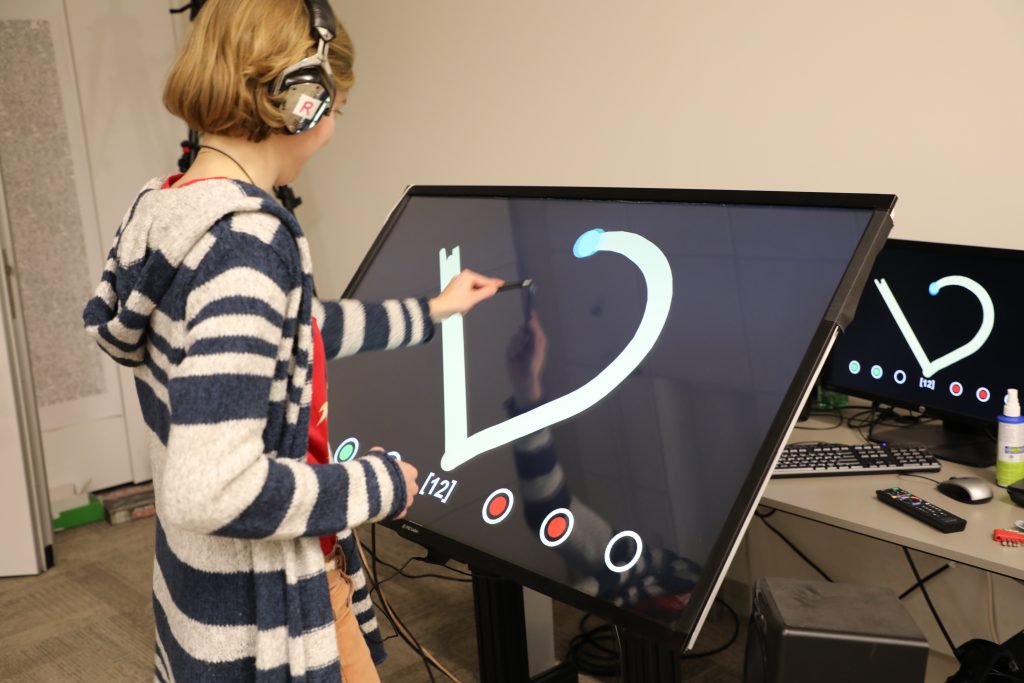
–I ended up going with the IR sensor touch screen placed on top of the monitor as the solution. This allowed a user to use either their hand, a touch-friendly pen, and headphones (simultaneously send to speakers as well) for the experience.
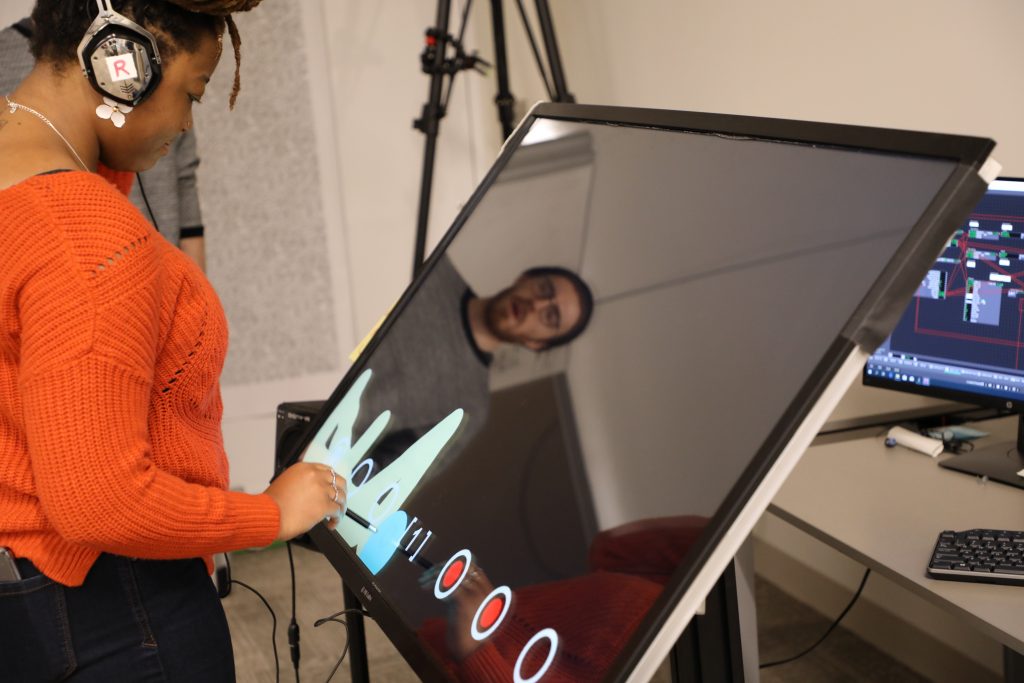
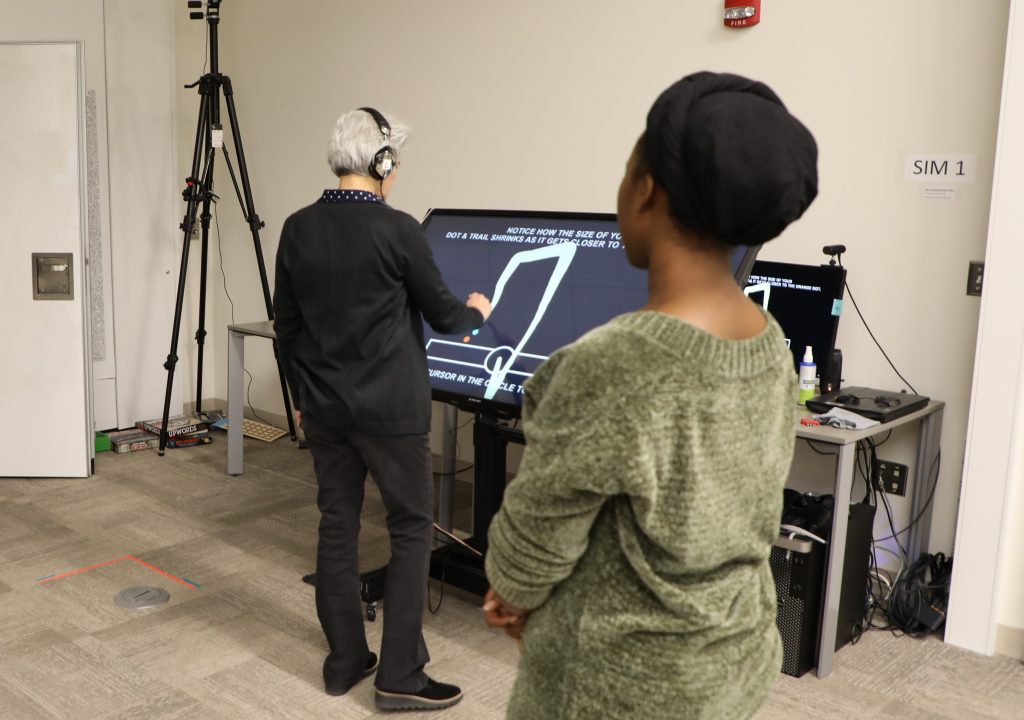
—Below is a visual representation of the layout, including photos from the final day of people playing the game:
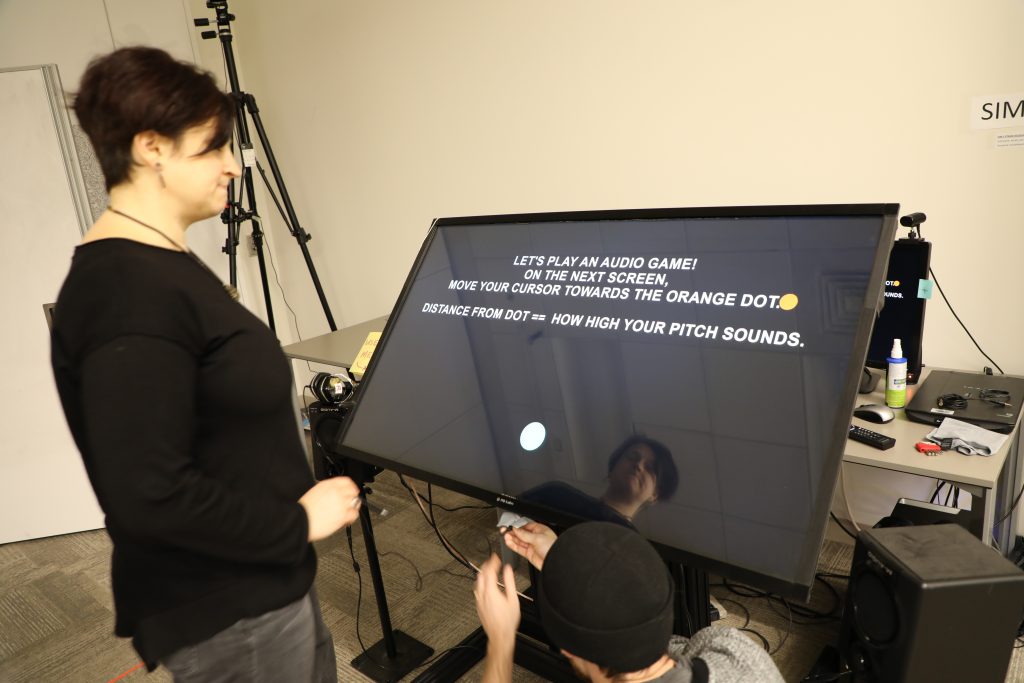
—Below is an example of the actual game being played. It goes through the Easy / Medium modes. If you happen to win the experience, you get a nice treat of music and visuals at the end! Note: the losing screen is not shown, though if you can imagine: No music, and no visuals. Just a plain, “You Lose!” screen with the same options as the ‘Win’ screen.
—I decided to move forward with the project in a way that made it as easy for the user to get used to using a touch screen. This prevented the player from scribbling all over the screen with a mouse to try to find the dot, and added a level of difficulty that didn’t let the participant “cheat” to win.
I also ended up throwing in the different difficulties for the experience.
>>Easy Mode<<
—The user gets a visual trail to track where they’ve been; this includes shrinking the trail as the user gets closer to the target. The user’s cursor shrinks as it gets closer. The audio will also aid in their efforts.
>>Medium Mode<<
—The user’s cursor shrinks as it gets closer. The audio will also aid in their efforts.
>>Hard Mode<<
—Only the audio will aid in their efforts. (Using headphones is the best way for this experience)
The actors used within the Isadora project include:
- Keyboard Watcher
- Mouse Watcher
- Stage Mouse Watcher
- Trigger Delay
- Pulse Generator
- Text Draw
- Shape
- Sound Player
- Video Player
- Jump++
- Enter Scene Trigger
- Enter Scene Value
- Gate
- Dual Trigger Watcher
- Calculator
- Math
- Route
- Counter
- Envelope Generator
- OSC multi-transmit
- Projector
- Multi-mix
- Ease In-Out (2D)
- Inside Range
- Envelope Generator
- Limit-Scale Value
- Shapes
The objects used within the Max / Msp patch include:
- udprecieve
- message boxes
- unpack
- scale
- gate
- toggle
- cycle~
- ezdac~
Outcome:
—I think that my game was well received. Everything about the experience taught me more about working within the limitations of Isadora. I would go back and change a few things about the interaction — like some idle music during the sections where the user needs to read. Or, I might narrate those pages altogether to ‘make’ the user listen, rather than expect them to read the text to it’s full extent. I would also want to add some videos as the explanation screens; and having them ‘catch’ a few of the dots before moving forward seems like it would benefit the experience–rather than throwing them into the experience too quickly. All in all, I see myself using the program more in tandem with Max/MSP, and perhaps Touch Designer, for future projects that could be installations!
-Taylor Olsen
Cycle 2 – Audio Game
Posted: November 25, 2019 Filed under: Uncategorized Leave a comment »For Cycle 2:
—I decided to completely abandon my idea of using this project as a means to push my thesis work forward, and decided to instead use this as a way to explore an audio-driven game. The game itself is an interactive piece that uses the body as a “human tuning-fork”. The programs that would be used are Isadora and Max/MSP. Isadora would send the messages via an OSC message to Max, and would therein transmit a sound based on those OSC messages. My intentions are to use the body tracking from a Kinect, or Orbbec, to tune a pitch to match another “fixed” pitch (this would also be sent to Max).
To begin:
—I drew out my initial idea on a whiteboard of how the experience would start. This included:
- Making a “Welcome” Screen.
- Having the welcome screen introduce the concept of using your body to tune the pitch to match the fixed tone.
- Introducing the concept of making it into a game
- Showing the visuals for the game
- Giving parameters for how the game will keep score, and how much time is allotted for each round.
- Game-play screen with proposed visuals
- Some math for how the determinate pitch will be associated with the fixed pitch

Welcome Screen 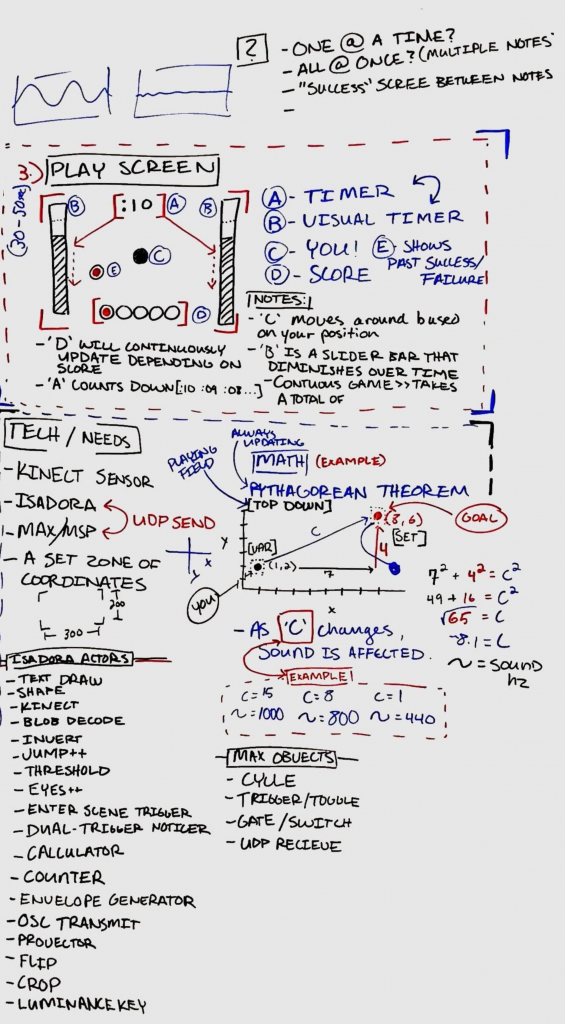
Gameplay
—For now there are 3 screens: Welcome, Goals, and Game-play. The welcome screen includes all of the introductory information for the game, including how the experience will play out and a small example. The goals screen shows what the player needs to do; it’s a 3-out-of-5 win/lose gambit. The game-play screen shows the timer, a visual representation of the countdown, and where the player has won/lost a round.
—To elaborate upon this, I proposed the idea to the group and had some feedback/questions in terms of game-play, visuals. The setup thankfully made sense to the group (and myself). The comments are as follows:
>>Game-play:
- Do you get to choose the pitch you want to listen for?
- How will you know when you’ve gained a point?
- Is the pitch always the same? Or does it change?
- Is our pitch lower or higher than that of the initial pitch to begin?
>>Visuals:
- Will there be visual indicators of how close/far you are from the desired pitch?
- How will these visuals be shown? Through a sine-wave graph? Through a visual bar?
- Does the player have a visual to notate where they are in the space?
- Is it necessary to have a timer AND a visual for the time? Is this too much? How could the screen space be used in a better way?
- Is there a way that the X & Y coordinate could be represented as visual? As in: if I am on the correct X/Y coordinate, something would show this correlation?
—My next steps include (in order, hopefully):
- Making the screens for each section
- Making the interactivity between Isadora and Max/MSP function correctly.
- Using a “Mouse Watcher” actor as the means to test the game-play.
- Using the math (Pythagorean theorem) to create the game-play screen pitch sounds. Distance from goal == pitch (scaled).
- Making the game-play function correctly; points, movement, etc.
- Using the top-down kinect/orbbec depth sensor and the blob-tracking function to take the place of the “mouse-watcher” actor.
-Taylor Olsen
Cycle 1 – Anim. Driven Spatialized Audio
Posted: November 7, 2019 Filed under: Uncategorized Leave a comment »–This week of Cycle 1 I progressed more towards using this time to develop my thesis work. I decided to show the class the progress of the work and an example of how the project is progressing towards a ‘finalized’ project.
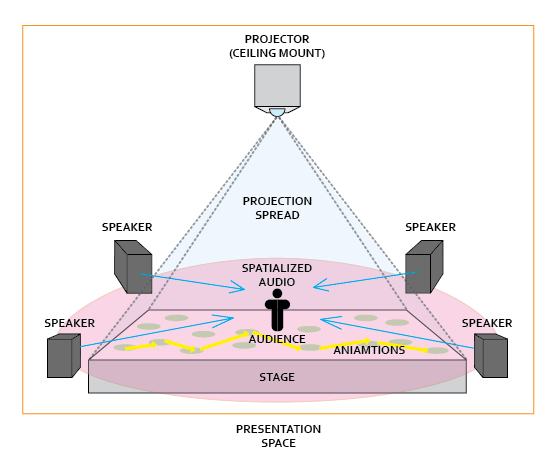
–My goal for this project is to be able to have the visuals projected towards the ground plane, and have the audio also reactive to the visuals being produced. Giving the viewer an audio-visual experience of animation beyond that of just watching it projected on a screen.


–For the moment, the patch works as an interface that 4 separate instances of utilizing visuals to drive audio. The proposed 4 separate sources are as follows:
1. Video
2. Image
3. Live
4. Multi-Touch
–Currently the only piece that I have invested time into showcasing is the “video” source. For the sake of effort and how much time it takes to connect all of the separate pieces that entail the position based object orientation, the GUI setup, and the prototyping, I have decided to stick with the work of making the video portion the main focus.
–Beyond this, I have been having considerations of changing the viewing experience from a viewing experience on a screen to a top-down projection onto the floor. I proposed a series of questions for the sake of generating a conversation around the piece as well:
- What would you imagine if the image was projected onto the ground?
- If color is incorporated, what do you expect to happen?
- I have the ability to derive a color palette from live imagery – would you all imagine that this affects all the sounds? Or ones from specifically tracked objects?
Feedback from the class (from what I could write down in time) entailed:
- Give us the understanding that based on the visuals, the audio data is being pulled out of the visual space itself.
- Explain that the video is live and the audio is being directly reactive from such.
- What kind of understanding should be gained through working with the experience? What can we experience/learn from it? Or is it purely something to enjoy?
- What do you want us to notice first? Audio? Visuals?
- Where would this piece actually be located? Within a museum? Open space?
- How do you project the visuals to give us more of an audio-visual sensation that drives our understanding?
- How does the curiosity of the audience aware that it wasn’t just pre-composed?
What I want to accomplish moving into next week:
- Work with the projector in the MoLab to have the animations play on the ground.
- Work with the audio in the MoLab to have the speakers setup in a way that is conducive to having the correct audio spatialization.
- Find patches/online resources that help with transferring different pieces of audio between different speakers.
PP3 – Mysterious Riddles
Posted: October 21, 2019 Filed under: Uncategorized 2 Comments »For this pressure project we had to reveal a mystery within 3 minutes with the following caveats:
1. Create an experience for one or more participants
2. In this experience a mystery is revealed
3. You must use Isadora for some aspect of this experience
4. Your human/computer interface may(must?) NOT include a mouse or keyboard.
**Above is an attachment of my ideation**
Ideation
- Have users move around a space to use an alpha mask to reveal lines that lead to spaces where more movement is needed to maintain a visual / note. [3 Phases]
- Use colors as the visual indicators of objects
- White? Orange? Green? (What colors do people generally stray away from?)
- What materials?
- Balloons
- Paper
- Cubes / Discs
- What materials?
- White? Orange? Green? (What colors do people generally stray away from?)
- Use colors as the visual indicators of objects
- Use camera movements to “wipe away” an image to reveal something underneath. Modes of revealing are referenced either literally or figuratively. [3 Phases]
- Use movement to reveal the visual
- How the “wiping” initially introduced as the method of revealing?
- Spinning Shapes (?)
- Spinning wiper blade
- Real World examples (?)
- Wiper blade on a car windshield
- Literal Instructions (?)
- Move your arms/body to wipe away the visual
- Spinning Shapes (?)
- How the “wiping” initially introduced as the method of revealing?
- The image / text underneath gives them their next interactive “mode” to reveal the next scene.
Use audio to reveal the scene.- Top / Mid / Bottom splits (horizontal)
- Frequency ranges
- Tenor freq. – Top Band / Alto freq. – Mid Band / Bass freq. – Low Band
- Top / Mid / Bottom splits (horizontal)
- Use movement to reveal the visual
Process
- Create the webcam interactivity
To do this, there needs to be a webcam hooked up to Isadora. After the interface is “live”, I used a Difference actor to notice these variations and output them to a virtual stage. On Virt Stage 1: we can see this effect being used. The grey area is the dynamically recorded imagery being noticed as separate pixels on from the webcam. On Virt Stage 2: we can see that I changed the visuals to a threshold–making them stand out as pure white. Through this pipeline, I then used a Calculate Brightness actor to notice the amount of white-pixels (created by movement) on the screen. This number could then be base-lined, and outputted to an Inside Range actor.
You might notice on Stage 1 (not virtual) that the grainy pieces along the edges of the imagery are less apparent–this is due to ‘grabbing’ the frame (Freeze actor), and regulating the change in imagery rather than having it be constantly examined. Putting this through an Effect Mixer actor, I was able to have a threshold of the original image and the live-frames being used. This provided a more smooth measurement of the difference in frames rather than a disruption from stray pixels. Putting this data through a Smoother actor also alleviated arbitrary numbers that would ‘jump’ and disrupt the data stream.
- Use the webcam interactivity as a base for the elucidation of visuals
After creating the webcam interactivity, I used the Inside Range actor as the basis of measuring how many times ‘movement’ was captured. This was done by having a trigger activate when the amount of white on the screen (from movement) was enough to trigger a reaction. I used this to ‘build’ tension as a meter filled up to reveal text underneath. The triggers were sent to a Counter actor, and then to a shape actor to continuously update the width of the shape. To make sure that the participants kept moving, the meter would go recede back to normal through a Pulse Generator actor. This pulse was subtracting the numbers, rather than counting. On top of this, there was a beeping sound that increased in amplitude and the speed at which it was played if it was continuously triggered. This extra bit of feedback made the audience more aware that what they were doing was having an effect.
- Use the motion data to influence the experience
As the amount of threshold from the pixels was attained, the experience would jump to another scene to reveal the answer to the riddle. Though I didn’t give the user a choice to try to answer the riddle, I think this would have pushed the experience over the 3-minute mark. It came in 3 phases: Movement, Audio, Movement & Audio.
For the Audio version, I used the microphone of the webcam and the same ‘building’ shape technique as the movement scene.
For the dual combination, I upped the amount of times the Pulse Generator triggered the subtraction from the counter, but made sure that both the sound and movement was being accounted for. This made the experience more difficult to achieve if someone was solely moving, or making noise. Having both required a deeper level of interactivity beyond the standard of just one of them working to complete the task.
For those who are interested (and for my own reference) here’s the list of actors that I used within the patch:
- Picture Player
- Video In / Audio In Watcher
- Freeze
- Threshold
- Max Value Hold
- Calculate Brightness
- Calculator
- Effect mixer
- Background Color
- Alpha Mask
- Gaussian Blur
- Text Draw
- Text Formatter
- Dots
- Jump++
- Projector
- Enter Scene Trigger
- Trigger Delay
- Enter Scene Value
- Pulse Generator
- Counter
- Inside Range
- Shapes
Outcome
I think that I would have changed this experience to have more of a ‘choice’ once the user filled up the meter. Though, making them re-do the experience if they guessed wrong might push back the notion to continue in the first place (my subjects might get tired). I could just have a glaring noise if they guessed wrong, and allow them to continue the experience. I also wanted to use the choice through an object or a body to make the decision. Things to think about for next time!
-Taylor
PP2 – AKIRA
Posted: September 30, 2019 Filed under: Uncategorized Leave a comment »This pressure project utilized 5-hours to tell a culturally significant, folk, or personal story in under 1-minute — using one of the following:
1. Audio
2. Visuals
3. Audio & Visuals
**Attached above is a Word doc of my idea**
Ideation
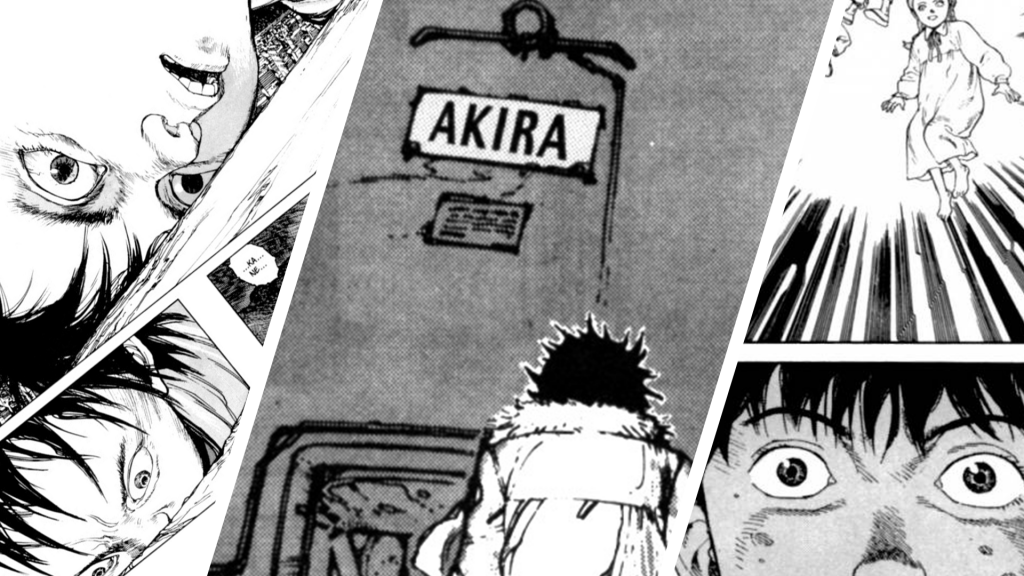
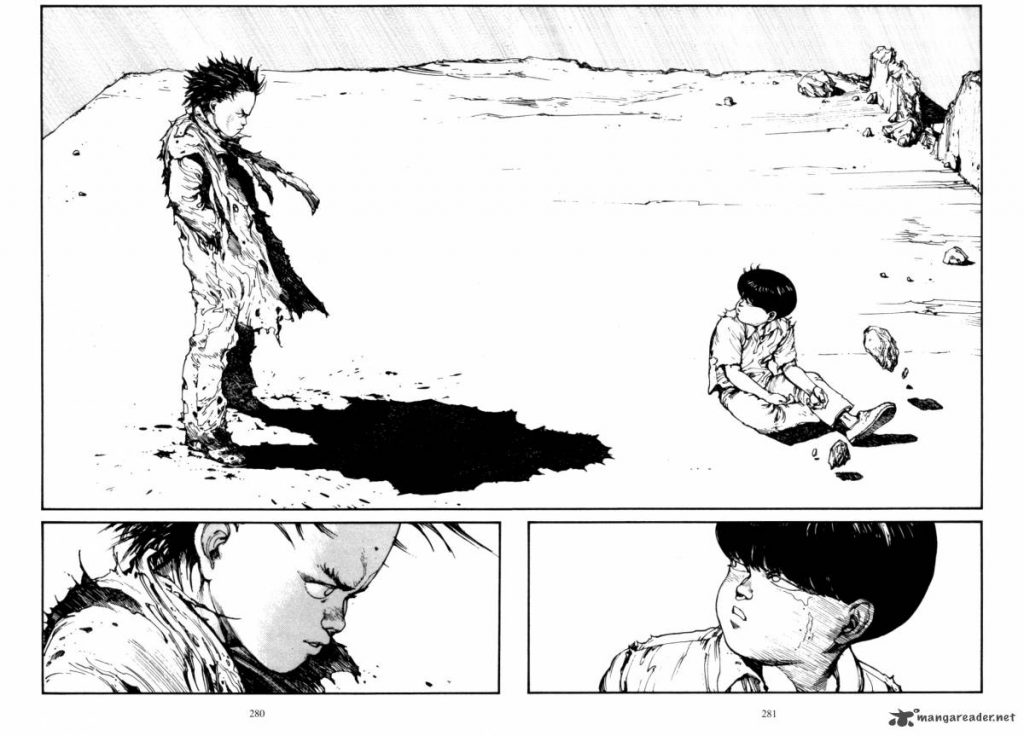
Initially for my Pressure Project I decided to retell the story of AKIRA. This is a story that I have always held close to me and has strong cultural significance regarding War, Honor, Politics, and Science &
Engineering.
Process
To start:
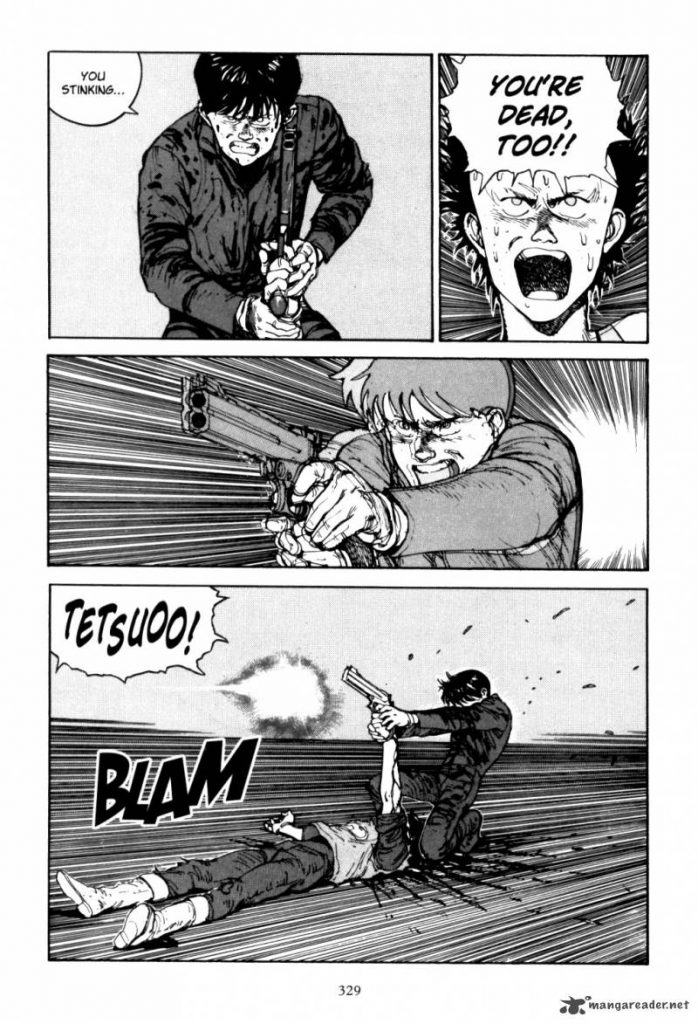
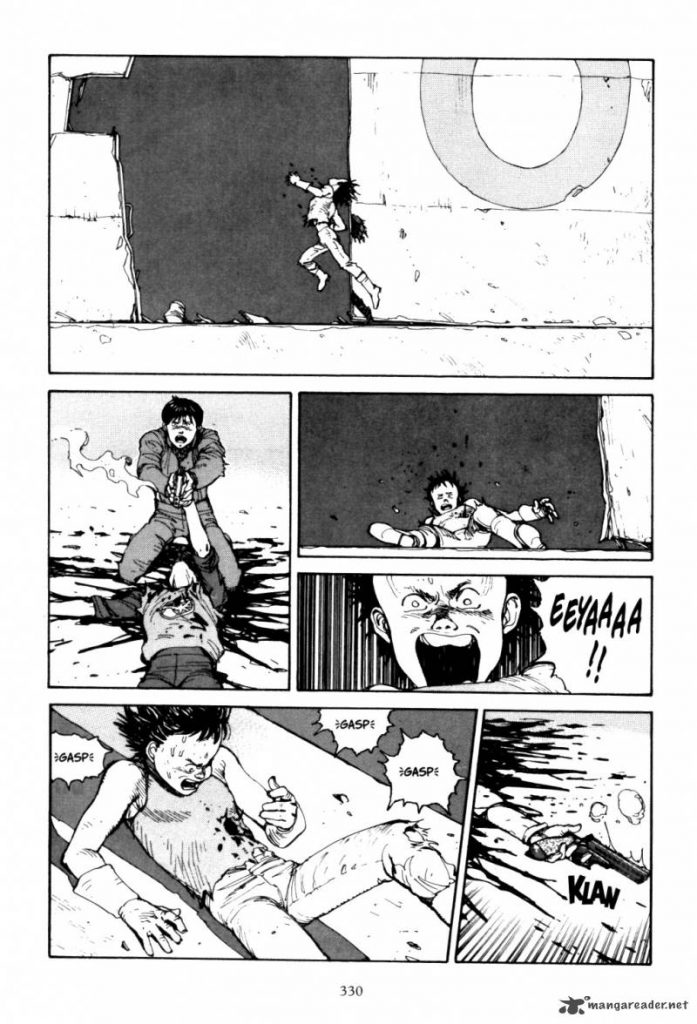
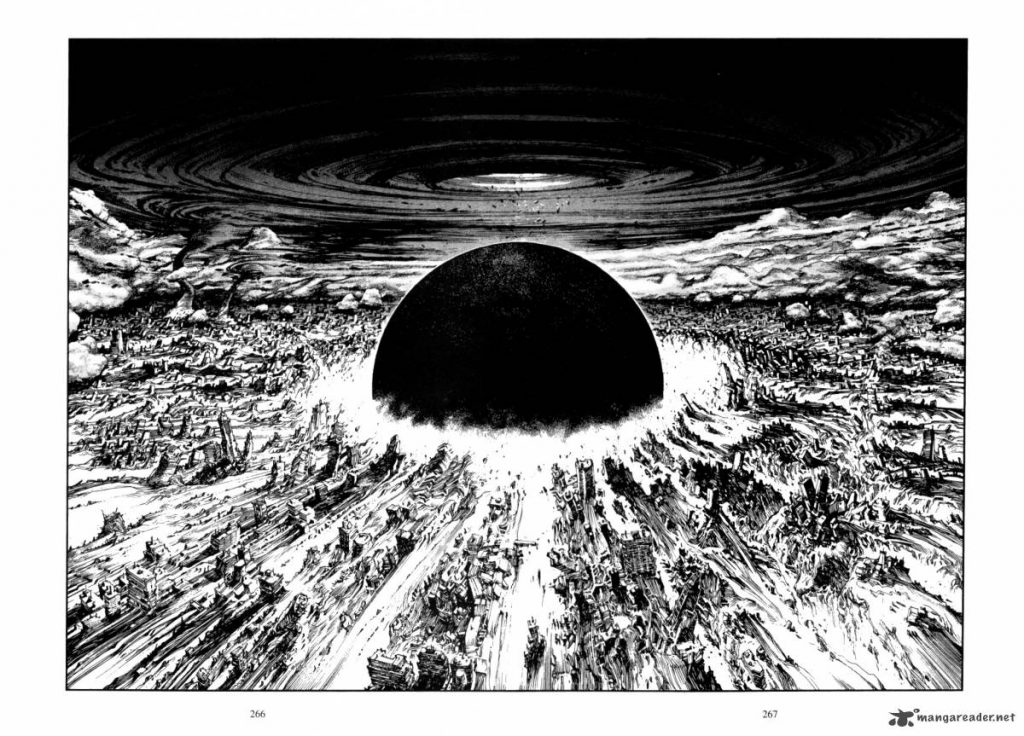
- Use Visuals from the Film / Scans from the manga
- Have some motion graphics used within the recreation
- Record audio of most of parts I find significant
- Have some overlap of the audio
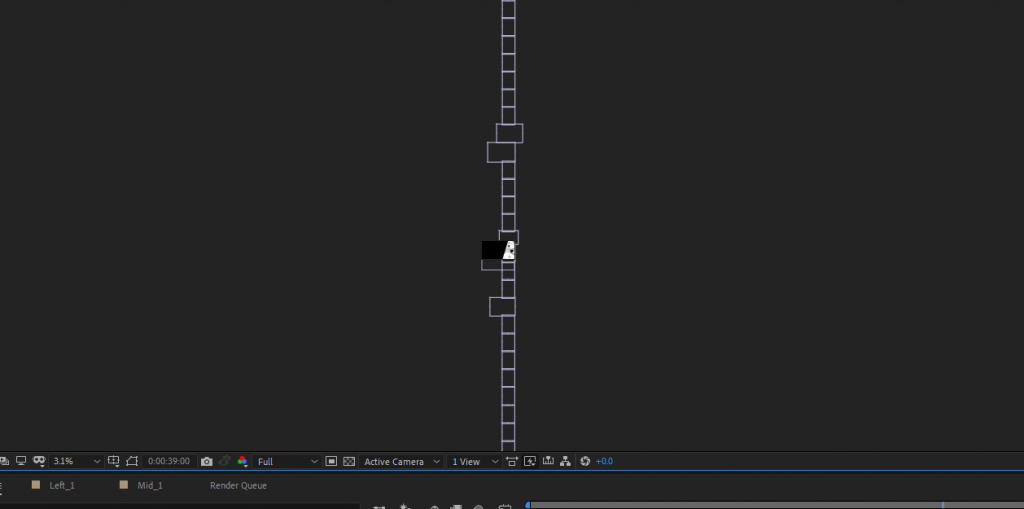
For the splits within the imagery:
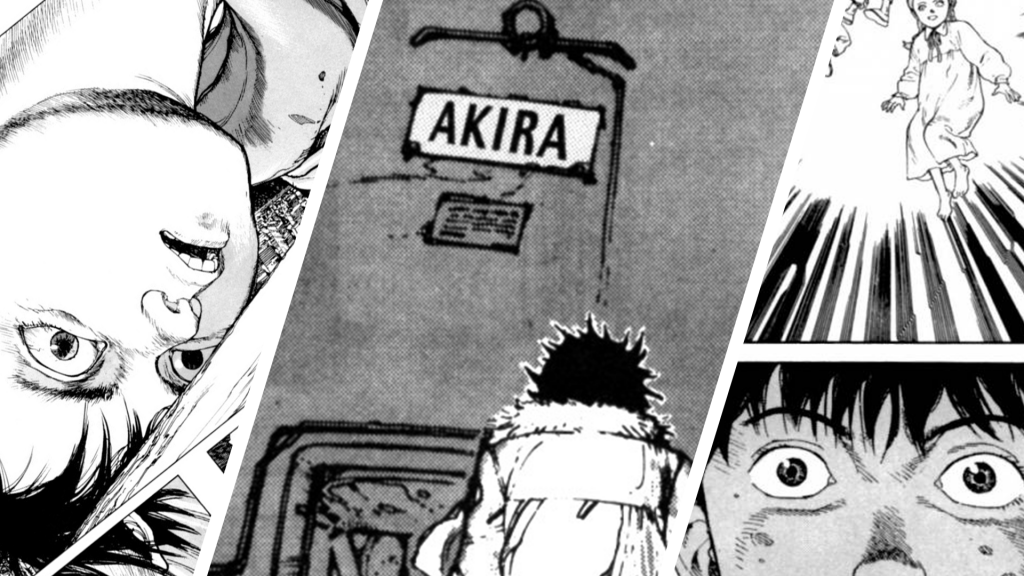
To begin I created 3 different B&W-luma images to section off the content in After Effects. I could have also used masking techniques, but since I already had an example of the split imagery available, I decided that this was an easier way to use my time.

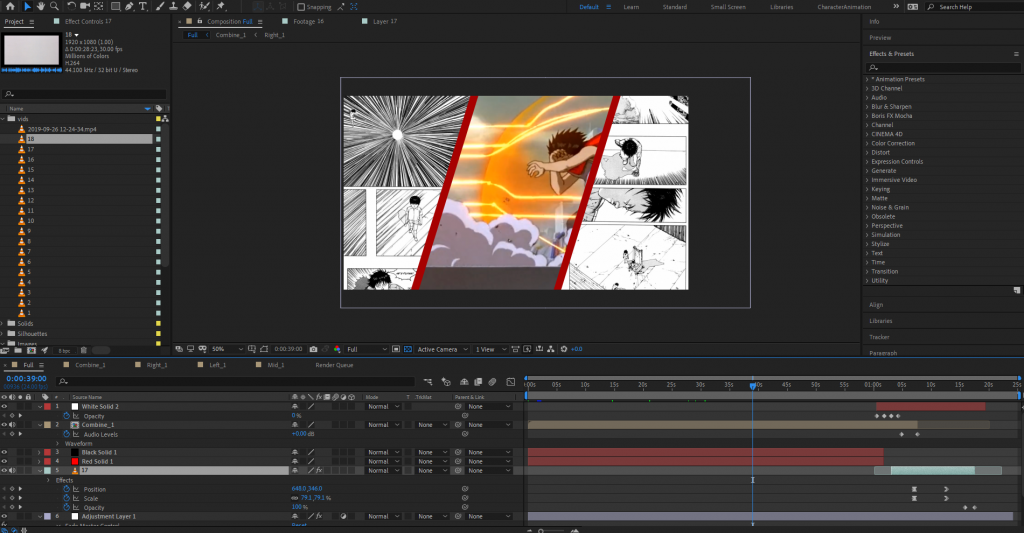
Below is some of the example imagery from the manga I decided to go with. I was initially scanning them in from the physical books, but this process was taking too much time to produce results. I went online and found a manga-reader that allowed people to download the pages instead.
Outcome
Attached below is the final video that I rendered out from the process. I think it was an effective use of time in terms of getting all of my content in an organized space–but the story of AKIRA is quite hefty and very difficult to tell in under 1-minute. I think that this is where the project fell short; having a primer about the story might have been important to letting it unfold rather than throwing the audience directly into the action. Also, I think my visuals might have been heavy-handed from the animation, the scrolling effect, and too much to look at / respond to while the video was playing. I did appreciate that the class decided to listen to just the audio one time through without the visuals–it created a different experience for them in the sense that they were able to pick out more characters than having it coupled with the visuals.
-Tay
PP1- Tay
Posted: September 12, 2019 Filed under: Uncategorized Leave a comment »For this pressure project we had 4-hours and some “goals” to attempt to achieve:
1. Someone laughs
2. Maintain surprise for more than 10sec
3. Maintain surprise for more than 30sec
4. Picks up a number between ‘1’ and ‘5’ and reacts
Ideation
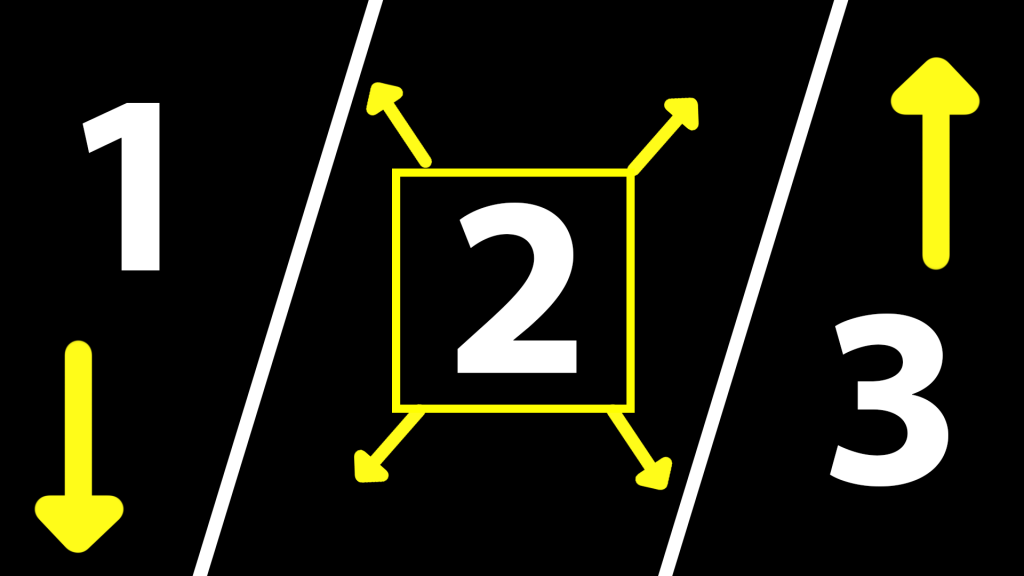
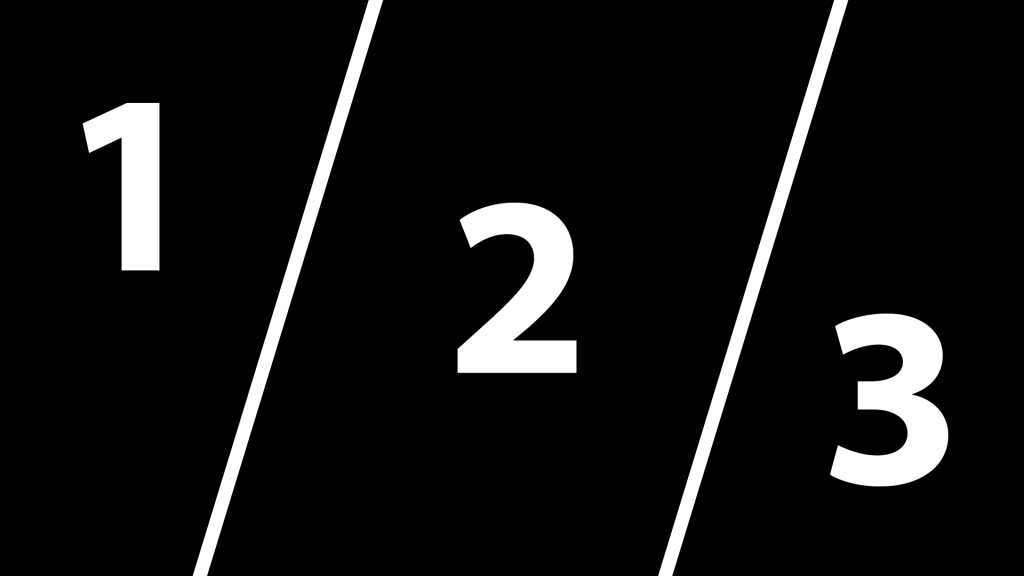
Initially for my Pressure Project I decided on 3 different scenarios:
- Have visuals move for 10sec / transition / 10sec / transition / etc.
–The experience would eventually repeat itself. The visuals would be a combination of moving lines, moving shapes, then a combination of both. - Have a webcam track movements of an individual.
–The user would move around to activate the experience. The color of screen would then be tied to how much the user was moving within the space.
RED = No movement
ORANGE/YELLOW = Little movement
GREEN = High amount of movement - Have an interactive game [This is the one I decided upon. Though it strayed from my initial idea.]
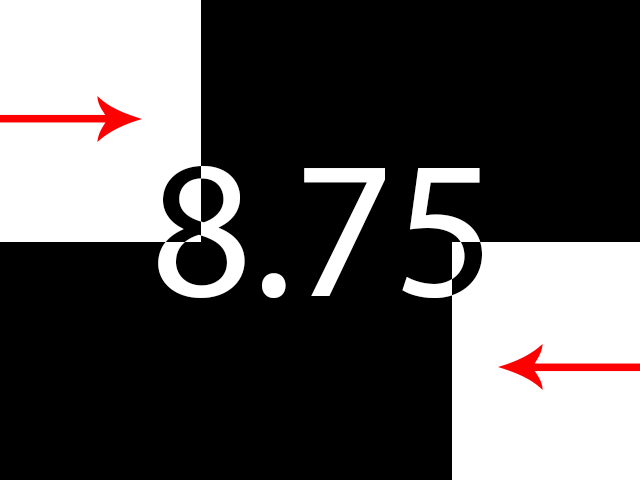
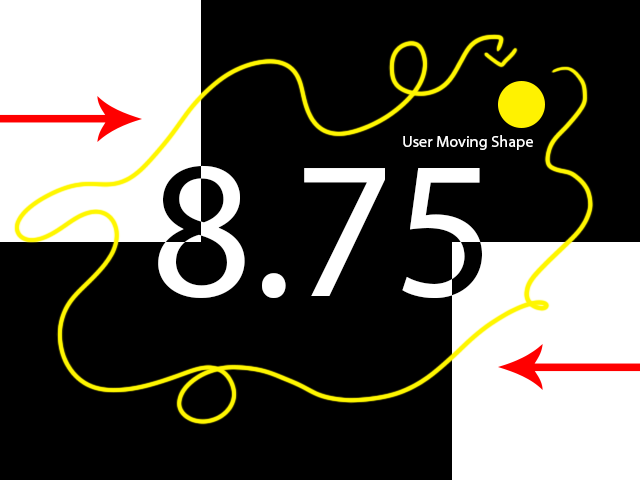
–Have shapes that begin to shrink with a timer in the middle. The user is also able to control a circle and move it around with the mouse.
–Once the timer runs out have music begin to play.
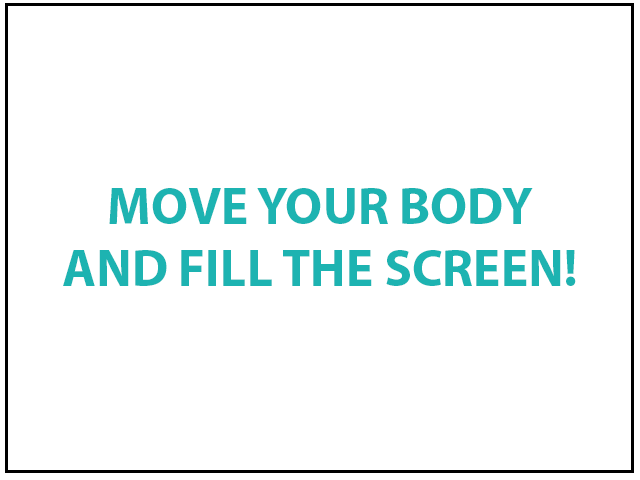
–Have a screen that says “Move your body to draw and fill in the space!”
–If they fill the canvas: screen transitions to say “You’re the best!”
–If they don’t fill the canvas: screen transitions to say “Move them hips!” // and repeat the experience.
I chose to go with my 3rd idea. Below is a visual representation from my initial write-up of what I wanted the experience to do. (also available in the attached word document)


The way I spent my time for this pressure project was as follows:
Hour 1: Ideation of the different scenarios
Hour 2: Setting up the different scenes
Hour 3: Asking for help on ‘actors’ I didn’t know existed or how to do certain things within Isadora. (Thank you Oded!)
Hour 4: Playing, debugging, watching, fixing.
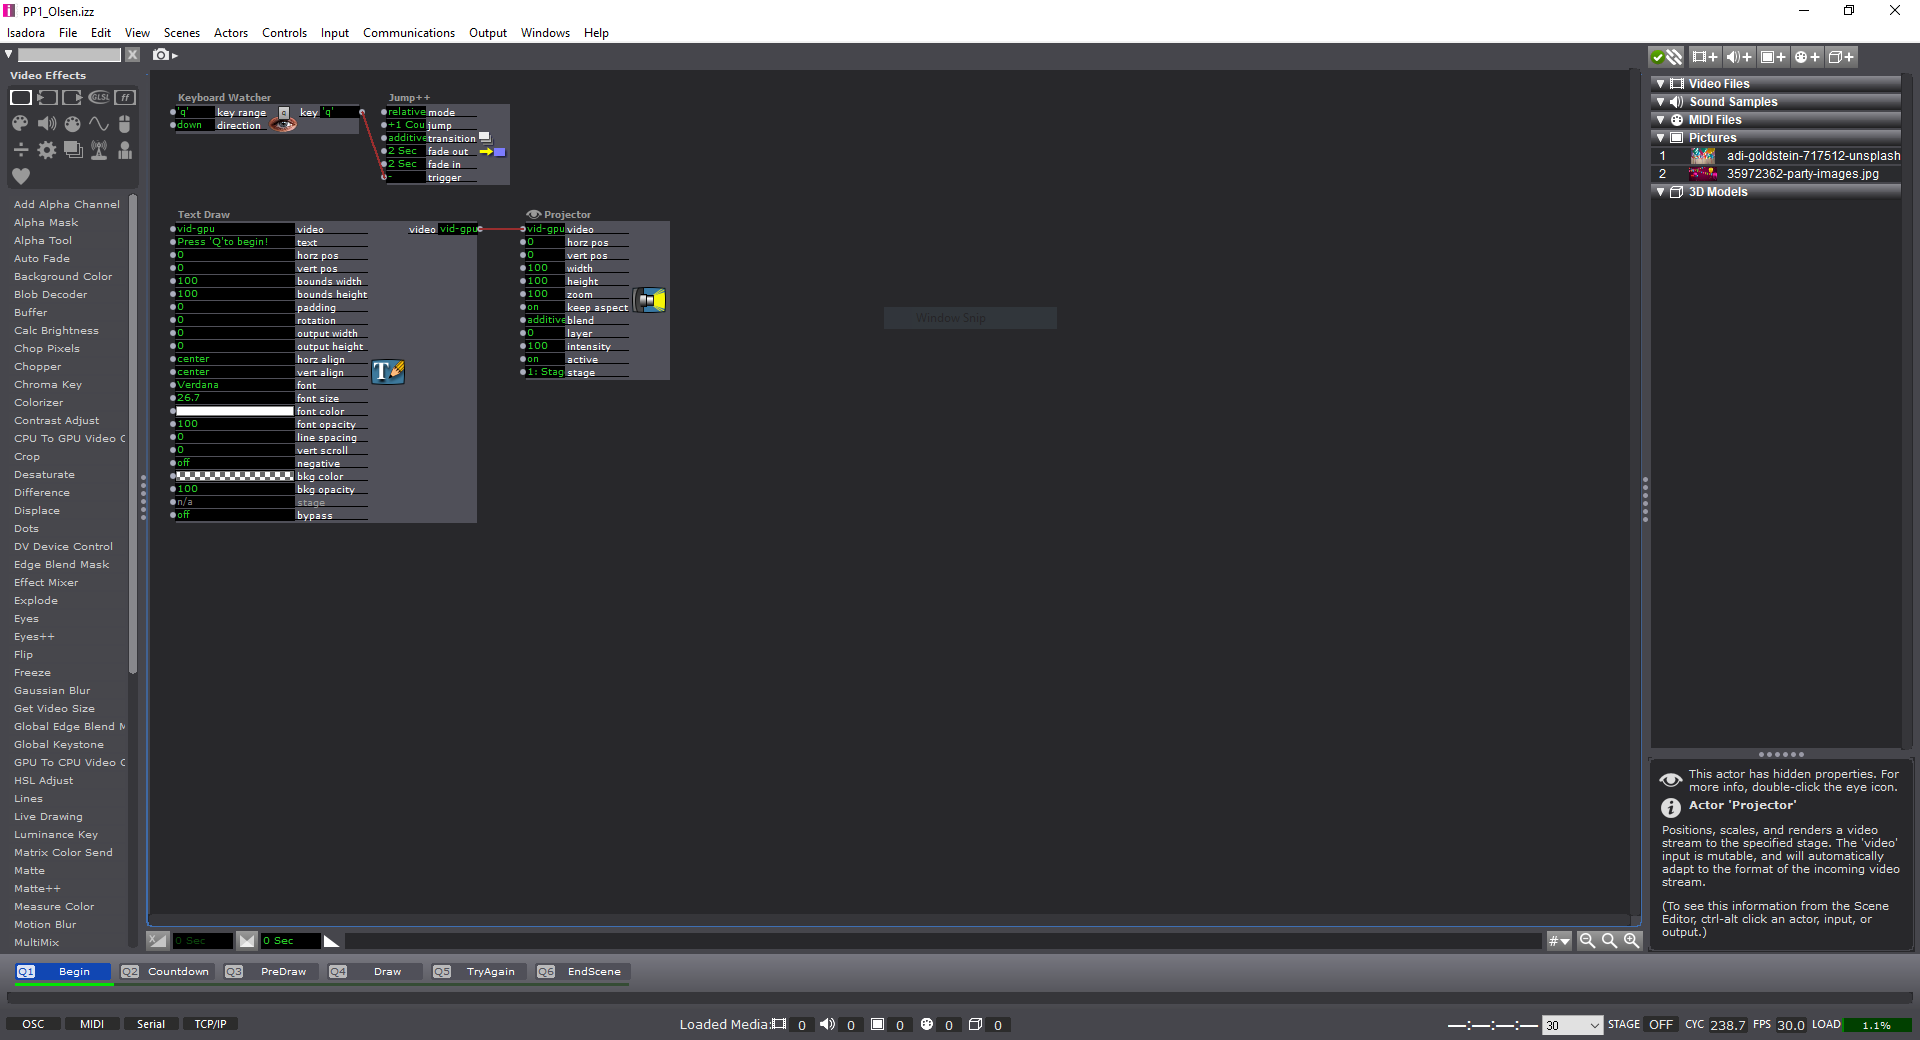
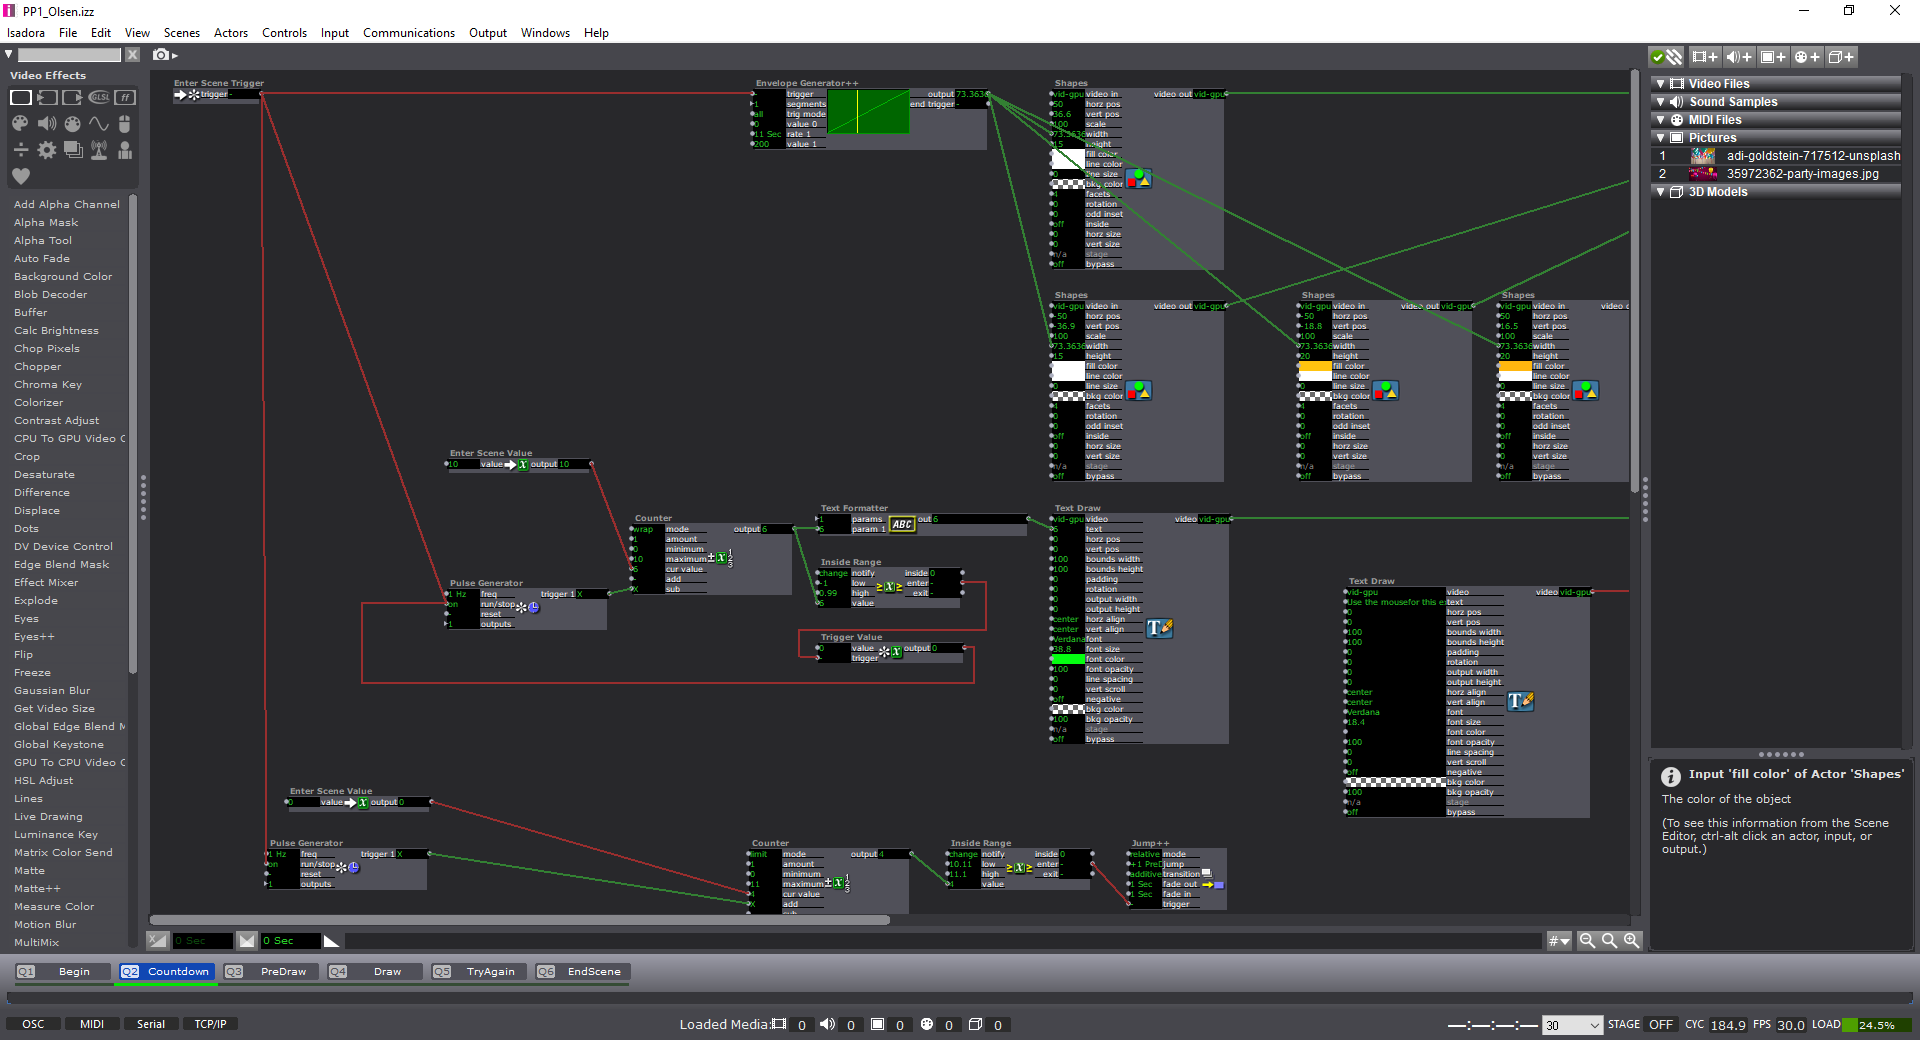
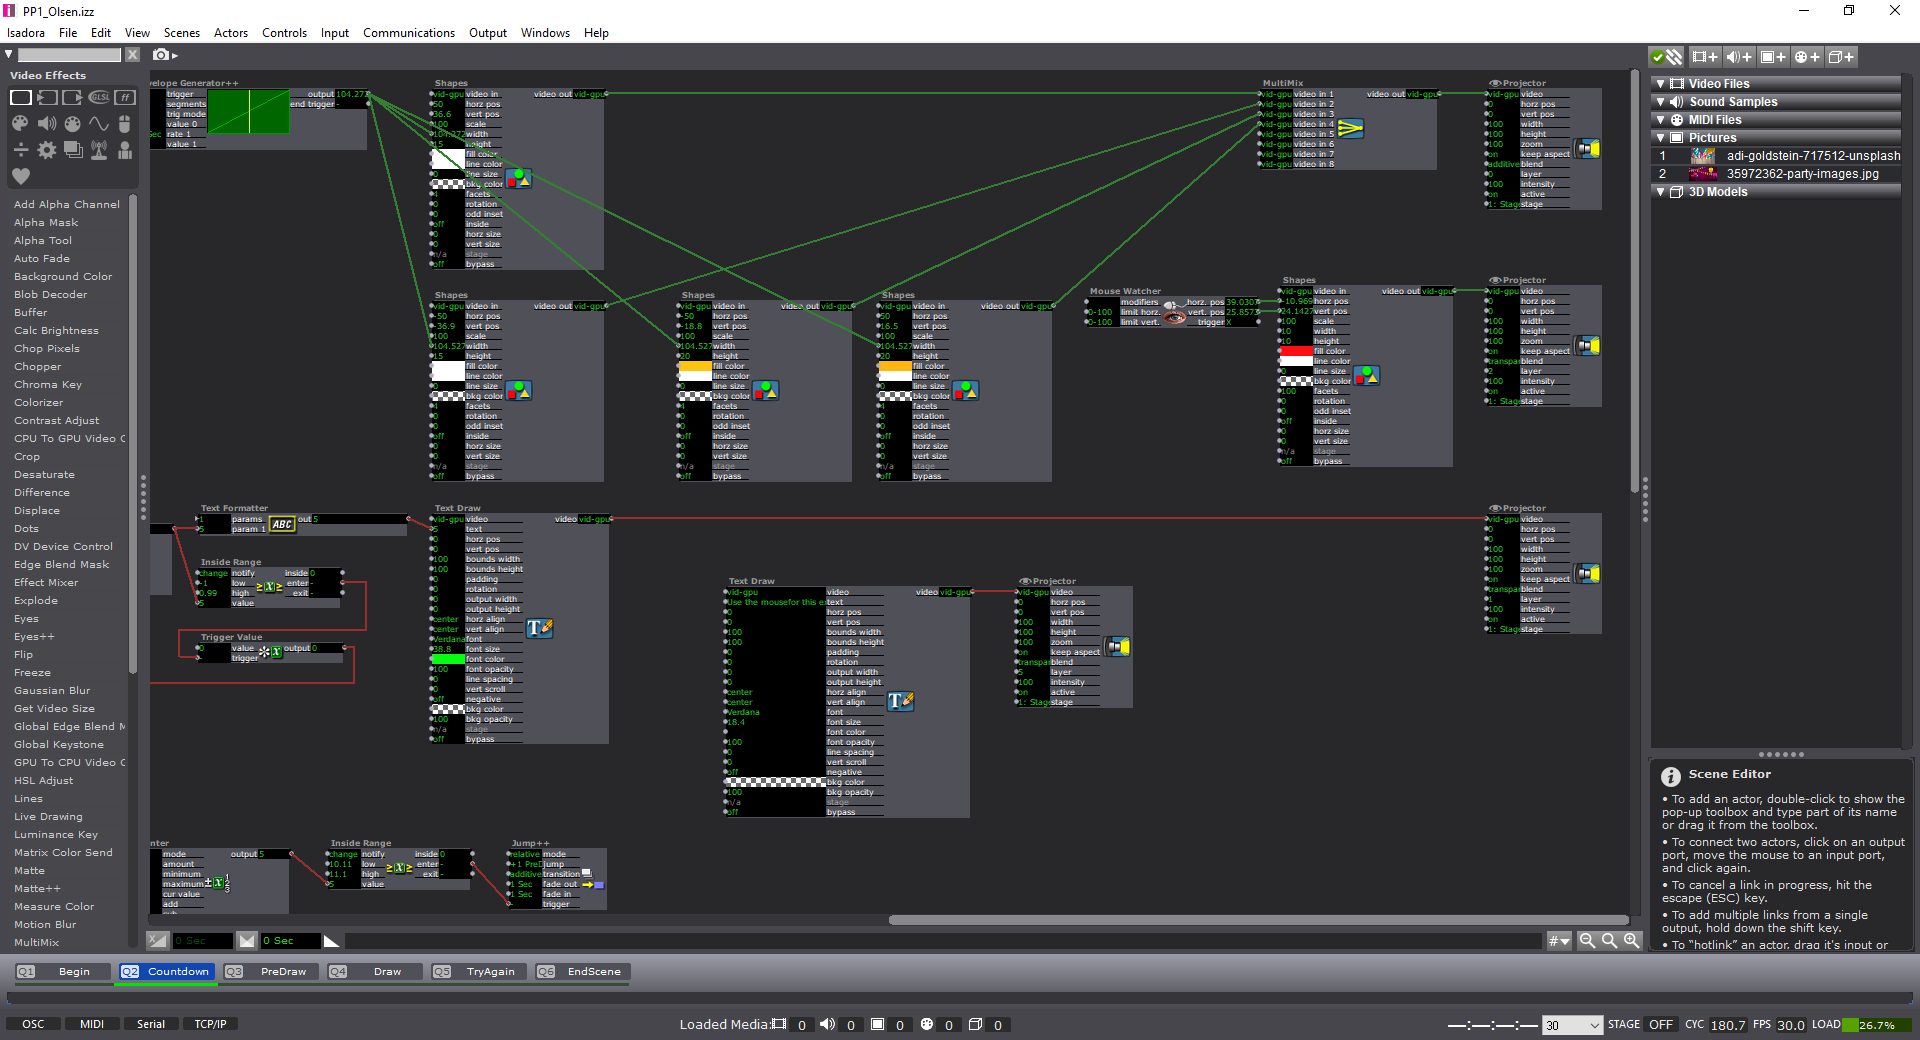
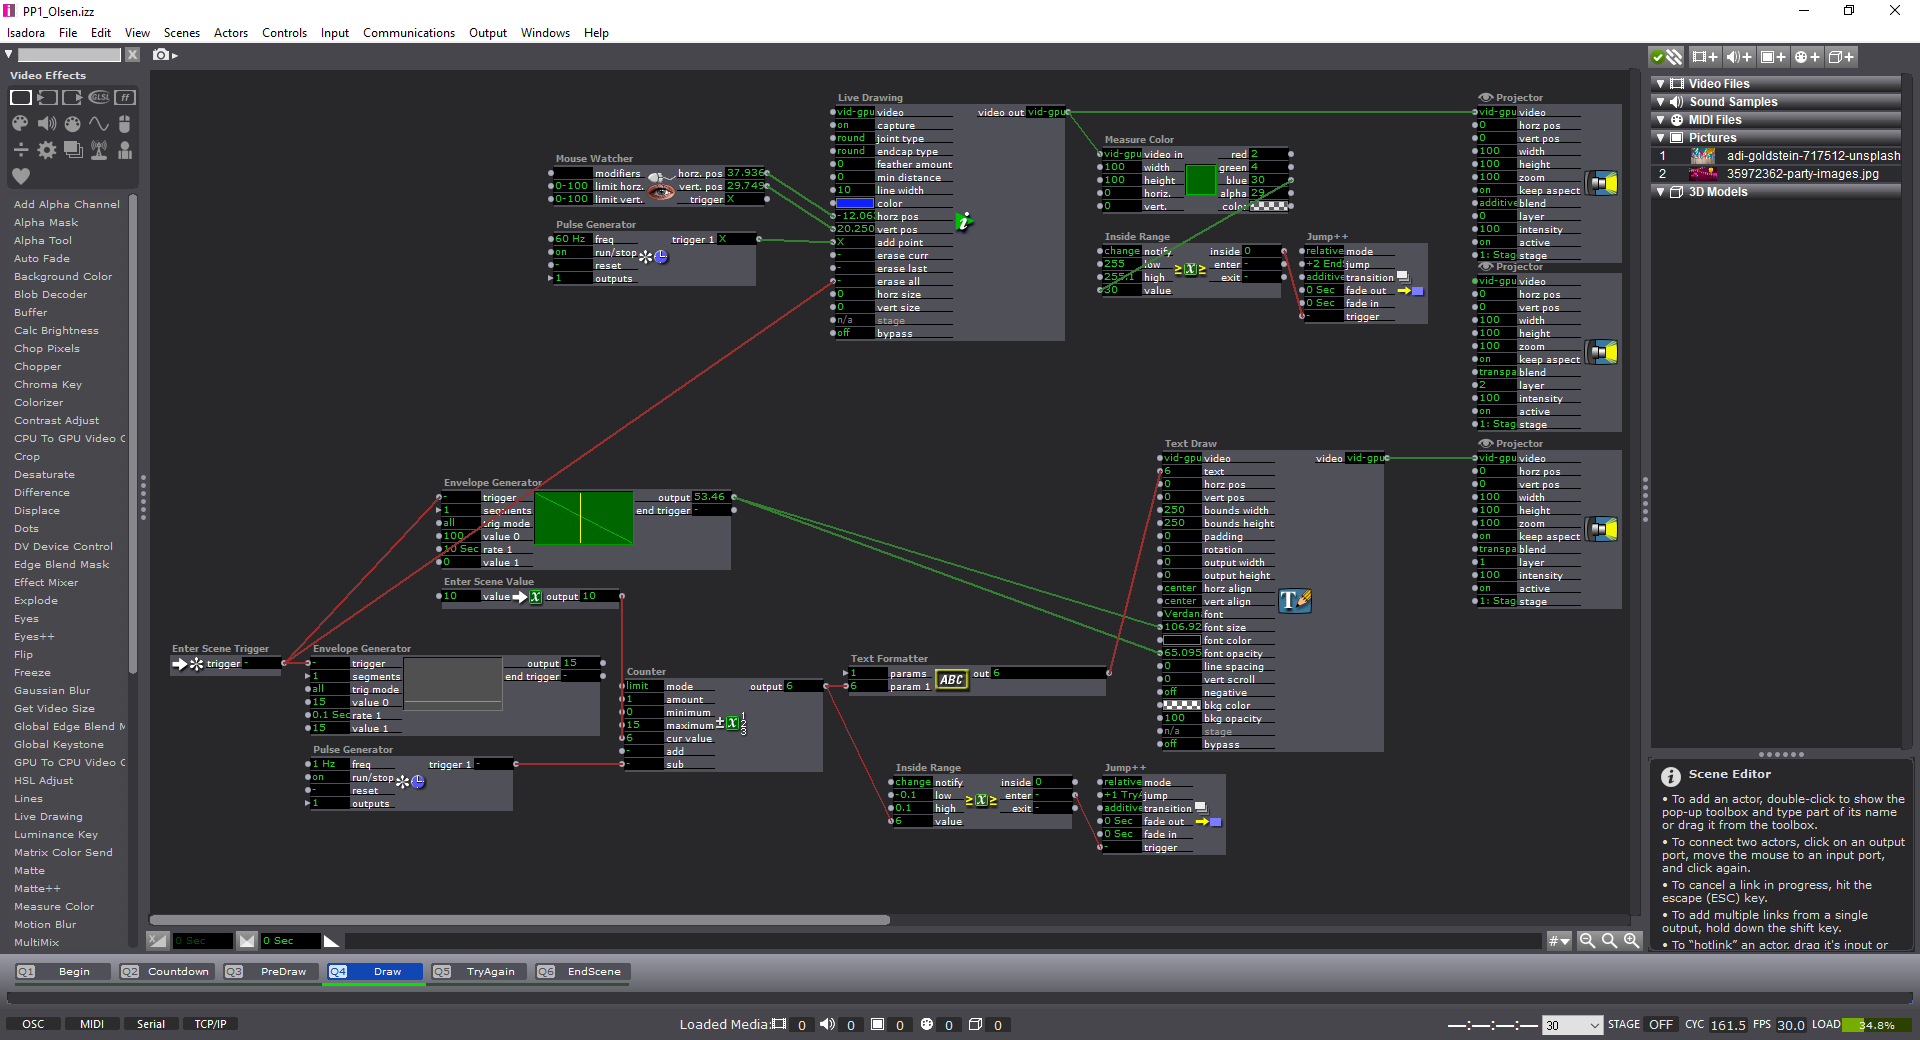
Process:
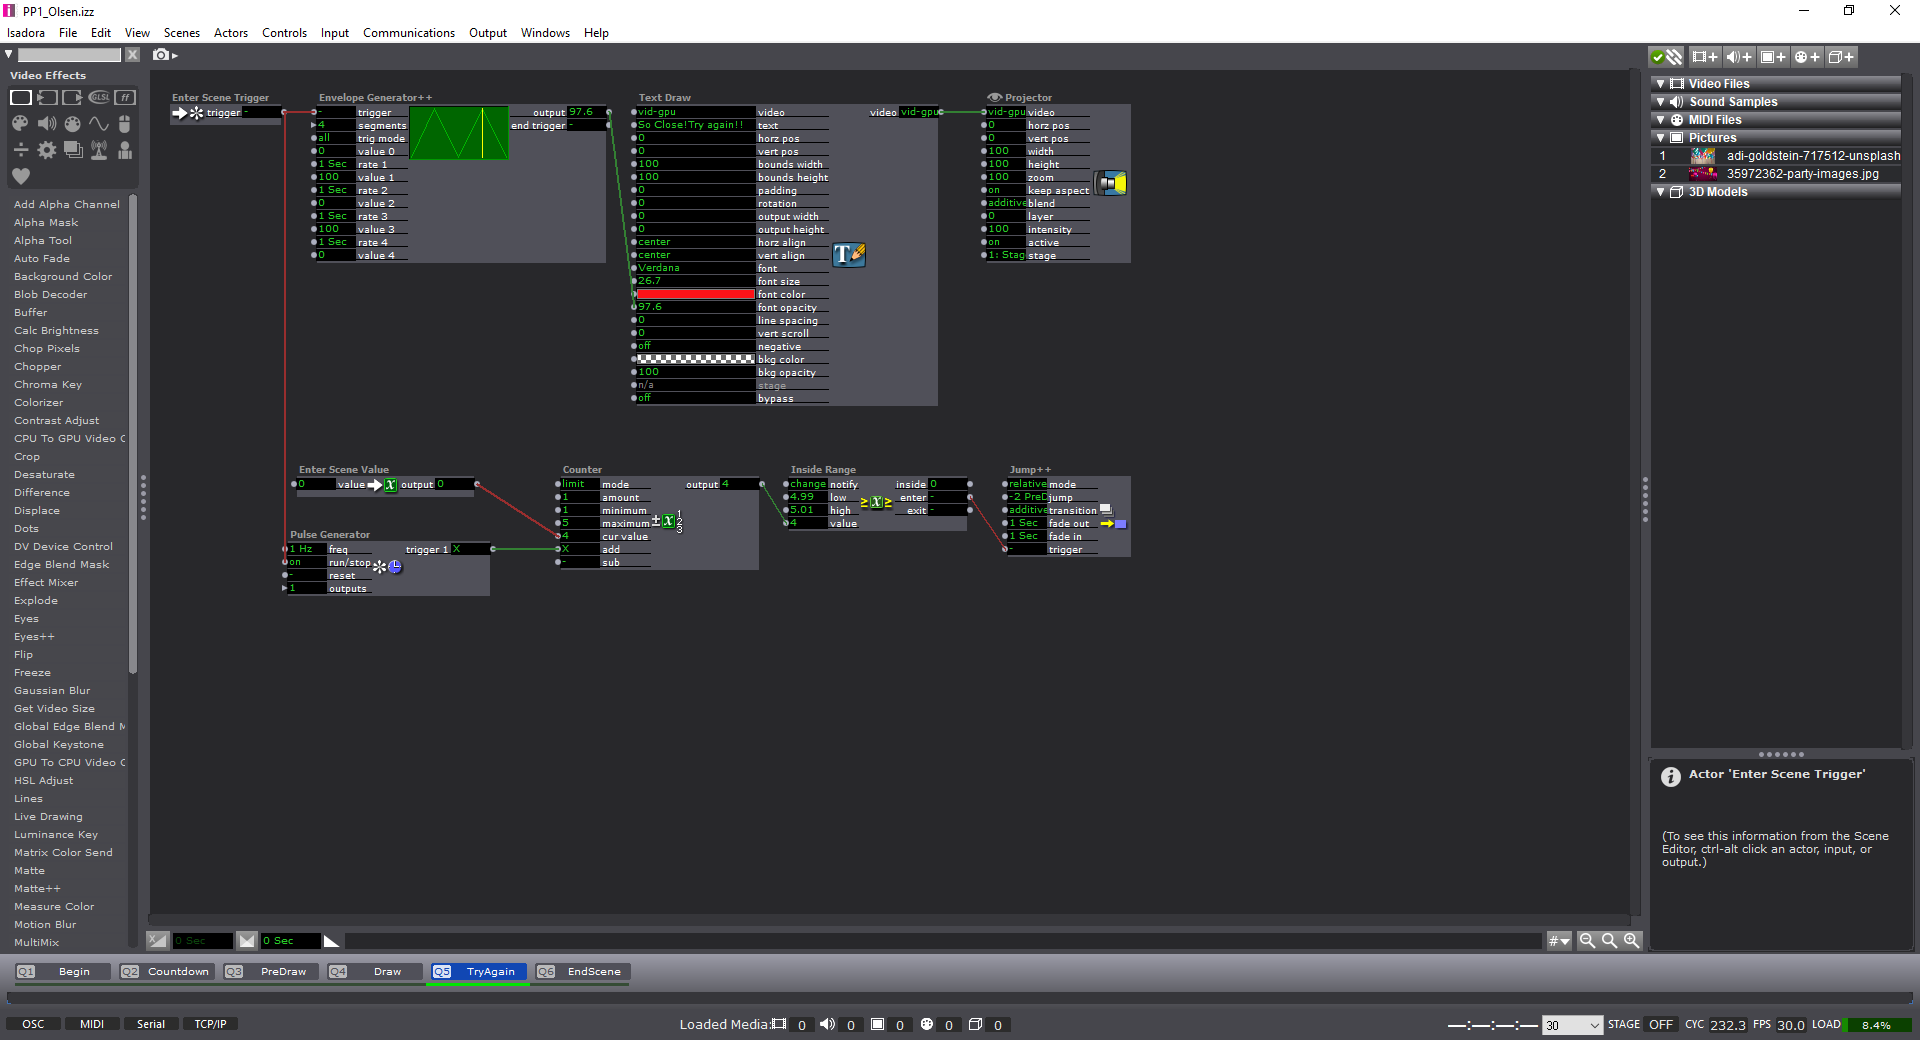
For those who are interested (and for my own reference) here’s the list of actors that I used within the patch:
- Keyboard Watcher
- Mouse Watcher
- Live Drawing
- Picture Player
- Measure Color
- Text Draw
- Text Formatter
- Jump++
- Projector
- Multimix
- Enter Scene Trigger
- Enter Scene Value
- Pulse Generator
- Wave Generator
- Counter
- Inside Range
- Trigger Value
- Shapes
- Envelope Generator (++)


Feedback: (sorry I haven’t learned everyone’s names!)
–Izzy patch could use more of a choice for what color is used to draw on the screen.
–The clear instructions to push certain keys and what was going to be used for the experience was a good touch.
–The sense of urgency was nice.
–Fix the small bug where if you restart the experience it jumps to the end without letting the user draw.
–Change the color countdown on the draw screen to something more noticeable (white?)
Response:
-I think this was a wonderful experience. I haven’t ever considered the idea of a ‘pressure project’ before. But after working through, I am excited for the next one! My approach was pretty straightforward in terms of design process: Ideate, Create, Test, Fix, Test, etc.
-I think next time I will have more people try it before I get the chance to present again as I only had one other person attempt the experience. But, this showcase actually helped me find the bug in my system as well! I couldn’t find the time (or the solution) to why it was happening, but it shows the power of ‘performing’ your piece before the final show to find any errors.
-I’m grateful to have seen everyone else’s project too, and I also appreciated being able to look at the ‘guts’ of their Izzy patches. I learned a few new things in terms of using ‘User Actors’ in an effective way–as I didn’t use any in the first place. It was unfortunate that I couldn’t connect up a “Listener” actor correctly in the end, but the only state change would have changed the ending photo. Regardless I enjoyed working on this, the experience, and the feedback from my peers.
-Tay