Cycle 3: Xylophone Hero at Fort Izzy
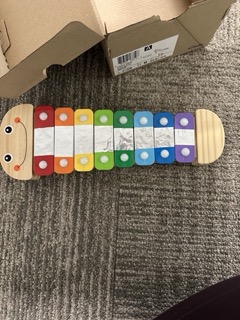
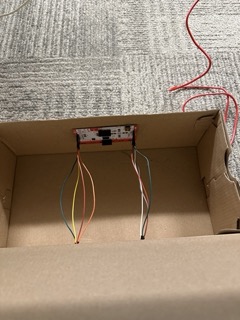
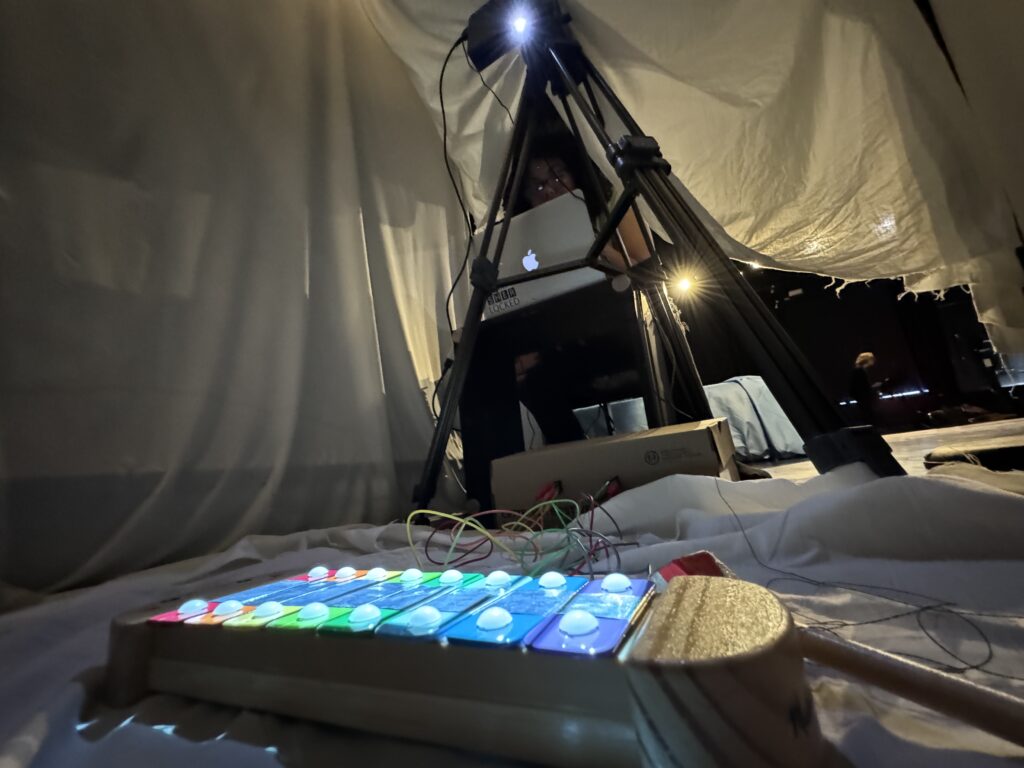
Posted: December 14, 2023 Filed under: Uncategorized Leave a comment »This Cycle I decided to focus on the physical presentation of my project. My first task was to connect my xylophone to Isadora using the Makey Makey. I wrapped foil around each key of the xylophone, then made “wires” out of foil that connected to each foiled key. Then I remapped the back inputs of the Makey Makey to the numbers 1-8 and attached the breadboard wires to the Makey Makey. I attached the Makey Makey to the inside of a shoebox and fed the breadboard wires through to the outside of the box. From there, I connected the alligator clips and the breadboard wires. To ground the mallet, I tied one end of some conductive string to Earth on the Makey Makey and tied the other end around the handle of the mallet, taping the extra string to the mallet. I then covered the top of the mallet in foil.

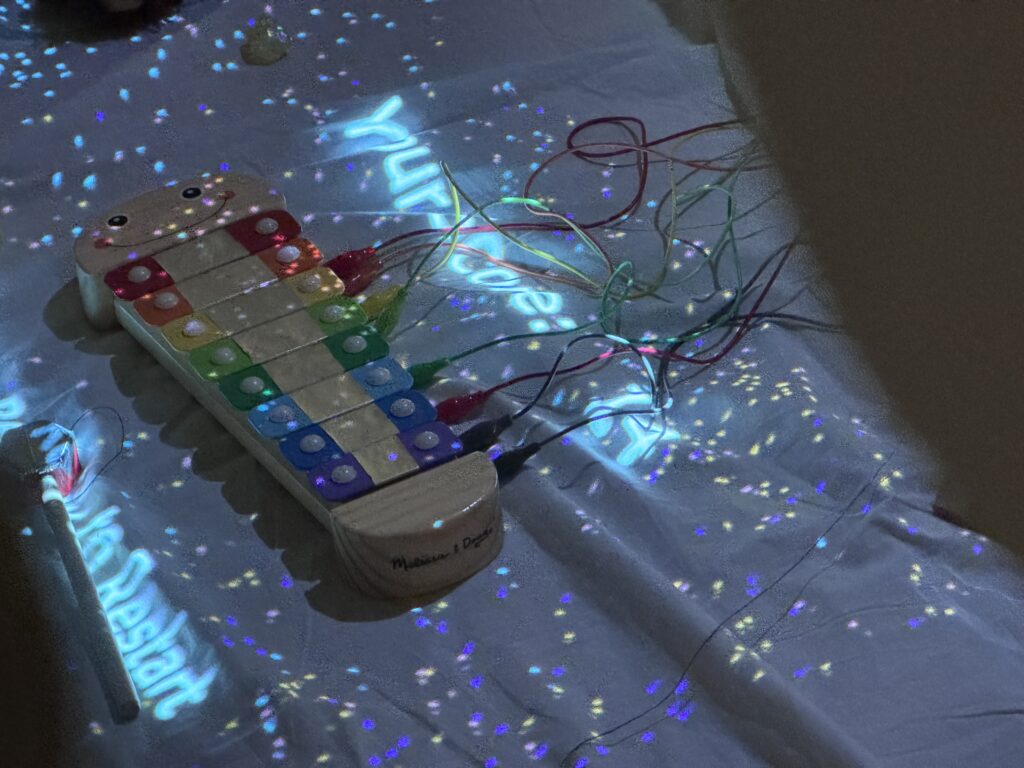
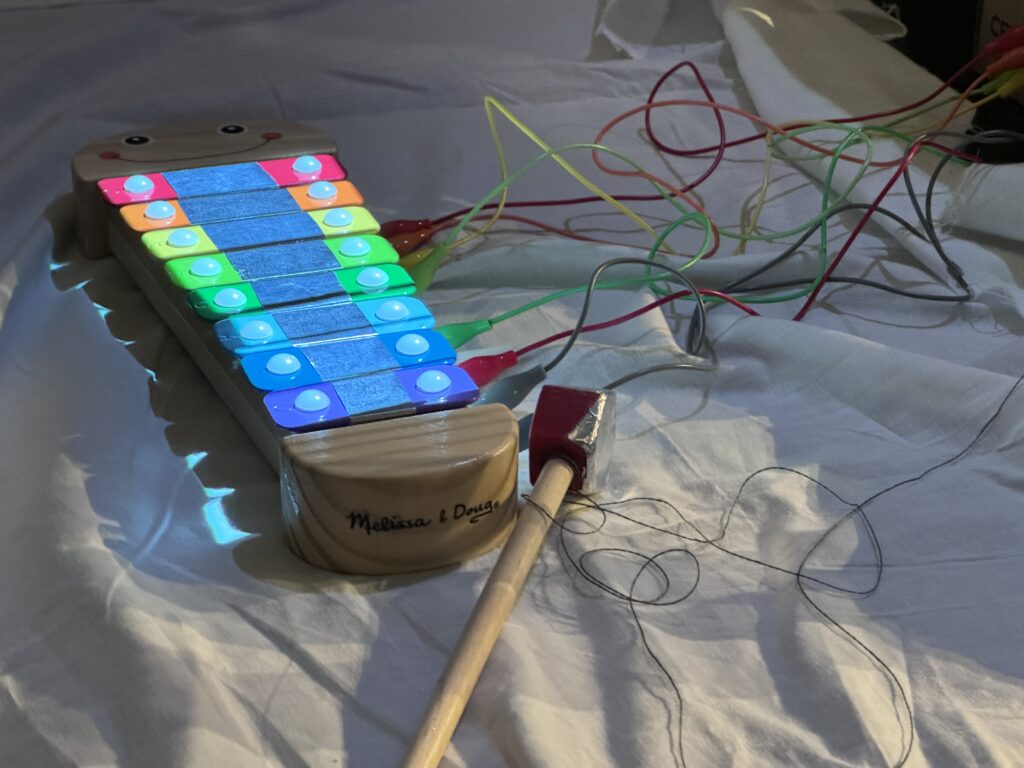
Before my Cycle 3 presentation, I mapped the output of my Isadora patch onto the xylophone and I set up a “blanket fort” around my projection in the Motion Lab. I also went through my patch to make sure everything was working as expected, and I added a start screen, an end screen, and a restart. I staged the fort with stuffed animals, playing cards, and other items that might be found in a children’s bedroom.
I am extremely happy with how this project turned out and I am so proud of what I produced. If I were to do more cycles, I would paint the shoebox to look more like a toy box, secure the bottom sheet to the floor, and I would figure out a way to hold a high score or display a scoreboard. I could also figure out a way to introduce game difficulties.
Cycle 2: Keeping Score
Posted: December 14, 2023 Filed under: Uncategorized Leave a comment »In between Cycle 1 and Cycle 2, I decided that my input device would be a children’s xylophone, which I would make work using the Makey Makey.
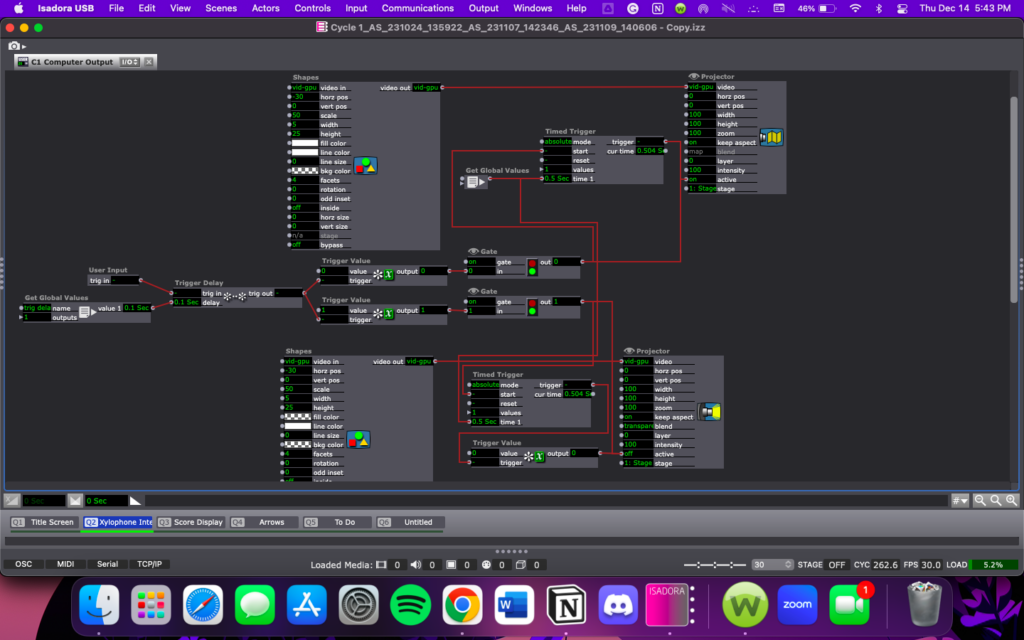
During Cycle 2, I spent most of my time working in Isadora. I wanted to make sure I had my Isadora patch working the way I wanted before I started any of the physical presentation elements. To start, I turned my four arrow shapes into rectangles, then added four more to simulate a xylophone.
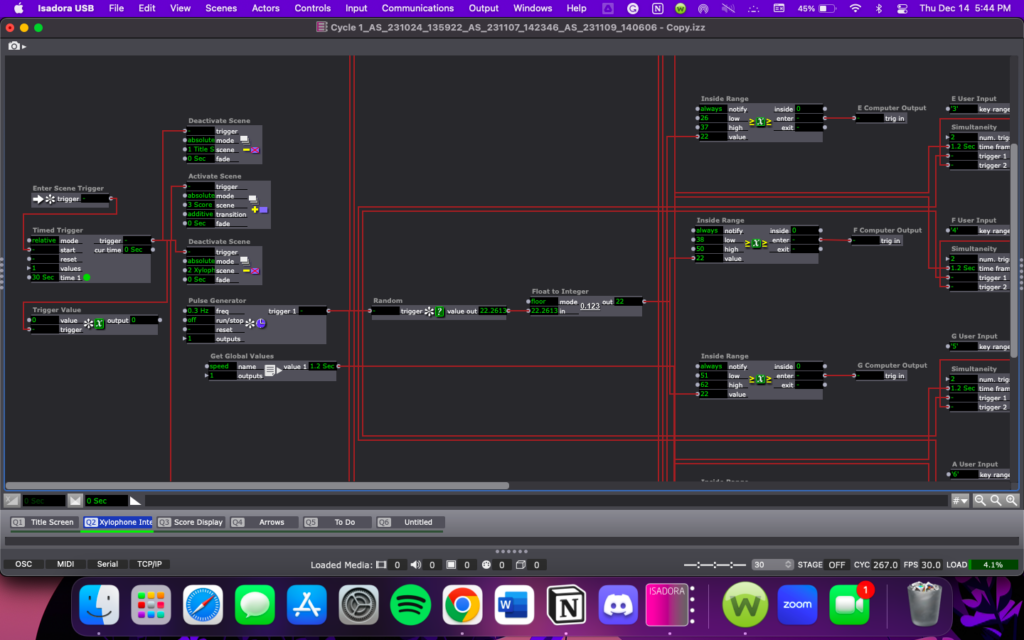
Next, I added in a way for the computer to tell the player which key to hit. To do this I started by duplicating the user actors I had made for the previous rectangles. Each user actor is almost identical to the blinking arrows in Cycle 1, but has input from a Get Global Values Actor inside the User Actor, and an Inside Range Actor outside of the User Actor. The outside mechanism uses an Enter Scene Trigger, Timed Trigger, Trigger Value, Pulse Generator, Activate and Deactivate Scene Actors, the Random Actor and the Float to Integer Actor, as well as an Inside Range Actor connected to each of the duplicated User Actors. Both patch snippets are pictured below.
I added in a goal for the game; To score as many points as possible in one minute. First I added a way for Isadora to track the player’s score using the Counter. Actor. Then I added in a game timer using the TimerTool Actor downloaded from the Add-Ons page of the TroikaTronics website.
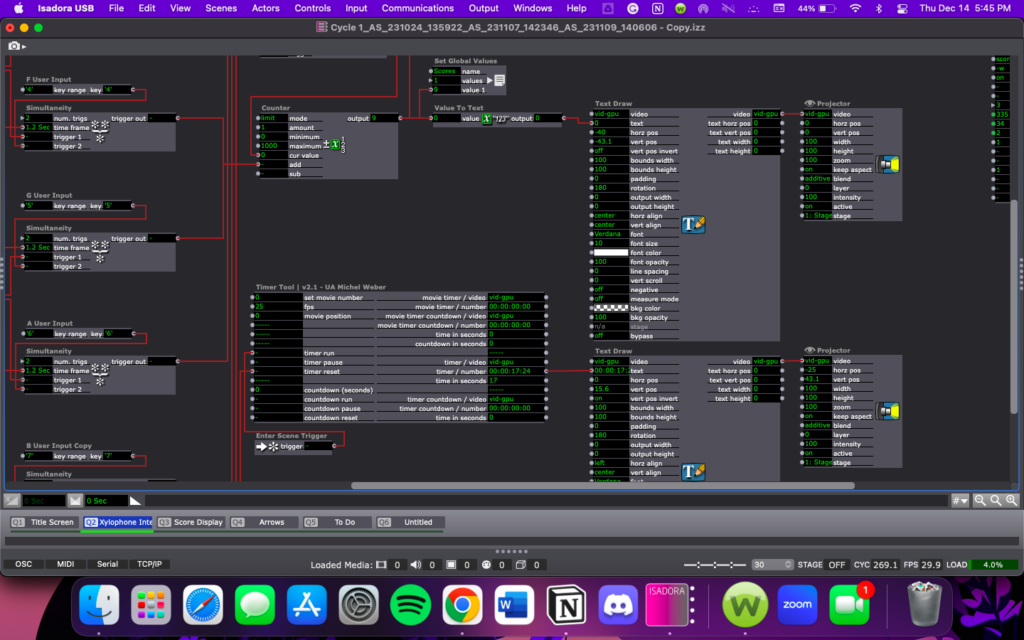
I also tried to add in a scoreboard feature, but it turned out to be much more difficult than I had anticipated, so a scoreboard is likely a Cycle 4 type of addition.
In Cycle 3 I am going to spend more time focusing on the physical presentation of my project. My goals are to get the xylophone connected to my Isadora patch, figure out how I want to set up in the Motion Lab, and projection map my Stage onto the xylophone.
Cycle 1: Blinking Arrows
Posted: November 12, 2023 Filed under: Uncategorized Leave a comment »Going into Cycle 1, I knew that I wanted to make a game of some kind and I knew I wanted to use an alternative control scheme of some kind using the Makey Makey. I was also drawing inspiration from retro games, like Snake and Simon/Simon Says. Aside from this, I didn’t have any idea of what I wanted my final project to look like, so I decided to treat Cycle 1 as a pressure project, in that I would play around with Isadora and my ideas so far, and whatever came from it is what I’d demo for class.
My first step was just figuring out what exactly I wanted my project to look like at the end of Cycle 3, so I decided to just look at some retro games that I could potentially recreate in Isadora within the scope of the class. This research brought me to Dance Dance Revolution (not quite retro but close enough) and the idea of a rhythm game, the mechanics of which felt simple enough to produce before the end of the semester.
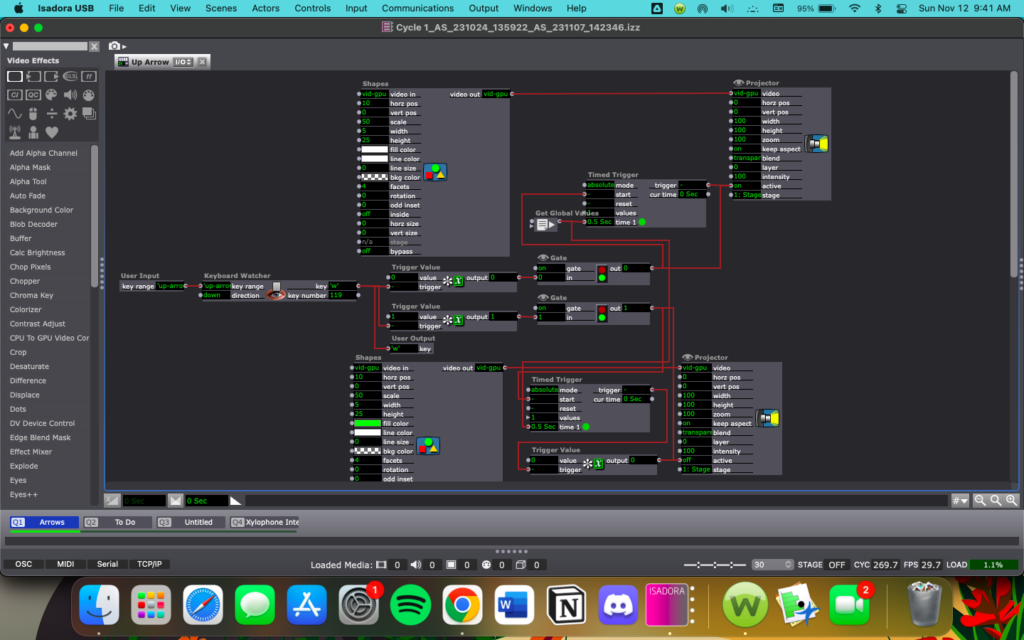
I started my patch with a rectangle in each corner of the stage, each labeled with a direction (up, down, left right). I would be using the Makey Makey as my controller (I will decide the actual controls in a later cycle), but these would correspond to the temporary keyboard input for each rectangles action. The rectangle UI didn’t feel very intuitive to me, and I didn’t like how it looked, so I scrapped those and changed them to arrows. At this point, I moved towards creating the game mechanics, starting with getting the arrows to blink based on the input of the user. Below is a picture of the patch for just one of the arrows to demonstrate how I got this to work.
During the in-class demo, I mentioned wanting to use a source of input that would be simple enough that a baby could use it, drawing inspiration from my baby nephew. Someone suggested I use a children’s xylophone as my controller and I really liked the idea, so I will be exploring children’s toys as input methods, most likely in Cycle 3. For Cycle 2, I will me continuing to work on the mechanics of my game.
Pressure Project 3
Posted: October 25, 2023 Filed under: Uncategorized 1 Comment »Pressure project 3 was a continuation of pressure project 2. We were given an additional 8 hours to iterate on pressure project 2 in preparation for the Chuck Csuri open house at ACCAD.
For pp3 I changed the third scene of my project to transition from the spinning ball into a color-changing “light show”.
The ball slowly changing to a black screen is not triggered by motion, but is just a series of timers that are triggered when the scene starts. The background and all four elements of the circle are connected to their own timer, with the first triggering at 10 seconds and the next triggering a second after the first, and so on until the ball is gone. To change the color, I connected each Timed Trigger to a Colorizer so that when each went off, the Colorizer would turn on.

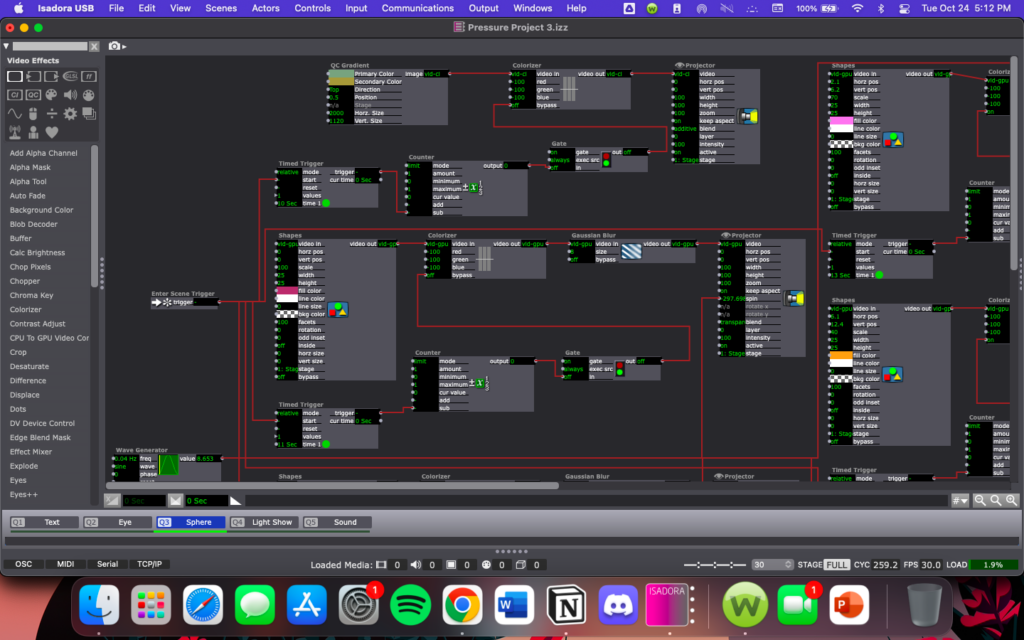

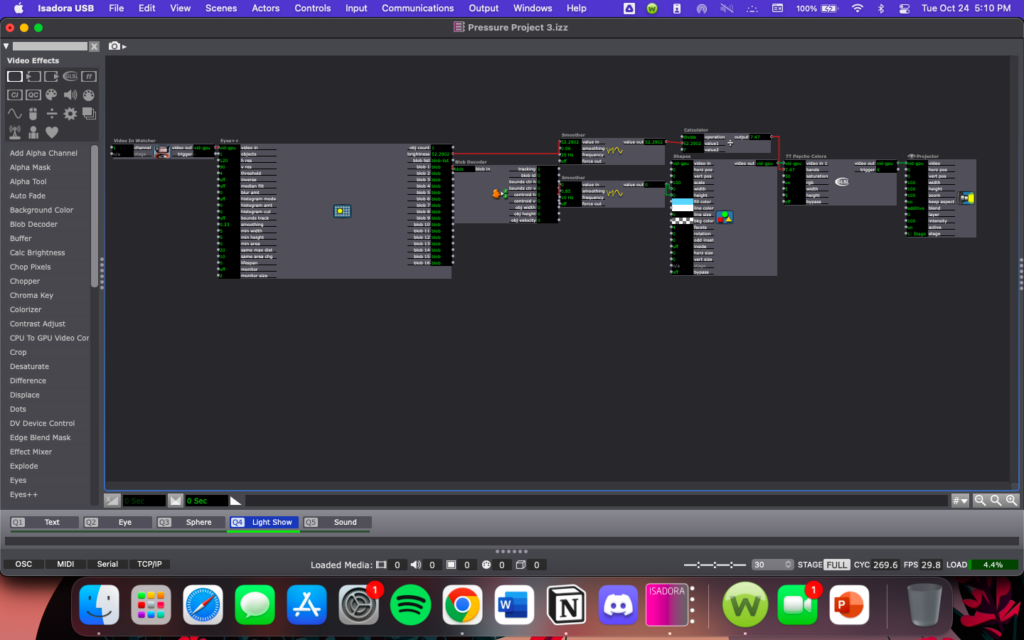
The “light show” scene I added after the spinning ball is motion controlled and uses the Video In Watcher and Eyes++ actors to track the users motion. I used a TT Psycho Colors actor, with the brightness output from the Eyes++ actor controlling the bands and the first blob output controlling the width and height of the shape, with both passing through a smoother in an attempt to get the color changes to be more of a gradual change. This works unless there is lots of rapid movement by the user, in which case the colors shift more suddenly, which could negatively impact users with photosensitivity.

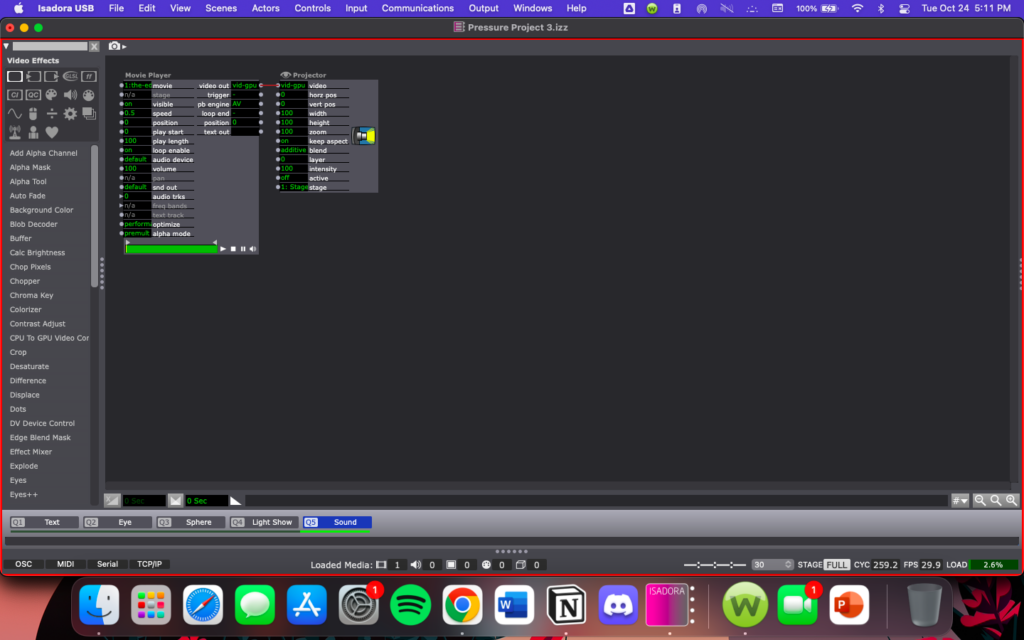
The last thing I added in PP3 was sound playing through the whole experience. To do this I placed my sound file (MP3) connected to a projector in a separate scene, then in each of the scenes I wanted to play music in, I placed a listener actor connected to a projector. This approach did not work with a WAV file.
Pressure Project 2
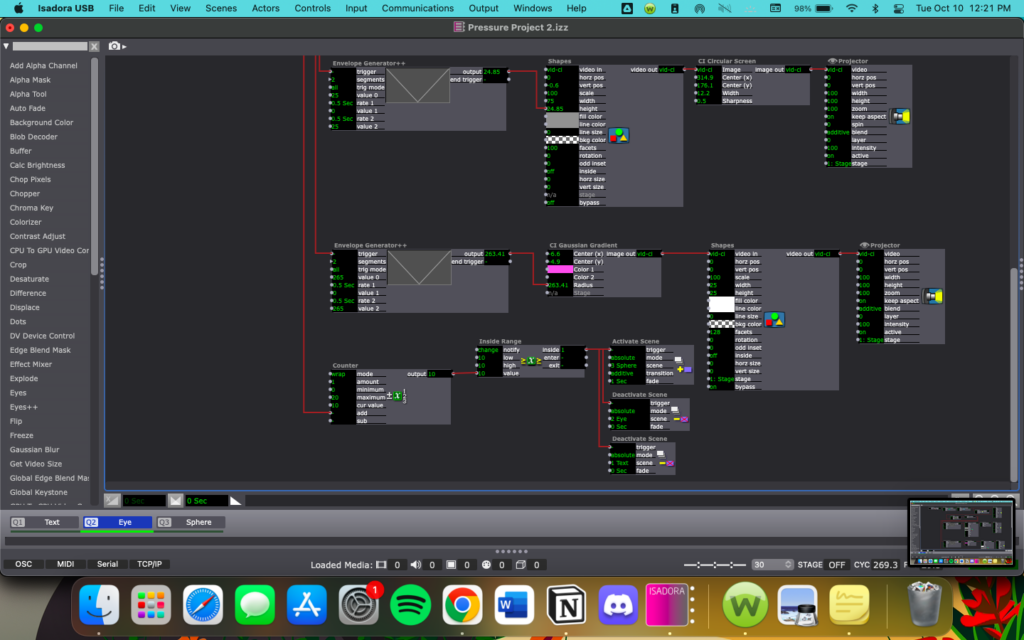
Posted: October 16, 2023 Filed under: Uncategorized Leave a comment »Pressure Project 2 had to be completed in 8 hours, had to use the Video In Watcher, had to be interactive, and had to be inspired by Chuck Csuri. I was inspired the colors in this piece and wanted to use them in some way in my work. One of the biggest problems I ran into throughout this Pressure Project was keeping Isadora from crashing. I found that just starting live capture with my webcam would increase the load of Isadora by 30% or more, so I decided to use it in only one part of my project rather than the whole thing in an attempt to keep the load down. I also reduced the webcam resolution quite a bit and this helped to keep Isadora and my computer from crashing.
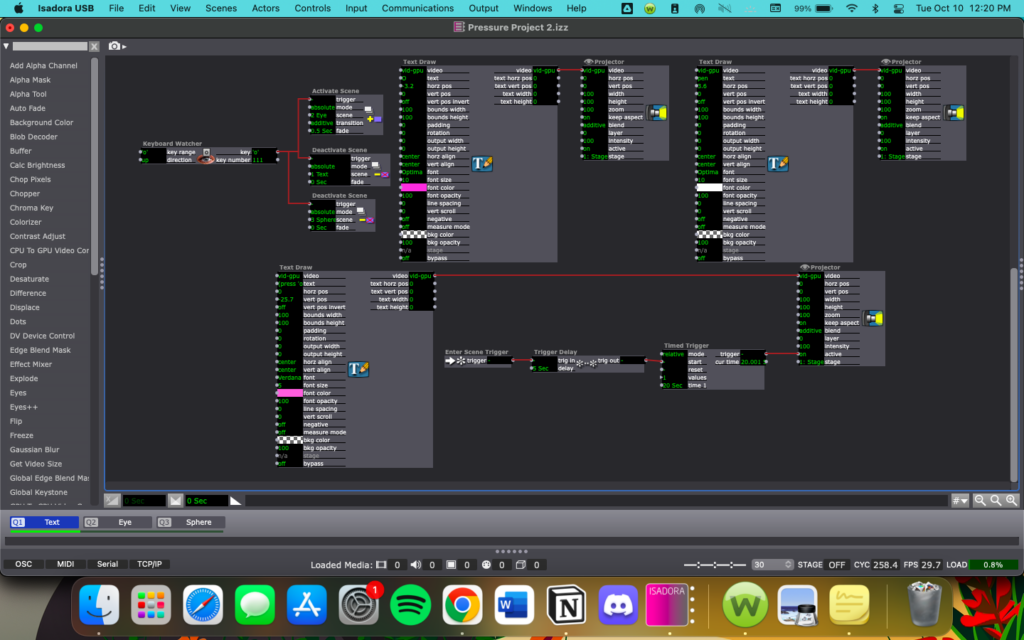
My project begins with a blank screen that says “Open”, with the ‘O’ in pink and the rest of the word in white.
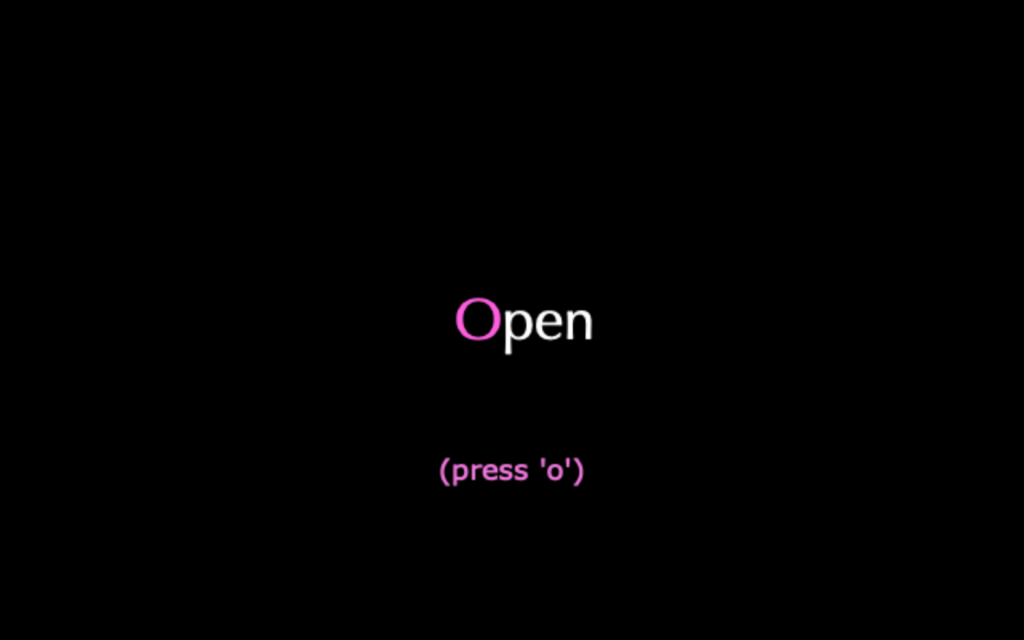
I used three Text Draw actors in this scene; one for the ‘O’, one for ‘pen’ placed beside the ‘O’ to look like one word, and the third for the hint that is displayed after 20 seconds. To create the timer, I used the Enter Scene Trigger, Trigger Delay, and Timed Trigger actors. I also used a keyboard watcher to trigger the next scene when the letter ‘o’ is pressed.
The second scene is an eye shape made of concentric circles and a glowing pink center. I actually started with this scene first, so I started playing with the Video In Watcher here.
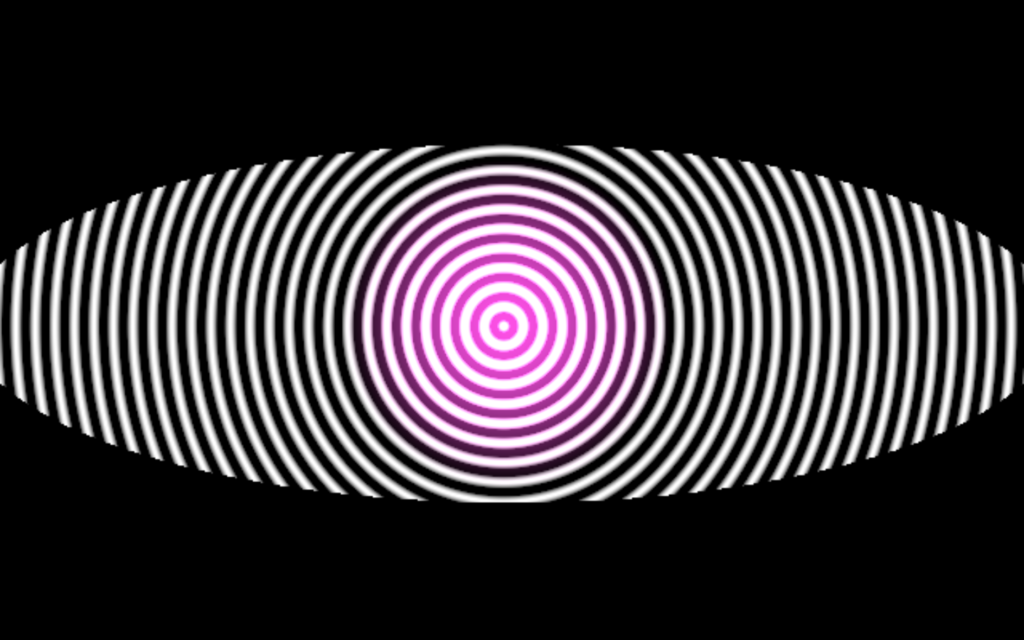
The biggest challenge in this scene was getting a delay between each eye blink so that the next scene doesn’t trigger too quickly. To do this, I used an Inside Range actor within a sequence connected to the Video In Watcher with a higher minimum value and a small range, then a Trigger Delay actor off of the Inside Range Actor.
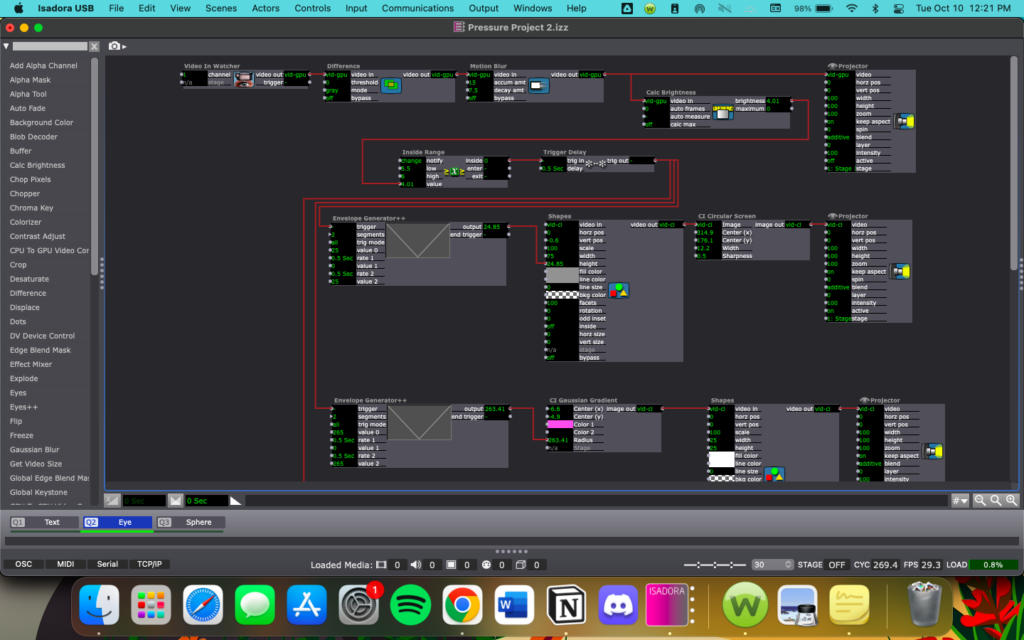
Because I wanted the scene to change after so many eye blinks, I used a Counter and an Inside Range actor to count the number of blinks (movement inputs from the Video In Watcher), then after x blinks (I used 10 but this can be changed for a longer experience), the Inside Range actor will trigger an Activate Scene actor to move to the next scene.
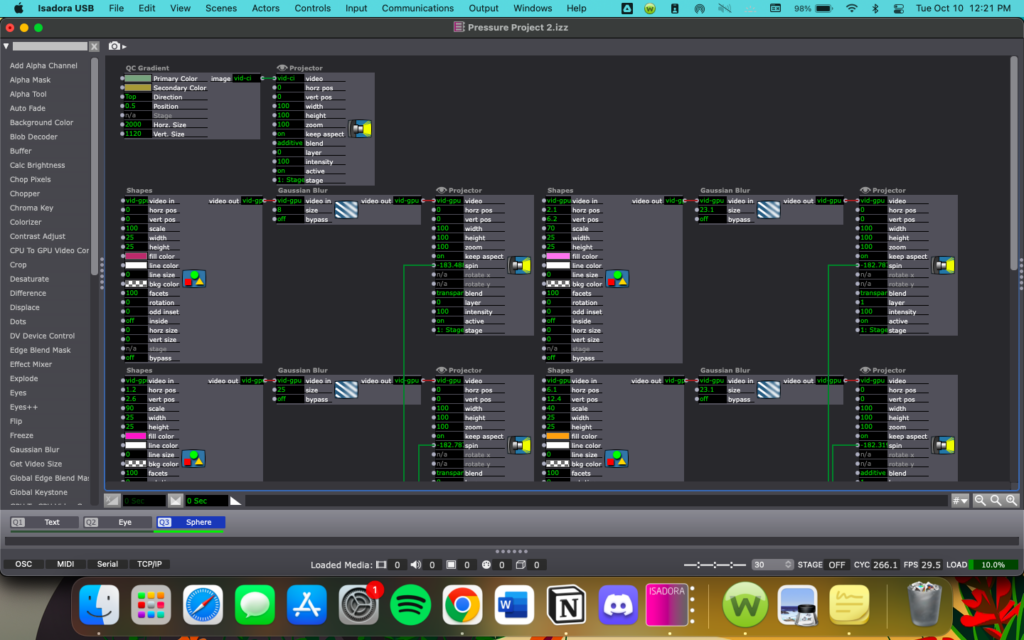
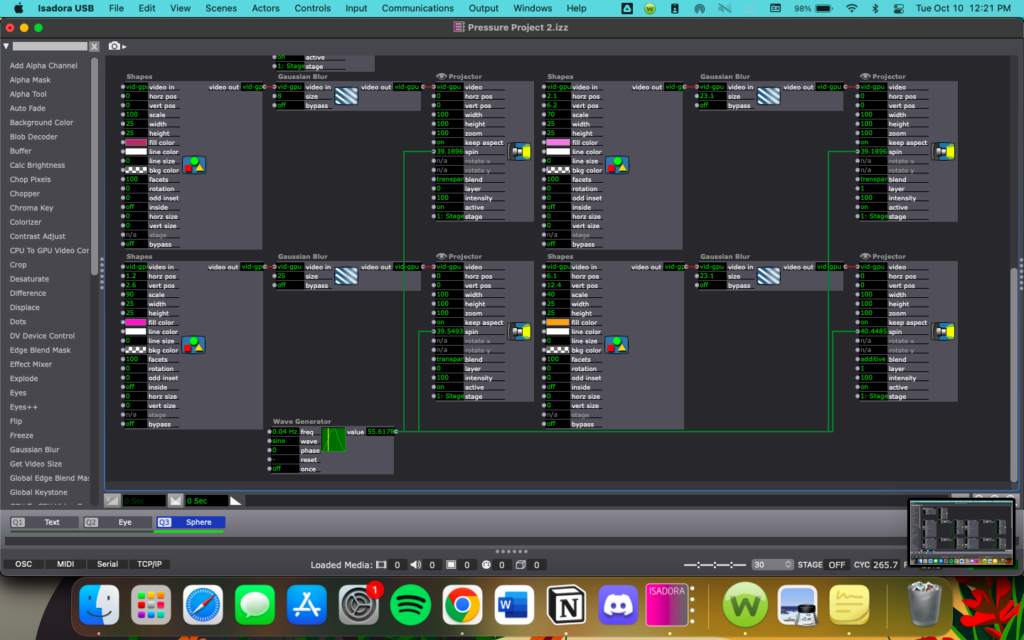
The third scene is a pink sphere on a gold and green/blue background. This one was mostly a result of playing around with layering Shapes actors to see if I could give the illusion of a 3D object. This scene is not interactive, mostly because I couldn’t decide on an input method or how I wanted it to be interacted with.

My biggest obstacles in this scene were just getting each circle in the right place and finding the right actor for the background gradient, and these took a lot of time to do but were relatively easy overall. Because this scene does not have any interactive components, I used a Wave Generator actor to get the circle to spin. As of now, this scene does not end.
Pressure Project 1: Sunrise
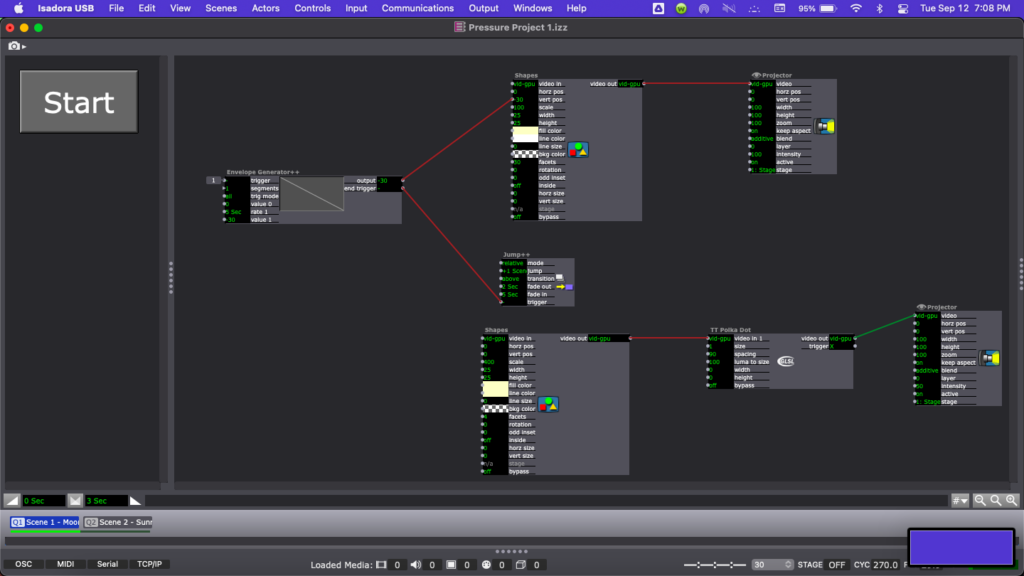
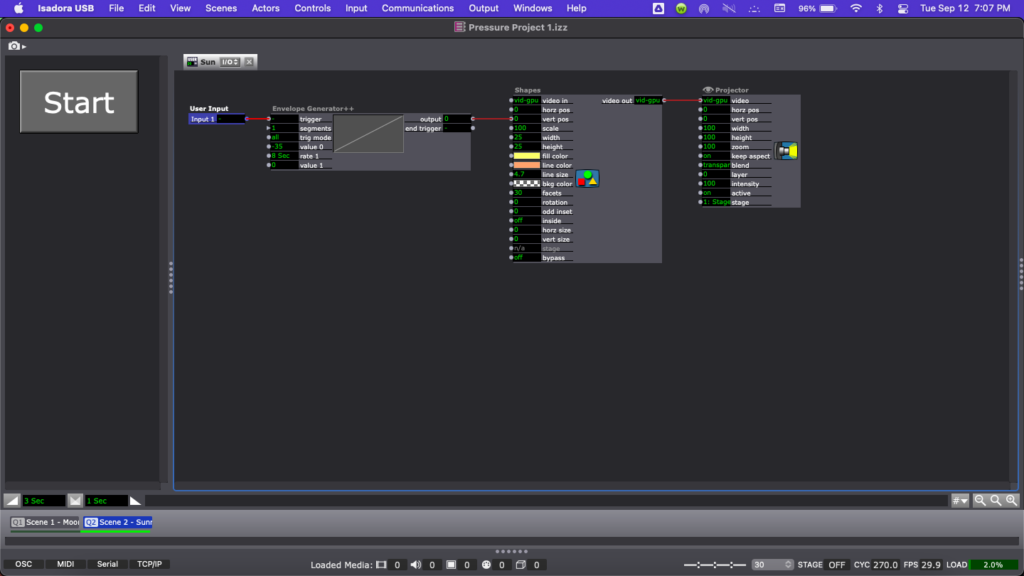
Posted: September 12, 2023 Filed under: Uncategorized Leave a comment »For Pressure Project 1, I created a short scene of a moon setting that transitioned into a sunrise using Isadora.
Step 1: The Idea
Coming up with an idea for this project was probably one of the hardest parts for me because I did not have any ideas when I first sat down to work, but after a few minutes of playing around in Isadora, I started to come up with ideas.
Step 2: Iteration
My first idea started with colored rectangles that I wanted to have change colors over time, so I started working on rectangle placement. While working, I got another idea that excited me more than the one I was working on and scrapped the original concept. This new idea was going to play with negative space and would be entirely in black and white. I spent a lot of time working on trying to make the very first scene look the way I wanted, with a half black, half white circle on an opposing black and white background, but the split color circle ate up way too much time and I didn’t end up getting it to work the way I was hoping. From the ashes of the circle rose another idea: a sunset.
Step 3: Sun and Moon
In the time that I had left with this project, I started by making one of the circles yellow with an orange outline and deleted the extra one. Then I started to play with the position of the sun in the sky, making sure the action was not happening too fast, as sunrise is a naturally slower transition. Next, I used the Envelope Generator++ and Color Maker RGBA actors to make the color of the sky change from black to a pink-orange, making sure that this was happening in sync with the change in position of the sun. To add another element to my project, I created a new scene with a light yellow circle on a black background that would be a moon. I made the action of the moon going down slightly slower than that of the sunrise and I also added a TT Polka Dot GLSL Shader actor in an attempt to give the look of stars, though I did not end up having time to adjust this very much.
Step 4: Timing
Figuring out the timing of everything in this project took a lot of time. Coordinating the sun rising with the background color change, making sure the action wasn’t happening too slow or too fast, coordinating this with the timing of the mood falling, then adjusting the transition between the two scenes was more of a challenge than expected. If one of my elements was off by a couple seconds, then something looked off, so I spent what time I had left adjusting timing on several actors. I finished off the project by adding a button to start the show, as I forgot how to make it loop, but I did remember how to quickly program a start button.
Isadora File & Screen Capture

Reflection
I feel like this pressure project overall was a good introduction to both Isadora and the idea of a pressure project. While I did choose to mostly use actors we had already discussed in class, I do think there was enough time to play around with unfamiliar actors as well. Most of my time was spent on playing with Isadora and working on ideas that came before this one, but I don’t consider that to have been a waste of my time. To me, this time spent on elements that did not end up in my final project was spent equally as well because the final product is just an iteration of my previous ideas. I would have liked to do a little more, but I am happy with my project overall.
Bump: “Cycle 2: Audio Game” – Taylor Olsen
Posted: September 11, 2023 Filed under: Uncategorized Leave a comment »This project jumped out to me because I am always interested in games that are unique, and I have never encountered a game concept like the one described here. I am also interested in making a game that utilizes a unique concept and/or an abnormal control scheme, an idea partially inspired by this project.
A link to the original post: https://dems.asc.ohio-state.edu/?p=2157