Pressure Project 3
Posted: December 8, 2025 Filed under: Uncategorized Leave a comment »Make a MakeyMakey
Pressure Project 3 asked us to incorporate a MakeyMakey with Isadora to create something that a user could interact with via a non keyboard/mouse interface. I ran into a serious issue with the assignment as I did not have a MakeyMakey to work with! I was not in class the day they were handed out, and I didn’t have the ability to get one before the assignment was due. However, I am a freshly minted Electrical Engineer from OSU, so I decided to come up with an alternative.
First, lets talk about electricity. Electricity at it’s most basic is simply the movement of electrons from a source of high potential (voltage) to a lower potential (ground). (This is actually not entirely accurate and we can blame Ben Franklin for the error! But it works for our purposes.) The red arrow in the image below shows the flow electrons, also referred to as a current. The electrons with high charge want to get to ground, but there are a few things in their way. First is a resistor (the 1MΩ) which acts to resist the flow of electrons, they can’t move through it very fast. The 1M here is for 1 mega-ohm, a very large value for a resistor. The electrons do flow through the resistor but then run into a capacitor (the two parallel lines). A capacitor is a simple device, two metal plates that are very close to each other but not actually toughing. Here the electrons pile up on one side of the capacitor, they can’t actually get to ground. After a short moment enough electrons have made it through the resistor to cause the voltage at the capacitor to reach the same value as the power source. The key thing to know is that at rest the system is in a state where the voltage at the touch point is equal to that of the voltage source.
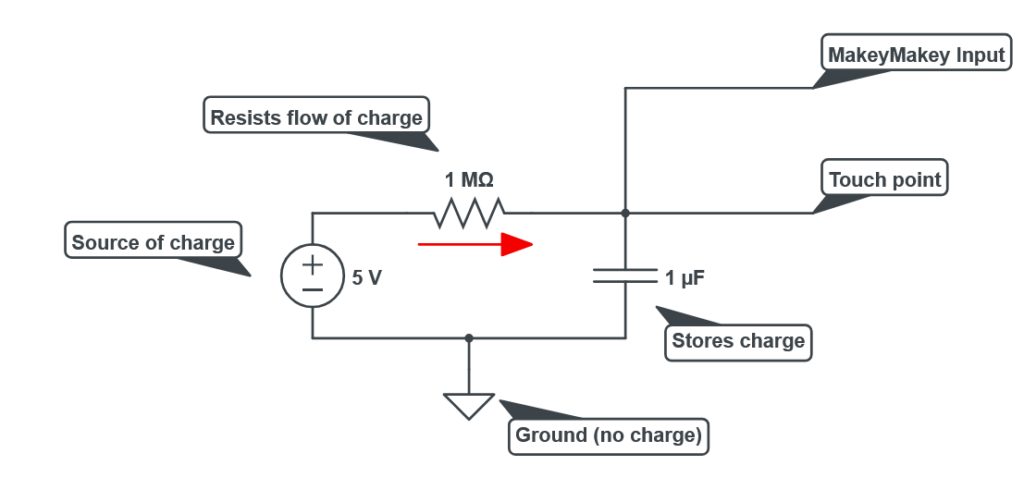
The MakeyMakey is constantly looking at the value of the voltage present on the charged side of the capacitor. But what if that voltage was to suddenly change? A sudden drop in voltage can be read by the MakeyMakey and recognized as a user input. Humans are good at carrying charge! When you shock yourself on a doorknob you are experiencing the transfer of charge from a high potential (you) to a lower potential (the door). The same thing happens here, when a person touches the wire connected to the MakeyMakey all the charge that was happily sitting in the capacitor suddenly sees a new place to go, into the user! All that charge rushes out of the system, and thanks to the resistor the power source can’t supply replacement electrons fast enough to maintain the voltage on the capacitor. Thus the MakeyMakey recognizes a voltage drop and triggers its output into the connected computer.
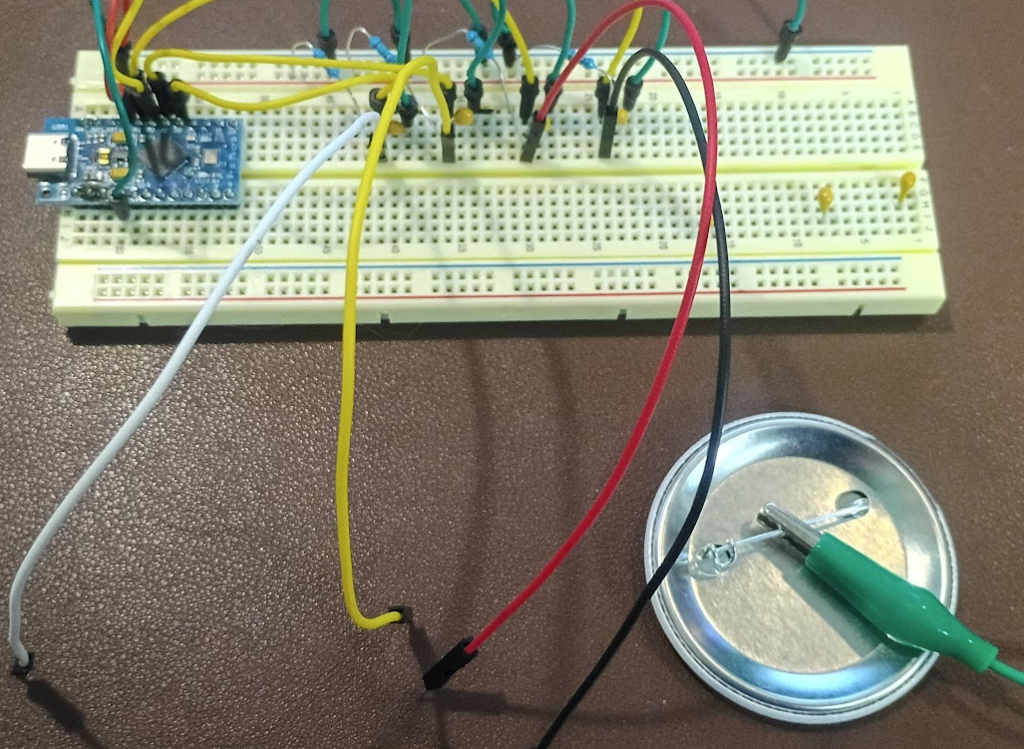
Above is my version of the MakeyMakey. The blue rectangle is an Arduino Leonardo and is responsible for running the program that makes the whole thing work. Key to this is that the Leonardo, unlike its other Arduino cousins, has a built in USB host, meaning it can natively act as a keyboard and mouse. The Arduino is supplying 5 volts of power to four pairs of resistors and capacitors as shown in the schematic above. The resistors are the skinny blue pieces and the capacitors are the round yellow bumps. The wires coming off towards the front are the sense points. The green wire connected to the back of a button is the ground.
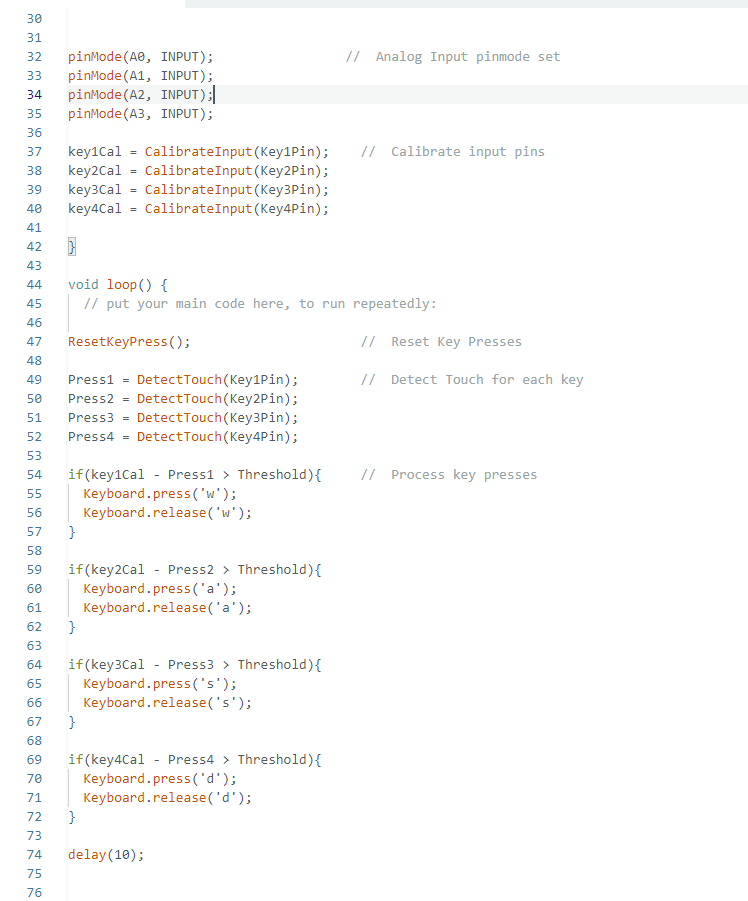
Above is a section of the code that makes the whole thing work. First the Arduino is told that it has four inputs, A0-A3. Next these inputs must be calibrated. The analog inputs that are constantly measuring the voltage of the capacitors see values that are continuously changing. Electrons really want to be at the lowest potential possible and are very good at doing so, this causes the inputs to the MakeyMakey to be a little unstable. The CalibrateInput function measures the input value several times and computes the average of the readings, this becomes the “default” value of each input. The DetectTouch function looks at each input and records its current state. The current state is compared to the calibration value, and if the difference is greater than 100 it is interpreted as a user input. The value of 100 is known as the “Threshold” and acts to prevent false positives. It allows for a little change in state without triggering a response. The value can be adjusted to regulate the sensitivity of the inputs. Finally, if an input has been detected a corresponding keystroke is passed to the host computer.
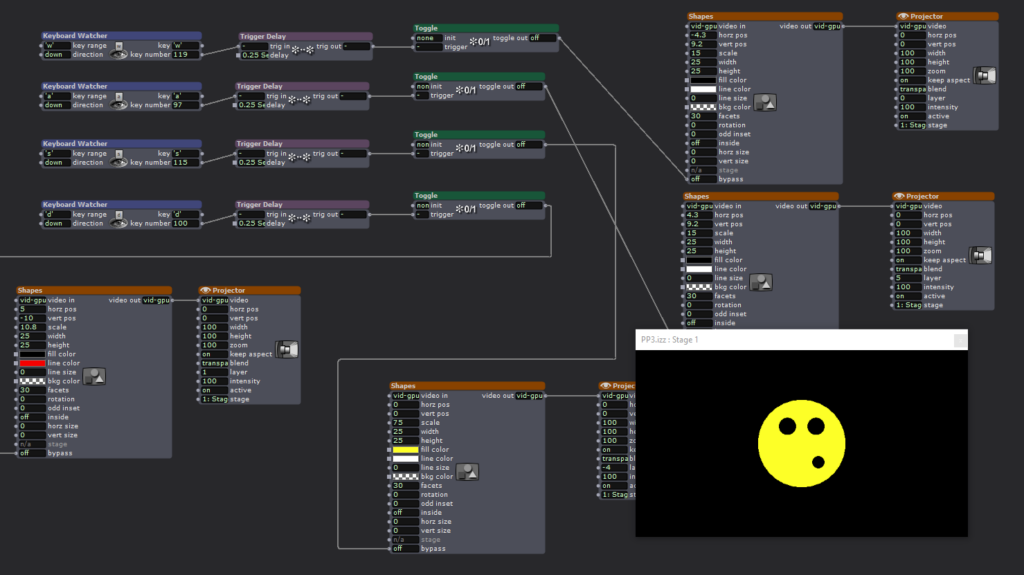
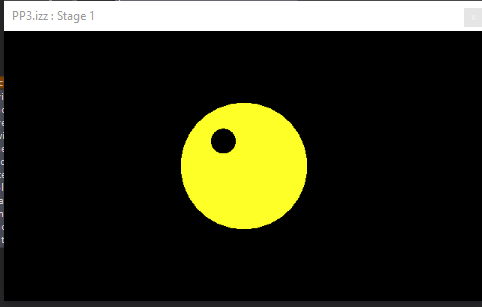
MakeyMakey Make it happen! Having solved my issue of not having a MakeyMakey it was time to connect it to Isadora. Keyboard Watcher Actors were configured to look for the keys W, A, S, D. Each input controlled a different part of the silly face shown. Touching the wires would turn on or off the black and yellow circles.
During the presentation a disaster occurred! All the USB-C cables we could find in the motion lab wouldn’t make my Arduino work! It was dead in the water without whatever magic cable I had left on my desk. Luckily I chose to use the same letters as the official MakeyMakey so it was easy to swap my contraption for the real thing. Isadora couldn’t tell the difference and the scene behaved as expected.
The MakeyMakey is truly an amazing piece of tech! It provides a fantastic means of exploring unusual interfaces for Isadora, games, or whatever the user can think of. However, building one from scratch opens up additional possibilities. Having access to both the code and the hardware allows for greater flexibility in operation. For example, my diy version is has much greater sensitivity. The MakeyMakey is unreliable at best if the user is not in constant contact with the ground wire. My diy version does not have this restriction, it can detect the change in charge state without the need for the user to be holding the ground. This behavior can be additionally controlled with the Threshold setting. Increasing the minimum change is state high enough results in the user having to be in contact with ground to ensure a large enough voltage drop across the capacitor. Or, if tuned the other direction, the sensor becomes more responsive to light touches. It is my intention to continue working on this project for Cycle 3 with the goal being to detect the presence of a person without them being aware of it.