Project bump
Posted: January 25, 2022 Filed under: Uncategorized Leave a comment »I was interested in this project because of the artist’s conceptual link to memory– which I think relates back to my own research and art practice. I thought the installation was equally beautiful and interesting. The way that the thin fabric allows the projections to overlap onto each other, but also frame certain scenes depending on the way it was draped was really mesmerizing. I found this overlapping to be a powerful symbol in talking about the artist’s shared cultures of being Iranian and African American. I watched the short clip of the installation space and I think it could be even more interesting to see how the fabric and projection could respond to viewer interaction or the place they take up in the space.
Project Bump
Posted: January 25, 2022 Filed under: Uncategorized Leave a comment »I chose to bump this post for a myriad of reasons. Primarily, this is an old companion that I did not know took this course so his name caught my attention. Secondly, I am a huge fan of projection mapping. This course has reframed my understanding of interaction with technology and I believe that Aarons project demonstrates a great compromise between digital systems and real time feedback.
Project Bump
Posted: January 25, 2022 Filed under: Uncategorized Leave a comment »Pressure Project 2 (Sara) | Devising EMS (ohio-state.edu)
I enjoy this pressure project. The little game Bottle Lighting motivate exhausted people spending too much time in front of screen to do wrist stretching exercise. Prolonged use of devices like smart phone and computer can cause many physical injuries like poor vision, neck pain … It is a good idea to remind people of the possible issues and help them in a gamification way.
Project Pump
Posted: January 25, 2022 Filed under: Uncategorized Leave a comment »https://dems.asc.ohio-state.edu/wp-admin/post.php?post=2214&action=edit
I find this dancing club project very interesting. One of the reasons that I choose this project is to see what are the possibilites of devising experiential dancing body that are already explored. I like the idea of connecting the virtual body and physical boby as well as the virtual space and theater conventions. The funny little twist here is that people get ticket in a box office to be the performers themselves. The whole interactive process is orgnized by a stucture that dictate people to move in certain way but finally failed at some point. The author’s realization that people are uncontrollabe tells us something about the slippage of the intentional devising concerning human experience.
Project bump
Posted: January 25, 2022 Filed under: Uncategorized Leave a comment »https://dems.asc.ohio-state.edu/wp-admin/post.php?post=2768&action=edit
I was looking through some of the pressure project and this caught my eyes because of the description and the though process of developing the program was well intended and planned then executed. Understanding what kind of work and thoughts that goes into making art, following through with the intention and plan is hard to do at times especially with these projects that has a limited time. I liked the intention and the art that came from that intention.
Pressure Project 3 Bump
Posted: January 24, 2022 Filed under: Uncategorized Leave a comment »The digital storytelling in this project caught my attention. The enthusiasm in his voice kept me engaged wanting to know more on prohibition. The still images gives the viewer time to take in the story being told as well as hold the visual context for the narrative. I also enjoy cocktails! https://dems.asc.ohio-state.edu/?p=2924&trashed=1&ids=158
Project Bump
Posted: January 24, 2022 Filed under: Uncategorized Leave a comment »I really enjoyed this project as it made a simple video game style into an interactive experience. I’ve always liked games that were self-aware while you were playing them, and adding the ability to use your hands to control it is a cool bonus! https://dems.asc.ohio-state.edu/?m=202104
Cycle 3
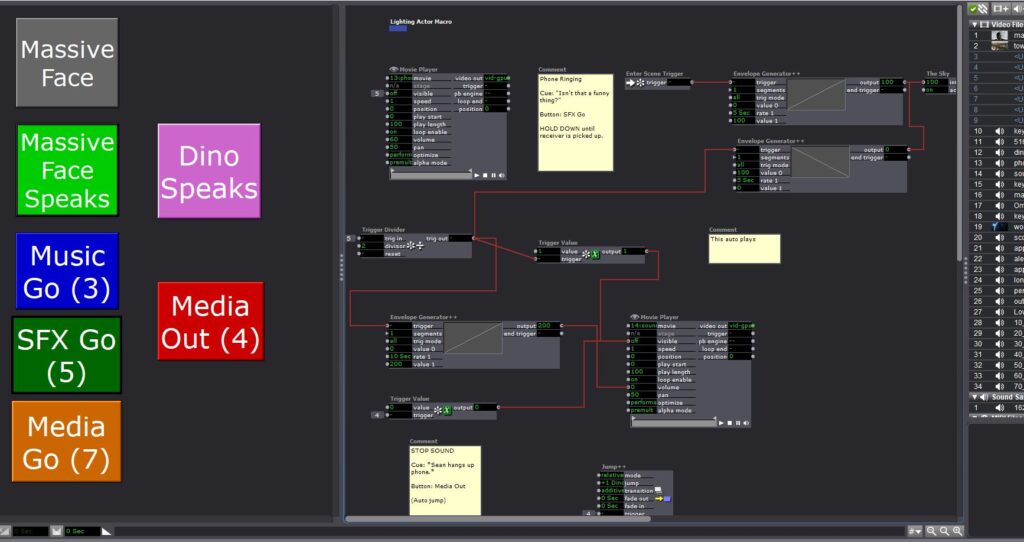
Posted: May 2, 2021 Filed under: Uncategorized Leave a comment »My Cycle project was to create an Isadora patch that would support my thesis performance of my original solo theatre piece Mr. Shirley at the End of the World. The initial patch was designed to integrate media with sound. I was interested in the final iteration of my project to incorporate actors that would control lighting equipment in the theatre and cue lighting changes in the play.
Here is the video I made detailing that process and what I learned.
Here’s a look at some of the equipment I was working on.
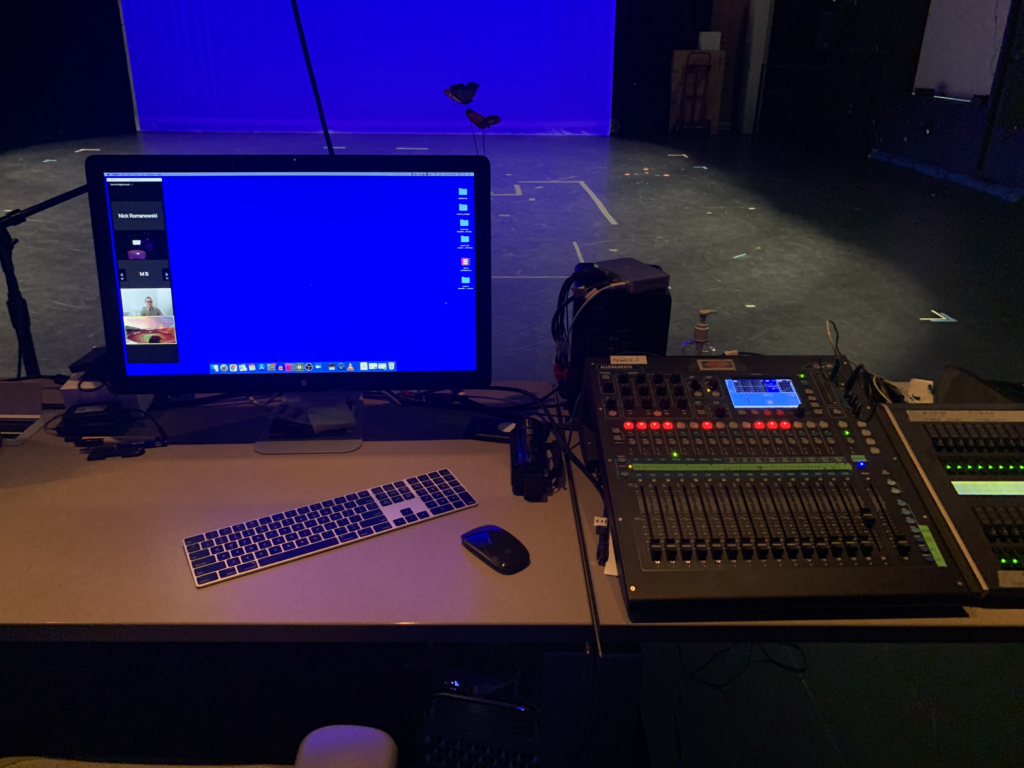
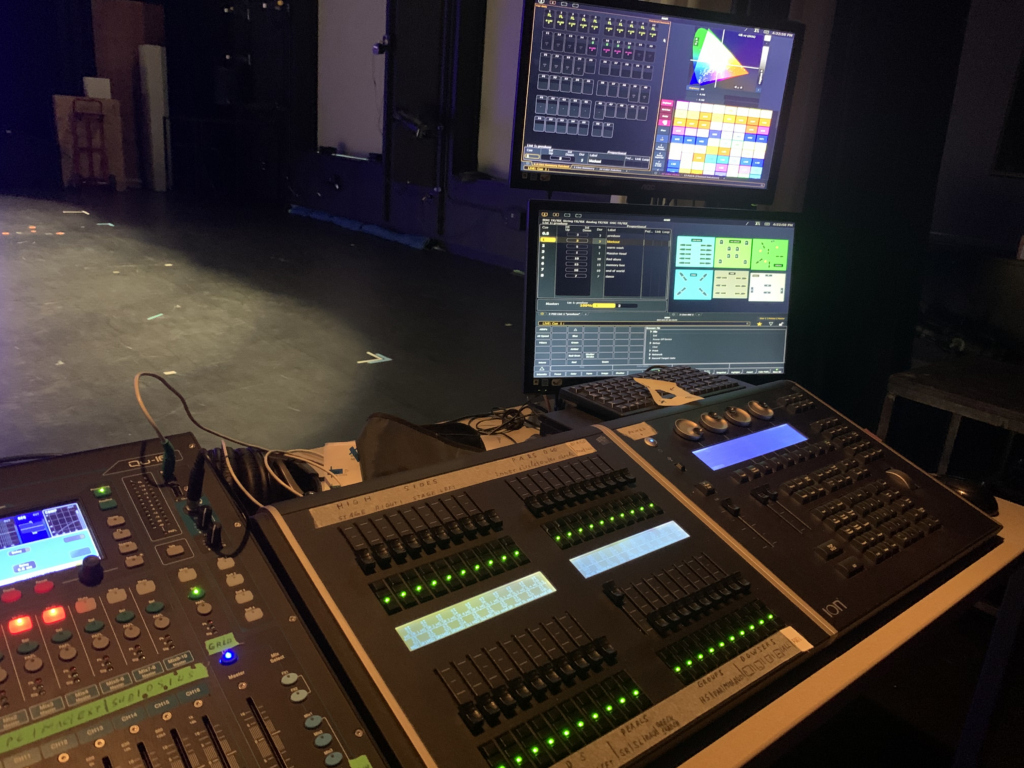
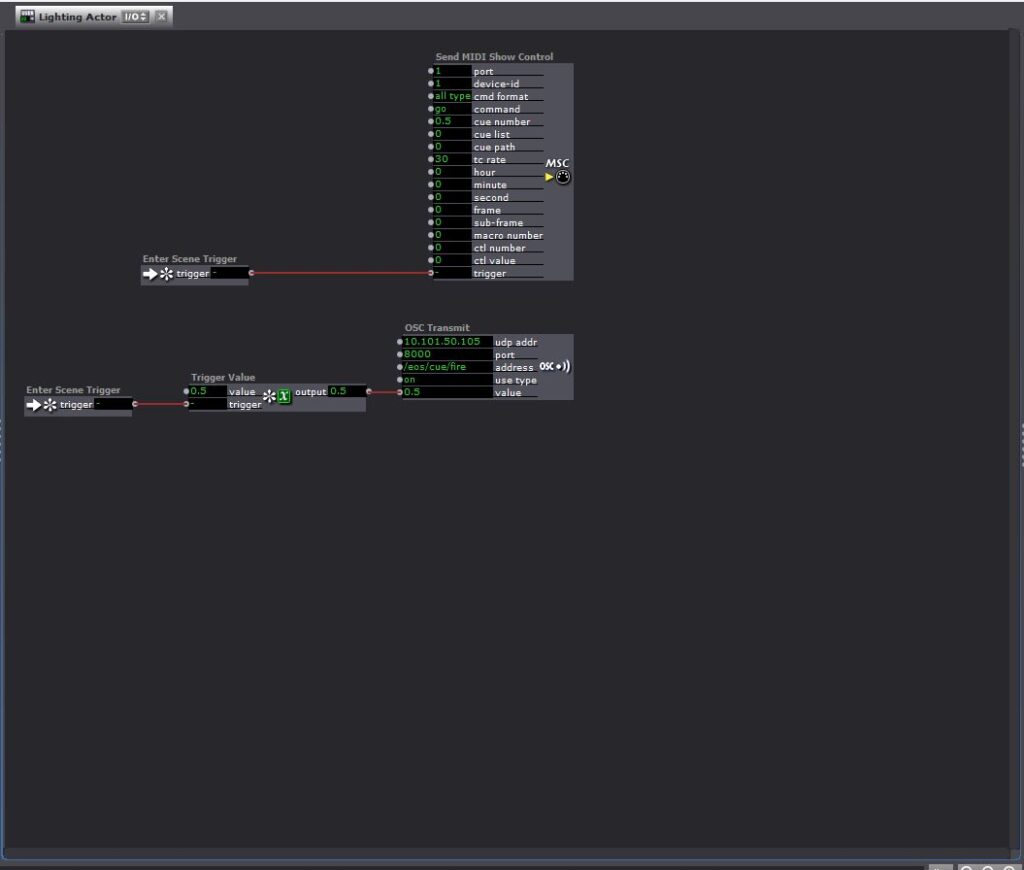
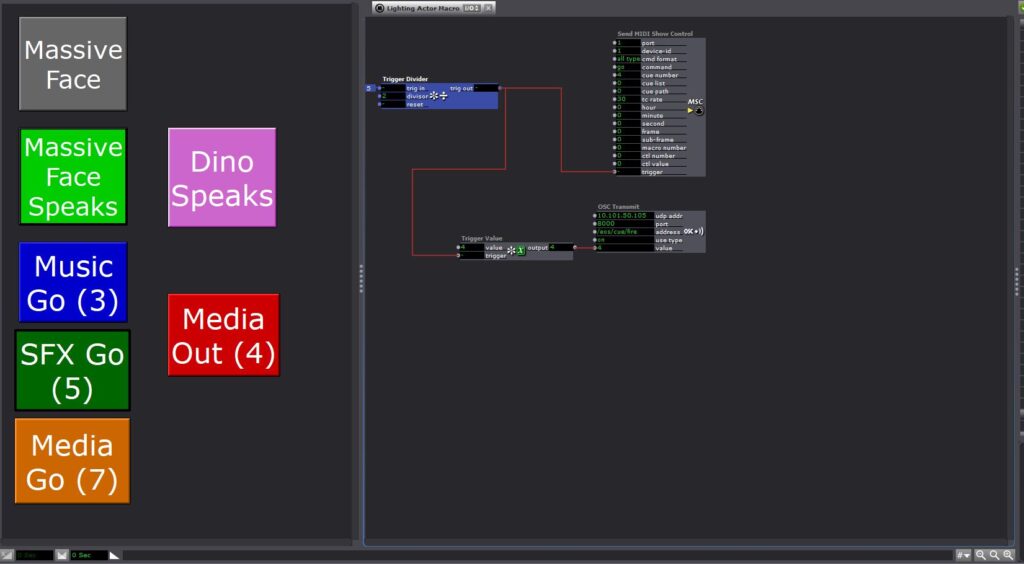
Here’s a look at some of the patch that I created. I made a dedicated macro user actor to operate the lights on two different systems – MIDI and OSC. With the MIDI actor, the computer running Isadora and the light board need to be physically connected through a MIDI box. With the OSC actor, they are connected via modem over a network.
Pressure Project 3
Posted: May 2, 2021 Filed under: Uncategorized Leave a comment »Here is an audio story I made for pressure Project 3. I have always been fascinated with the history of the cocktail and how it aligns with American history over the past 200 years! This is one of my favorite stories from Prohibition.
Pressure Project 3 (Murt)
Posted: April 28, 2021 Filed under: Uncategorized Leave a comment »For this project, I wanted to explore the use of spatial effects to distinguish the inner states-of-mind of different characters from their outward presentation. Within Logic Pro X, I set up three of the “smart drummers”(an oxymoron, depending who you ask). Each drummer plays an outer-world part, and inner-world part with some form of reverb/delay, and a third section where the two parts are combined but panned hard to opposite sides of the binaural field.
Anders is Logic’s metal drummer, but I used him to play something steady and subdued(soft-spoken) outwardly. For the inner section, I used an instance of EZDrummer2 Drumkit from Hell with a reverb and dub delay to create the inner metalhead.
Maya is a retro 80s drummer with a rad WYSIWYG vibe.
Aidan is indie rock oriented. He is constantly overplaying and it doesn’t suit the music. In other words, he is a loud mouth.

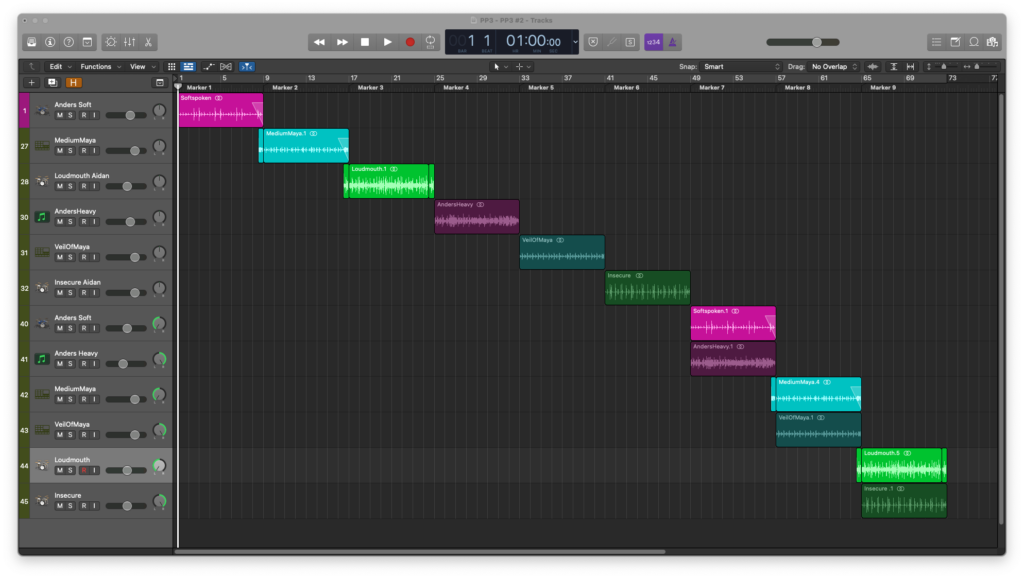
Based on the critique session, it seemed that the project might read better if I put each drummer’s parts in their own sequence rather than three external-> three internal-> three discrepancy.