Cycle One Mirror Room
Posted: April 10, 2024 Filed under: Uncategorized | Tags: cycle 1, Isadora Leave a comment »The concept for the whole project is to just have fun messing with different video effects that Isadora can create in real time. One of the ways of messing with your image in real time is with a mirror that is warped in some way. The first cycle is simple by just deciding on what kind of effects that should be applied to the person in the camera. I wanted each one to be unique so the effect is something not available in usual house of mirrors.
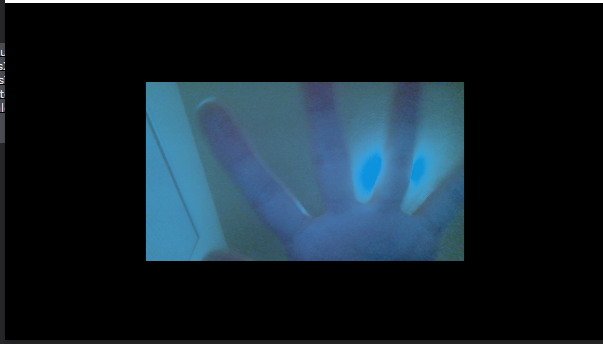
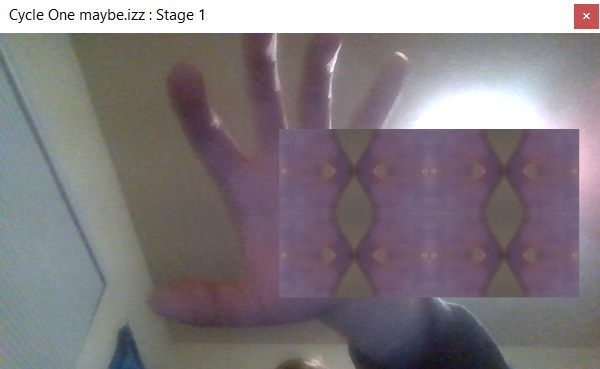
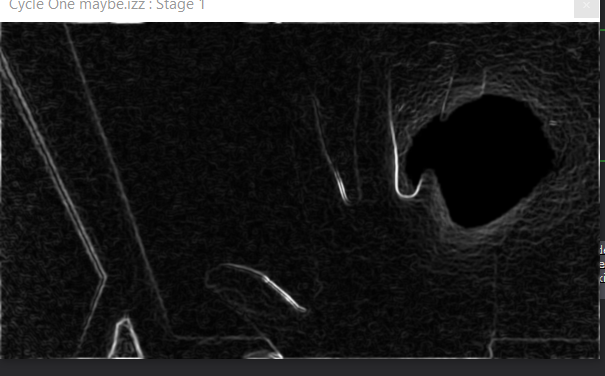
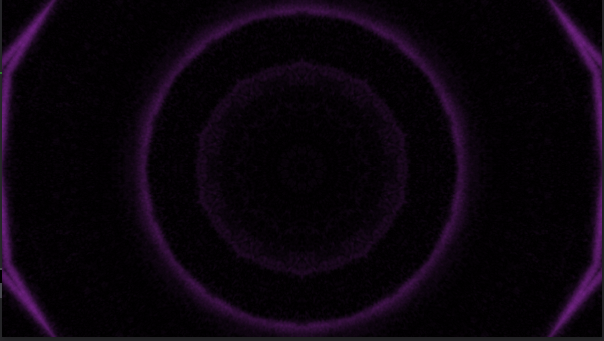
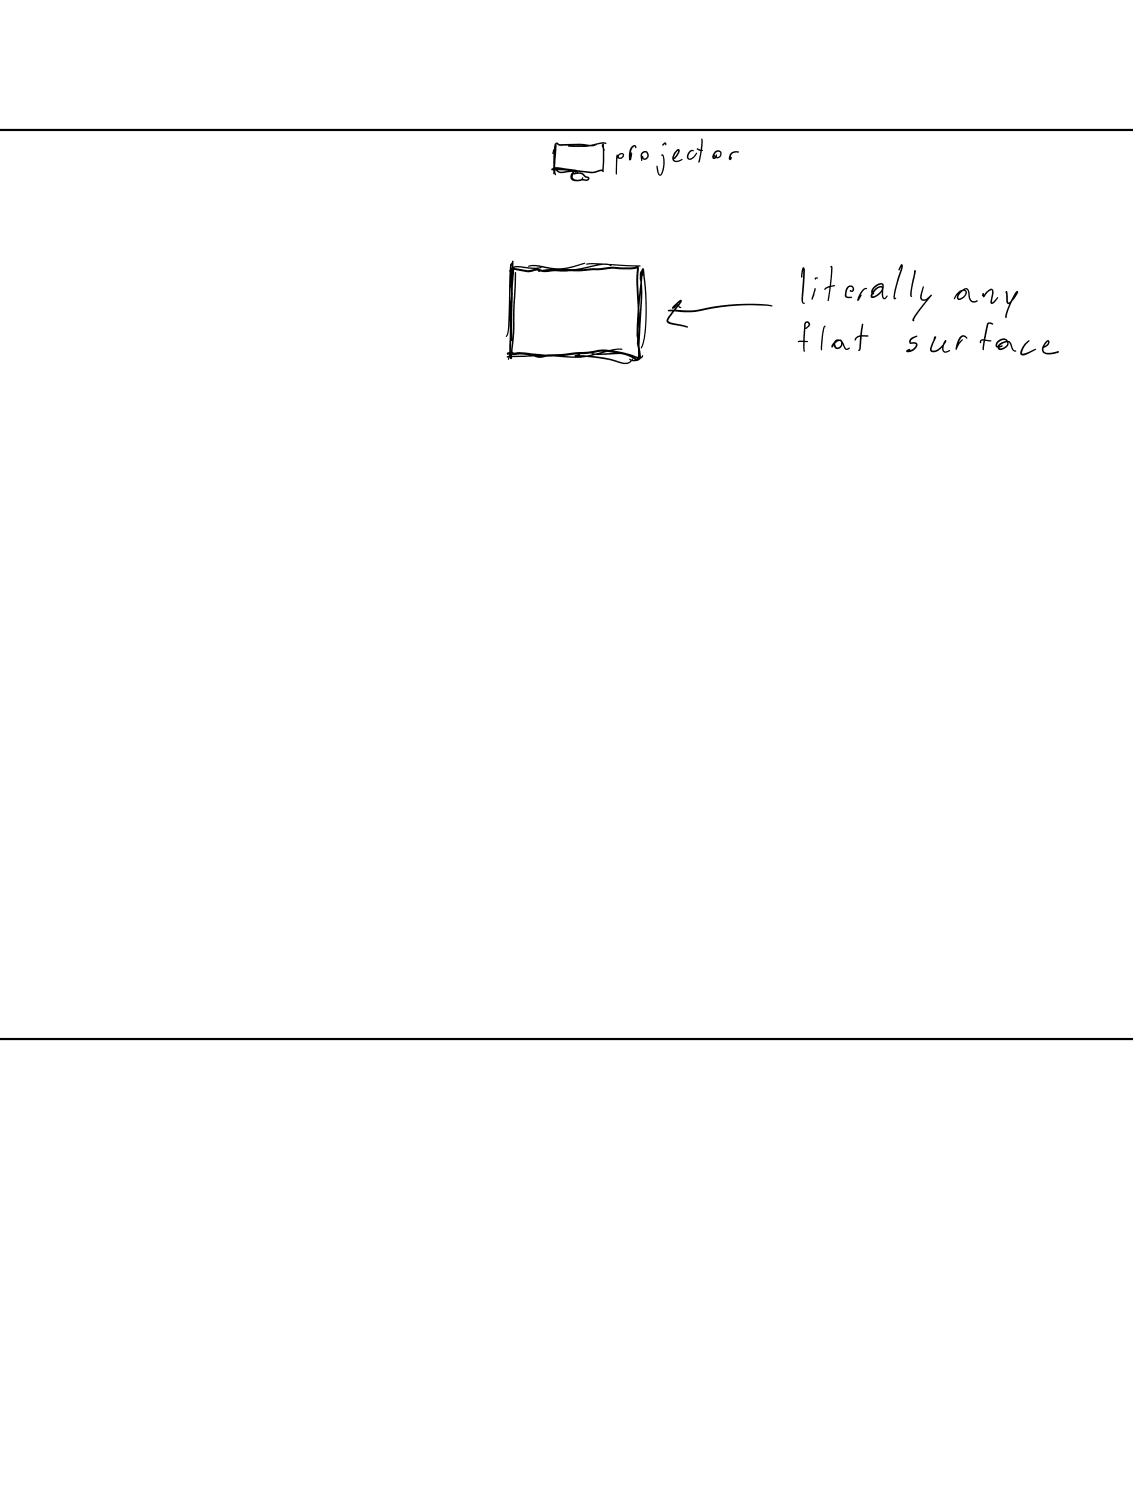
The feedback for the effects that had something that took a bit of time for the user to figure out what was going on was positive. They enjoyed messing around in the camera until they could have a decent idea on how they affect the outcome. The one they thought was lack luster was the one with lines trailing their image. They were able to figure out almost immediately how they affect the image. So, for the next cycle the plan is to update the one effect screen to make it a bit harder to decipher what is going on. Next on the list is to try and get a configuration set up with projectors and projection mapping so the person can be in view of the camera and see what is happening on the screen or projection without blocking the projection or showing up on screen at a weird angle.
Cycle I: History of Bop
Posted: April 10, 2024 Filed under: Uncategorized | Tags: cycle 1 Leave a comment »Video Bop interpretation of an Excerpt from Jack Kerouac’s ‘History of Bop’
History Of Bop The History of Bop by Jack Kerouac
As a jazz enthusiast and young adult, reading Kerouac’s ‘On The Road’ was a transformative experience. In school, I was predominantly interested in the math and sciences and hardly cared to read a book or pick up a pen to write. However, Kerouac’s style, legacy, and approach to writing (and life for that matter) convinced me of the value in these types of intellectual pursuits. Over the last five years or so, I’ve continued to explore Kerouac and other works from the beat canon; One exciting find was his set of spoken word readings called ‘On the Beat Generation’. For cycle I, I focused on the final minute and a half section from his work ‘History of Bop’. I find this writing to be a triumphant portrayal of the evolution of bebop and cultural changes in America surrounding the genre.
Upon researching the piece, it was interesting to find that it was originally published in the April 1959 issue of an lewd magazine called Escapade – a hidden gem of writing amongst smutty caricatures and 50s advertisements. Although, I was not entirely surprised by this discordant arrangement given that the hero of the beats (Neal Cassady) was, according to Allen Ginsberg, an “Adonis of Denver—joy to the memory of his innumerable lays of girls in empty lots & diner backyards, moviehouses’ rickety rows, on mountaintops in caves or with gaunt waitresses in familiar roadside lonely petticoat upliftings & especially secret gas-station solipsisms of johns, & hometown alleys too”(Howl, 1956). This quality of the beats did not age well especially from the vantage of sexual equality, but unconventional behavior and criticism are the norm for this eclectic group. What I’d call a most foundational criticism of Kerouac and this piece of writing in particular is in the realm of black appropriation. Scholars like James Baldwin described this ‘untroubled tribute to youthful spontaneity [as] a double disservice—to the black Americans who were assumed to embody its spirit of spontaneity and to Kerouac’s full literary achievement… a romantic appraisal of black inner vitality’(Scott Saul, FREEDOM IS, FREEDOM AIN’T, pg 56). It cannot be denied that Kerouac and his writer friends were escaping what they feared as the trap of the middle class white picket fence, and couldn’t have experienced the true reality of being a black in the mid 20th century. Yet, their works speak to a deep respect and profound inspiration for the black art of their time (jazz).
One artistic technique embodied by the beats and inspired from jazz is what Kerouac calls ‘spontaneous prose’. Jazz musicians exceled at this rapid invention of musical structures through heightened sonic sensibility and borderline phantasmal prostheses of an instrument to their nervous systems and soul for that matter. The beats took up this approach with the technology of their time; namely the typewriter. Kerouac even made a manifesto called ESSENTIALS OF SPONTANEOUS PROSE in which he describes the procedure of writing as ‘the essence in the purity of speech, sketching language is undisturbed flow from the mind of personal secret idea-words, blowing (as per jazz musician) on subject of image.’ Other writers of his time, such as Truman Capote, didn’t see eye to eye with this artistic style and humorously commented “That’s not writing, that’s typing.” While I don’t mean to argue that thoroughly edited and fully composed art is better or worse than spontaneous artforms like jazz and bop-prose, it is just that spontaneous modes of creation akin to ‘play’ can potentially more honestly externalize such private and elusive inner processes occurring in the lawless relational environment of the mind.
It has been a good 70 years since these creative practices surfaced within the avant-garde art scene, and the technologies at society’s disposal for externalizing thought have tremendously improved especially due to the massive sea of networked image and video objects available to the average internet user. Further, a concentrated development of skills in computer programming may be analogous to the level of discipline in harnessing artistic technics like the saxophone, piano, pencil, paper, typewriter, voice recorder and so on. With this long winded explanation in mind, these ideas are much the backbone of my inspirations in new media art and what I wish to explore in this 3 cycled project.
In cycle 1, I set out to visualize the final section of history of bop. I’ve listened to this poem recited countless times and did a lyrical transcription – meaning I listened to the recording and wrote out all of its words. This is a common practice among jazz musicians and writers since as it helps internalize language. Next, I followed Dmytro Nikolaiev’s implementation of a Vosk LLM in Python to convert the audio file into a transcribed text JSON file which contained the words and their position in time as spoken.
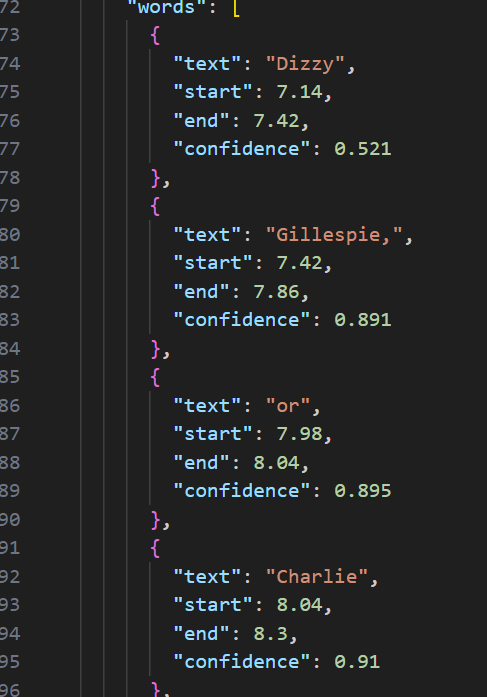
Not all the words were accurately transcribed so I had to manually correct as AI models are good but not nuanced enough to decipher all spoken phrases especially from an unconventional speaker like Kerouac. Further, I did some post-processing of the data to get it in a form which would play nicely with Isadora’s JSON parser actor. The format involved Key-Value pairs of timestamps and words spoken. Through experimentation, I found that repeating each word in the JSON list near the millisecond (ms) frequency ensured that it would appear onscreen and remain illuminated consistently as the corresponding audio is spoken. I found that although the resolution of the timecode variable of the movie player actor was at the ms scale, it didn’t increment consistently enough to predict the values it would trigger. Consequently, having a large and widespread array of timestamps between the start and end of a word ensures that it will be triggered. Additionally, Isadora plays in the realm of percentages between 0 and 100 rather than the typical format of videos being in time duration. So I had to account for a conversion of timestamp as percent completed with respect to the total length of the audio clip.
This allowed me to funnel the current position of a playing audio file through to the JSON parser actor, such that as the timecode increments, the transcribed text would display onscreen exactly in time with the recited poetry. This was exciting on its own as it was a semi-autonomous method to generating lyric videos. Also, the style of the text was strobe like giving the quality of spoken words – they appear and vanish in an instant. See below the media circuit implemented in Isadora (with image player disabled) to see the flow of time triggering text and subsequently displaying on screen.
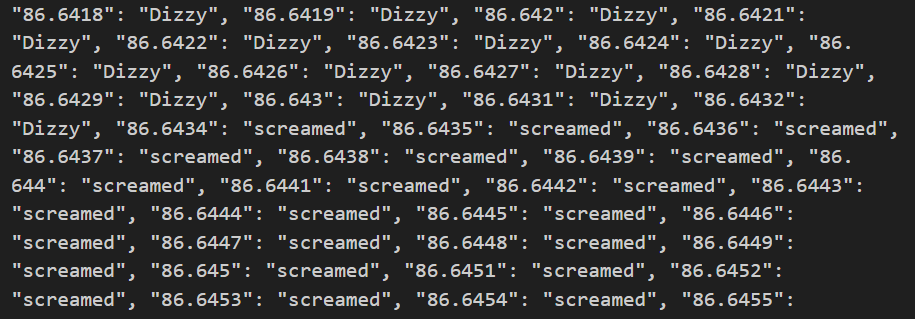
The next stage in the process was to find imagery representing the ideas that Kerouac is expressing. Following Kerouac’s ‘Setup’ step: ‘The object is set before the mind, either in reality. as in sketching (before a landscape or teacup or old face) or is set in the memory wherein it becomes the sketching from memory of a definite image-object.’, I used Kerouac’s speaking of the words to serve as the stimulus (object) for mental imagery. Once an image or set of ideas was established in mind through free-association (‘mental image blowing’), I would search Youtube to find a clip which best represented this mental image. Instead of using one of the many available and ad-prone sites for converting Youtube videos to .mp4 files, I adapted a Python script using the yt-dlp/yt-dlp library to do so with better speed and precision. This allowed me to quickly find sections of videos, copy their video url along with start / end time into a function which would download the video file with a specific name to a designated folder. This method allows more mental energy to be concentrated on thinking of images and finding existing internet representations rather than downloading and cutting the video segments. In this way a quick flow can be achieved, better mimicking Kerouac’s spontaneous prose method. To add, just as writing is a negotiation between image thoughts and the language available to one’s tongue and fingers at that moment, video-bop (new term for this method) is a negotiation between a visualized animation and the medium of available images / videos online. This medium includes not only the content available and the form they take, but also the algorithmic recommender process personalized by the user’s previous internet activity. For in this intentionally fast paced creative process, one relies heavily on differentiating search terms to approach on an appropriate visualization.
When videos were found, they were named with the first ‘semi-unique’ word within the phrase they belonged to, and the length of the video was chosen to match the duration of that phrase as calculable from the initial audio transcription step. The grouping of phrases is to the video-bopper’s discretion and in accordance to the aesthetic sensibility eminent in jazz’s musical structuring. It is not necessary to find video images in the order for which they are spoken. I’d hopped around between Kerouac’s phrases freely and would encourage this approach as it may follow the flow of thinking more closely and it builds natural structures of moments and transitions between moments. This idea was neatly phrased by Mark Turner, a modern tenor saxophone player who describes “When I’m in the middle of a solo, whenever I am most certain of the next note I have to play, the more possibilities open up for the notes that follow.”(The Jazz of Physics, Stephon Alexander). To riff on Heisenberg’s uncertainty principle, there is this interdependence on knowing the exactness of both a particle’s momentum and position. To extend this into the domain of thought and artistic expression, perhaps carelessly, it suggests that there is a tradeoff in awareness. When the improvisor’s awareness is tuned most closely to what idea should come next, they may be unaware of the larger artistic structure to emerge. In contrast, if the improvisor’s awareness is tuned to larger timespans and movements in the piece, they may have less awareness of the idea to come next.
As a continuation on methodology, Isadora unfortunately doesn’t read file-paths for media artifacts and rather relies on an internal numbering system as files are uploaded to the project. To accommodate this structure, I manually updated a JSON object to convert between video trigger words and their index in Isadora. These index values are passed into Isadora’s movie player object to allow them to be visualized in time with the typography and spoken words.
Upon showing the project to my classmates and delving into ideas on how it can be more interactive for cycle’s 2 and 3 to come, many important suggestions were accumulated to form the next direction:
- Jiang – Words that are action oriented may be good to include for transitions of images. (ie ‘turn’).
- Afure – She liked my interpretation of word ‘Dreaming’ – Although, everyone would have a different interpretation of that word and what img they’d select.
- Tik Tok Trend for going on Pinterest and searching words and displaying what image that is algorithmically connected with.
- Kiki – Liked the subject matter – she teaches jazz dance and it would be helpful to have a more interesting way to teach about the this genre.
- Alex – ways for interactivity – what sorts of ways to automate img generation and allow for user thoughts / personalities to be included. Potential for a custom web-app.
- Nathan – would like to have clicked on links related to the content being shown. As a way to learn more about each part (as informative).
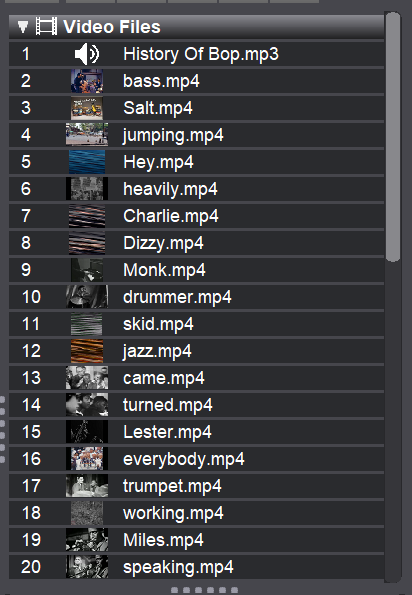
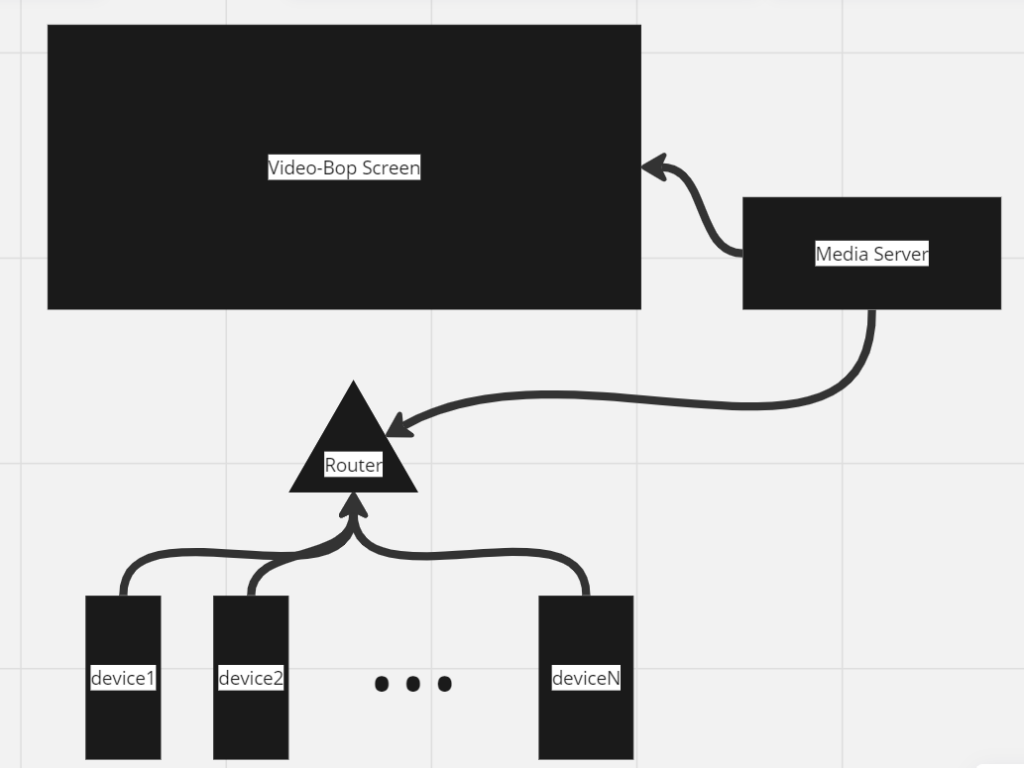
With these suggestions in mind, I plan to explore the use of Dispatcher — python-osc 1.7.1 documentation to build a simple server hosted web interface open to smart-device users connected to a LAN. A spoken word poem should be found and disseminated to each of the audience’s device surfaces. As an experience, there should be a listening period in which the audience engages with their own forms of active imagination to see what phrases catch their ears and images that become naturally available to them. From there, they should go through the video-bop process and find a clip which matches what they’ve concepted. Then they will connect to the media server and paste the link of that video, the start and end time, as well as the phrase it connects to. The media server will need to collect these audience responses and run the Youtube extraction script to grab all the associated artifacts and make them available for rendering in time with the spoken word poetry. This is the direction I envision for cycle two and a diagram of how I see the interaction occurring:
Cycle 1 – Unknown Creators
Posted: April 9, 2024 Filed under: Uncategorized Leave a comment »For my final project I knew I wanted to do a perspective piece sort of thing after my work from last project. After thinking about it for a while I decided that I would go back a social issue that occurs in the games industry and other media that require large teams of people. There is a phenomenon where the creation of a piece of art is attributed to one person, even we know that there are more people behind the scenes. One might refer to a movie as a Hitchcock or Tarantino film, or a play as something by Sondheim. These individuals that get referenced, mostly male, are often leads in some way: main writers, directors, etc., and they often get more screen time and interviews. The games industry is no different, and there are several big names that get thrown around: Hideo Kojima, Hidetaka Miyazaki, Shigeru Miyamoto, Warren Specter, the list goes on. In order to address and convey this issue to those that don’t know so much about games, I wanted to take an example of a revered creator and juxtapose that person with some others that are relatively unknown, people who did programming, mocap, animation, etc.
In my piece I wanted to focus on a studio that I know quite well, Bethesda, and it’s lead designer Todd Howard. I found a short interview from GameInformer about his life and how he got into the industry, linked here: How Skyrim’s Director Todd Howard Got Into The Industry (youtube.com). For the people who were lesser known, I am pulling footage from some documentaries made by ex-employees at Bethesda: How Bethesda built the worlds of Skyrim and Fallout (youtube.com), and A SKYRIM DOCUMENTARY | You’re Finally Awake: Nine Developers Recount the Making of Skyrim (youtube.com). In terms of set up, my idea looked a little like this:
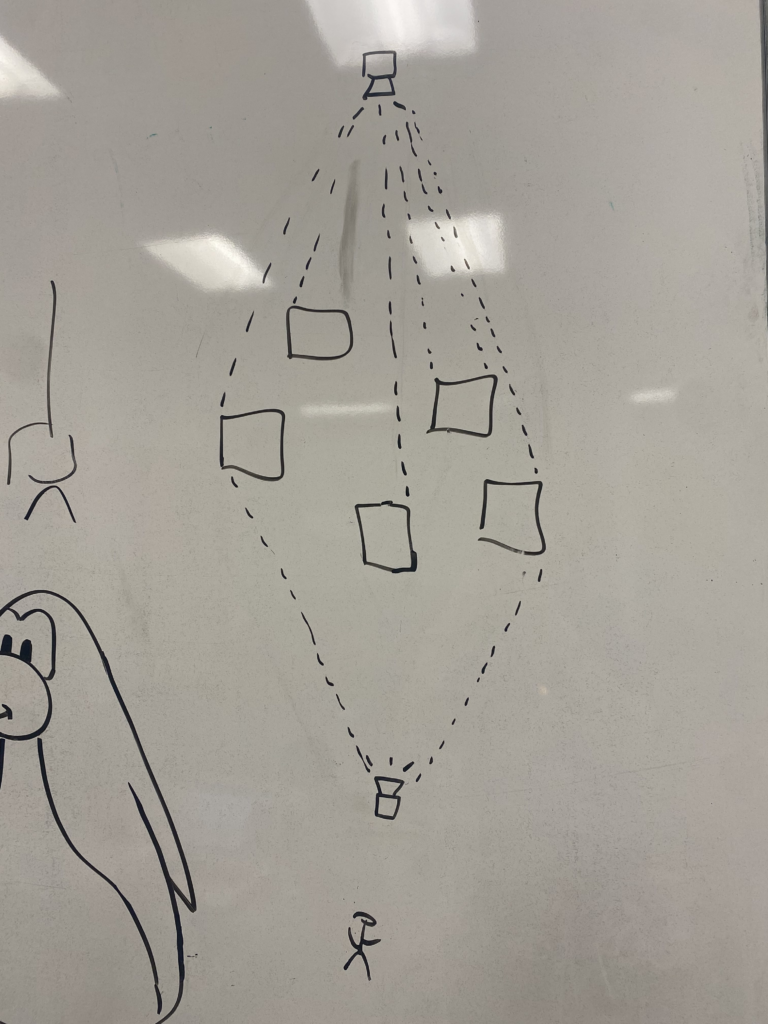
Essentially I wanted to have some tall boxes set up in the center of a space (ideally the motion lab). On one side of these boxes, there would be a large projection of Todd Howard, the footage would be stretched over all the boxes so that when looked at as a whole, the image would become clear. On the other side of the boxes, individuals that worked at Bethesda would be projected. Each person would be projected onto one box. The Isadora part is fairly simple, just a bunch of projection mapping and some videos, the setup and space would really be the big issues.
One of the first things I did was go into the motion lab and establish what sorts of resources I would be using, as well as try and get some projection mapping stuff working just to get familiar with the process and environment; Michael Hesmond was very helpful in this regard. I was going to need to use the Mac Studio, that way I could use two projectors at once. We decided to try two different kind of projectors, a short-throw and long-throw, just to see if one would be better than the other. After getting everything set up and using the grid I got something that kind of looked like this:
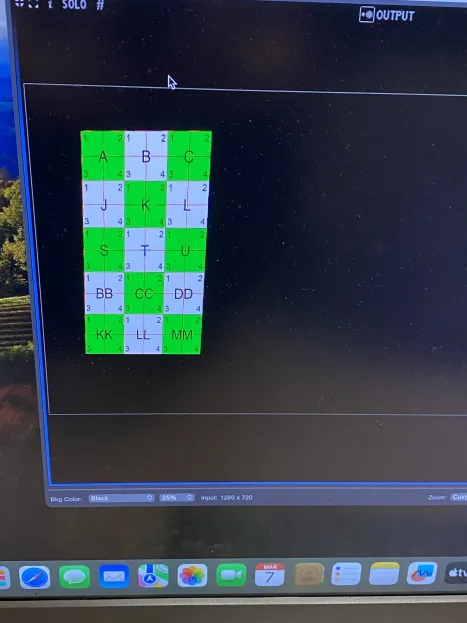
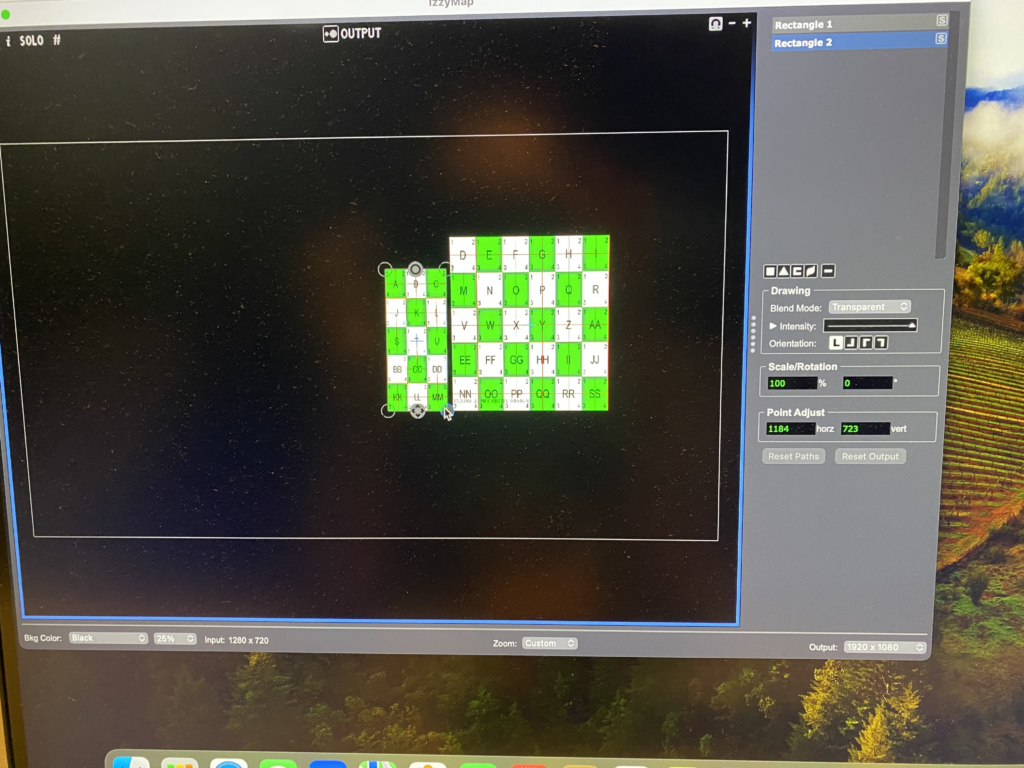
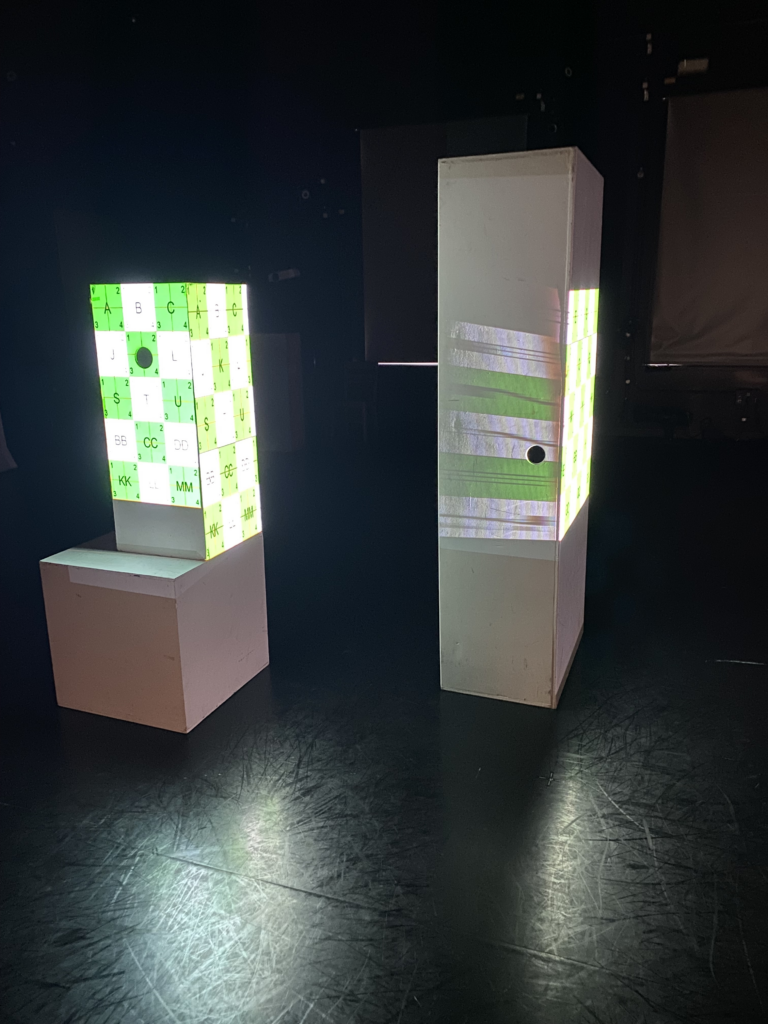
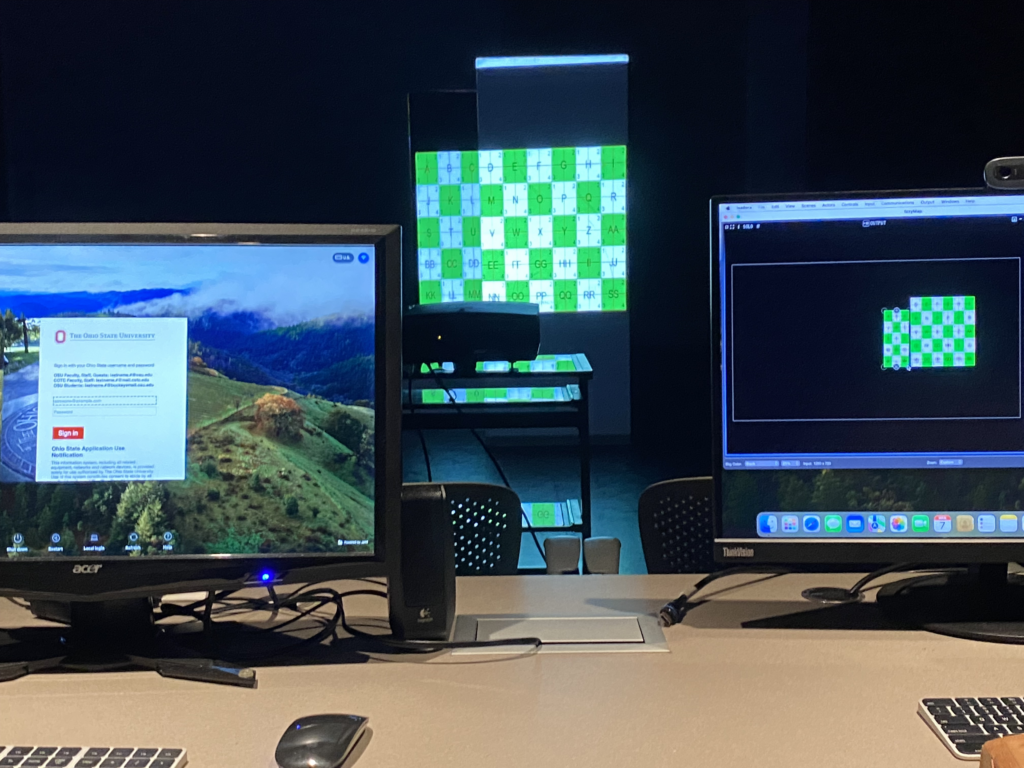
I was technically projecting on the side instead of across from each other, but this was okay, I really just needed a proof of concept and I wanted to also see how pixel smearing would look. After doing all this, I determined that I would need these resources:
- 2x Power Cables for the projectors
- 2x Extension cables that would plug into the wall
- 2x HDMI cables
- 2x Short-throw Ben-Q projectors, both projector types worked fine but I wanted to use the short throws because their color was better, and the space was relatively small
- The motion lab switcher, this was important for getting both of the projectors working; we had to do a little debugging to make sure the projections were going to the correct outputs
The only resources I wasn’t sure about were the boxes. There weren’t a lot of them, and I wanted more uniform shapes, so this would have to be reworked. When I came back, I did a bit more work thinking about the setup and resources with Nico and Michael, and I got another setup going:
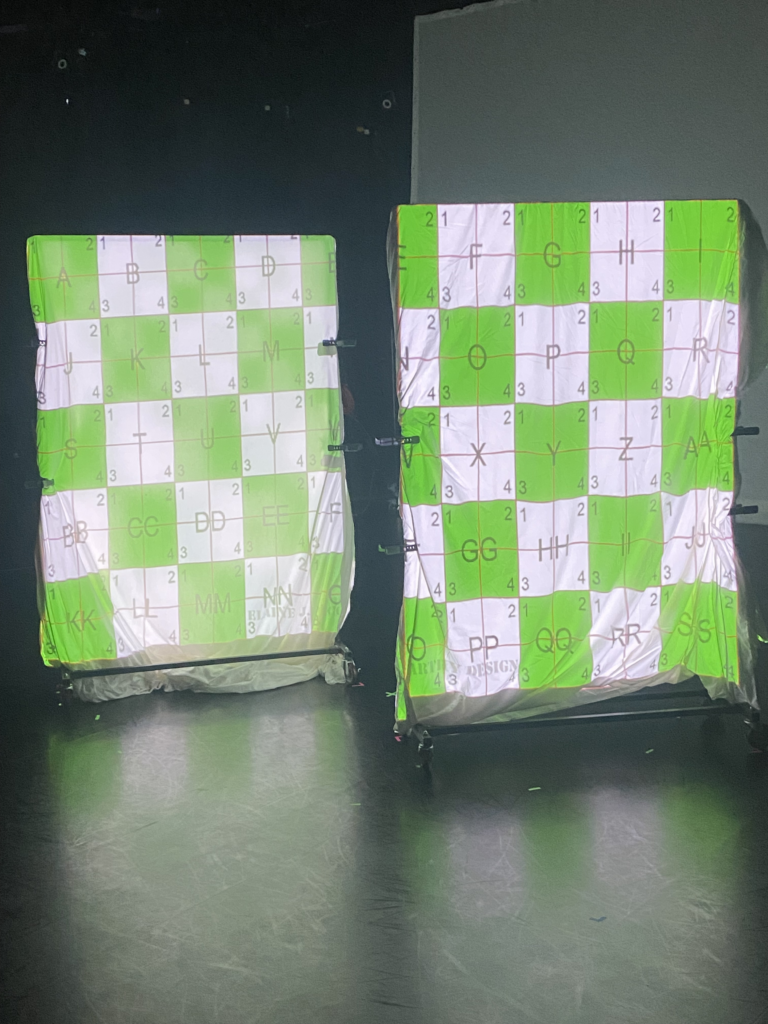
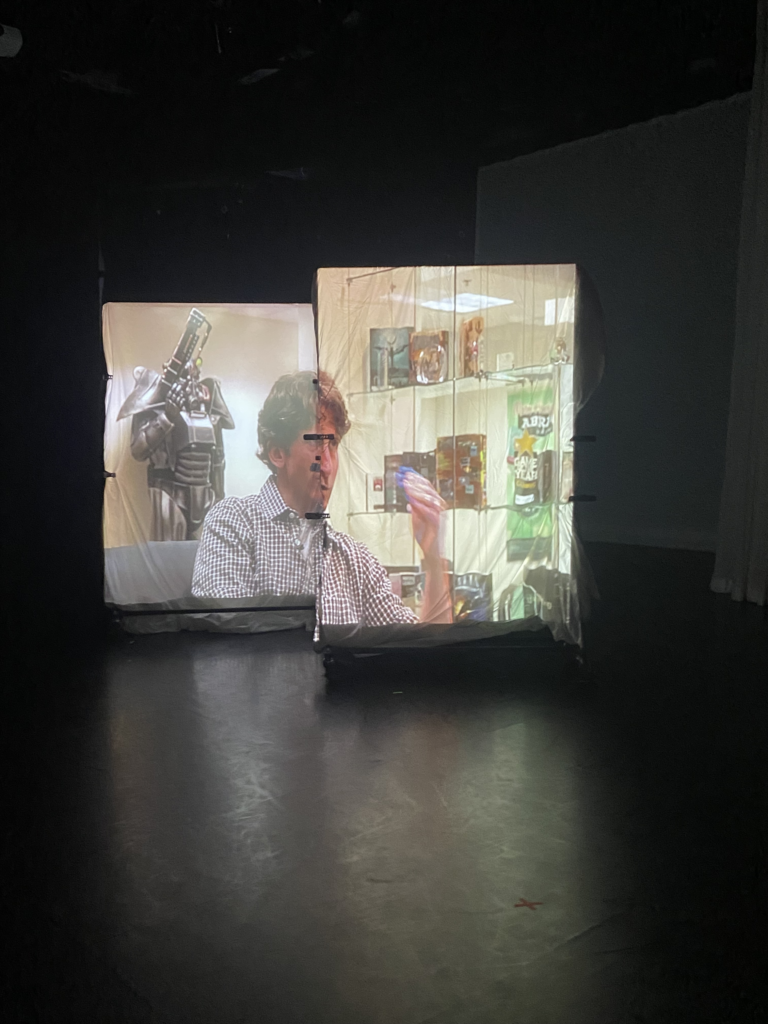
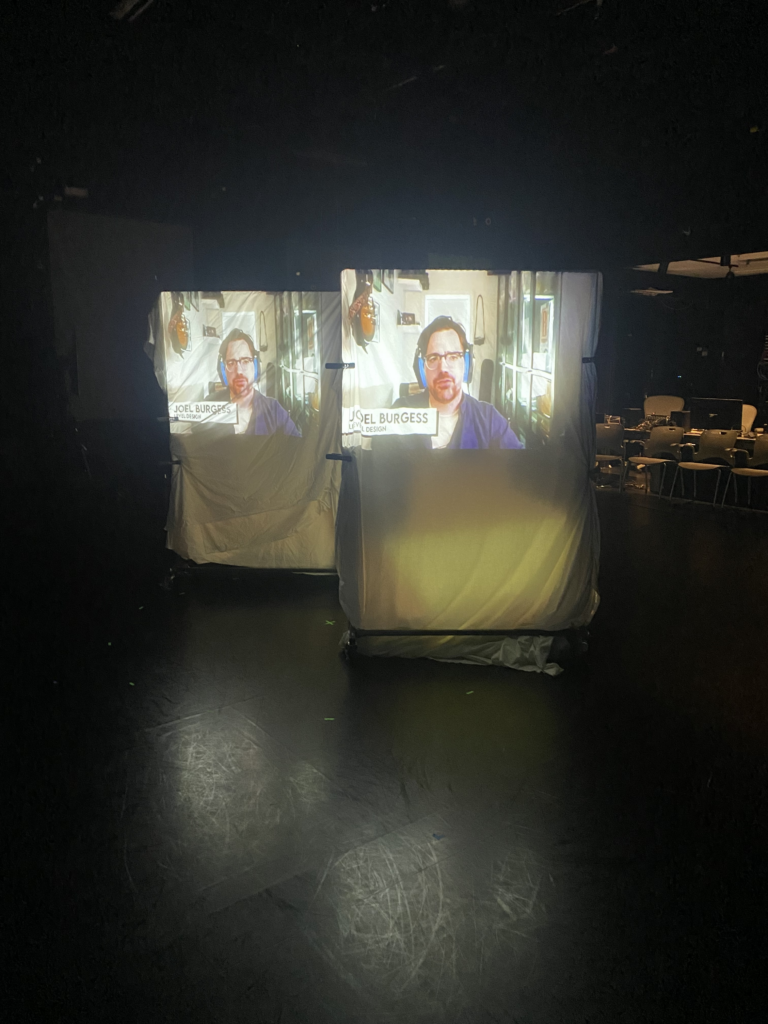
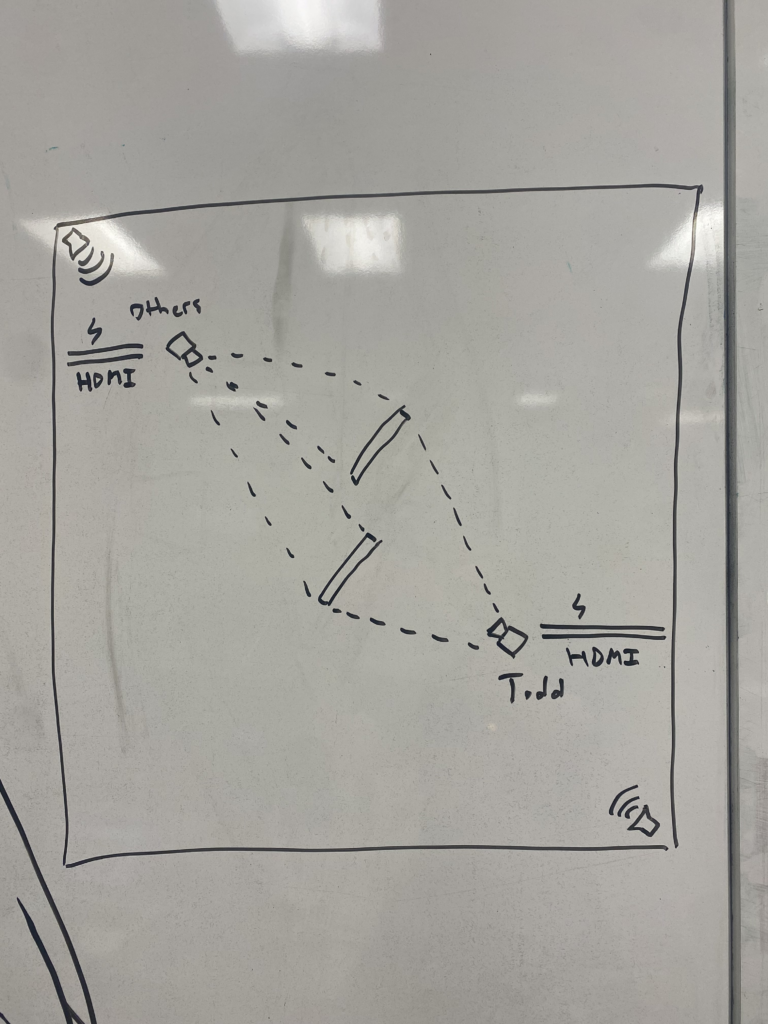
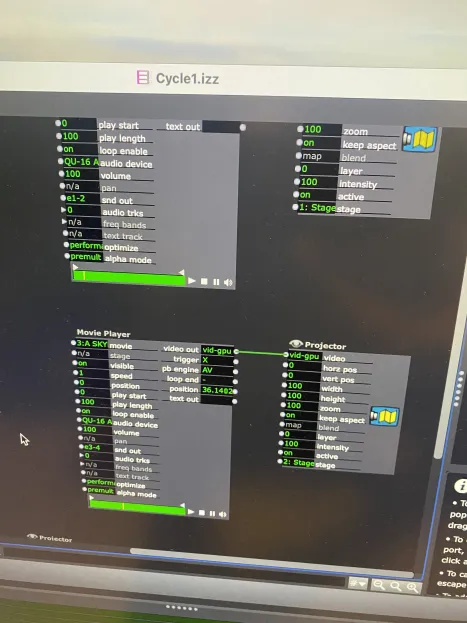
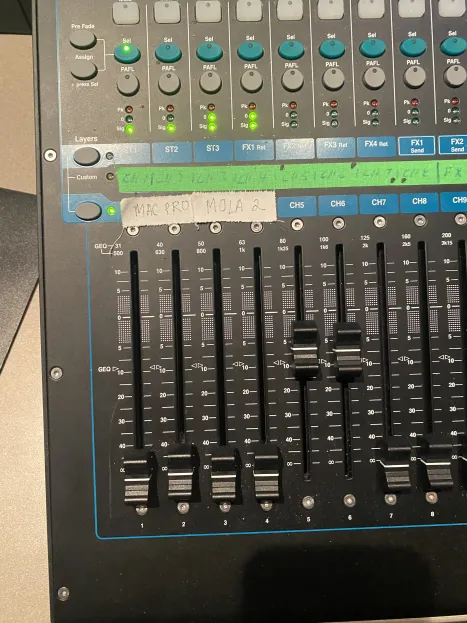
This time, the setup was moved diagonally. I wanted to do this to give myself more space to work with and because when audio would be incorporated, I needed speakers that I could project audio from in different locations. Instead of boxes, Nico had a great suggestion of using some draped sheets, so we took them and folded them over some movable coat racks. I also played with getting audio to play out of different speakers. I only wanted sound to come out of the back left and the front right speaker. Isadora had a little bit of trouble, the snd out parameter for my movies had to be set to e1-2 for the front speakers and e3-4 for the back speakers, then the panning needed to be adjusted so that audio would only play out of a specific speaker. After that was figured out though, we saved my audio settings to the sound board so that it could be loaded up quickly later.
For the cycle 1 presentation, I took a quick video:
I got a lot of great feedback about peoples’ thoughts and feelings on this project:
- Jiara felt that there was a resonance between the tone of the voice and the quality of the fabric, or perhaps the wrinkly appearance of the fabric. It seemed that for one coat rack the fabric was more pristine and ironed, while on another the fabric was more crumpled, which could connect to the quality of audio or perhaps the autobiographical nature of the footage
- There was some confusion about the meaning of the piece, for many the relationship between the people and footage wasn’t clear. Was it connected? Was there a back and forth? It almost seemed like one side of the footage was the interviewer and the other side was the interviewee
- People liked spatial aspect of what was going on. Alex noted that the sound could be disorienting because there are multiple sources faced towards each other, which is a very good thing to note. Michael and I had talked about this briefly and this issue could potentially be solved by having the speakers be under the coat racks and having them project in the opposite direction, rather than projecting towards each other. But one thing that was good about this audio setup was that there were dedicated viewing positions that we created since the audio would be less distracting in the corners where the perspective was best framed. Moreover, finding spots where both footage can be viewed and heard was fun
- The biggest thing is that the messaging isn’t clear for those that don’t have context about these people. In general, there needs to be some conveyance of information about these people’s backgrounds, positions, roles, etc. and there could be more done to imply that one person is more well-known than the others. For example, maybe there is more ornate framing around Todd, maybe there is something about the volume of the space that could be played with, maybe the footage of the normal developers is jumbled and fragmented
- Someone suggested having the racks move, which would be really interesting though I don’t know how that would work haha
PP3/ Cycle 1- Rhythm Imposter
Posted: April 7, 2024 Filed under: Uncategorized Leave a comment »For my cycle 1 I was inspired by the game Among Us. I wanted to put a twist on the game and use sound and body movement to help players decide who was the imposter and who wasn’t. I immediately knew I needed multiple headphones, but I struggled where to put these headphone in for Isadora to send the sound to. I realized that I was going to need a multichannel sound system that allows me to connect multiple headphones. I first used a different version of the MOTU UltraLite mk3 Hybrid sound system that had 8 channels on it. It was pretty simple to use but when I connected it to my computer and tried to send the sound through, it was only reading 2 channles. It took a couple of classes, reading the manual, and asking Alex how do I solve this problem but I solved the problem.
First, I had each player choose 1 number and that number would assign your role as a “regular” or “imposter”. Here is my patch for where everyone chose their roles:
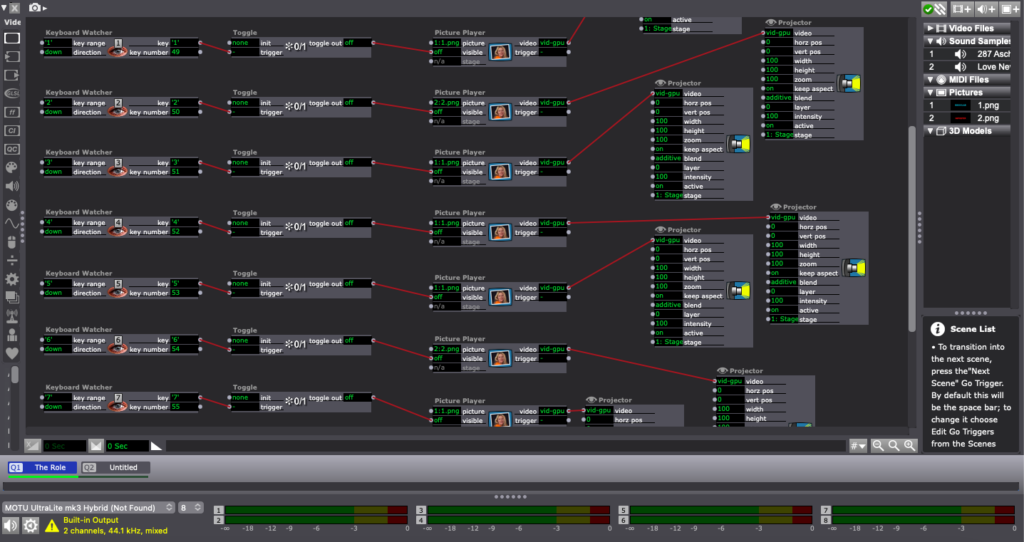
Here is my patch for getting the sound to be sent through different channels. Again in this instance I had 1 song going to 4 channels (headphones) and another song going to 2 channels (headphones).
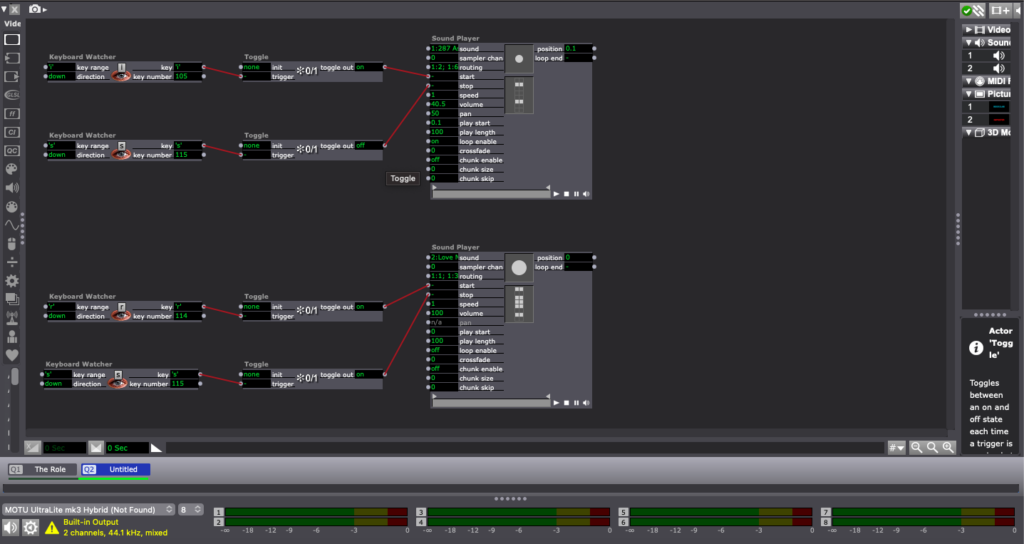
The purpose of this cycle was to get the MOTU sound system working and solving the problem of getting different sounds/ songs to be sent through different channels. My first struggle was that I could on get 2 channels working, however after switching to a bigger MOTU sound system and making sure Isadora read 8 channels, then I was able to achieve my goal.
Cycle 1: Personal Metrics
Posted: April 4, 2024 Filed under: Uncategorized Leave a comment »Overview:
Cycles 1-3 aims to explore the data behind providing personalized running phase zones to a sprinter based on user input. Eventually leading to efficient training strategies to improve performance.
Implementation:
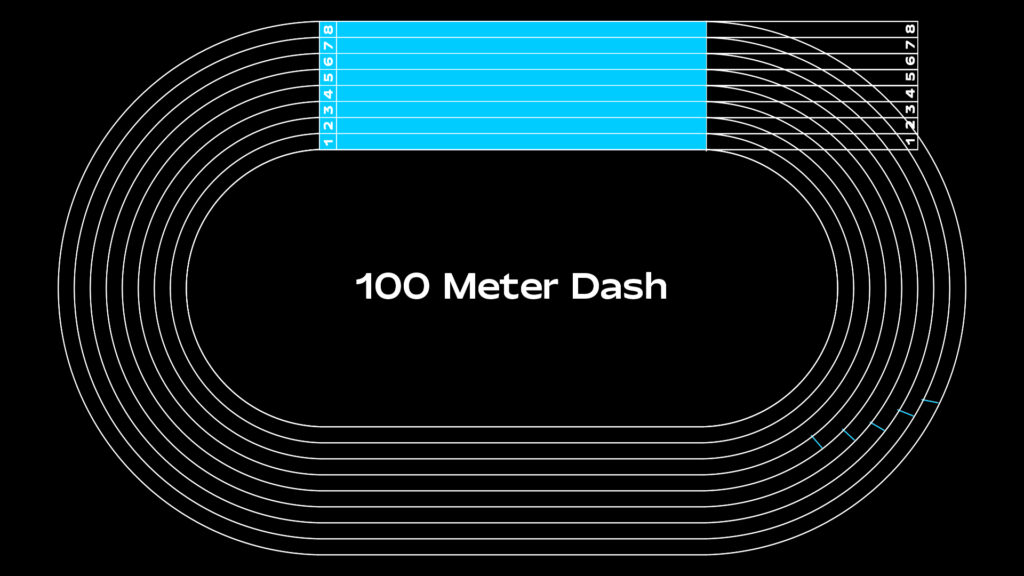
The project will utilize Isadora’s control panel feature for interactive user input (Cycle 1). Algorithms for phase zone calculation will be developed, drawing on secondary research for running phase terminology and incorporating height as a variable (Cycle 2). The system will be designed to present users with clear and actionable results, potentially visualizing phase zones on a track diagram for better comprehension (Cycle 3).
Cycle 1 Features:
- User Input Interaction: Utilizing Isadora’s control panel feature, users will input their fastest running time, goal time, and height, providing essential data for the calculation process that I will be workshopping in Cycle 2.
- Personalization Based on World Records: Users will be able to set their persona best time and goal time, with reference ranges derived from the current Men’s and Women’s world records for sprint events (100m, 200m, and 400m dashes).
- Height Adjustment: Height will be factored into the calculation process, potentially influencing the distribution of running phase zones to accommodate individual physical characteristics.

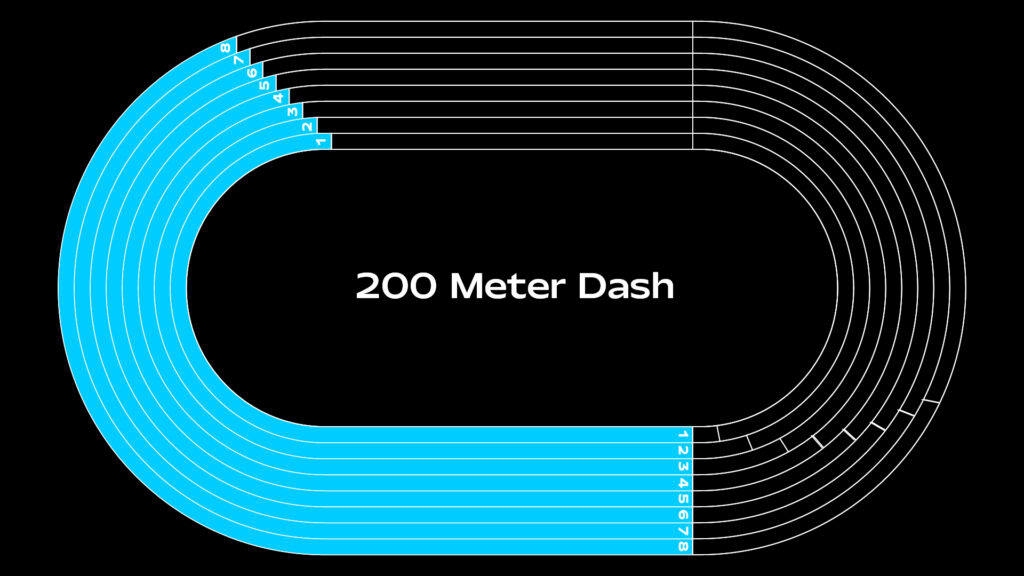
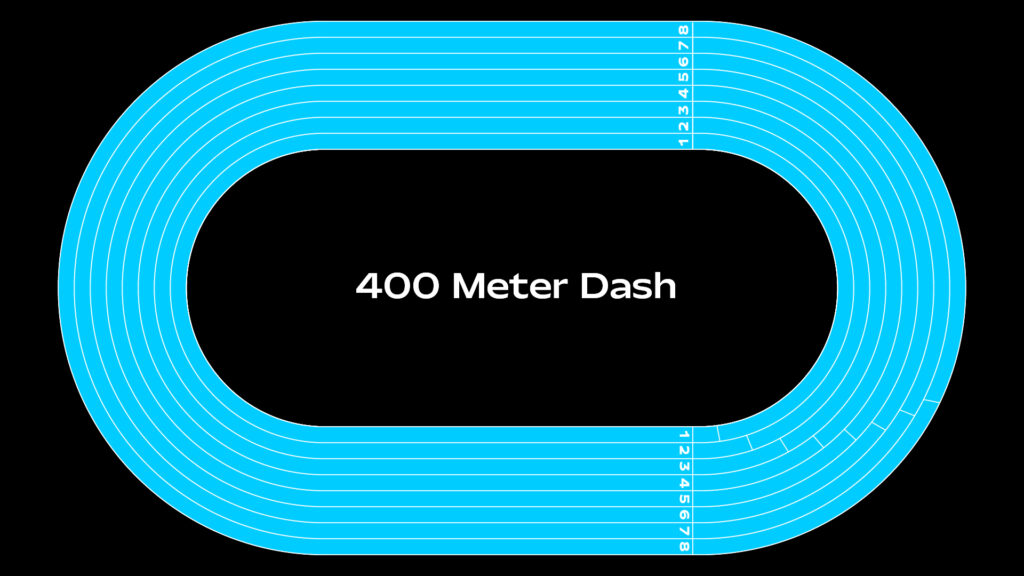
Pressure Project 3: Puzzle Box
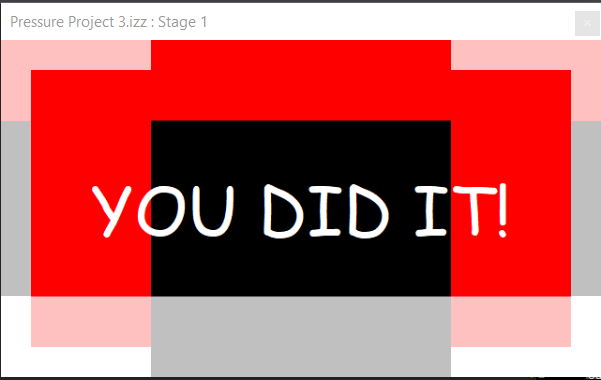
Posted: April 2, 2024 Filed under: Uncategorized | Tags: Isadora, Pressure Project, Pressure Project 3 Leave a comment »Well uh the thing is is that the project didn’t work. The idea was for a box to have a puzzle entirely solvable without any outside information. Anyone with any background can have a fair chance at solving the puzzle. So, because I am not a puzzle making extraordinaire, I had to take inspiration from elsewhere. It just so happens that a puzzle with just those requirements was gifted to me as a gift from my Grandpa. It is called a Caesar’s Codex. The puzzle works by presenting the user with a four rows of symbols that can slide up and down then right next to it is a single column of symbols. Then on the back is a grid full of very similar symbols to the ones with the four rows. Finally, their are symbols on the four sides that are similar to the ones on the column next to the four rows.
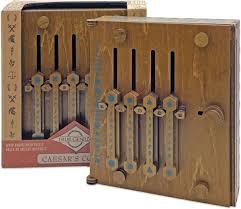
Now the challenge is to get this fully mechanical system to interact with the user interface created in Isadora. The solution was to use a Makey Makey kit. So the wat the user moves the pieces to solve the puzzle needed to change, but the hints to solve the puzzle needed to stay the same. The mechanical puzzle requires flipping the box over constantly to find the right symbol on the grid and then flip it over again to move the row to the right position. I opted to just have the grid portion be set up to directly solve the puzzle.
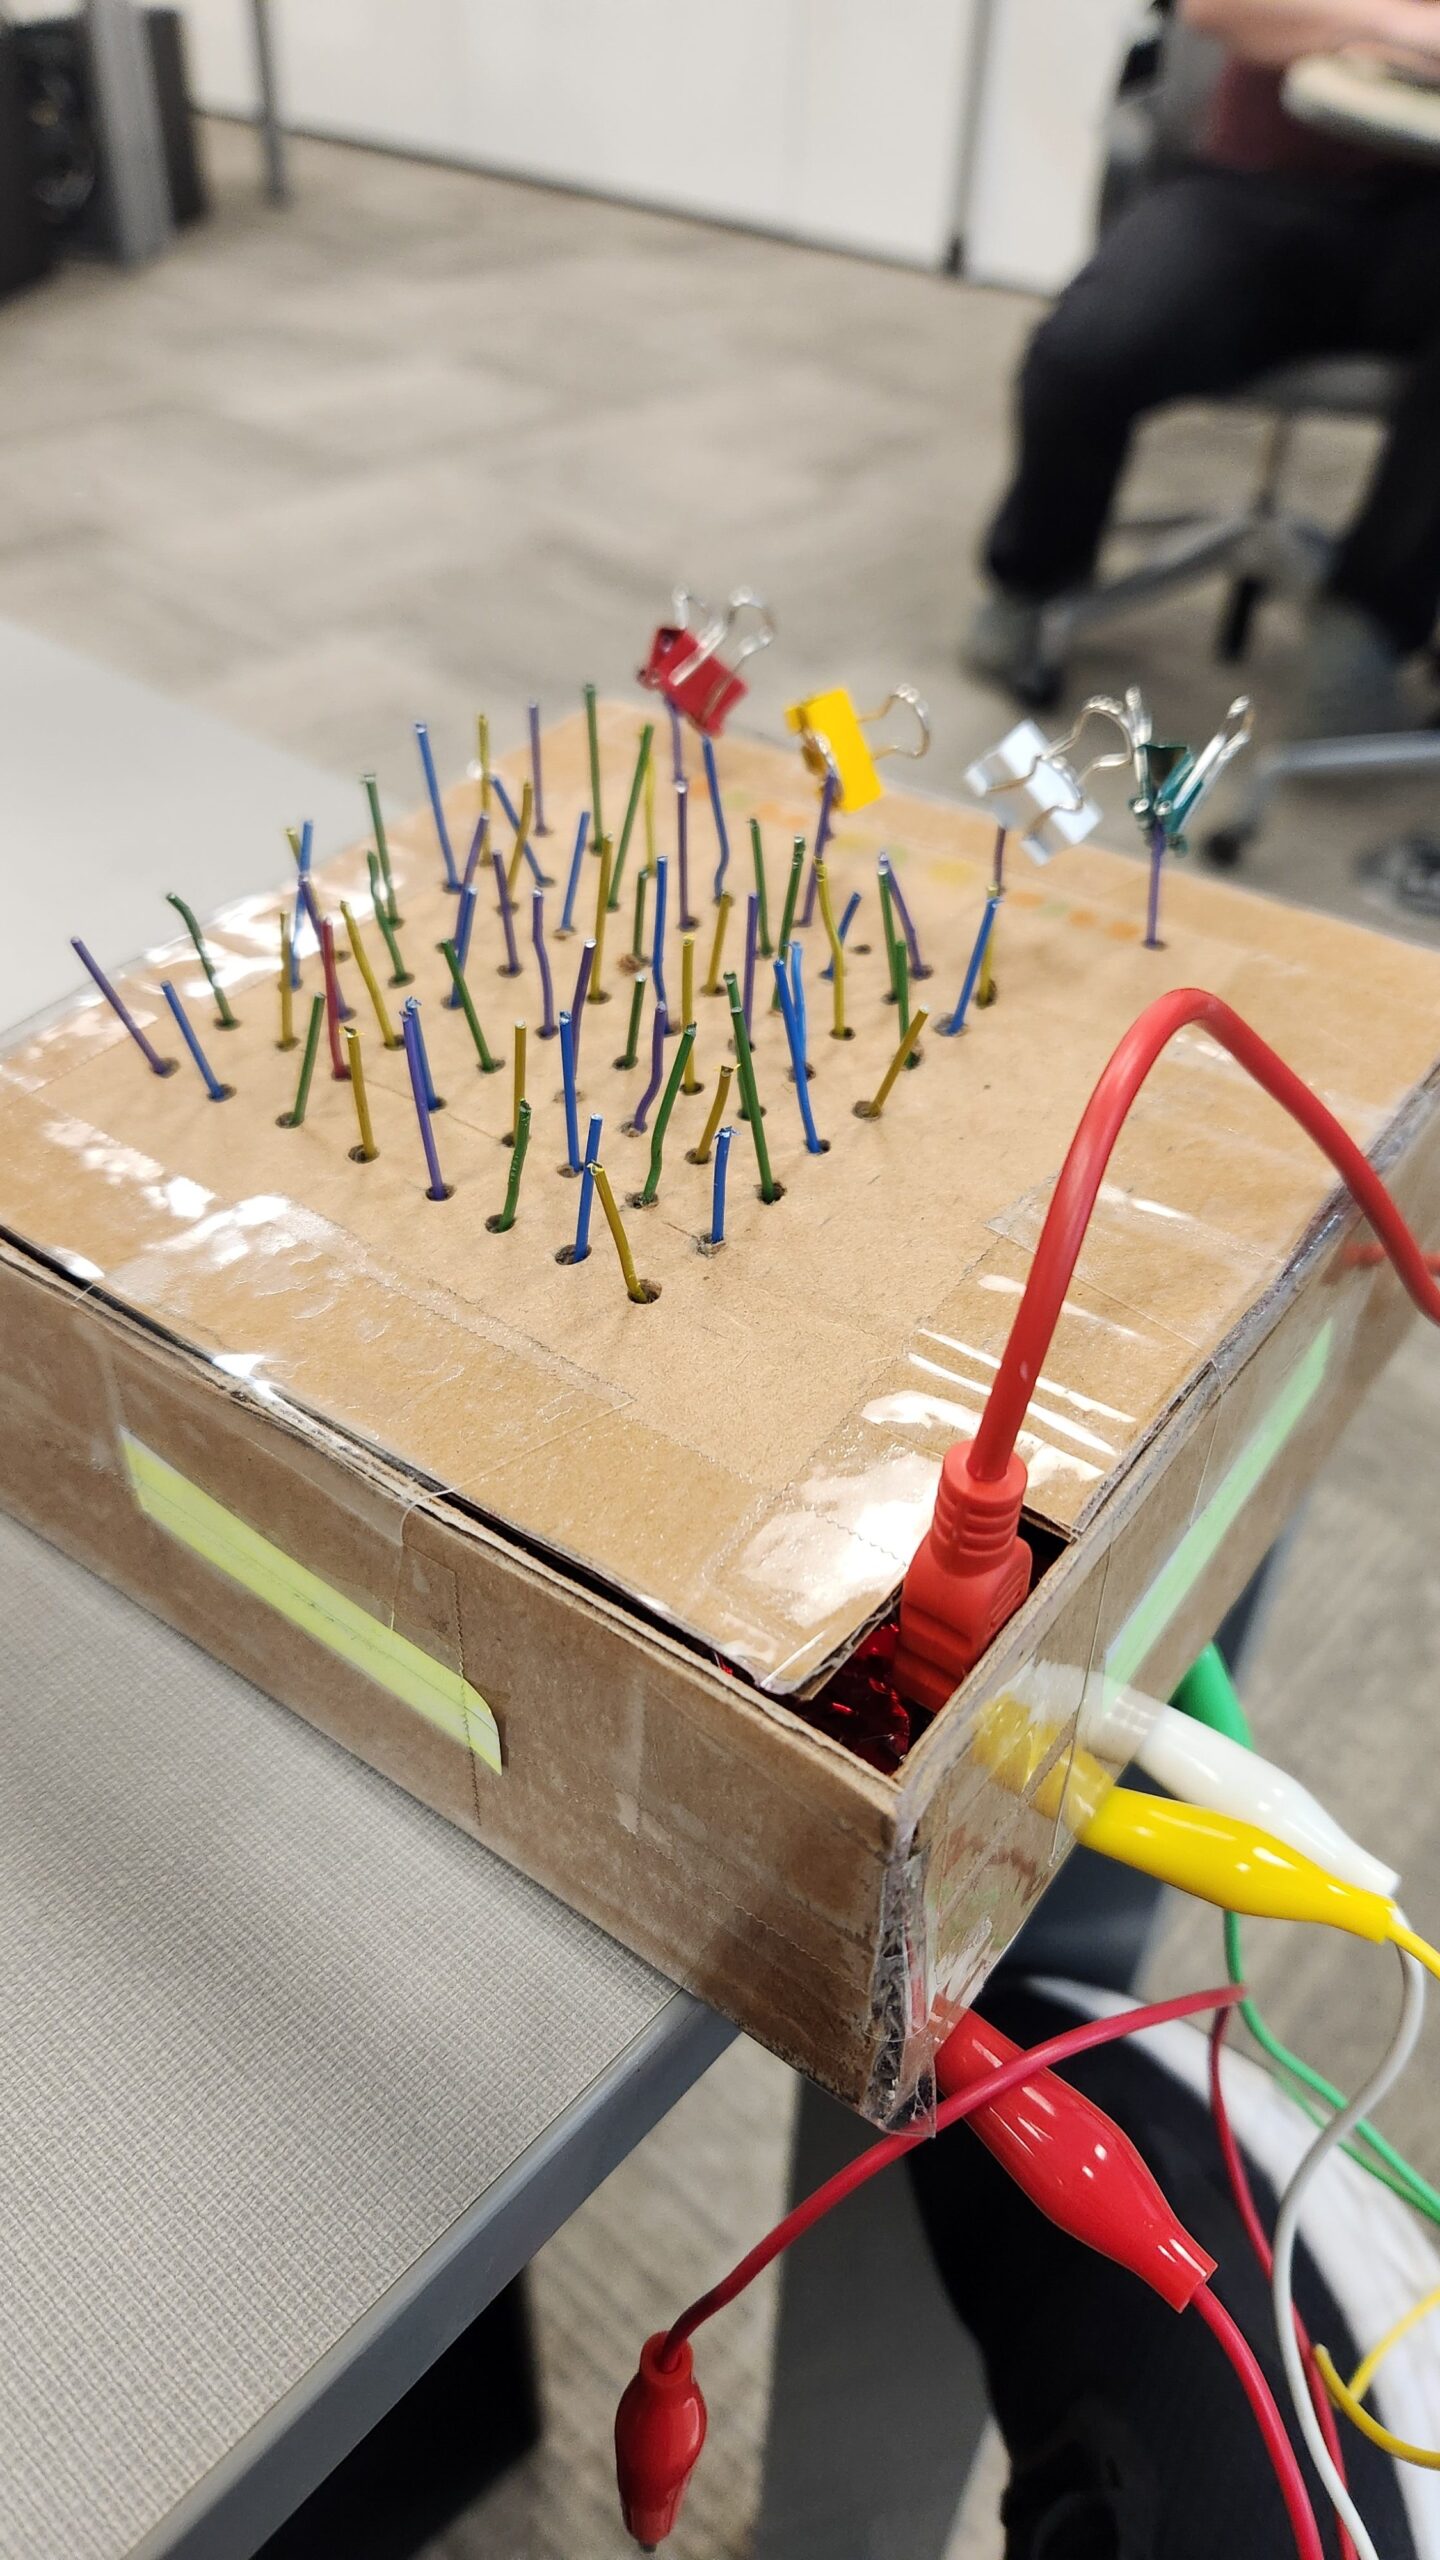
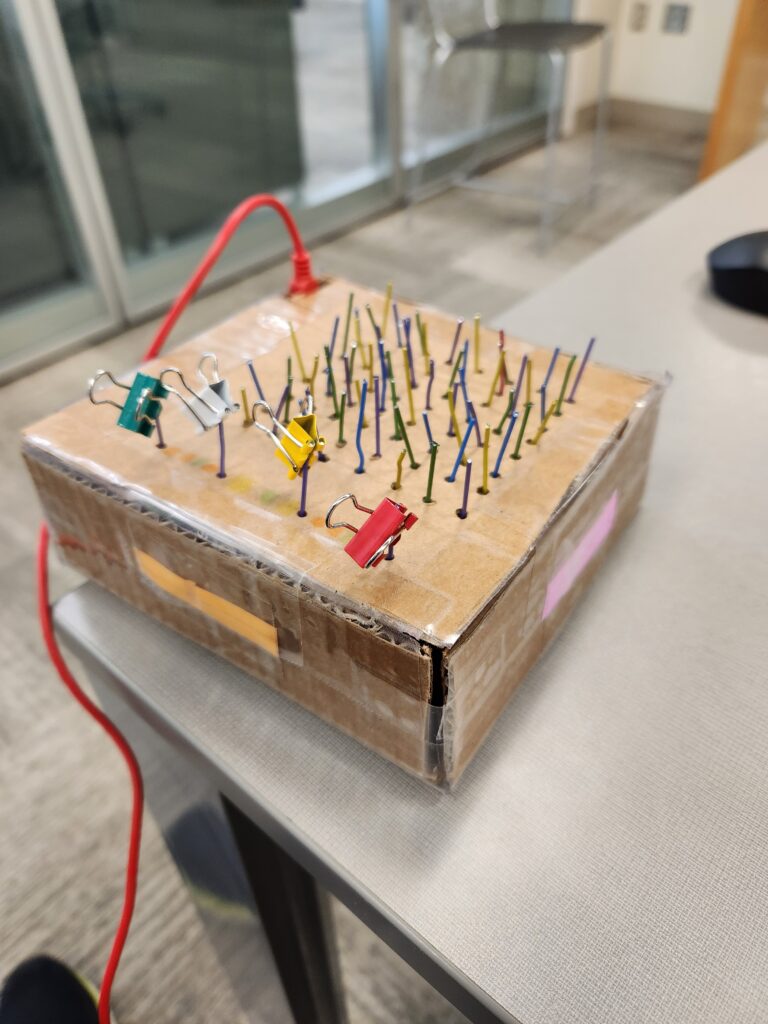
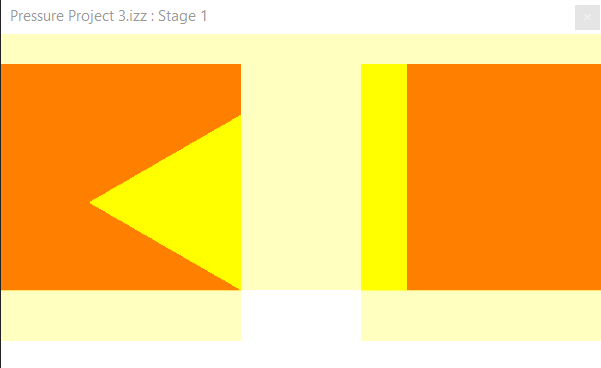
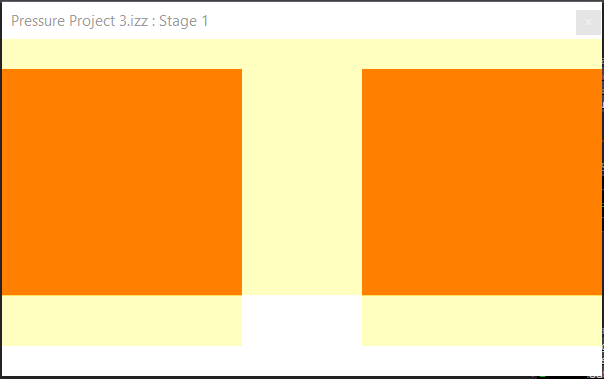
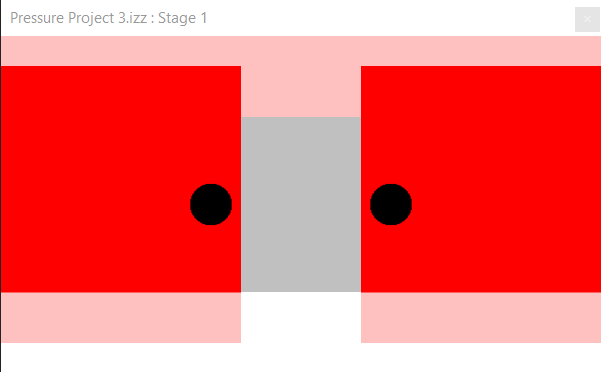
The paperclips are aligned in a grid like pattern for the users to follow. There is one unique paperclip color to indicate the start. The binder clips are used to indicate when an alligator clip needs to be attached to the paperclip. When the alligator clip is attached to the right paper clip, the screen shown on Isadora will change. Unfortunately, I never tested whether or not the paperclips were conductive enough. I assumed they would, but the coating on the paper clips was resistive enough to not allow a current to flow through them. So, lesson learned, always test everything before it is too late to make any changes, or you make your entire design based on it.
Pressure Project 3
Posted: March 28, 2024 Filed under: Uncategorized | Tags: Pressure Project Leave a comment »A Mystery is Revealed | Color By Numbers
Initially, I began this project with uncertainty about the mystery I wanted to explore. Reviewing past student work, I stumbled upon a personality test concept that intrigued me, expanding my understanding of what constitutes as a mystery.
Following my usual design process, I sought inspiration from Pinterest and various design platforms. A comic called “Polychromie” by artist Pierre Jeanneau caught my attention, particularly its use of anaglyph—a technique where stereo images are superimposed and printed in different colors, creating a 3D effect when viewed through corresponding filters. I was intrigued by how the mystery unfolded depending on the filter used.


While exploring the feasibility of implementing anaglyph on web screens, I encountered challenges due to my unfamiliarity with the term. Nonetheless, I pivoted towards a “color by numbers” concept, drawing inspiration from “Querkle,” a coloring activity based on circular designs developed by graphic designer Thomas Pavitte, who drew inspiration from logos designed using circles.

For practicality and time constraints, I chose simple images and creted them using Adobe Illustrator, layering the circles into colorable sections. Using MakeyMakey for interaction and Isadora’s Live Capture for audio cues, I facilitated engagement. Additionally, I devised a method using MakeyMakey and alligator clips for answering multiple-choice questions.
Implementing keyboard watchers, trigger values, and jump++ actors, I orchestrated transitions between scenes in the patch, ultimately unveiling the mysteries.


PP3 – Scarcity & Abundance
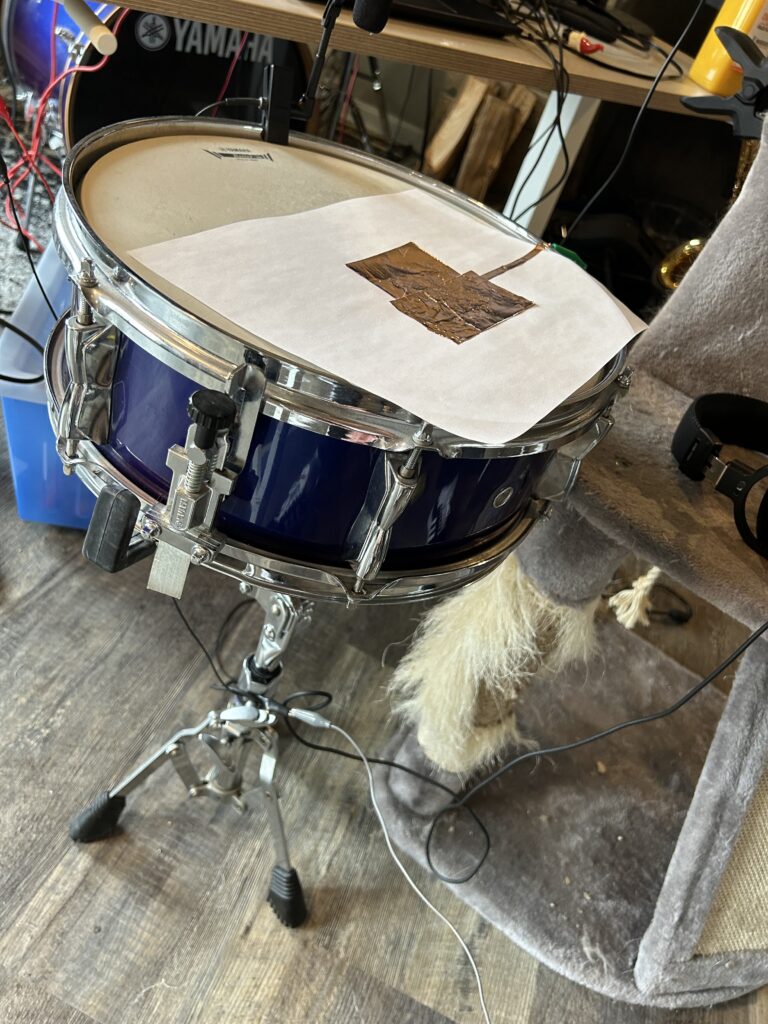
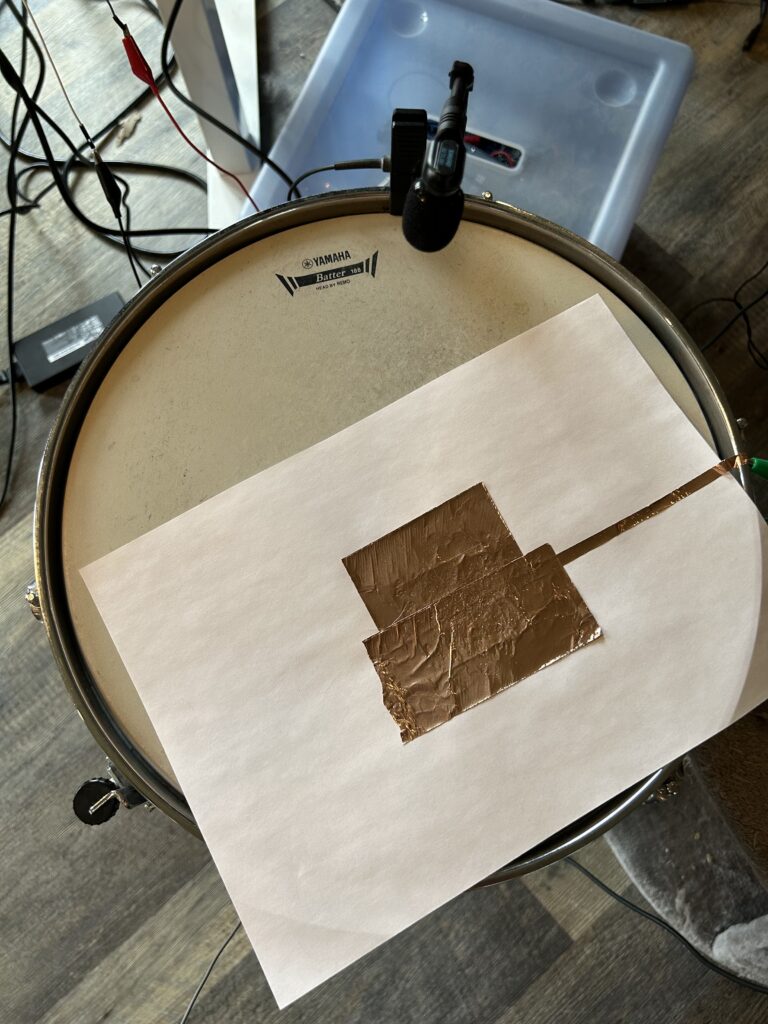
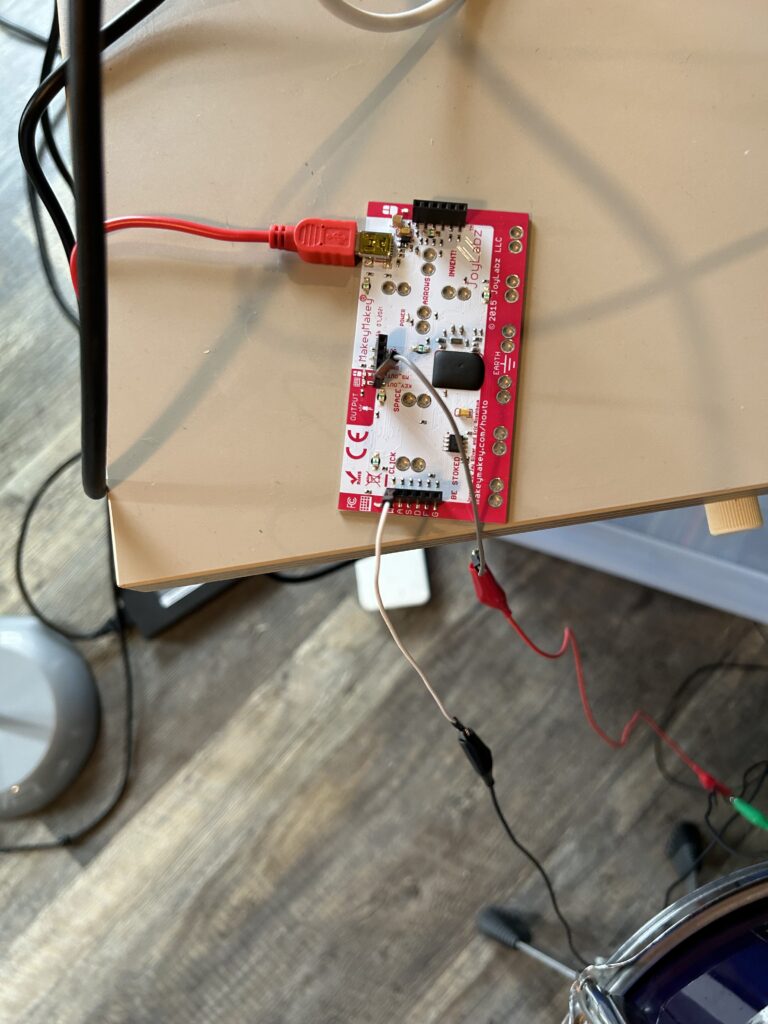
Posted: March 4, 2024 Filed under: Uncategorized | Tags: Pressure Project Leave a comment »This project began with the idea to use a snare drum as a control event in relation to the Makey Makey device and Isadora. With the prompt of ‘a surprise is revealed’, I wanted to explore user experiences involving sharp contrasts in perspective through two parallel narratives. One narrative (‘clean path’) contains imagery suggestive of positive experiences within a culture of abundant resources. The second narrative (‘noisy path’) includes imagery often filtered out of mainline consciousness as it is a failure byproduct within the cultures of abundant resources. By striking the snare drum in accordance with an audible metronome, the user traverses a deliberate set of media objects. In photo based scenes, there is a continuum of images scaled from most to least ‘noisy’. Hitting the drum in synchronous with the metronome will enhance the apparent cleanliness of the image. While hitting off beat renders the reverse effect giving more noisy or distasteful images. In video based scenes, two videos were chosen which illustrate opposing viewpoints and similarly, the timing of drum beats alters the display of positive or negative imagery.
The first images are of random noise added to a sinusoid. A Python script was written to generate these images and an array of noise thresholds were selected to cover the variation from a pure sinusoid to absolute random noise. This serves as a symbol for the entire piece as Fourier mathematics form the basis for electrical communication systems. This theory supports that all analog and digital waveforms can be characterized by sums of sinusoids of varying frequency and amplitude. As such, all digital information (video, image, audio…) can be represented digitally in the form of these sinusoids for efficient capture, transmission, and reception. In the digital domain, often unwanted signal artifacts are captured during this process, so digital signal processing (filtering) mechanisms are incorporated to clean up the signal content. Just as filtering adjusts signal content from the binary level of media objects, it exists at higher computing levels, most notably algorithmic filtering in search engine recommendation, social media feeds, and spam detection in email inbox to name a few. Further, on the human cognitive level, societies with abundance of resources may be subjected to the filtering out of undesirable realities.
One such undesirable reality is that of consumer waste which is conceptually filtered through the out of sight, out of mind tactic of landfills. Even when in sight, such as in a litter prevalent city, the trash may be filtered out cognitively just as is done by audible ambient noise. The grocery store shopping and landfill scenes serve to illustrate this concept. The timelapse style emphasizes the speed and mechanicalness at which the actions of buying colorful rectangular food items and compressing massive trash piles occur. Within the system of food consumption, this video pair the familiar experience of filling up a cart at the grocery store with the unfamiliar afterthought of where those consumables are disposed.
The third scene takes influence from Edward Burtynsky’s photography of shipbreaking in countries like Pakistan, India, and Bangladesh in which a majority of the worlds ships and oil tankers are beached for material stripping. These countries are not abundant in metal mines and their economies are dependent on reception of ships for recyclability of iron and steel. The working conditions are highly dangerous involving toxic material exposure and regular demolition of heavy equipment which dehumanize workers and cause environmental damage. This video is contrasted by an advertisement for Carnival cruise line and a family enjoying the luxury of vacationing at sea on a massive boat containing a waterpark and small rollercoaster. This scene reveals an excessive leisure experience available to those in areas of abundance and the disposal process when these ships are no longer of use. Further emphasizing the sentiment of ‘what is one man’s trash is another man’s treasure’.
The last scene includes a series of screenshots taken from Adobe photoshop showing the digital transformation of a pregnant woman into a slim figure. Considering the human body as having an ideal form, akin to that of the pure sinusoid, manual and automated photoshop tools provide ways to ‘cleanup’ individual appearance to a desired form. With body image insecurity, obesity, and prevalence of cosmetic surgeries pervading the social consciousness of abundance societies, this scene registers the ease at which these problems can be filtered away.
The choice of the drum and metronome as a control interface is designed to reconstruct the role that conformity plays in decision making and exposure to alternate perspectives. It is suspected that most users will hit the drum on beat because that is what sounds appealing and natural. Here the metronome represents the social systems underpinning our formation of narratives around consumption and self identity. With the design of this media system, it is possible for the user to only experience positive imagery so long as they strike in phase with the metronome. But for those daring to go against the grain and strike off beat, they are greeted by a multitude of undesirable realities. It is my hope that in participating with this media system, that users realize the role that digital systems play in shaping perceptions as well as how our the style of our interactions alter the possibilities on what can be seen.
Resources used in this project:
- Makey Makey
- Snare Drum
- Copper Tape
- Drum Stick
- Isadora
- 10 Hours of time
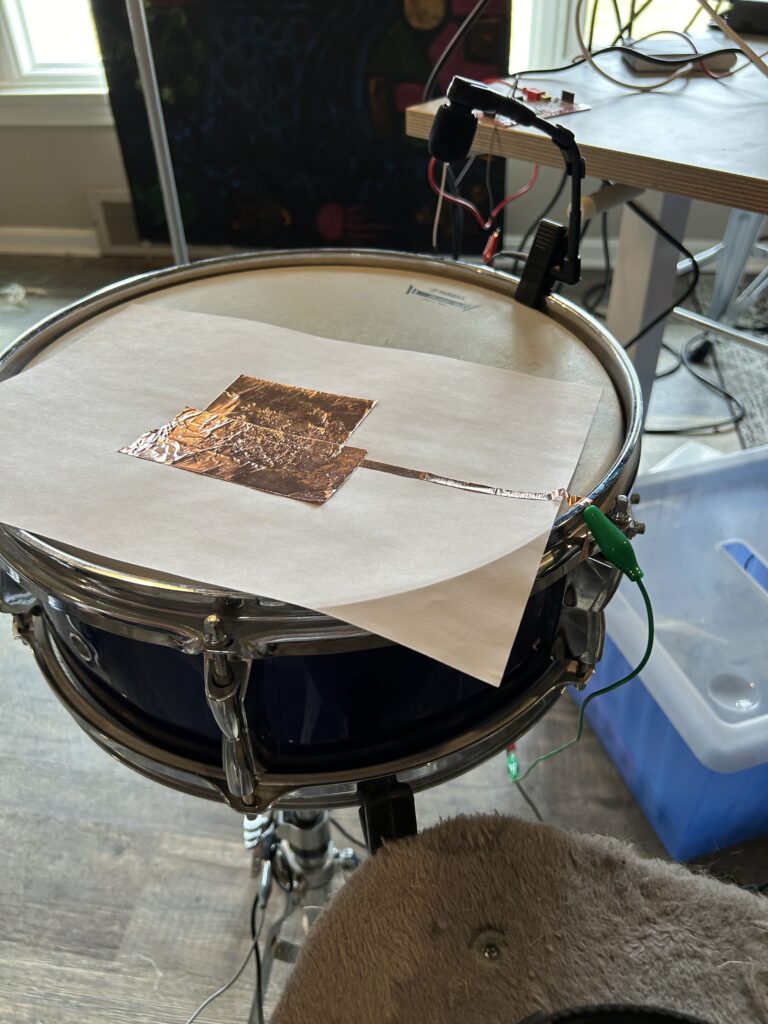
Media Artifacts Used:
Pressure Project 2 – Escape Otherworld
Posted: February 8, 2024 Filed under: Uncategorized Leave a comment »I’ve been to Otherworld some years ago so I was excited to go back. It’s a really strange space, but that’s what’s interesting about it, especially when I was able to find patterns or “figure out” a room. There were a few rooms that drew my attention at first. One was the mush-room (really funny joke). What I found interesting in it was the cow room, which had a very Legend of Zelda puzzle in it. Basically, there are six colored levers attached to a machine that itself is attached to the cow’s utters, and there is an order in which you need to pull the levers in order to get some effect. It was interesting to see how people would solve this puzzle, if they did at all (and a lot didn’t, mostly because they didn’t stay in the room long enough to realize that anything was afoot), but there were two notable instances. Sometimes what would happen is someone would be pulling random levers and then they would pull the correct one and something different would happen. In a few cases, people just started pulling levers to see if anything would happen, which lead to finding out that if you pull the levers in a certain order they don’t make the cow angry. Through trial and error they figured out the combination and the cow did fun things.
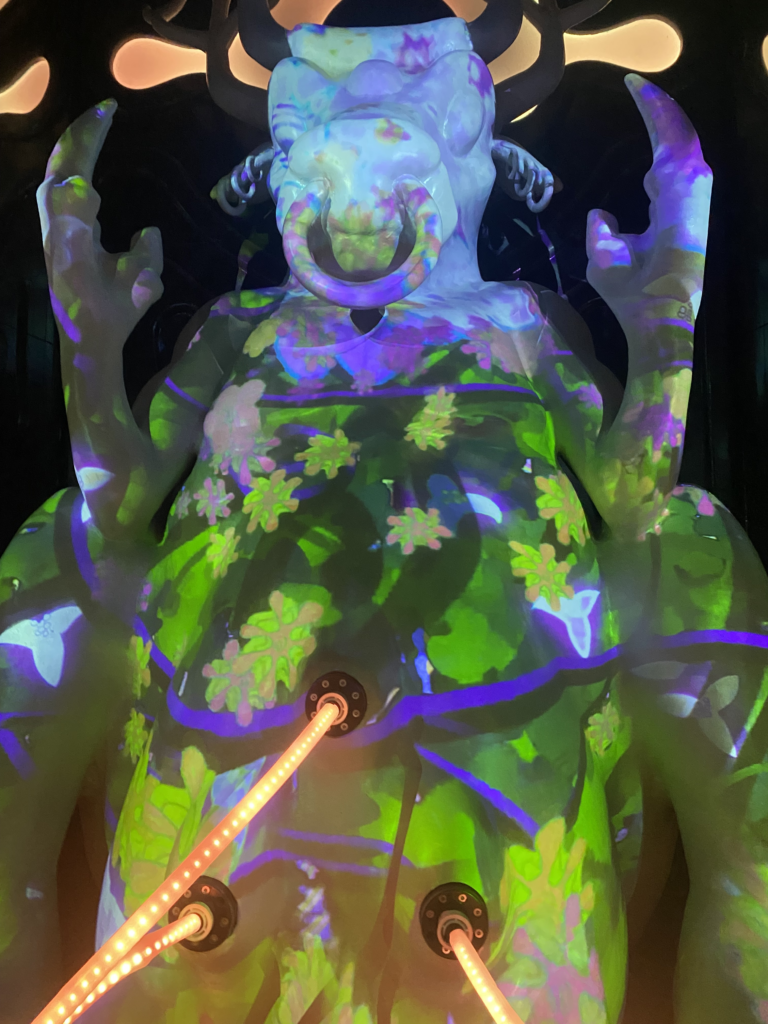
An image of the cow doing fun things!
However, some people also noticed this panel on the back wall with lights of different colors that would come on in a certain pattern. Someone then put together that the color of the lights was the same as the color of the levers and from there they found out that the light pattern was the order of the levers, which is not something I noticed at all but was really neat.
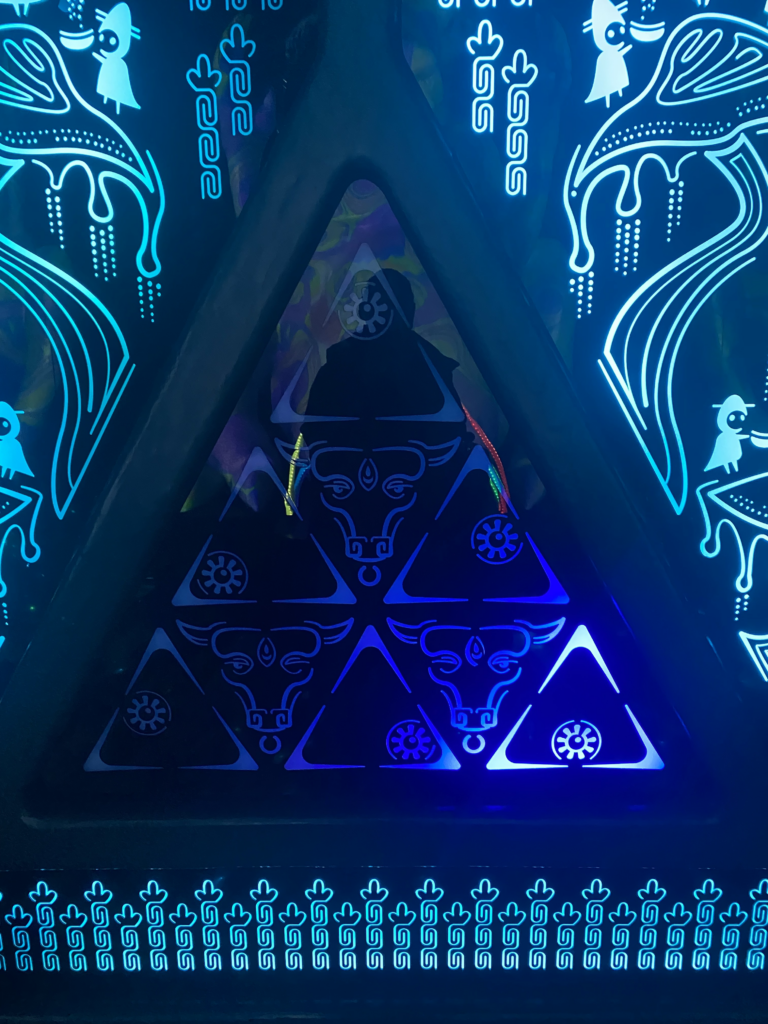
The interesting hint light panel that I didn’t notice because I’m not a true gamer
The room I actually want to talk about though because I can’t stop thinking about it is one of the first ones that people encounter. It’s right in the beginning and it’s this plainly sci-fi looking room with a bunch of panels and buttons.
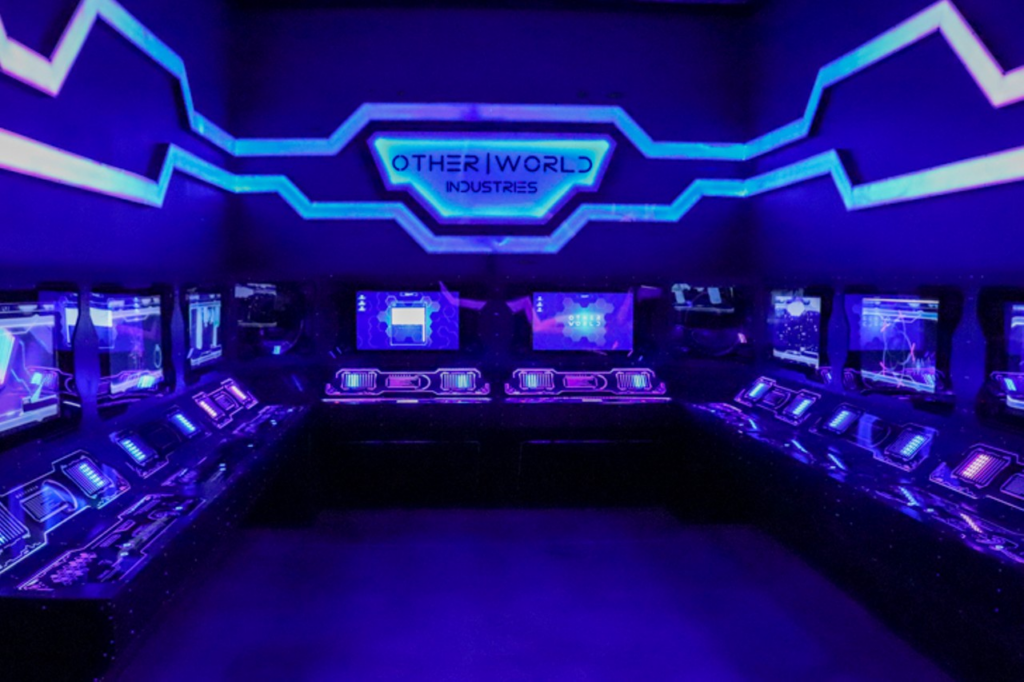
This is the panel room, I stole this image because I didn’t have any good photos of this room and I didn’t expect to be talking about it but here we are: https://www.citybeat.com/cincinnati/inside-columbus-otherworld-an-immersive-choose-your-own-adventure-sci-fi-art-installation/Slideshow/12234210
At first, I wasn’t really interested in this room. For starters, the first button I pressed made all the screens display a rick roll, and I almost cried. In general, most of the panels weren’t related from what I could tell. Some of them had small games, like one had a game where you have to time pressing a button to cause a system overload. Some had videos that showed a scientist talking about Otherworld itself, which are interesting from a lore perspective but weren’t super interesting from the experience side (most people just watched them, which isn’t very interesting to describe haha). There was one panel that I saw a kid playing with that had a camera view of another room, specifically the mouth cave room, and when the button was pressed a sound effect would play like a burp. That I thought was very interesting. I tried playing with the panel myself, apparently you can change the sound effect played by turning this knob. What I wanted to know is if those sounds were being played to people inside the mouth room. Anytime one of the sound effects was played I stared intently at the panel to see if anyone would react. Unfortunately, basically no one had any sort of interesting reaction, so I couldn’t really tell if the sounds were going through. I went to the mouth cave room myself to see if I could hear anything (I probably sat in that room for like 10 minutes too), but I didn’t hear any noises. I don’t know if this was because no one was playing sounds or because the sounds aren’t being projected, but I’m like 90% certain that the sounds matter. Even if it doesn’t, people that I saw using the panel had sort of a devious way of playing, like they were messing with others in the experience.
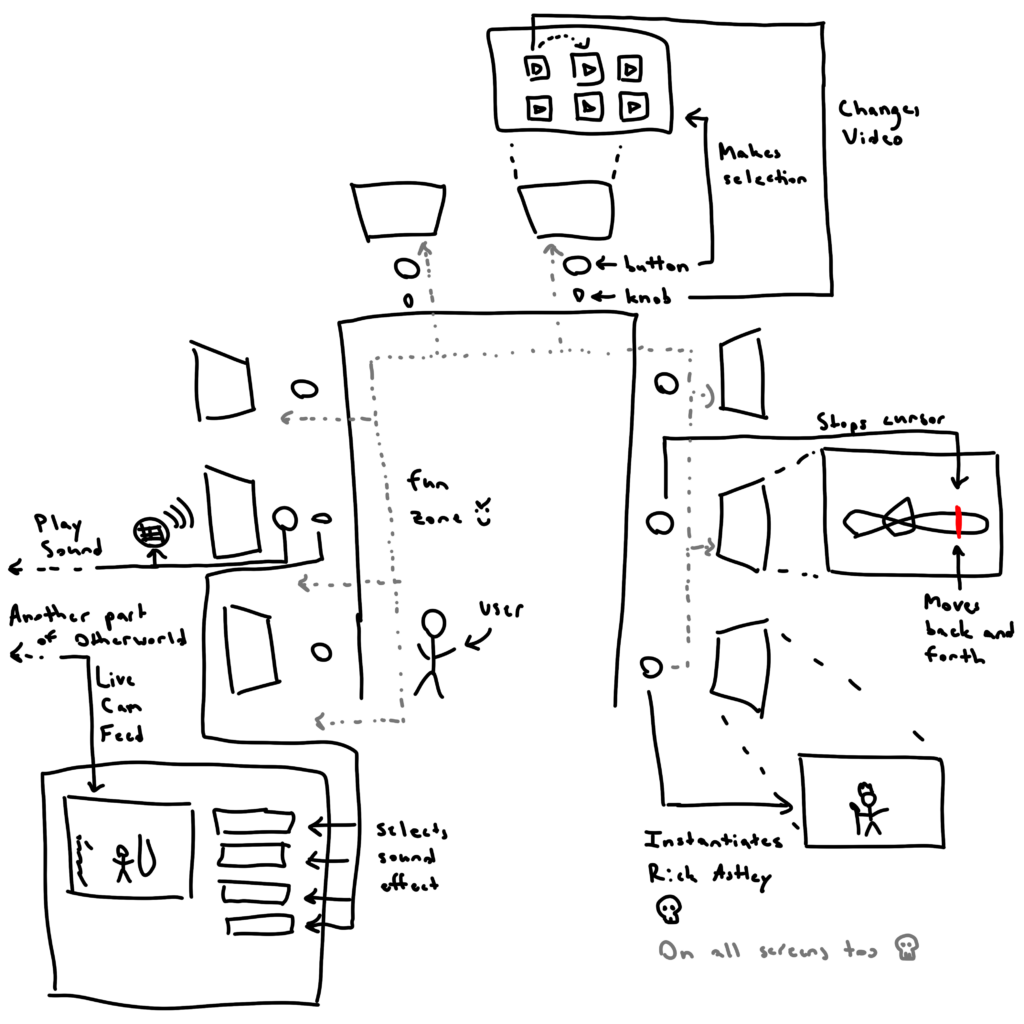
The original room, and a little about how it works. Not super complicated all things considered.
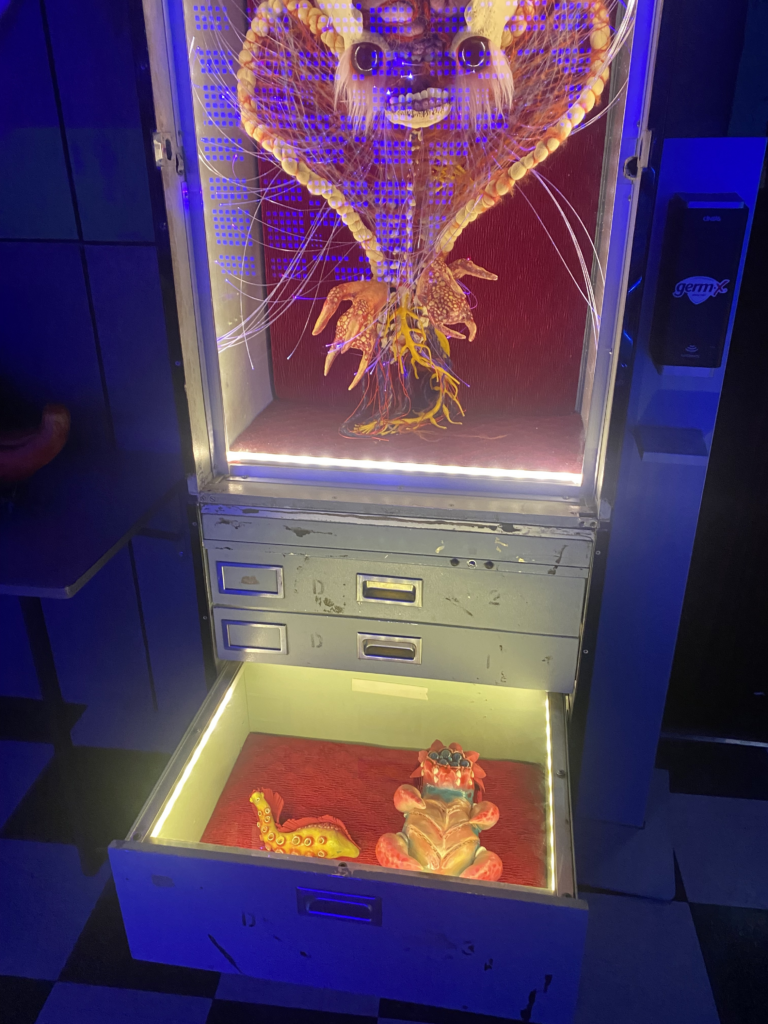
Regardless, I started to think about this room as a sort of control room, for the whole experience really. I didn’t see any other panels in this control room that linked to other rooms, but I started to think about what it would be like if this room was connected to all the other ones and in a reverse Five Nights at Freddy’s or regular Hunger Games sort of way, if you could make different things happen in other rooms. As I was just exploring on my own, I started to see places where the room could definitely have jump-scared me in a haunted house sort of way. As I was looking through drawers in this room, I felt like this guy could have jumped out and grabbed me.
Similarly, while I was in this gothic/lovecraftian spider room, I had a chilling moment where I thought I remembered this bloke being an animatronic that moves around, but it was still. Then, when I turned around to focus on a different part of the room, I heard it move, and just as a turned around I could just barely see it move before it stopped again and never moved the entire time I was there. What if people could mess with others in these really minute ways? It would be kind of horrible, but it would be fun
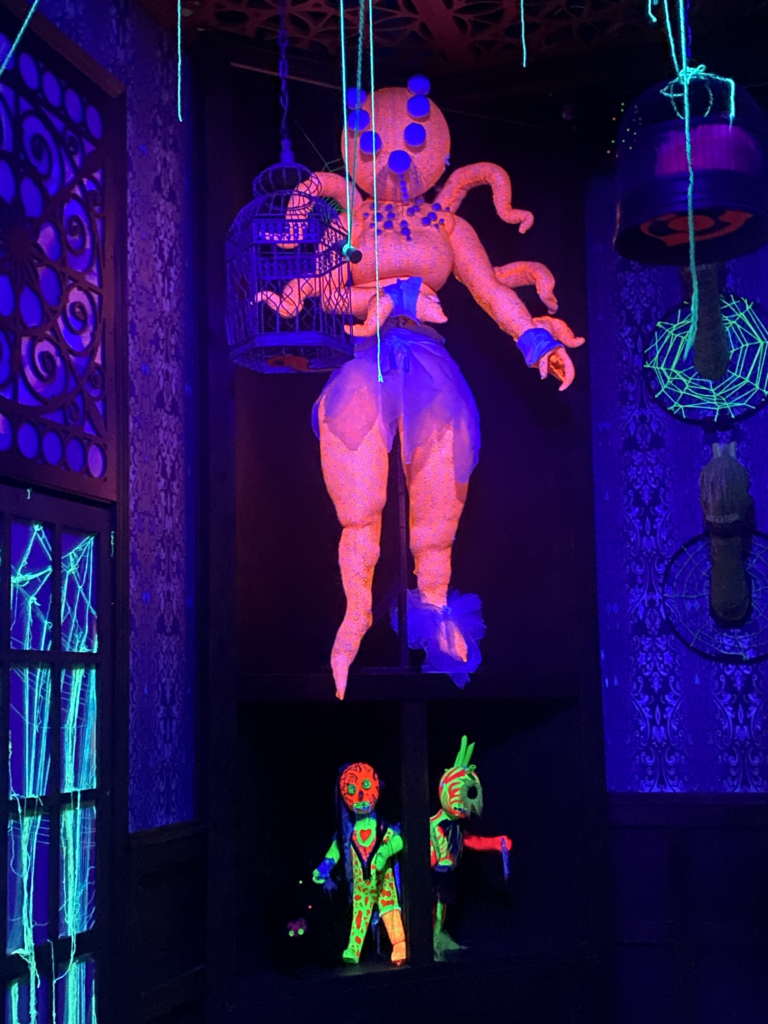
it looks like a Bloodborne boss ngl, this thing scared me
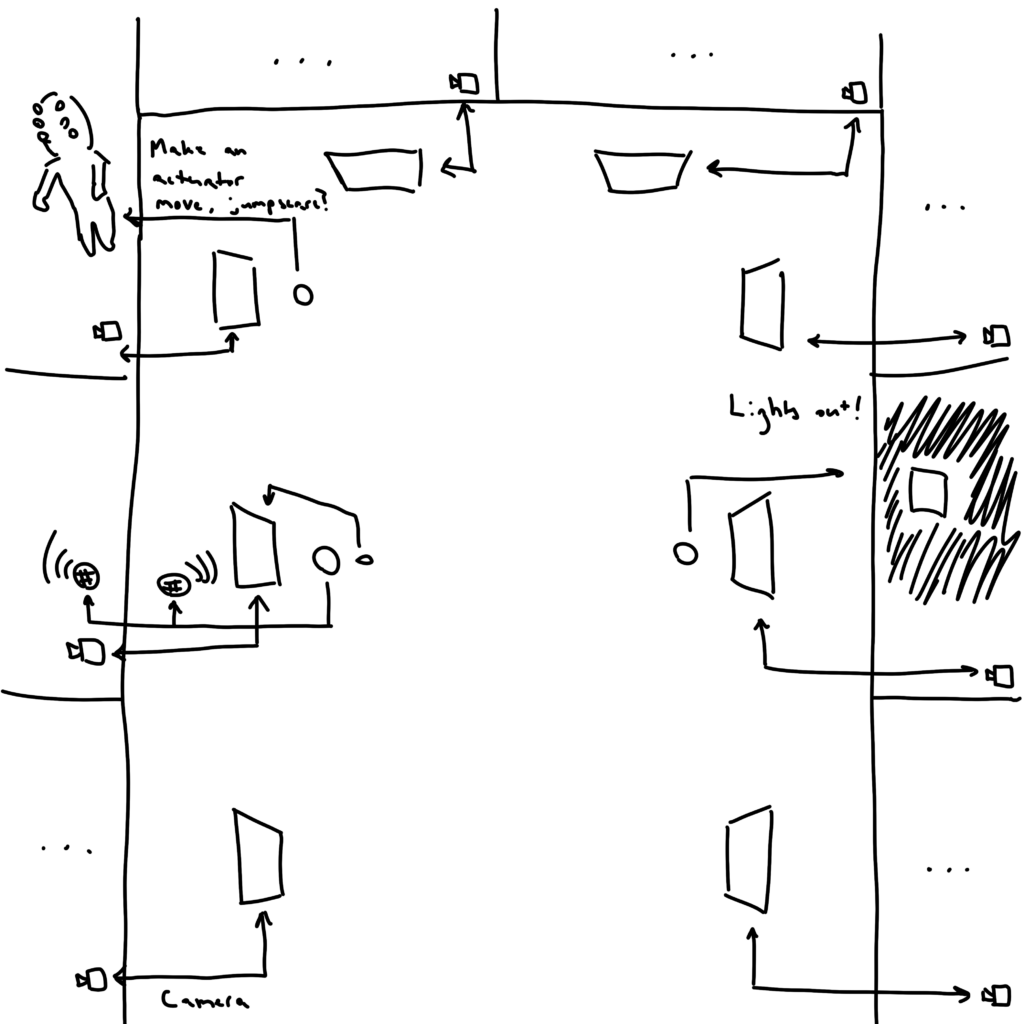
The devious room where you play nasty pranks on people
I also started thinking about some of the puzzles I saw and some of the ways I saw couples collaborating in these rooms, and then a different idea came into my head. It happened while I was trying to explain what Otherworld was and one of my friends said: “It’s like an escape room except the goal isn’t to escape.” What would Otherworld function like as an escape room of some sort? The person in the control room is almost like the game master. I also remembered this strange moment where in the aforementioned spider room, the antique phone started ringing, some random guy came in, answered it (as if he knew this phone would ring), and then left. Aside from the fact that it was weird, it could be interesting to have connections between the rooms; maybe the phone is connected to the room with the bats, and you have to speak into one of their ears to communicate with the spider room phone? What if Otherworld was this Toolmaker’s paradigm fever dream where each person was put in a different room, and they had to figure out how to communicate with each other? It would be interesting to see a place like Otherworld or Meow Wolf with this alien aesthetic, but the goal is the solve some greater puzzle instead of the puzzle being an optional thing or the room interactions being disconnected.
Otherworldly Experience
Posted: February 8, 2024 Filed under: Uncategorized | Tags: Pressure Project, Pressure Project 2 Leave a comment »This room is one of the first rooms I experienced. It is immediately after the room that Rick rolls guests and allows them to mess with other guests throughout the facility. It is a dimly lit room with three ominous human sized capsules. They all surround a giant sphere suspended in the air with what looks like wires from each of the capsules leading into it.
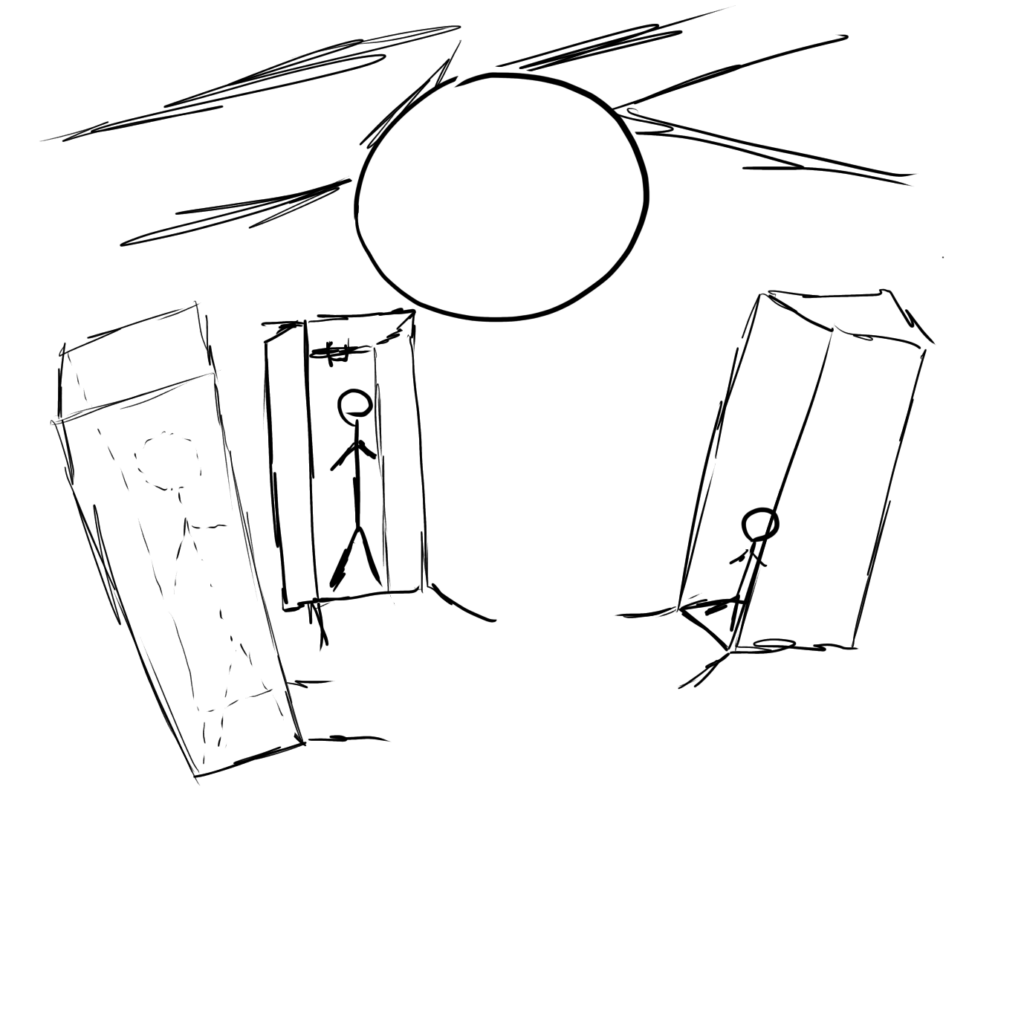
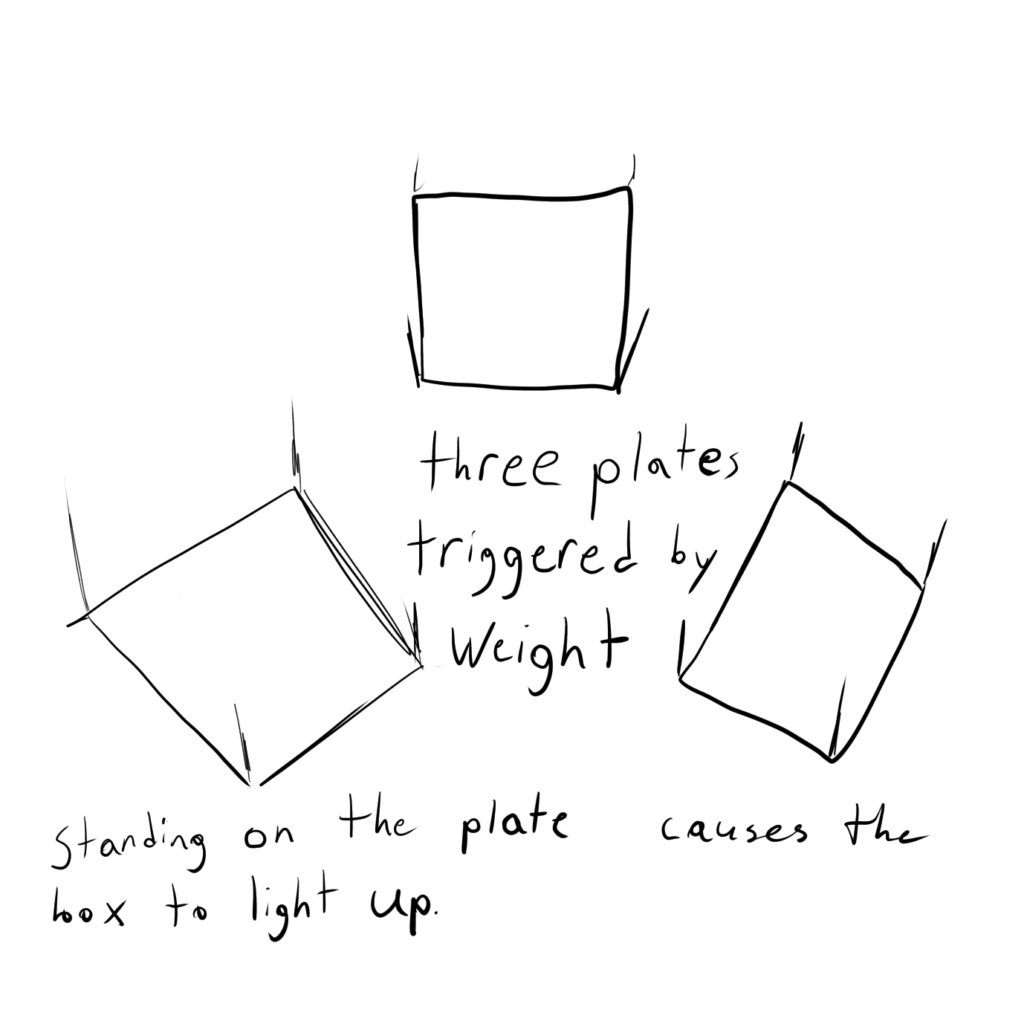
The capsules are really eye catching so many guests that entered the room immediately walked into them to check it out. Then they hear a noise in the pod and can see the side light up. This prompted nearly all of them to go looking for other people nearby to fill the other two pods to see what may happen. Once three people are standing in the pods They begin to flash black and white as well as the lights leading to the orb. At the same time a noise that sounds like static electricity is whirling around the room. Finally, the room goes dark and all is quiet then the guests standing in the pods are sprayed with gusts of air. Caught off guard, the guests let out a scream or flee from the container.
There is not much I would want to redesign with how the system is able to capture people’s attention and clearly convey what needs to be done to activate. So, what I would add would be some sort of fog like effect that is also ejected with the puff of air as well as maybe tone down the air pressure, but keep it spraying for longer. This would hopefully make it a bit less of a jump scare and make it seem cooler when the guest leaves the pod.