Body as Reservoir of Secrets, DEMS Cycle 3
Posted: December 12, 2023 Filed under: Uncategorized Leave a comment »In cycle 3, the three things I focused on were:
- Refined the composition of the graphics generated. Included more gaussian blur effects to reduce the number of hard-edges present in the work. The reduction of hard edges was intentional to reduce the “digital” nature of the graphics.
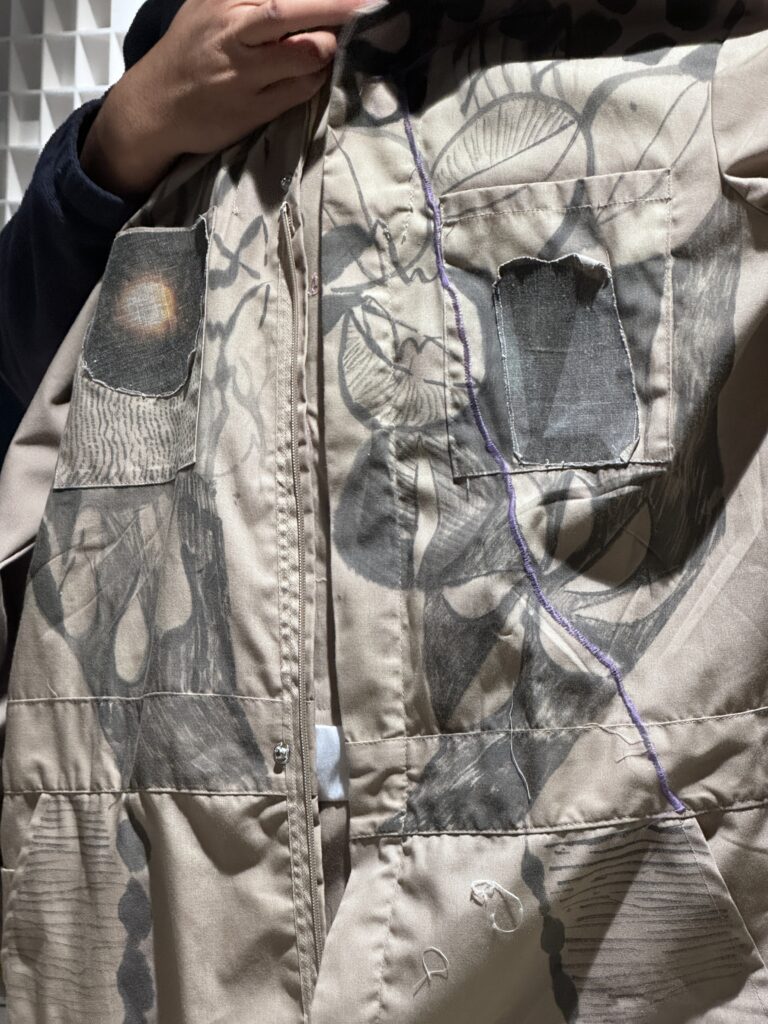
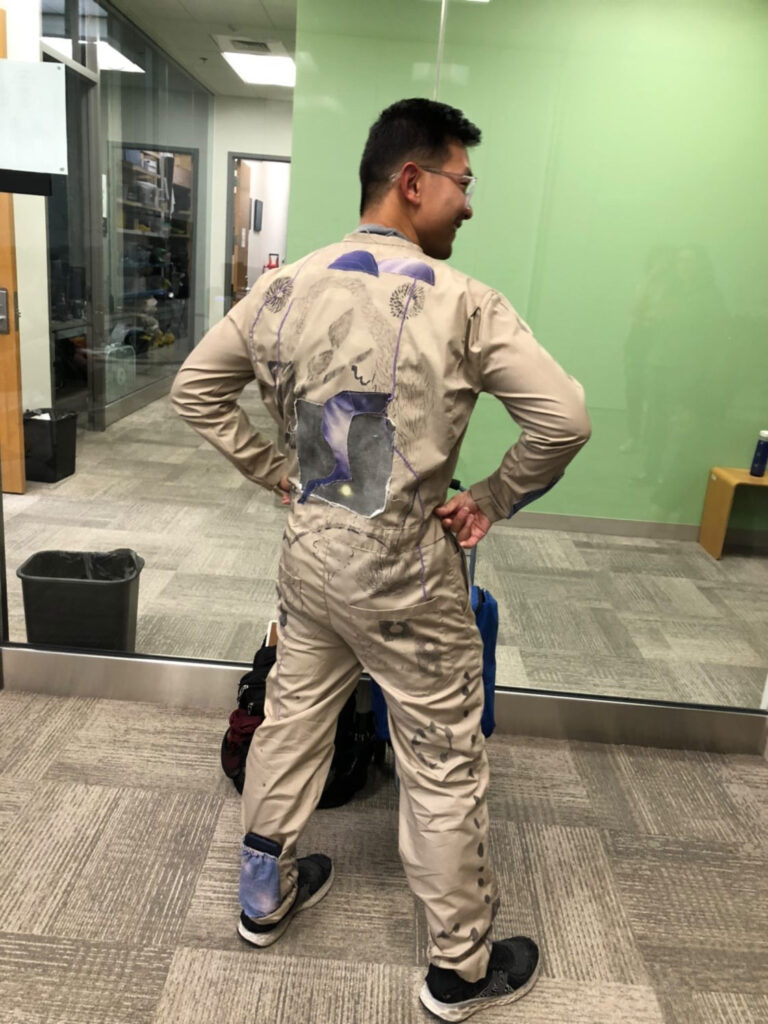
- I continued to develop the costume. I drew, painted and stitched in the costume, to create a more shamanistic leaning for the costume, hoping to steer away from an immediate aviation or space travel reference.
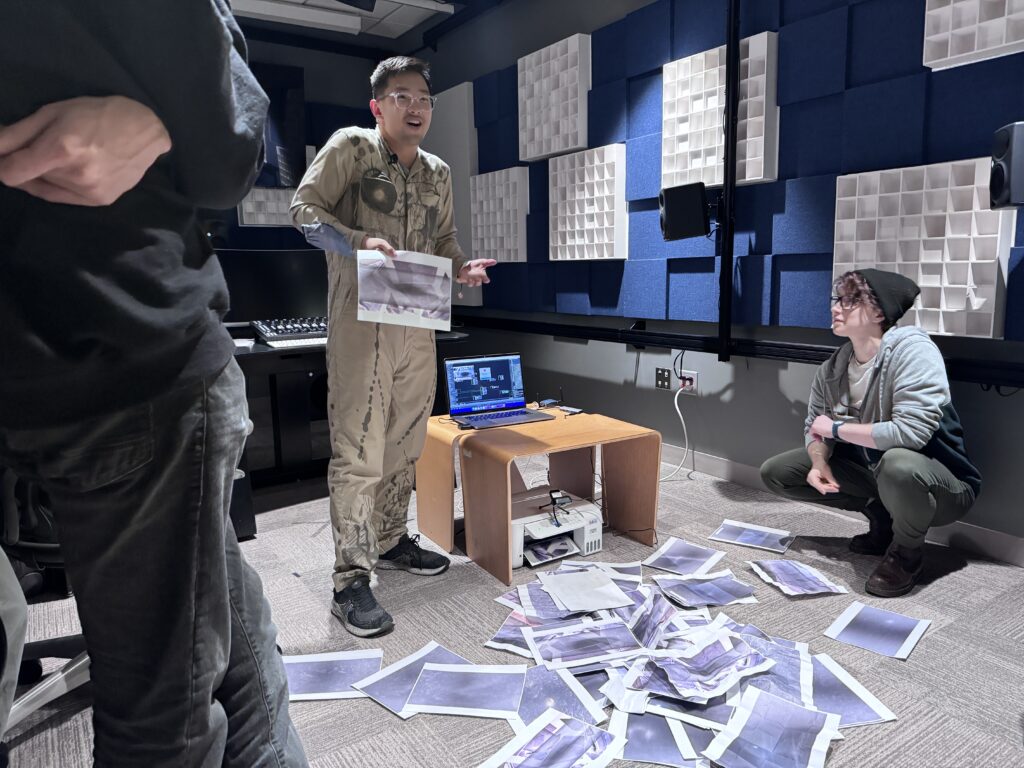
- I managed to program a Hot Folder in my computer, so that syncs up with the stage to image actor on isadora, and whatever Isadora exports to the Capture folder is automatically printed.
Decisions made:
- I decided to include an additional web-cam to do a live-capture of the pile of printed matter that was generated. The pile would then appear in some print outs.
- I moved the pulse sensing contact mic to my wrist due to the headache I experienced after the cycle 2 presentation.
- The score of the piece was supposed to be live-painting/collaging. There was not enough space/time for that to happen at ACCAD and the dec 8th critique. So I devised a score that was about folding each sheet of paper 8 times, and being unable to fold it the 9th time as a parallel to the irretrievable nature of ancestry.
Challenges/Feedback:
- My patch got very complicated and towards the end I was having some difficulty figuring how everything was wired, even though I did make an effort to be organized.
- Isadora crashed from time to time. I will look into buying a high capacity windows laptop next year.
- I needed some troubleshooting with the Hot Folder and took awhile to figure out why I was generating so many prints. Turned out that I had an earlier version isadora file running in the background which was feeding the hot folder a bunch of images.
- The prints generated had a general purple hue to them. It seems like I needed to vary the colors more in the graphics generated, so that this purple hue is counteracted/balanced.
Observations/ Ongoing curiosities:
- The printer working generated an unexpected mechanical soundscape to the piece. The rhythmic and hasty machine sound creates a sense of urgent-ness to the work, I find myself feeling some anxiousness and felt pressure to work at that rhythm/pace. I felt “chased” by the printer.
- A classmate posed me a question about generative art, and how generative art tend not to have any material cost to it. She asked me how I felt about the paper and ink expended for this performance. I actually welcome the creation of these materials because as an artist working in collage, I hardly throw away anything because I save everything in flat files. These materials will eventually find its way into another piece of work in the future.
- I intend to stage a cycle 4 in the Sherman Studio Arts Center after the semester quietens down. Cycle 4 will have the live-painting aspect and I will be exploring using what I have created in this class, as means to create a video work. I am also curious about how feature extraction can influence sound and be used for composing.
Body as Reservoir of Secrets, DEMS Cycle 2
Posted: December 12, 2023 Filed under: Uncategorized Leave a comment »For cycle 2, the idea started to take shape in a more concrete manner. I started to develop the costume using coveralls bought on amazon which I tailored myself for a better fit.
The following feature extraction functionalities were in the costume-
- On the coveralls I stitched on some patches with dark pieces of digitally printed fabric. This increases the overall contrast of the figure, which helps the eyes++ actor and webcam track object movements better.
- A contact microphone was housed in the chest pocket running up to my neck. An additional elastic band was devised to apply pressure and hold the contact microphone in place.
- Two iphone Gyroscopes were housed within blue/purple pockets with elastic openings on the arm and calf of the custom.
- A microphone was blown into whenever a scene change was desired, as a means of activating breath.
Challenges/Feedback
- Composition looked too busy given that more than 10 variables were being fed into isadora.
- My computer’s graphics card seems to be struggling and isadora crashes easily.
- A classmate mentioned that the costume appeared like an astronaut, which is not what I intended.
- I had a headache after wearing the neck piece with the contact mic for 20 minutes because it was restricting bloodflow.
Observations/On-going curiosities
- The class seems to be very interested to map/figure out which visual element was coupled with the various sensors.
- The class seems to be interested view the live generated graphics as a video piece, when I had intended the graphics primarily to be viewed as prints. I am open to the possibility of the video being screened alongside the painting performance.
Cycle 3: The Sound Station
Posted: December 11, 2023 Filed under: Arvcuken Noquisi, Final Project, Isadora | Tags: Au23, Cycle 3 Leave a comment »Hello again. My work culminates into cycle 3 as The Sound Station:
The MaxMSP granular synthesis patch runs on my laptop, while the Isadora video response runs on the ACCAD desktop – the MaxMSP patch sends OSC over to Isadora via Alex’s router (it took some finagling to get around the ACCAD desktop’s firewall, with some help from IT folks).
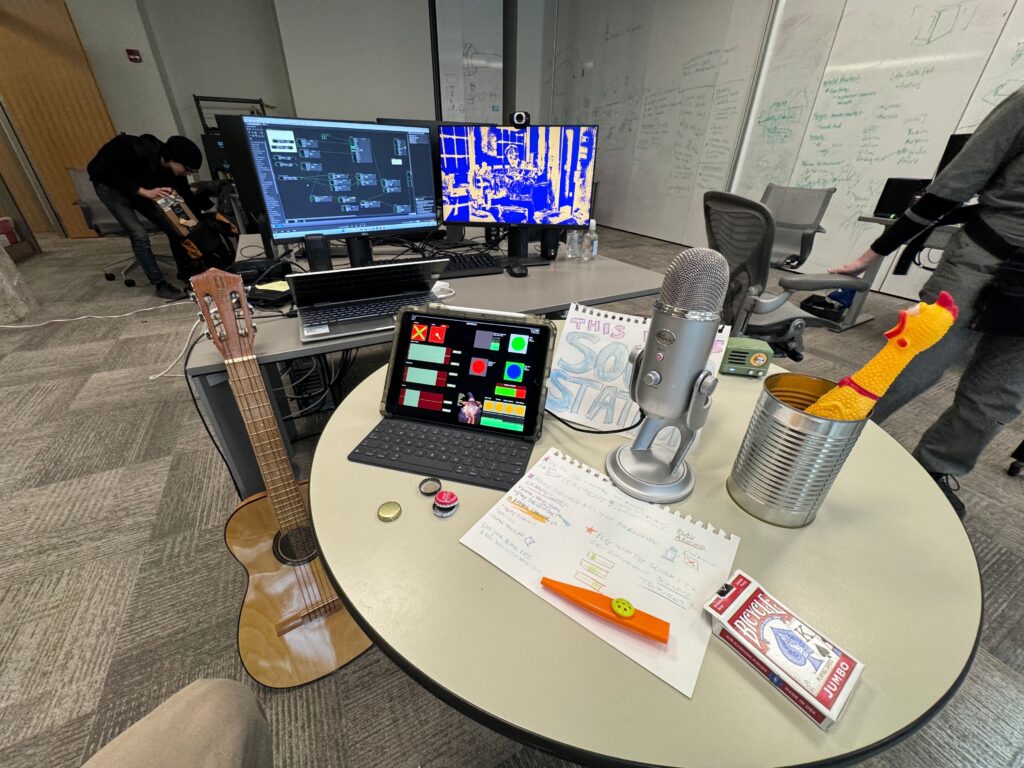
I used the Mira app on my iPad to create an interface to interact with the MaxMSP patch. This meant that I had the chance make the digital aspect of my work seem more inviting and encourage more experimentation. I faced a bit of a challenge, though, because some important MaxMSP objects do not actually appear on the Mira app on the iPad. I spent a lot of time rearranging and rewording parts of the Mira interface to avoid confusion from the user. Additionally I wrote out a little guide page to set on the table, in case people needed additional information to understand the interface and what they were “allowed” to do with it.
Video 1:
The Isadora video is responsive to the both the microphone input and the granular synthesis output. The microphone input alters the colors of the stylized webcam feed to parallel the loudness of the sound, going from red to green to blue with especially loud sounds. This helps the audience mentally connect the video feed to the sounds they are making. The granular synthesis output appears as the floating line in the middle of the screen: it elongates into a circle/oval with the loudness of the granular synthesis output, creating a dancing inversion of the webcam colors. I also threw a little slider in the iPad interface to change the color of the non mic-responsive half of the video, to direct audience focus toward the computer screen so that they recognize the relationship between the screen and the sounds they were making.
The video aspect of this project does personally feel a little arbitrary – I would definitely focus more on it for a potential cycle 4. I would need to make the video feed larger (on a bigger screen) and more responsive for it to actually have any impact on the audience. I feel like the audience focuses so much more on the instruments, microphone, and iPad interface to really necessitate the addition of the video feed, but I wanted to keep it as an aspect of my project just to illustrate the capacity MaxMSP and Isadora have to work together on separate devices.
Video 2:
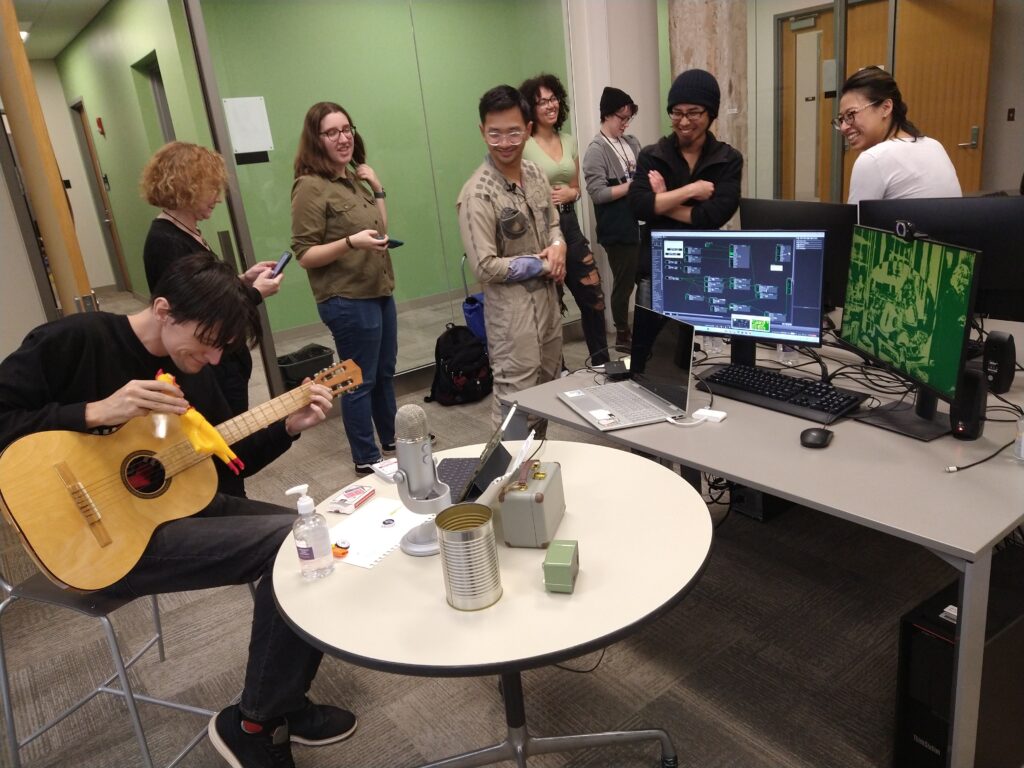
Overall I wanted my project to incite playfulness and experimentation in its audience. I brought my flat guitar (“skinned” guitar), a kazoo, a can full of bottlecaps, a deck of cards, and miraculously found a rubber chicken in the classroom to contribute to the array of instruments I offered at The Sound Station. The curiosity and novelty of the objects serves the playfulness of the space.
Before our group critique we had one visitor go around for essentially one-on-one project presentations. I took a hands-off approach with this individual, partially because I didn’t want to be watching over their shoulder and telling them how to use my project correctly. While they found some entertainment engaging with my work, I felt like they were missing essential context that would have enabled more interaction with the granular synthesis and the instruments. In stark contrast, I tried to be very active in presenting my project to the larger group. I lead them to The Sound Station and showed them how to use the flat guitar, and joined in making sounds and moving the iPad controls with the whole group. This was a fascinating exploration of how group dynamics and human presence within a media system can enable greater activity. I served as an example for the audience to mirror, my actions and presence served as permission for everyone else to become more involved with the project. This definitely made me think more about what direction I would take this project in future cycles, if it were for group use versus personal use (since I plan on using the maxMSP patch for a solo musical performance). I wonder how I would have started this project differently if I did not think of it as a personal tool and instead as directly intended for group/cooperative play. I probably would have taken much more time to work on the user interface and removed the video feed entirely!
Lawson: Cycle 2
Posted: November 30, 2023 Filed under: Nico Lawson | Tags: Cycle 2, dance, Digital Performance, Interactive Media, Isadora Leave a comment »The poem shared in the videos:
I’m sorry that I can’t be more clear.
I’m still waking up.
This body is still waking up.
What a strange sensation,
To feel a part of you dying while you’re still alive.
What a strange sensation for part of you to feel like someone else.
Maybe she was someone else.
I can’t explain the relief that I feel to let her go.
I can’t explain the peace that I feel,
To give myself back to the dust,
On my own terms this time.
That’s just it.
My past life, Wisteria’s life, is dust.
That life caught fire and returned to the durst from which it came…
But the rain came just as it always does
Cleansing tears and eternal life cycle.
It reminds me that this body is seventy percent water
Intimately tied to planer just the same
That will always come to claim it’s own.
Wash me away and birth me again.
When I still prayed to a god they taught me about baptism.
How the water washes away your sin.
How you die when they lay you down.
How you are reborn when they raise you up.
While Wisteria turns to dust,
I return myself to the water, still on my own terms.
I watch my life in the sunlight that dances on the surface
Let the current take her remains as my tears and the Earth’s flow by.
Grieving…
Lost time
Self-loathing
The beautiful possibilities choked off before they could take root
The parts of myself that I sacrificed in the name of redemption.
And the water whispers love.
I am not sin.
I am holy.
I am sacred.
I am made of the stuff of the Earth and the universe.
No forgiveness, no redemption is necessary.
Only the washing away of the remains of the beautiful mask I wore.
Only the washing away of self-destruction and prayers for mercy.
And when I emerge I hope the water in my veins will whisper love to me
Until I can believe it in every cell…
Technical Elements
Unfortunately I do not have images of my Isadora patch for Cycle 2. I will share more extensive images in my Cycle 3 post. The changes applied to the patch are as follows:
- Projection mapping onto a square the size of the kiddie pool that I will eventually be using.
- Rotating the projection map of the “reflection” to match the perspective of the viewer.
- Adding an “Inside Range” actor to calculate the brightness of the reflection.
- Colorizer and HSL adjust actors to modify the reflection.
For Cycle 2, I also projected onto the silk rose petals that will form the bulk of the future projection surface and set the side lighting to be optimal for not blinding the camera. Before the final showing on December 8, I need to spray the rose petals with starch to prevent them from sticking to each other and participants’ clothing.
For Cycle 3, I know that I will need to remap the projections once the pool is in place. One of the things that I observed from my video is that the water animation and the reflection do not overlap well. Once I have the kiddie pool in place, it will be easier to make sure that the projections fall int he correct place.
I also want to experiment with doubling and layering the projection to play into the already other-worldliness of the digital “water.” I may also play with the colorization of the reflections as well. The reflection image is already distorted; however, it is incredibly subtle and, as noted by one of the viewers at my showing, potentially easy to miss. Since there is no way to make the reflection behave like water, I see no reason not to further abstract this component of the project to make it more easily observable and more impactful on the viewer.
Reflections and Questions
One of my main questions about this part of the project was how to encourage people to eventually get into the pool to have their own experience in the water. For my showing, I verbally encouraged people to get in and play with the flower petals while they listened to me read the poem. However, when this project is installed in exhibition for my MFA project, I will not be present to explain to viewers how to participate. So I am curious about how to docent my project so that viewers want to engage with it.
What I observed during my showing and learned from post-showing feedback is that hearing me read the poem while they were in the pool created an embodied experience. Hearing my perspective on the spiritual nature of my project directed people into a meditative or trance-like experience of my project. What I want to try for Cycle 3 is creating a loop of sections of my poem with prompts and invitations for physical reflections in the pool. My hope is that hearing these invitations will encourage people to engage with the installation. I will also provide written instructions alongside the pool to make it clear that they are invited to physically engage with the installation.
Cycle 2
Posted: November 28, 2023 Filed under: Uncategorized Leave a comment »Cycle 2
I achieved connecting Isadora and Arduino for Cycle 1 and made just a simple Arduino project like blinking LEDs.
So, I set up my goal for Cycle 2 to try to operate motor(s) by Isadora using a webcam as a motion sensor.
I firstly tried a servo motor. Fortunately, Arduino actor on Isadora already had a feature to control servos so I could easily connect them.
I made a webcam as a motion sensor like we had played in PP3 and made an instant “interactive servo robot” whose arm chases a viewer’s motion.
I also tried a stepper motor. I was a little bit tricky for me as Arduino actor on Isadora doesn’t have a stepper motor operating feature.
So, I re-checked a tutorial Arduino code to control a stepper motor and made the same work flow on Isadora (blinking Low/High to make a magnetic motor spin).
Its motion was not smooth, but it worked!
Probably I need to adjust an interval time between Low/High or some other things to operate a stepper motor smoothly, but anyway I decided to use servo motors for Cycle 3 as I should focus on building a final output now (and servos are easier to control for my project).
But operating a stepper motor by Isadora taught me many things like the idea of translating a written code into an Isadora chart.
My Cycle 3, the final output, would be a small interactive robot using webcam, Arduino, servos, and Isadora for sure.
Feedbacks from the class during Cycle 2 inspired me to make a small but very organistic interactive robot; as I usually make spatial or sculptural scale works, I considered my small Arduino test project (like a tiny servo) just as a small mock-up, but everyone’s reaction suggested me that a small scale thing could have its own communicativeness which a large sculpture doesn’t have. This would be my direction to achieve Cycle 3.
Cycle 2: MaxMSP Granular Synthesis + Isadora
Posted: November 26, 2023 Filed under: Arvcuken Noquisi, Final Project Leave a comment »For Cycle 2 I focused on working on the MaxMSP portion of my project: I made a granular synthesis patch, which cuts up an audio sample into small grains that are then altered and distorted.
2 demonstration clips, using different samples:
I had some setbacks working on this patch. I had to start over from scratch a week before Cycle 2 was due, because my patch suddenly stopped sending audio. Recreating the patch at least helped me better understand the MaxMSP objects I was using and what role they played in creating the granular synthesis.
Once I had the MaxMSP patch built, I added some test-sends to see if the patch will cooperate with Isadora. For now I’m just sending the granular synthesis amplitude through to an altered version of the Isadora patch I had used from Cycle 1. This was an efficient and quick way to determine how the MaxMSP outputs would work in Isadora.
I still have quite a few things to work on for Cycle 3:
- Router setup. I need to test the router network between my laptop (MaxMSP) and one of the ACCAD computers (Isadora).
- Isadora patch. I plan on re-working the Isadora patch, so that it’s much more responsive to the audio data.
- Interactivity. I’ll need to pilfer the MOLA closet for a good microphone and some sound-making objects. I want Cycle 3 to essentially be a sound-making station for folks to play with. I will have to make sure the station is inviting enough and has enough information/instructions that individuals will actually interact with it.
- Sample recording. Alongside interactivity, I will need to adjust my MaxMSP patch so that it plays back recorded samples instead of pulled files. According to Marc Ainger this shouldn’t be a challenge at all, but I’ll need to make sure I don’t miss anything when altering my patch (don’t want to break anything!).
Lawson: Cycle 1
Posted: November 14, 2023 Filed under: Nico Lawson, Uncategorized | Tags: cycle 1, dance, Interactive Media, Isadora Leave a comment »My final project is yet untitled. This project will also be a part of my master’s thesis, “Grieving Landscapes” that I will present in January. The intention of this project is that it will be a part of the exhibit installation that audience members can interact with and that I will also dance in/with during the performances. My goal is to create a digital interpretation of “water” that is projected into a pool of silk flower petals that can then be interacted, including casting shadows and reflecting the person that enters the pool.
In my research into the performance of grief, water and washing has come up often. Water holds significant symbolism as a spirit world, a passage into the spirit world, the passing of time, change and transition, and cleansing. Water and washing also holds significance in my personal life. I was raised as an Evangelical Christian, so baptism was a significant part of my emotional and spiritual formation. In thinking about how I grieve my own experiences, baptism has reemerged as a means of taking control back over my life and how I engage with the changes I have experienced over the last several years.
For cycle 1, I created the Isadora patch that will act as my “water.” Rather than attempting to create an exact replica of physical water, I want to emphasis the spiritual quality of water: unpredictable and mysterious.
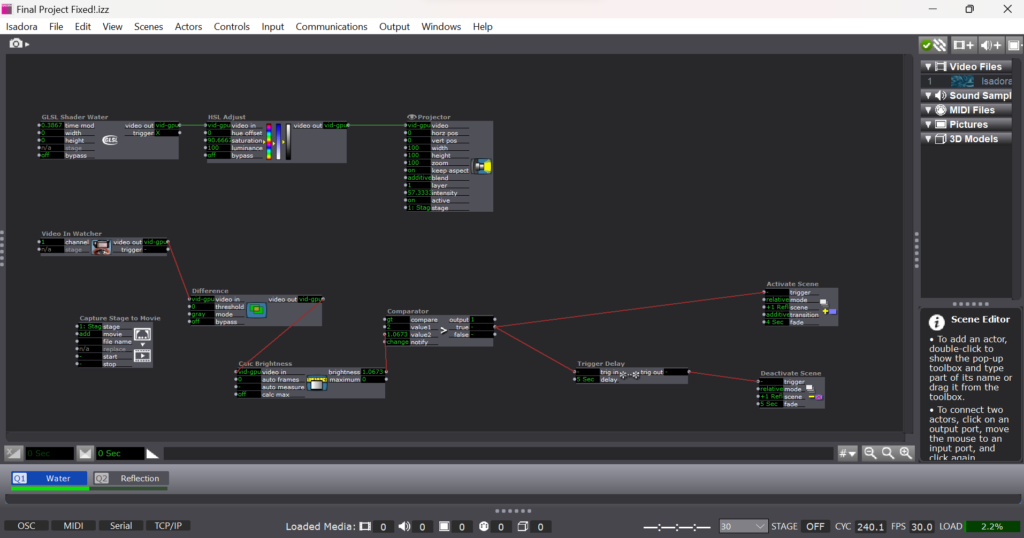
To create the shiny, flowing surface of water, I found a water GLSL shader online and adjusted it’s color until it felt suitably blue: ghostly but bright, but not so bright as to outshine the reflection generated by the web cam. To emphasize the spiritual quality of the digital emanation, I decided that I did not want the watch to be constantly projecting the web cam’s image. The GLSL shader became the “passive” state of the patch. I used difference, calculate brightness, and comparater actors with active and deactive scene actors to form a motion sensor that would detect movement in front of the camera. When movement is detected, the scene with the web cam projection is activated, projecting the participant’s image over the GLSL shader.
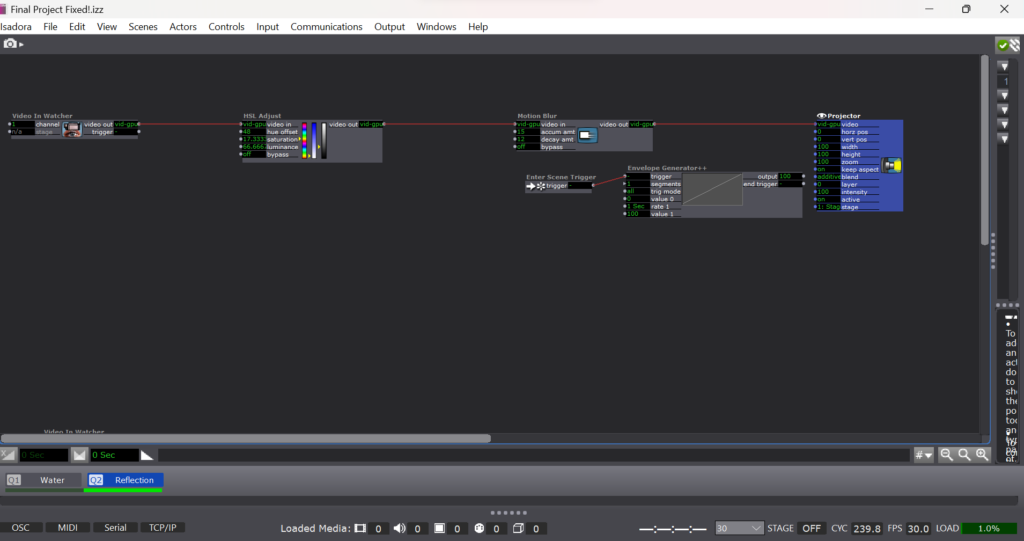
To imitate the instability of reflections in water I applied a motion blur to the reflection video. I also wanted to imitate the ghostliness of reflections in water, so I desaturated the image from the camera as well.
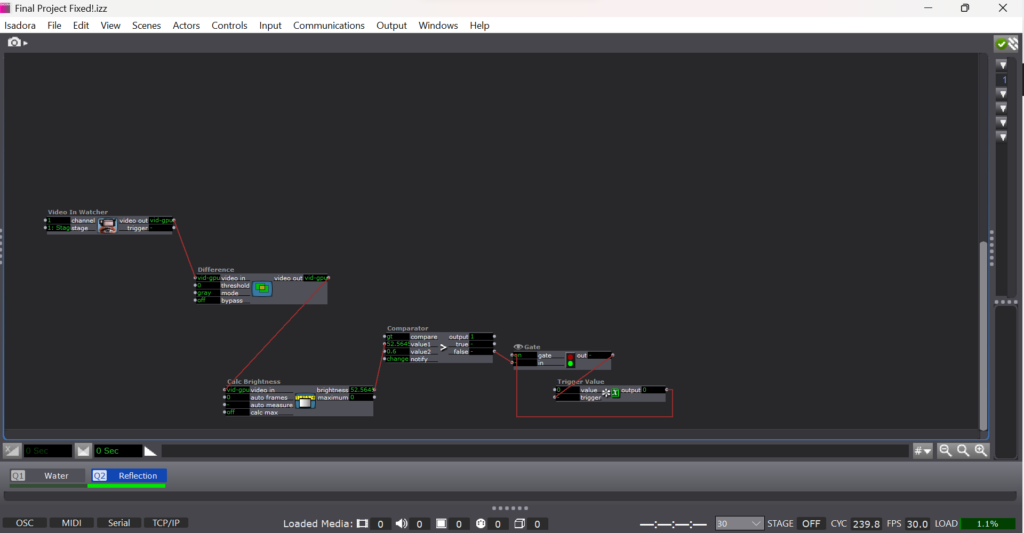
To emphasize the mysterious quality of my digital water, I used an additional motion sensor to deactivate the reflection scene. If the participant stops moving or moves out of the range of the camera, the reflection image fades away like the closing of a portal.
The patch itself is very simple. It’s two layers of projection and a simple motion detector. What matters to me is the way that this patch will eventually interact with the materials and how the materials with influence the way that the participant then engages with the patch.
For cycle 2, I will projection map the patch to the size of the pool, calibrating it for an uneven surface. I will determine what type of lighting I will need to support the web camera and appropriate placement of the web camera for a recognizable reflection. I will also need to recalibrate the comparater for a darker environment to keep the motion sensor functioning.
Lawson: PP3 “Melting Point”
Posted: November 14, 2023 Filed under: Nico Lawson, Uncategorized | Tags: Interactive Media, Isadora, Pressure Project Leave a comment »For Pressure Project 3, we were tasked to improve upon our previous project inspired by the work of Chuck Csuri to make the project suitable to be exhibited in a “gallery setting” for the ACCAD Open House on November 3, 2023. I was really happy with the way that my first iteration played with the melting and whimsical qualities of Csuri’s work, so I wanted to turn my attention to the way that my patch could also act as it’s own “docent” to encourage viewer engagement with the patch.
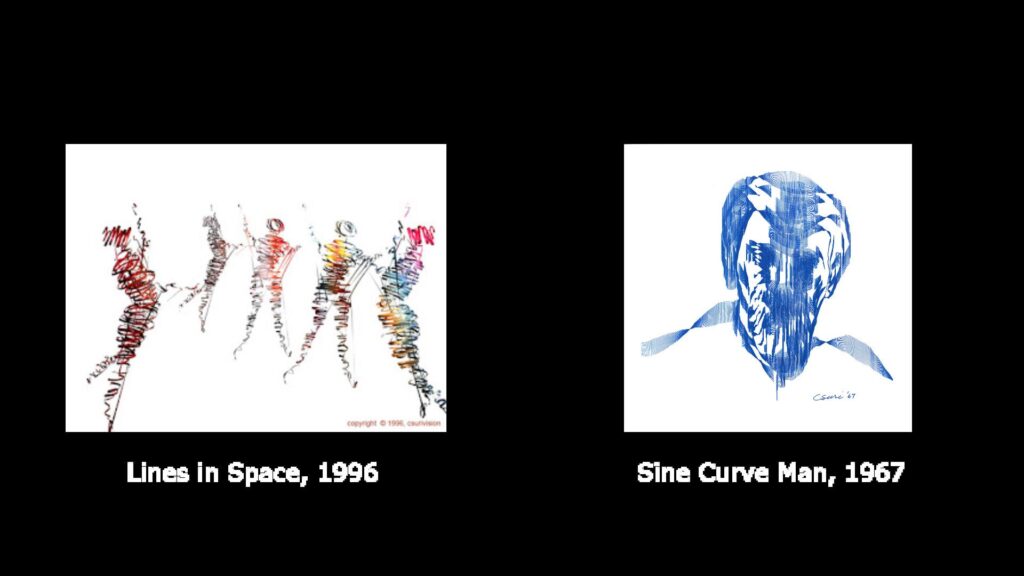
First, rather than wait until the end of my patch to feature the two works that inspired my project, I decided to make my inspiration photos the “passive” state of the patch. Before approaching the web camera and triggering the start of the patch, my hope was that the audience would be curious and approach the screen. I improved the sensitivity of the motion sensor aspect of the patch so that as soon as a person began moving in front of the camera, the patch would begin running.
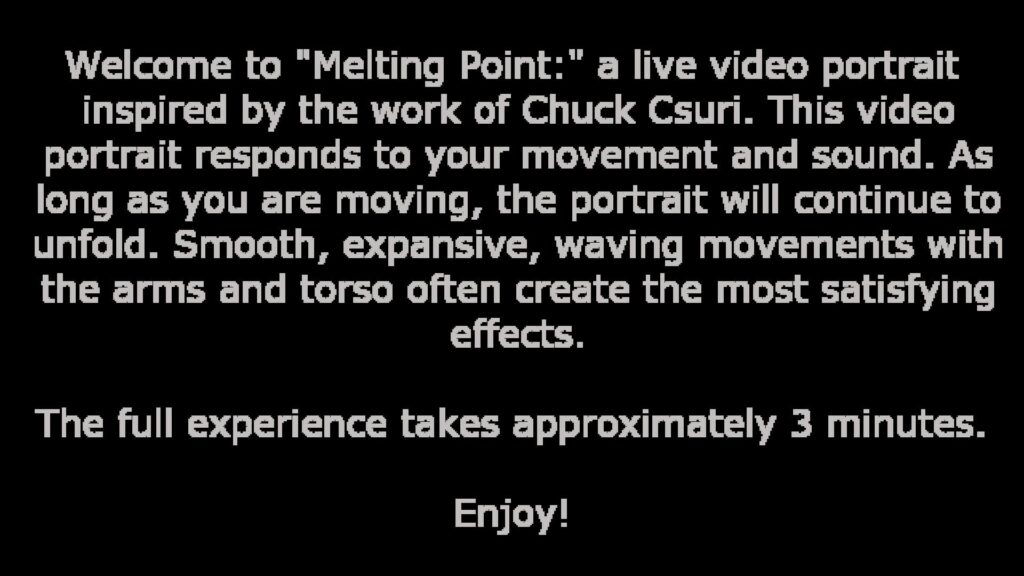
When the patch begins running, the first scene that the audience sees is this explanation. Because I am a dancer and the creator of the patch, I am intimately familiar with the types of actions that make the patch more interesting. However, audience members, especially those without movement experience, might not know how to move with the patch with only the effects on the screen. My hope was that including instructions for the type of movement that best interacted with the patch would increase the likelihood that a viewer would stay and engage with the patch for it’s full duration. For this reason, I also told the audience about the length of the patch so audience members would know what to expect. Additional improvements made to this patch were shortening the length of the scenes to keep viewers from getting bored.
Update upon further reflection:
I wish that I had removed or altered the final scene in which the facets of the kaleidoscope actor were controlled by the sound level watcher. After observing visitors to the open house and using the patch at home where I had control over my own sound levels, I found that it was difficult to get the volume to increase to such a level that the facets would change frequently enough for the actor to attract audience member’s attention by allowing them to intuit that their volume impacted what they saw on screen. For this reason, people would leave my project before the loop was complete seeiming to be confused or bored. For simplicity, I could have removed the scene. I also could have used an inside range level actor to lower the threshold for the facets to be increased and spark audience attention.
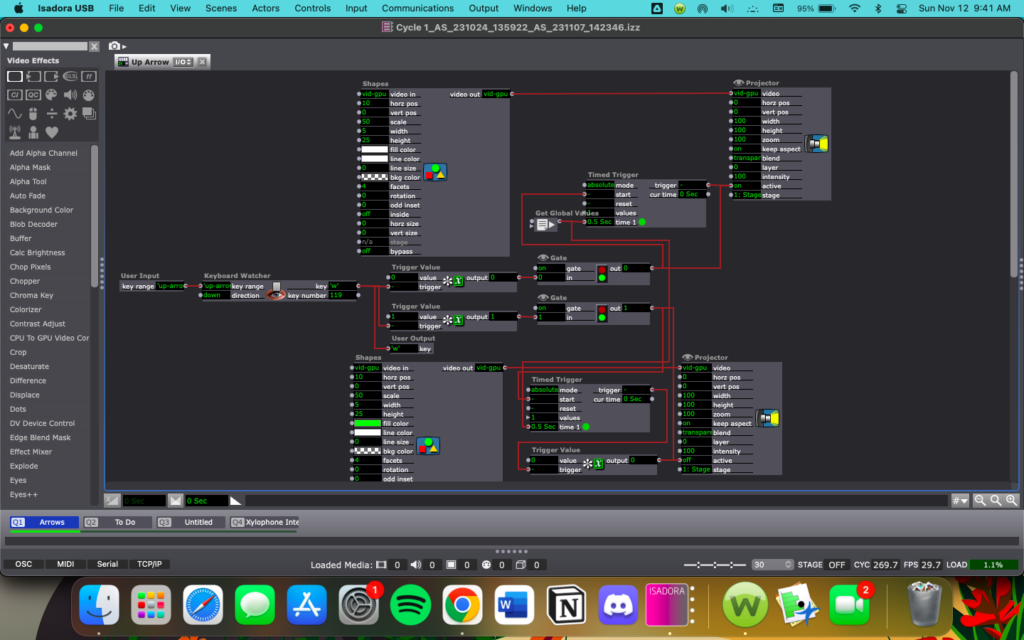
Cycle 1: Blinking Arrows
Posted: November 12, 2023 Filed under: Uncategorized Leave a comment »Going into Cycle 1, I knew that I wanted to make a game of some kind and I knew I wanted to use an alternative control scheme of some kind using the Makey Makey. I was also drawing inspiration from retro games, like Snake and Simon/Simon Says. Aside from this, I didn’t have any idea of what I wanted my final project to look like, so I decided to treat Cycle 1 as a pressure project, in that I would play around with Isadora and my ideas so far, and whatever came from it is what I’d demo for class.
My first step was just figuring out what exactly I wanted my project to look like at the end of Cycle 3, so I decided to just look at some retro games that I could potentially recreate in Isadora within the scope of the class. This research brought me to Dance Dance Revolution (not quite retro but close enough) and the idea of a rhythm game, the mechanics of which felt simple enough to produce before the end of the semester.
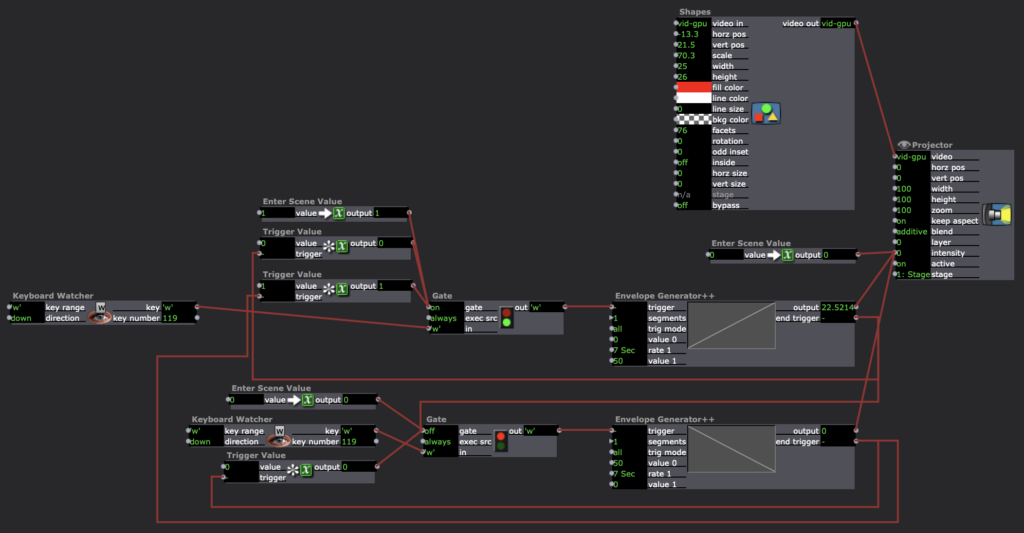
I started my patch with a rectangle in each corner of the stage, each labeled with a direction (up, down, left right). I would be using the Makey Makey as my controller (I will decide the actual controls in a later cycle), but these would correspond to the temporary keyboard input for each rectangles action. The rectangle UI didn’t feel very intuitive to me, and I didn’t like how it looked, so I scrapped those and changed them to arrows. At this point, I moved towards creating the game mechanics, starting with getting the arrows to blink based on the input of the user. Below is a picture of the patch for just one of the arrows to demonstrate how I got this to work.
During the in-class demo, I mentioned wanting to use a source of input that would be simple enough that a baby could use it, drawing inspiration from my baby nephew. Someone suggested I use a children’s xylophone as my controller and I really liked the idea, so I will be exploring children’s toys as input methods, most likely in Cycle 3. For Cycle 2, I will me continuing to work on the mechanics of my game.
Cycle 1: Getting Wires Crossed
Posted: November 7, 2023 Filed under: Uncategorized Leave a comment »For my cycle 1, I decided to tackle a basic interactive element I want my cycle 3 to have, a stove. I started my Isadora patch with a top-down view of an electric stove, where I would connect red shapes to slowly fade in and out based on user interaction. I initially tested with a keyboard watcher, but knew I would eventually attach a Makey-Makey to my makeshift stovetop. I used four user actors as the “burners” and used gates to prevent them from being continually turned on and off. Below is a screenshot of one of the burner’s patches.
I also knew going into this process that I want my cycle 3 to be a house-like experience with odd elements thrown in to encourage interaction. I’ve always been interested in the idea of a “normal house but move it slightly to the left.” I’m still deciding if I’m connecting some sort of story to it yet or not, but for the moment I knew something had to happen if the user interacted with the stove a certain way. I made it so a pit would “open up” on the stove top if the user turned all the burners on within 2 seconds. I used the simultaneity actor within Isadora to achieve this.
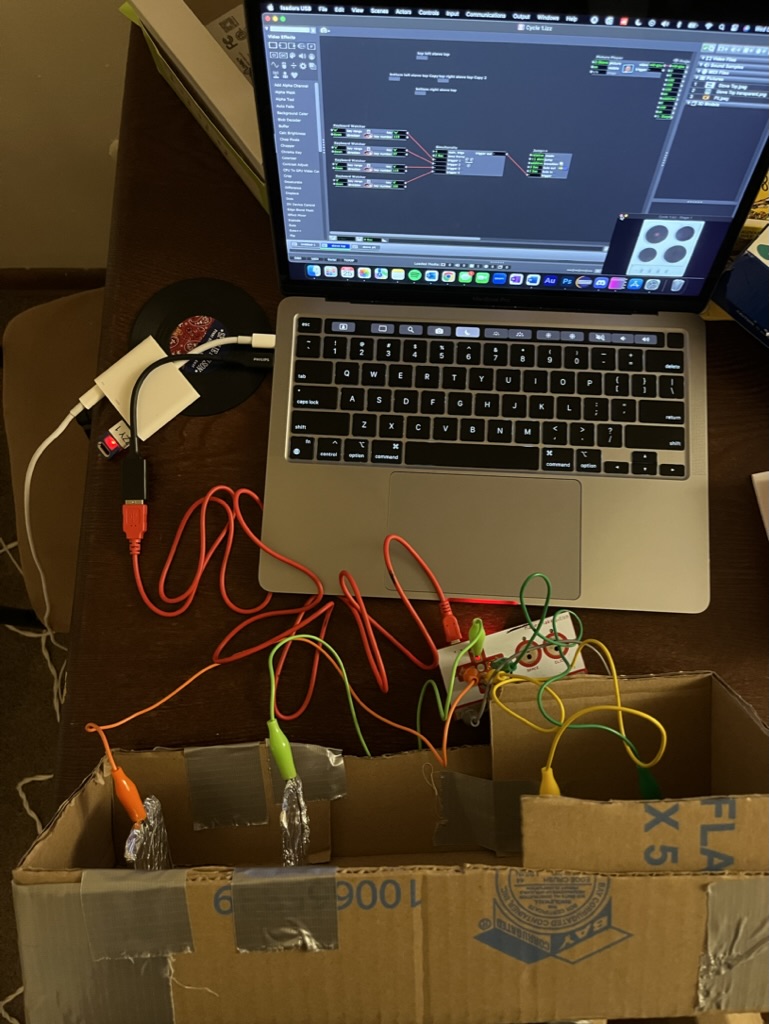
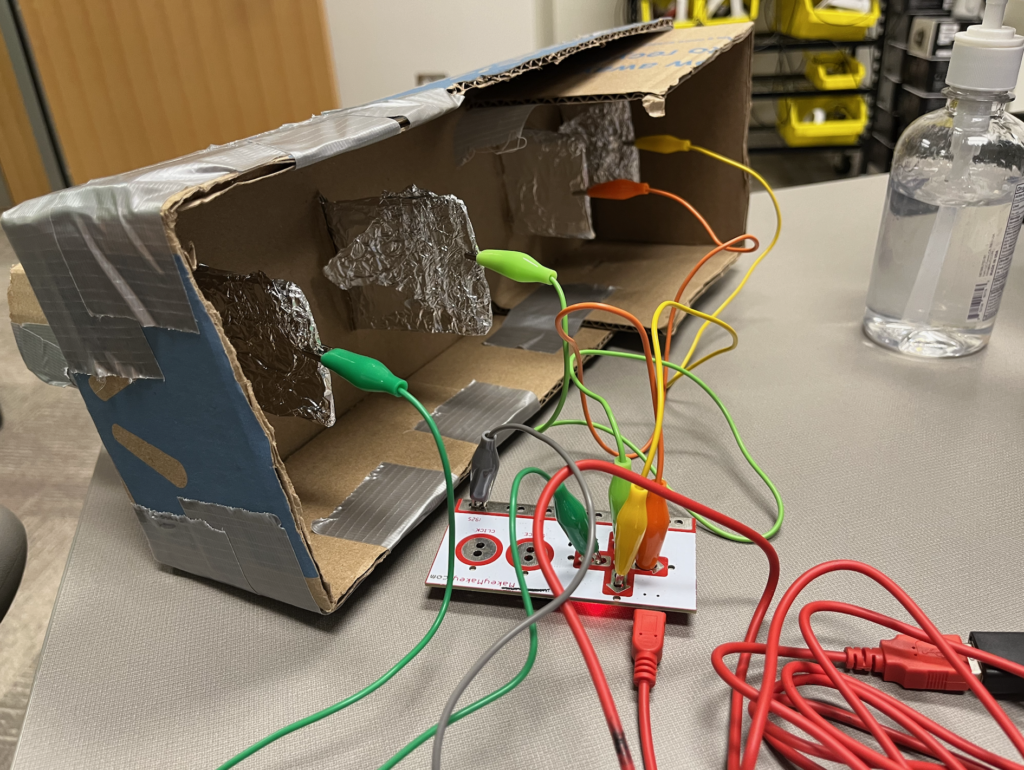
Here’s a few pictures I took when I first connected the Makey-Makey to the patch. The performance in class was a great experience and I deeply appreciated the feedback others provided. I took note especially that the framing of having physical stove dials helped make the experience more interactive and special, so I hope to include more physical interaction in my next two cycles.